Infrapy is a python based infrasound processing toolkit. It includes an array based beamformer with location and association capabilities, along with a spectral single-sensor detector. It can, with some configuration changes, be used to process audible acoustic as well as seismic data. It includes a python library for development of applications, a command-line-interface for easy terminal based analysis, and a GUI for visualization and fast analysis of events. Currently it can open local waveform files in SAC and mseed format, and can load inventories from stationXML files. Infrapy can also import data from FDSN servers such as IRIS, and from SQL databases that incorporate a CSS or KBCore shema.
Infrapy is primarily developed by the Seismo-Acoustic team at Los Alamos National Labs. It is open source and submissions from third parties are welcome.
The complete documentation can be found at https://infrapy.readthedocs.io/en/latest/
Infrapy can currently be installed on machines running newer versions of Linux, Apple OSX, and Windows.
The installation of infrapy currently depends on Anaconda to resolve and download the correct python libraries. So if you don’t currently have anaconda installed on your system, please do that first.
Anaconda can be downloaded from https://www.anaconda.com/distribution/. Either 3.x or 2.x will work since the numbers refer to the Python version of the default environment. Infrapy’s installation will create a new environment and will install the version of Python that it needs into that environment.
In a terminal, navigate to a directory that you would like to put infrapy in, then download the repository by either https:
>> git clone https://github.com/LANL-Seismoacoustics/infrapy.git
or by ssh:
>> git clone git@github.com:LANL-Seismoacoustics/infrapy.git
This will create a folder named infrapy. This will be the base directory for your installation.
With Anaconda installed and the repository cloned, you can now install infrapy. The command below will create an environment named infrapy_env, install the necessary packages into it, and install infrapy into that environment. Navigate to the base directory of infrapy (there will be a file there named infrapy_env.yml), and run:
>> conda env create -f infrapy_env.yml
If this command executes correctly and finishes without errors, it should print out instructions on how to activate and deactivate the new environment:
To activate the environment, use:

    >> conda activate infrapy_env

To deactivate an active environment, use

    >> conda deactivate
Infrapy is in continuous development. Features are added, bugs are fixed, and documentation is improved fairly often. It's good practice to reach out for the latest updates on a regular basis.
Since some updates will require newer or additional packages, it is a good idea to update your conda environment when pulling new features. For that, we have included a script that will do this for you:
>> update_infrapy.sh
This script will do a git pull, then check the environment file to see if there are any updated/new packages that need to be installed. If there are, it will attempt to do that for you.
If you are just doing a quick update for a bug-fix or something similar, you can still do the usual pull:
>> git pull
The current version of Pisces no longer installs the e1 compression module by default. If you need this (if you don't know what it is, you don't need it), then you can install it on OSX and Linux by activating the infrapy environment and installing it with pip...
>> conda activate infrapy_env
>> pip install e1
At this time, the e1 module is not supported on Windows. Let us know if you really need this, and we can work towards getting that fixed.
Once the installation is complete, you can test some things by first activating the environment with:
>> conda activate infrapy_env
Then navigate to the /example directory located in the infrapy base directory, and run the test scripts via something like:
>> python test_beamforming.py
If infrapy was successfully installed, all of the test scripts should run and finish without any errors.
Some of the example scripts included with infrapy in the /scripts directory depend on some supplemental data. This data can be found at https://github.com/LANL-Seismoacoustics/infrapy-data
Instructions found there will guide you in its installation.
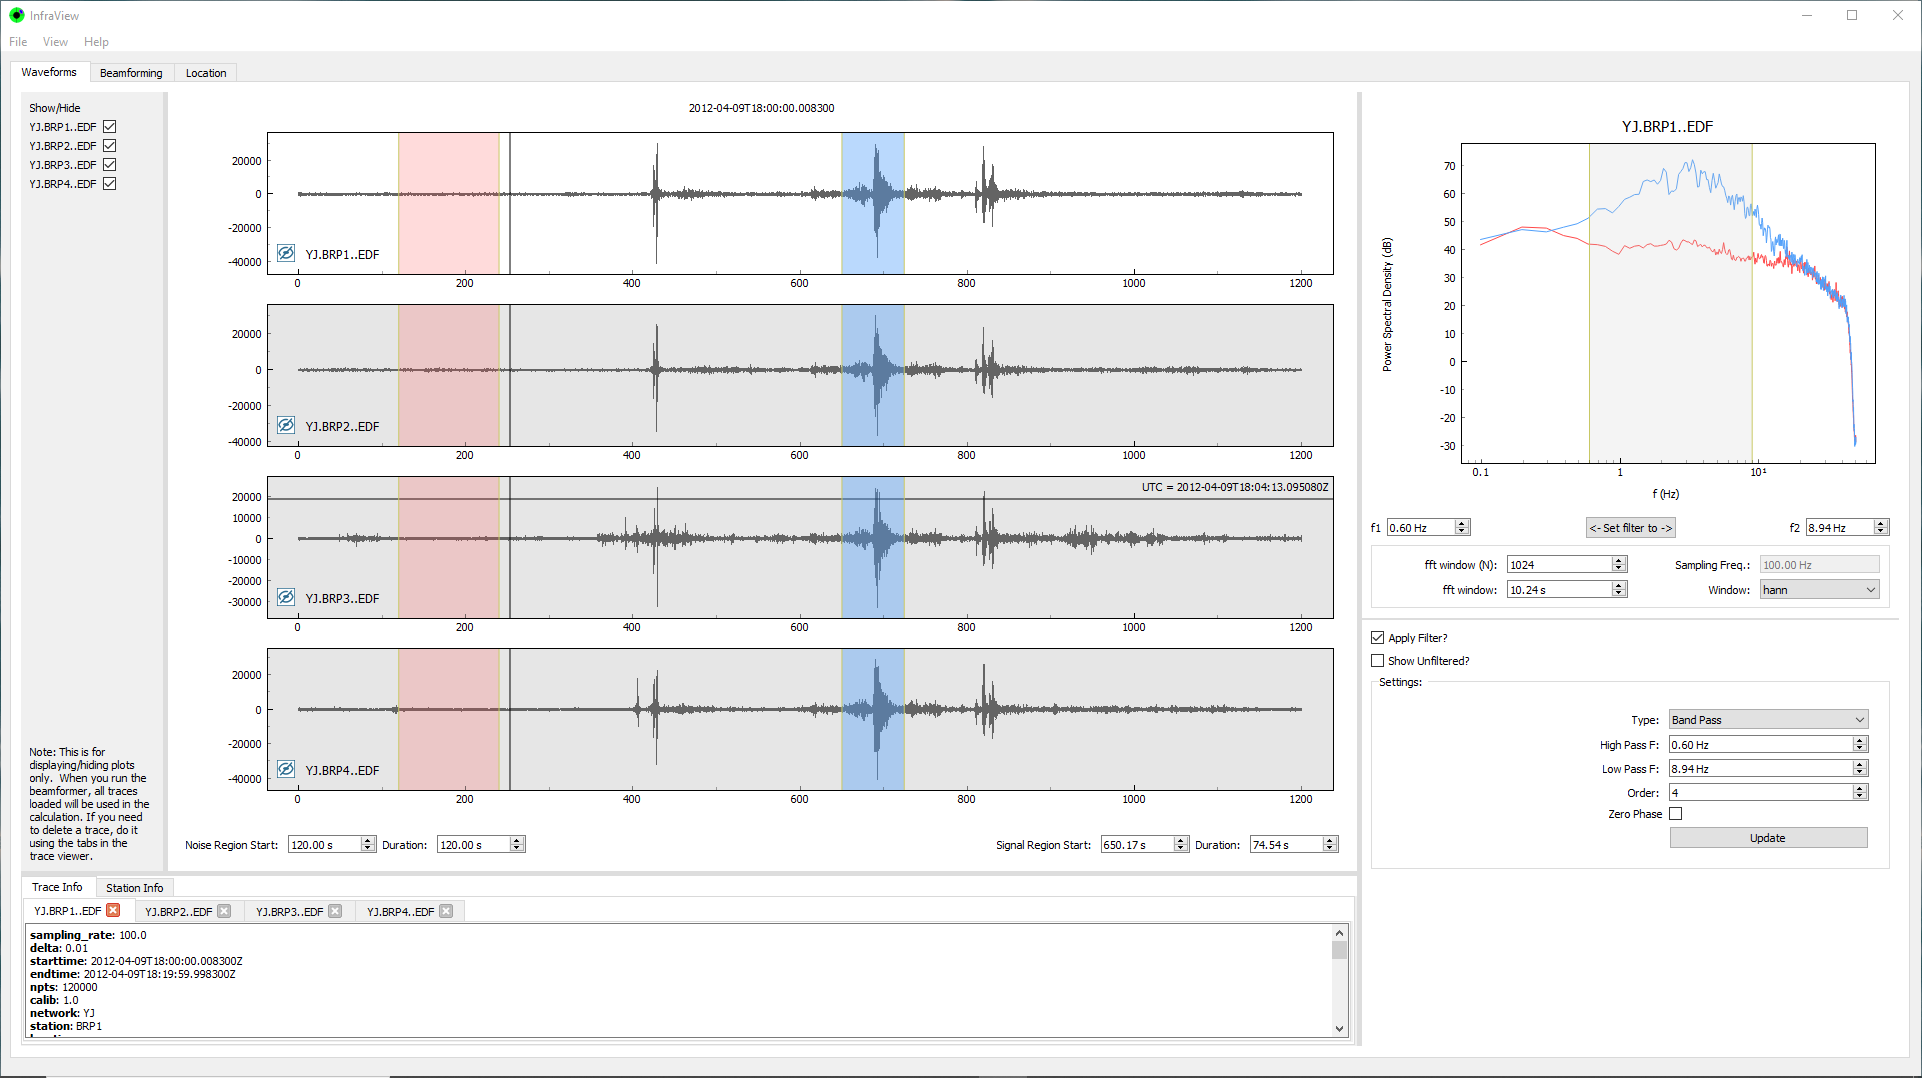
We supply a GUI application to help with quick data, beamforming, and location analysis. Once installation is complete, you can activate the infrapy_env and run the GUI with the commands:
>> conda activate infrapy_env
>> infraview
If you have any errors or issues related to the installation or basic functionality, or if you would like to request addtional features, the best way to get them to us is by submitting a new issue in the Issues Tab above.
Questions and problems that might not rise to the level of an Issue can be directed to:
jwebster@lanl.gov (Installation and GUI questions)
pblom@lanl.gov (Algorithms and general science questions)