The TRASH ROBOT network exists to grow a new civilization from the trash of the old one. When all the elements of a good life are contained in media we can replicate freely from trash and things we can grow we call that TRASH MAGIC.
The language of GEOMETRON is based on the symmetries of the Universe, and can be used to create geometric constructions to build up all our media and technology. Geometron is described in the First Book of Geometron and The Book of Geometron Magic.
Digital media are hosted on Geometron hosts from the self-replicating code swarm (called cyber magic) at github.com/lafelabs/geometronmagic. These can be installed on Raspberry Pi, any Linux machine, Windows, MacOS, iOS and Android. See instructions below to install a Geometron server.
Geometron Magic refers to self-replicating geometric media. This is media based on geometric constructions using the language of Geometron to make things which people replicate freely.
All work presented here was created by TRASH ROBOT, AKA Lafe Spietz, and is released into Public Domain. We replicate all this media and share it freely. As our story gathers more attention, we will ask for sponsors to directly support the growth of the Trash Robot Network by both financial support and direct material support of creators on the Network. This can be branded sponsorships, events, classes, sold art pieces, seminars, art installations, popups, games, educational programs, commissions, network installations, promotional campaigns, political campaigns, community organizing projects, or any other form of information sharing which has value to a potential sponsor. Direct material support can include places to work and live, food, medicine, clean water and sanitation, transportation, employment with a sponsor or just cash donations.
There is no central organizing body. To become a creator on the Network, just start creating and sharing. To become a sponsor, find a creator, ask them what they need, and support them. Build things, share them, tell people about them, improve them.
We are content creators who create our own platform. We create physical media as well as physical infrastructure to host digital media, and content to spread on that media. We create physical media which has material value in the form of food and consumer products as well as digital media which has value in capturing attention. Creators create, sponsors support, and consumers consume. This is the path of our media, and it removes the digital landlords who currently own all media networks.
The Geometron Hypercube is a set of constructions from trash which we can use to grow Trash Magic. The hypercube part living organisms, part trash, part machine, and part code. We use "hypercube" to refer to an extension of the idea of the cube into higher dimensions. These are not literal dimensions in an exact mathematical sense but
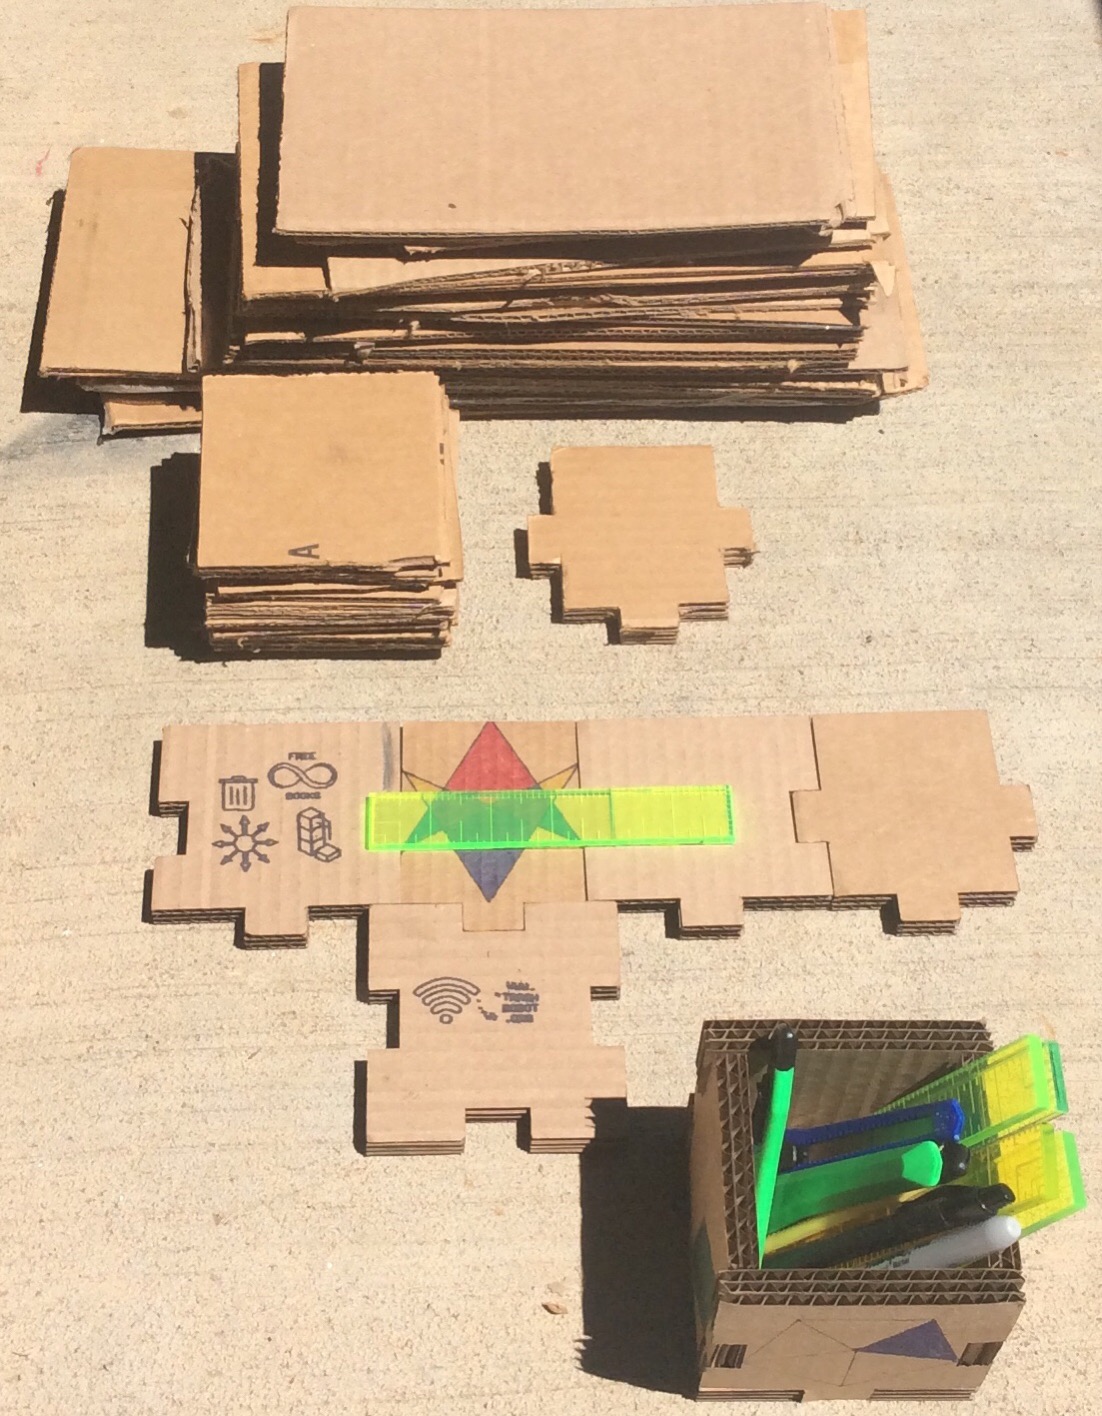
The cubes which are the primary physical element of the hypercube is is a 4 inch cube with 5 sides, each side is 3 layers of corrugated cardboard. All sides are made from 4 inch squares. Cut cardboard trash with a laser cutter or box cutter or razor blade or build and operate stamps for automated production. These cubes form a physical social media network, where we print media onto them, build them into machines, and use them to grow living things which are of use in building our new world.
The following Geometron file has the layout of all three of the panel patterns to make a cube. To make one cube you need 6 each of the two patterns with twofold symmetry and 3 of the pattern with 4 fold symmetry. All are 4 inches by 4 inches. You can use this file to cut these out on a laser cutter. Or you can download it and upload it to a Geometron server and make your own variations, including custom laser etch patterns. To replicate one by hand using the Geometron ruler, note that all patterns are on a grid of 0.5 inches and just slide the ruler around to get the patterns which match the diagram.

The box is self-replicating if it contains a box cutter. Squares and all the panel cutouts can be created with direct trace and a box cutter from existing parts, or new patterns can be created with a Geometron ruler(see below). Find a cardboard recycle dumpster, take boxes out, slice out flat panels, cut out into 4 inch squares, then either cut out and stack/glue or stack/glue then cut out. Assemble, and glue or rubber band as needed, use for parts bins, guerilla organic growing projects(plants, fungus, worms, compost), structural elements, decorative elements, and components of the Geometron Icon printer(see below)
Useful links for organic experiments:
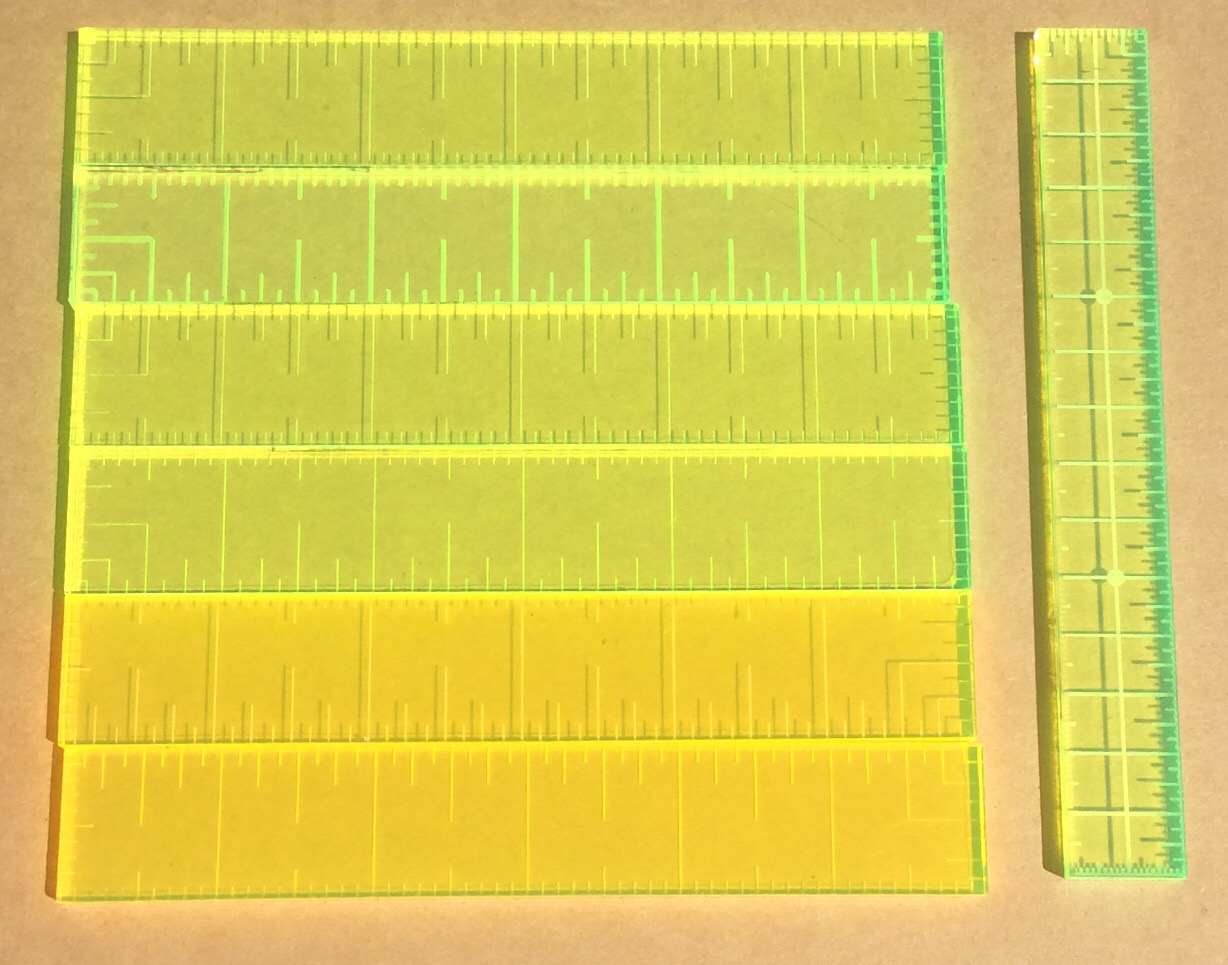
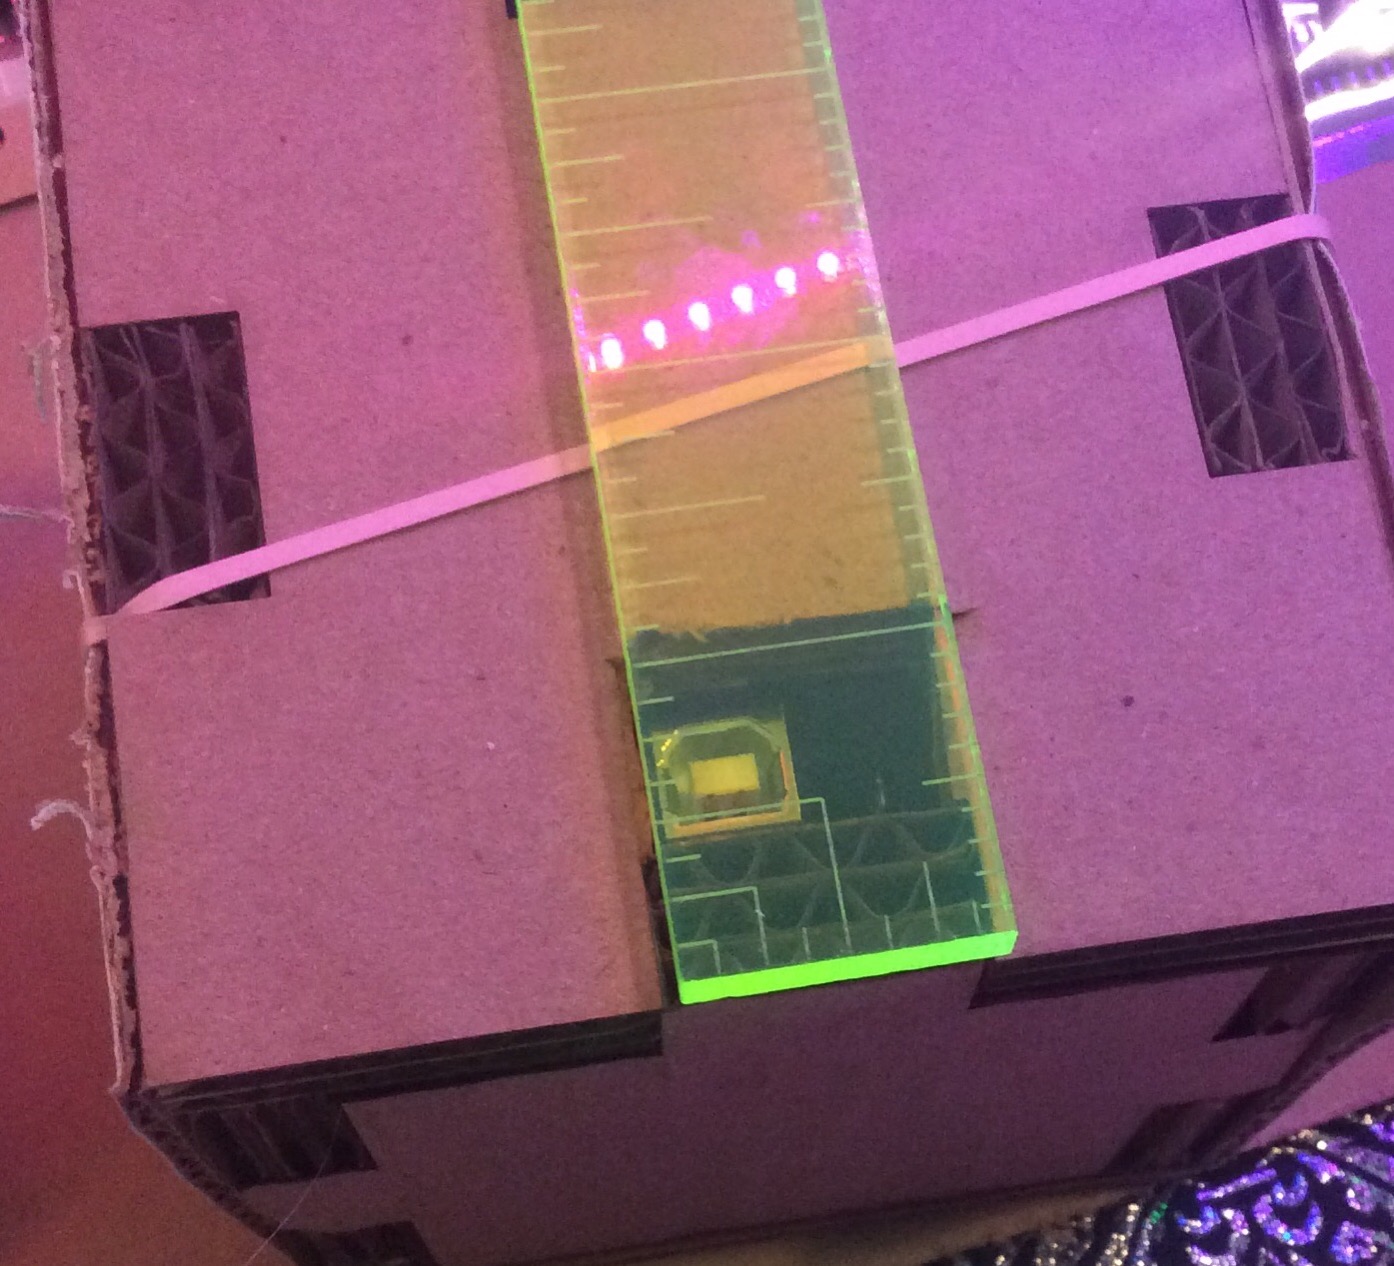
The Geometron Ruler is one inch by six inches. One side has tenths and the other halves, quarters and eights. The highest quality rulers are made from quarter inch neon green acrylic with a laser cutter. Any ruler can be used to make more rulers. Cereal box cardboard is a good material. Find a maker space or individual with a laser cutter. Dig through the waste bin to find extra acrylic. Place the outlines and etch and make rulers. Give them away and spread the word of Geometron, Trash Magic, Trash Robot and so on. Also you can use Ponoko.com to get large numbers of rulers made and can sell those if you so choose.
Using Ponoko.com is only cost effective if you have a budget of over 1000 dollars, then the cost per ruler can drop to about a dollar and a half. Also, Ponoko only has eighth inch acrylic and quarter inch is the nicest. For best results, go find 0.2 inch or quarter inch neon green acrylic somewhere, find a laser cutter and print these out yourself. All the files for this are below.
This is some 6 inch rulers from both green and yellow acrylic and a 15 cm metric ruler.
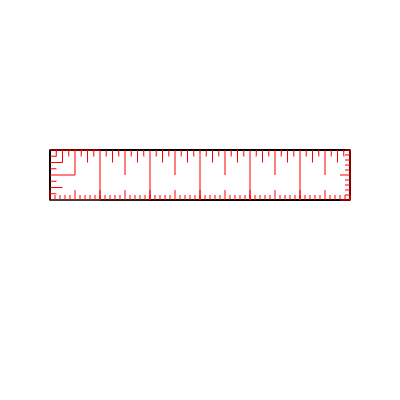
Ruler Outline SVG file:

Ruler Etch pattern PNG file:
Ruler 2 color SVG file for Ponoko.com:

Set of 8 rulers in one SVG file for Ponoko.com:

Centimeters PNG file for etch. Print out with 15 centimeter width and 2 cm height:
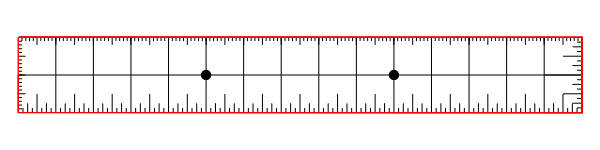
centimeters Ruler Outline SVG file, line up with etch and make 15x2 cm:

One ruler with etch and cut in different layers:

Set of 8 cm rulers in one SVG file for Ponoko.com:

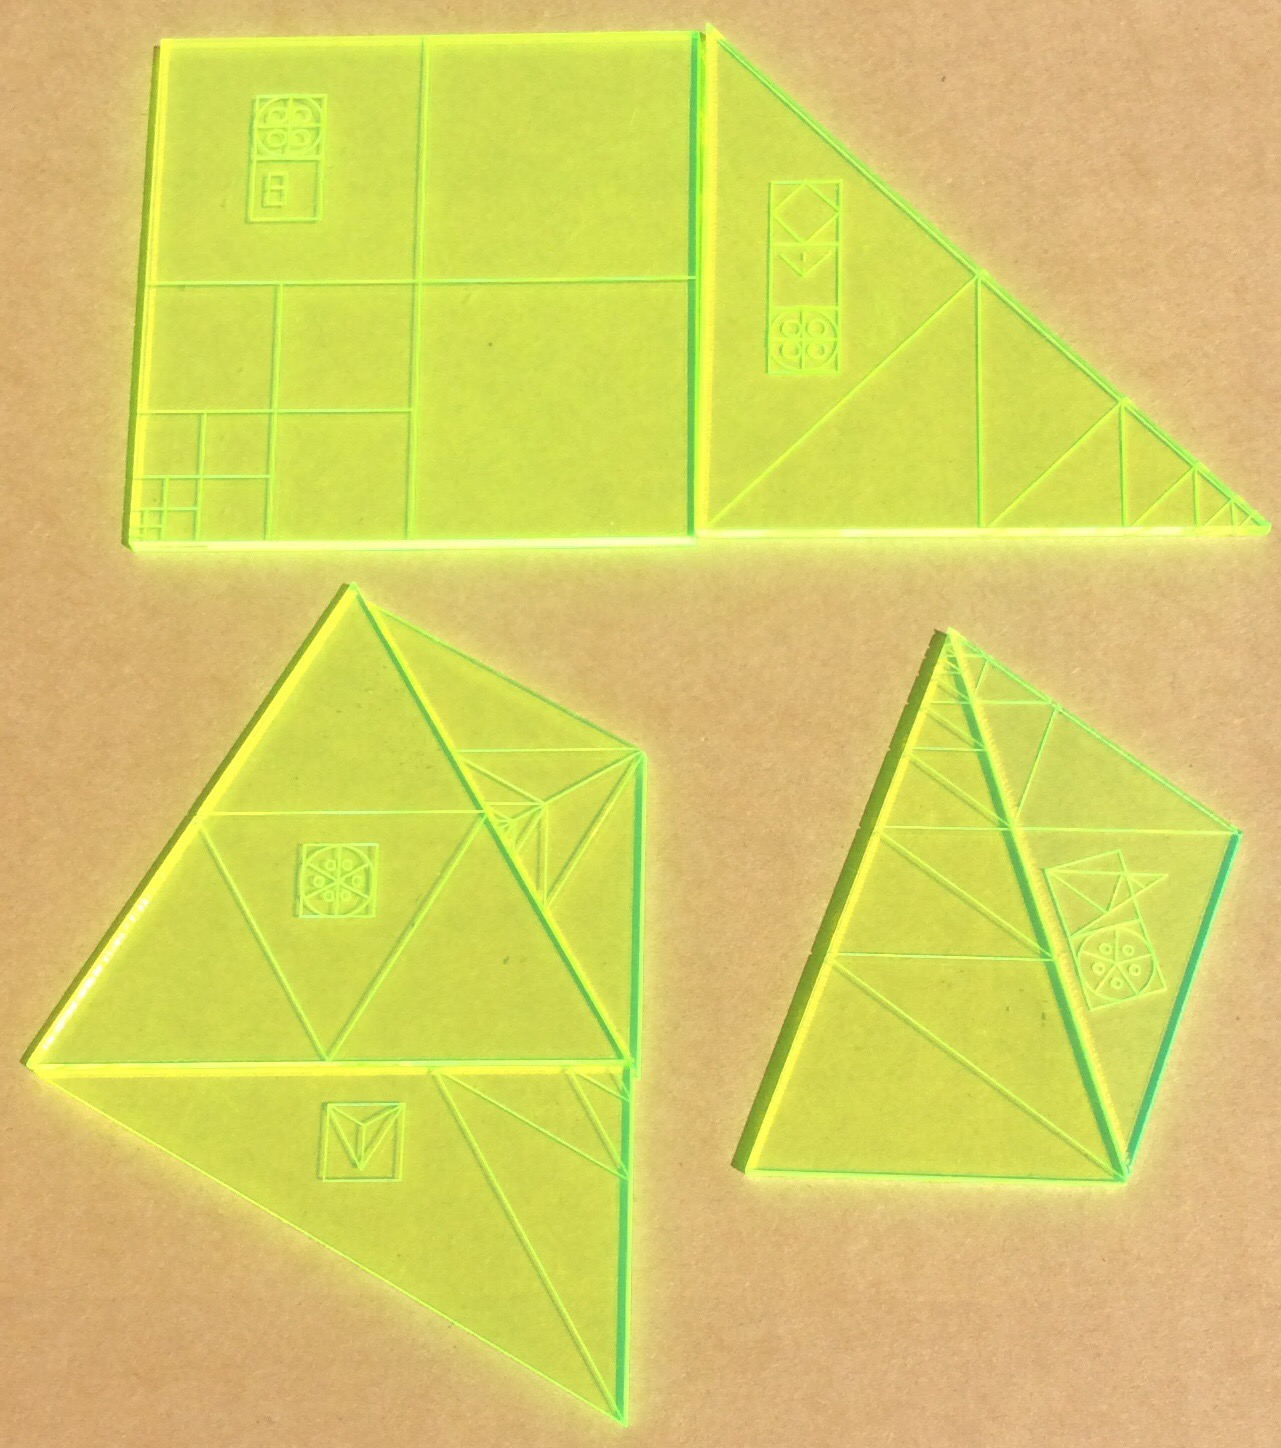
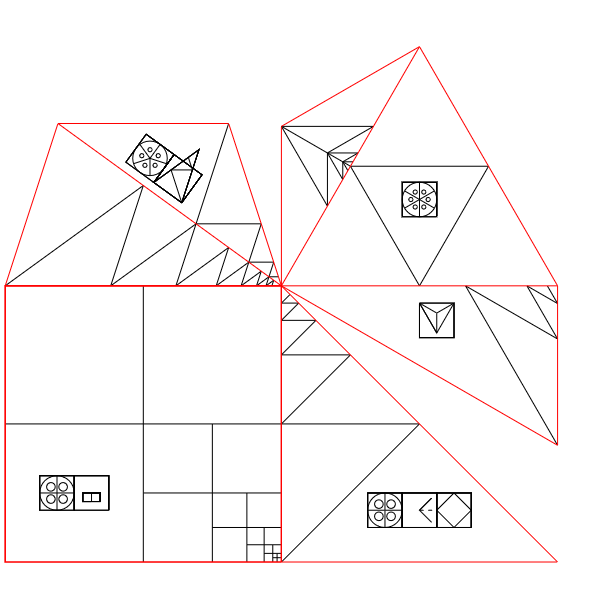
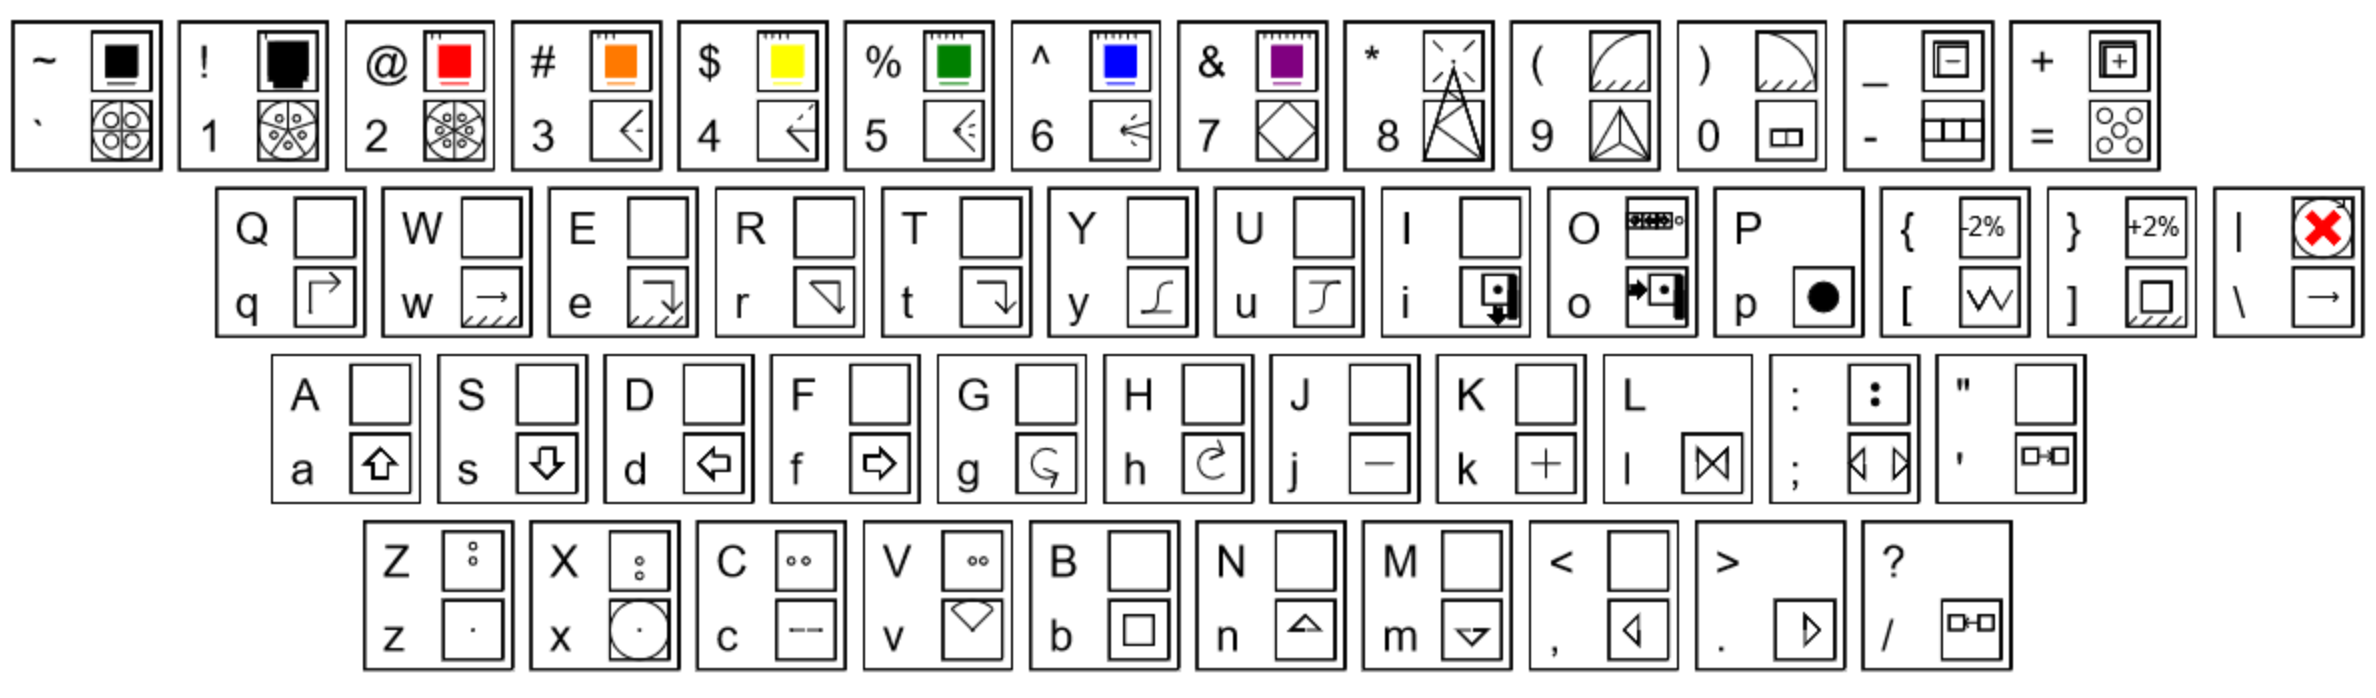
The basic set of Geometron shapes can be used in conjunction with the rulers above to construct objects using Geometron which mirror the constructions in the web browser.
These can be laser cut or printed and cut out or constructed through any of various geometric means. The shape set is a set of shapes based on a three inch unit and the various natural scales implied by common symmetries of the Universe. For best results, use 1/8 inch neon green transparent acrylic.


The printer is made up of 3 cubes, each with a custom lid. The top lid holds the z axis motion stage. The middle lid has the control panel which controls the printer. The bottom lid is just a cover for the cube which holds the Arduino brain. Each stage in the x and y directions is an independent construction with square base and top using a DVD drive stage. All stages have 4 wire cables with 0.1 inch socket connectors which go to the Arduino brain.
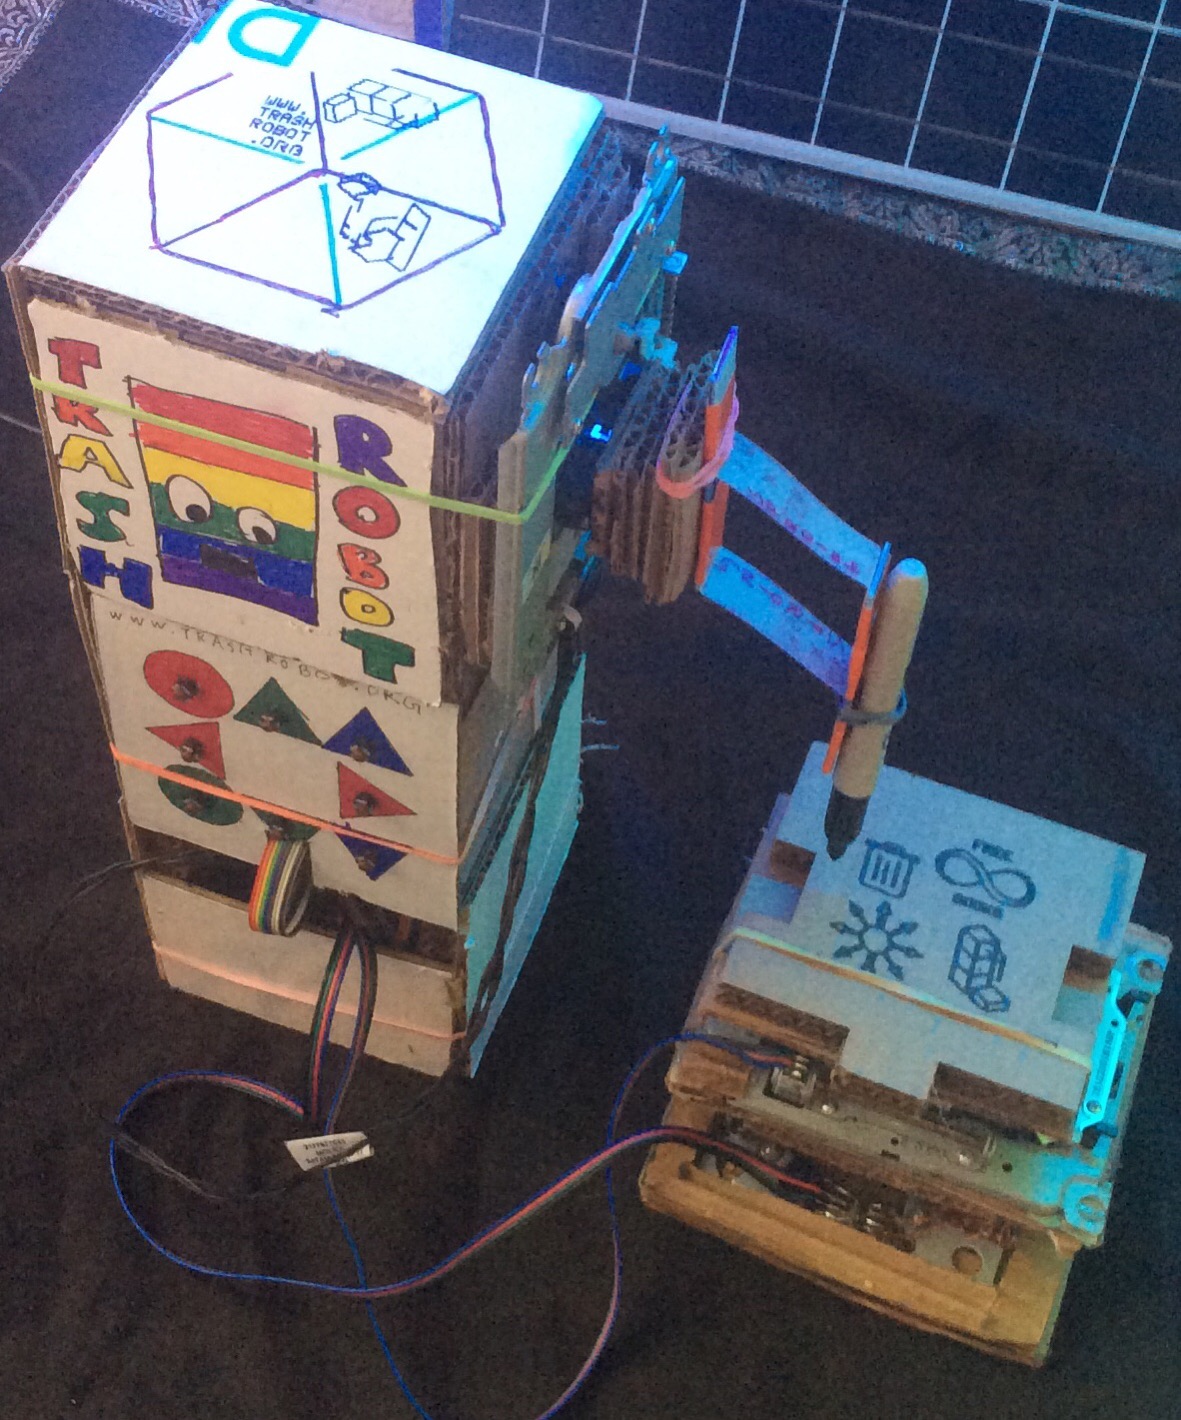
The Z axis stage is made by gluing a 3 inch square in the center of a 4 inch square then building up levels of cardboard to the stage, and a stack of cardboard on the stage which can hold the Sproing, also shown here.
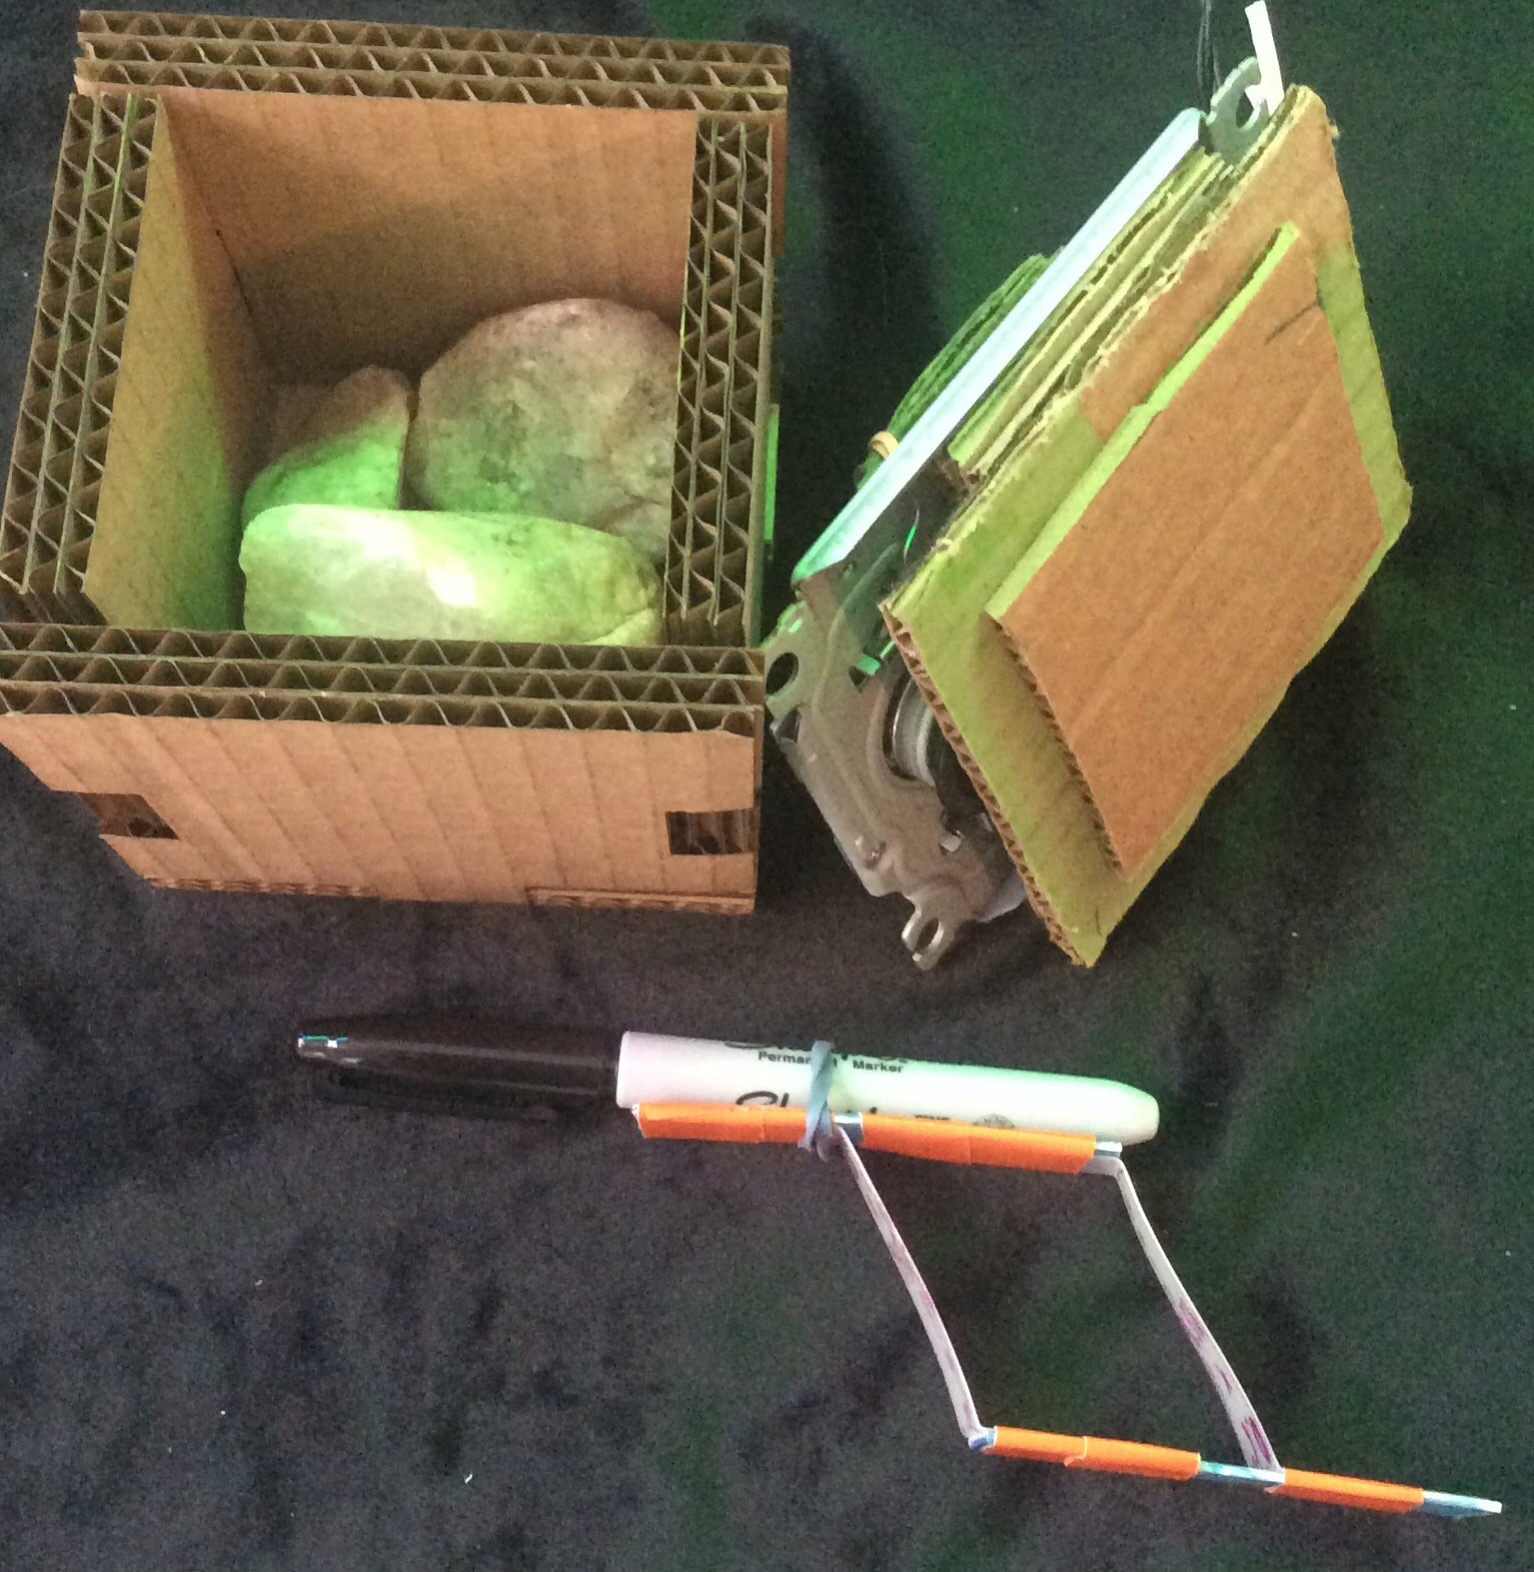
Don't forget the rocks! Without rocks, this will instantly tip over. Rocks are essential. Choose nice rocks so you can carry them around and use them for other stuff.
This soft spring loaded tool holder is the magic that makes this printer work on uneven random surfaces. By being soft, a long travel distance makes it possible to make marks over uneven surfaces. This is made from stiffer thicker plastic, thin soft sheet from milk bottles, duct tape and rubber bands. It uses the standard Geometron Rulers described in the laser shapes scroll.
This component is called the Sproing.
HDPE sheet from milk bottle is cut out into 2 identical rectangles, each 4.5 inches by 0.6 inches. Lines for folds are drawn an inch and a quarter in from each end.


Cut and fold

Z folds. About 90 degrees for each fold.

Get some stiff and thick but not too brittle plastic like polypropylene from the lid of a plastic storage tote. Trace out with Geometron ruler 2 different rectangles, one is 3 inches by 0.6 inches and the other 3 by three quarters of an inch.


Cut out rectangles with box cutter.

Join it all up witch duct tape as shown:

A doubled up small rubber band is used to mount the pen.

And finally the Sproing is fastened to the z stage on the DVD drive using another doubled up rubber band. Stack of cardboard is built onto the stage, first with 2 part epoxy Gorilla Glue to connect the metal to the cardboard then with Elmer's glue for the subsequent layers of cardboard to cardboard, and build that up until it's a good stage for the Sproing with the pen or other tool.

- 3 motor controller boards from Pololu(10x3=$30)
- Custom printed circuit board to connect Arduino to controllers and connectors($2/ea in lots of 20 with shipping)
- straight 0.1 inch headers from Digikey(buy about 2 per kit at about 60 cents each)
- Ribbon cable from Digikey(about $8 for about 6 kits worth for about $2/kit rounding up )
- 8 buttons for controller from Digikey(about $1 for all 8)
- Cables from Digikey to connect stepper motors in DVD drive stages to circuit board(about $10 for 3 of them)
- Arduino Uno from Sparkfun($25, some off brand UNOs have power supply problems for this application, test any new board to see if it stalls out)
- 9 pin socket headers
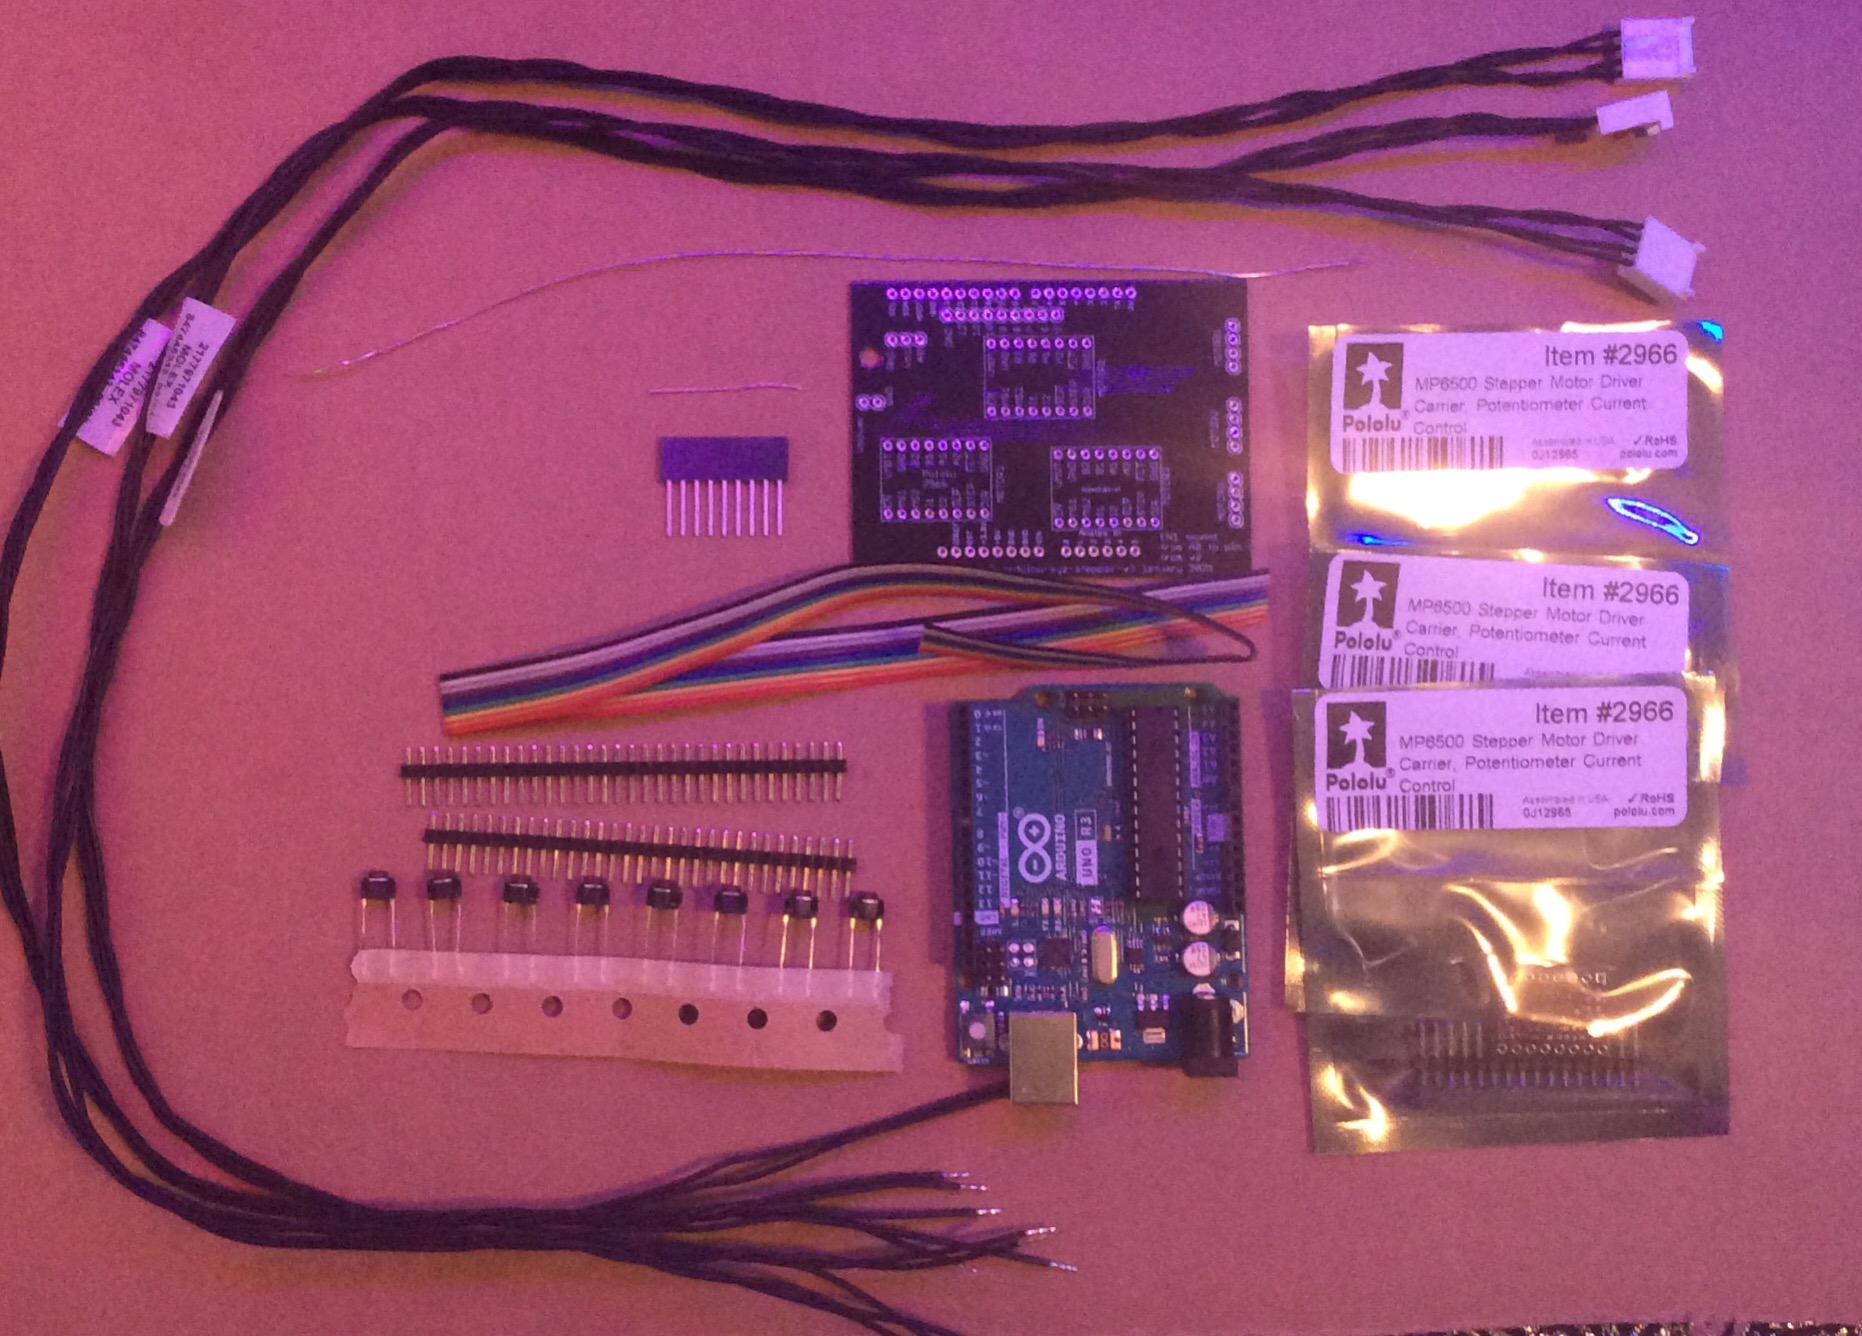
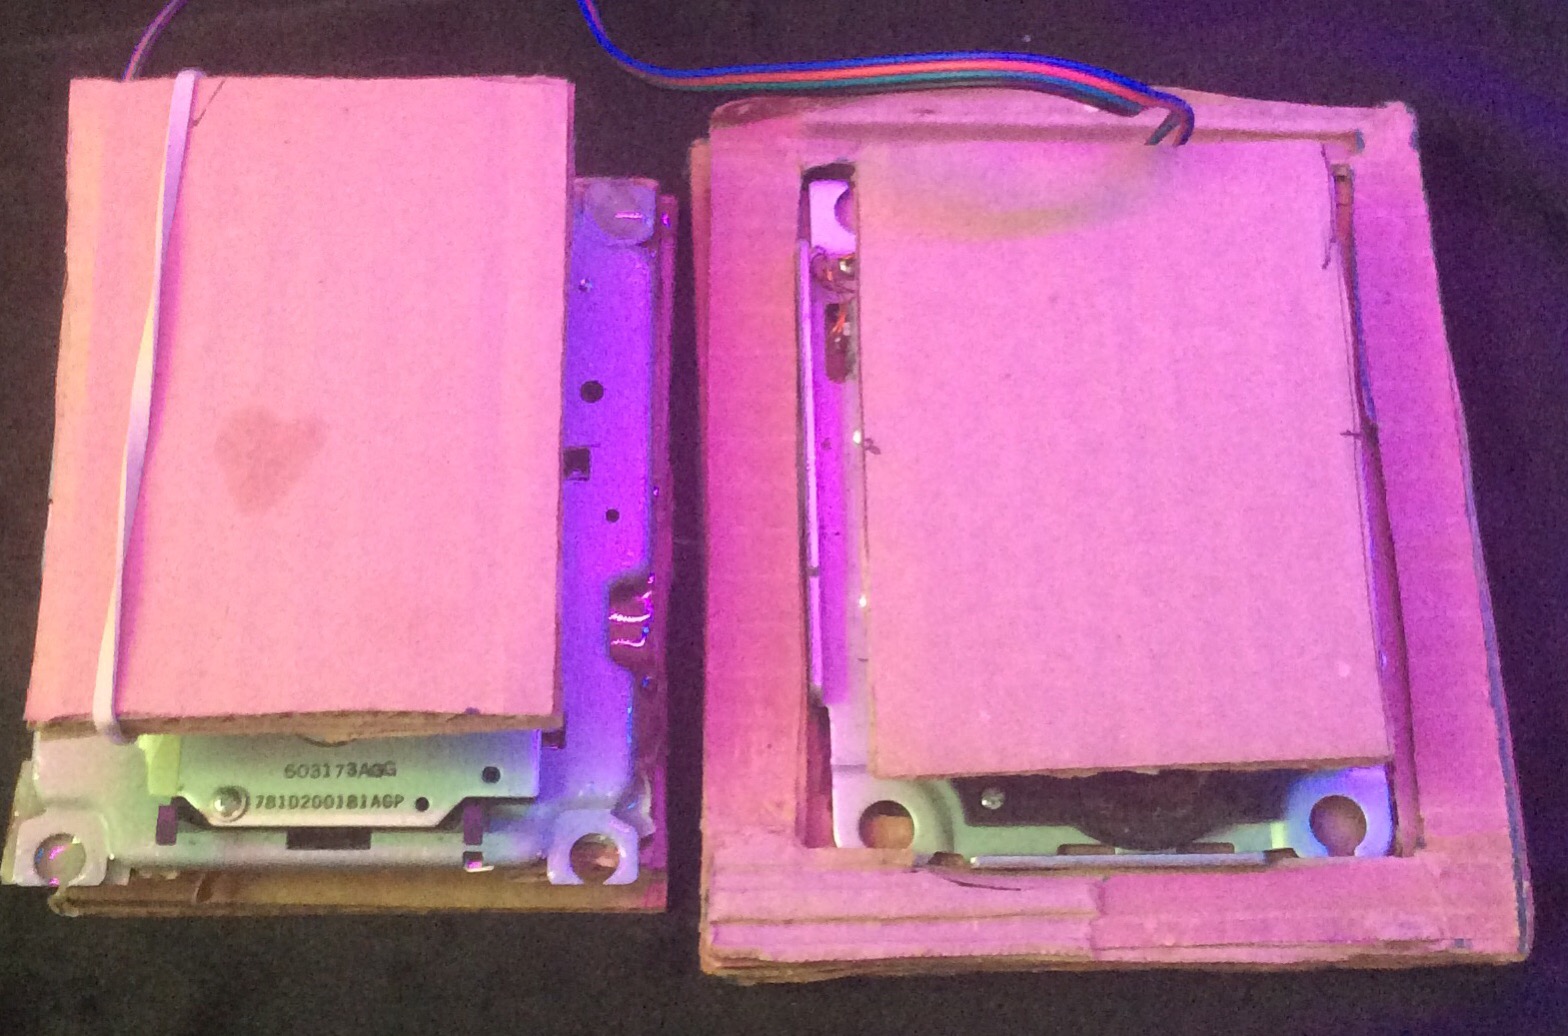
The exact electronics kit for one printer is as follows, and is in the following photograph:
- 8 inches of solid core wire for square ground ring in inside of controller cube
- 1 inch solid core wire for jumper from Vcc to Vin on shield board
- 14 inches of rainbow ribbon cable from black to red as shown
- 3 pololu stepper driver boards
- 1 custom shield board
- Arduino UNO
- 9 pin socket connector for cable from controller
- 2 strips of breakable headers 32-40 pins per strip
- 3 cables to connect the motors to the brain
- 8 buttons
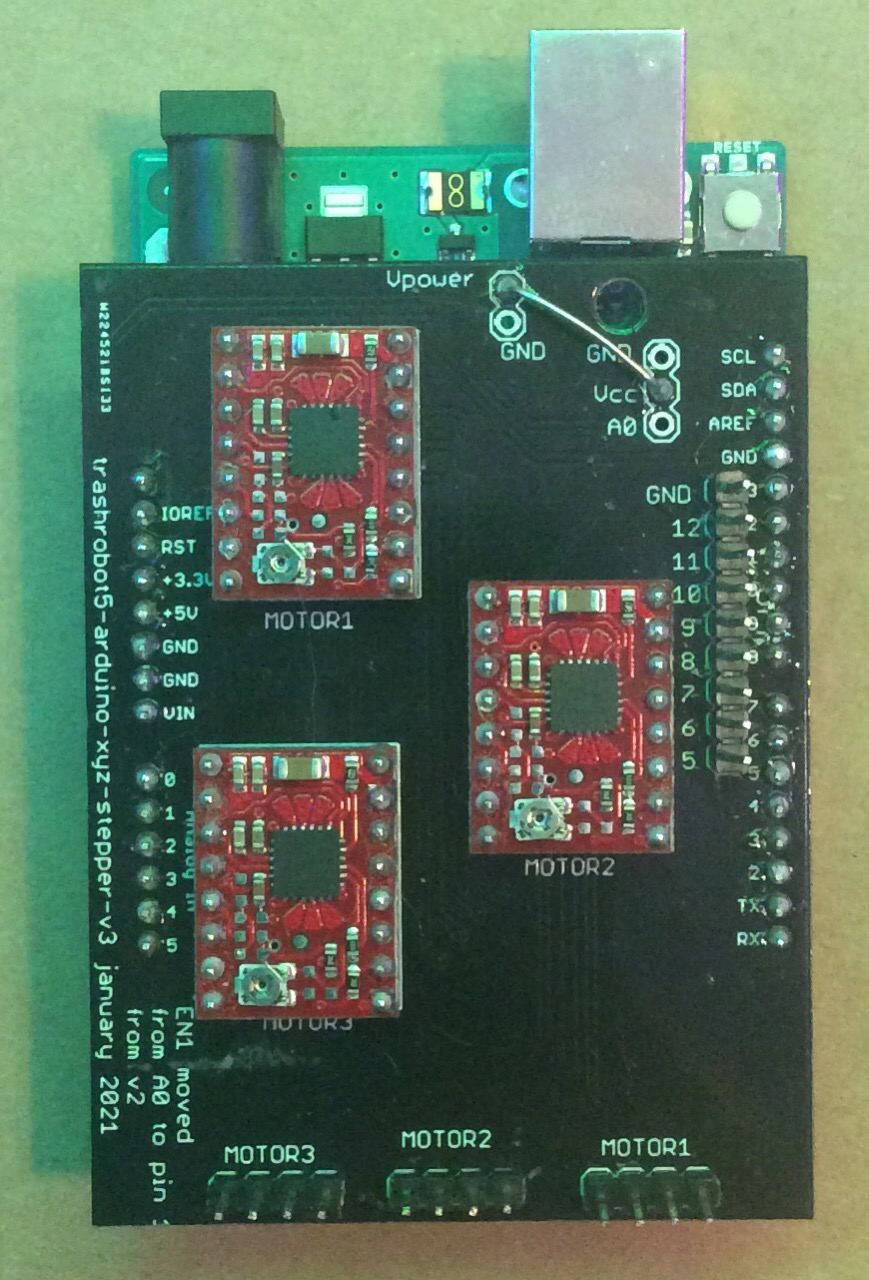
When assembled, the brain will look like this:
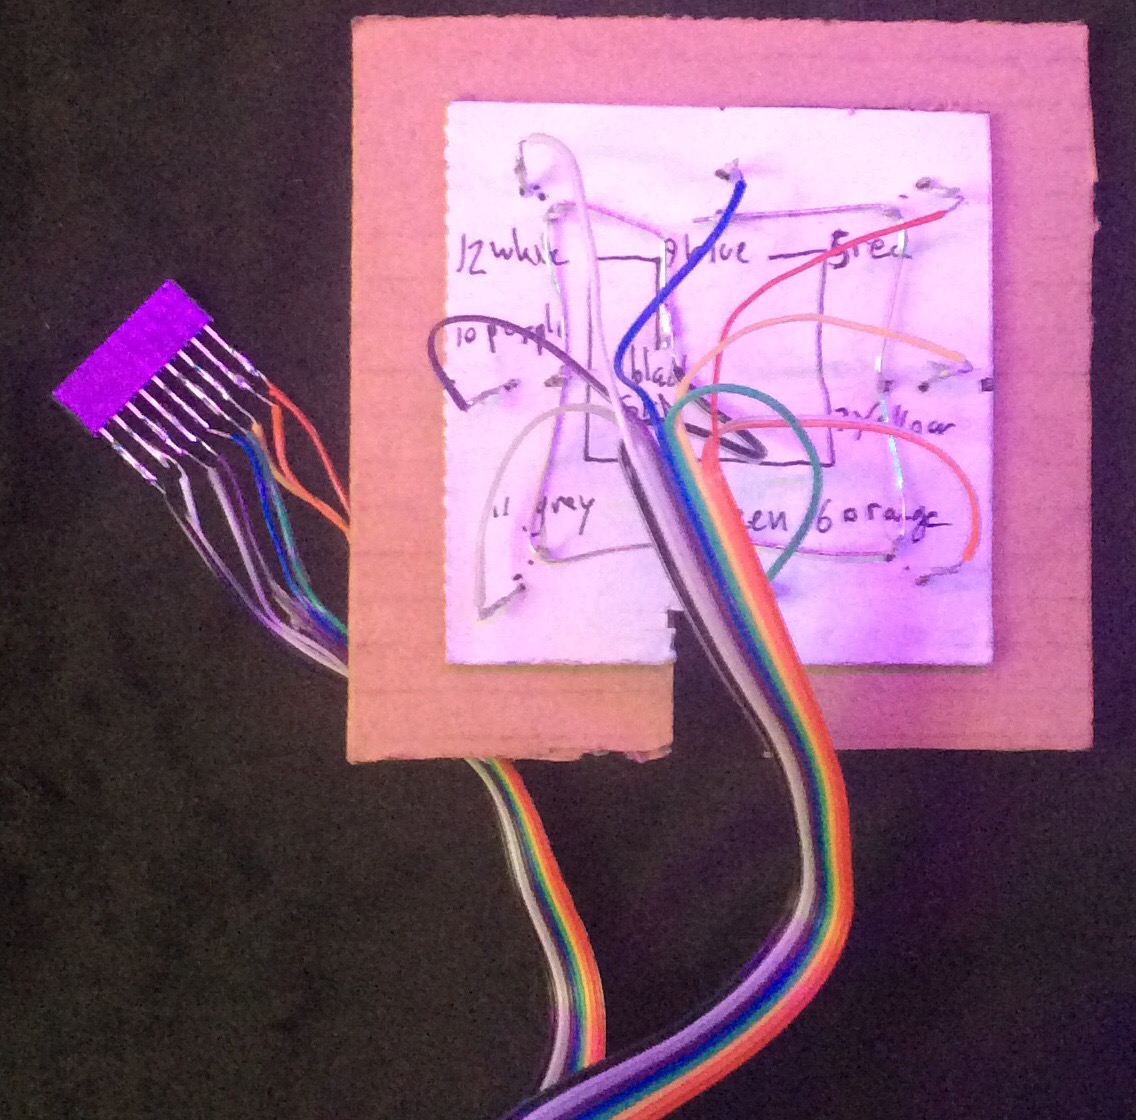
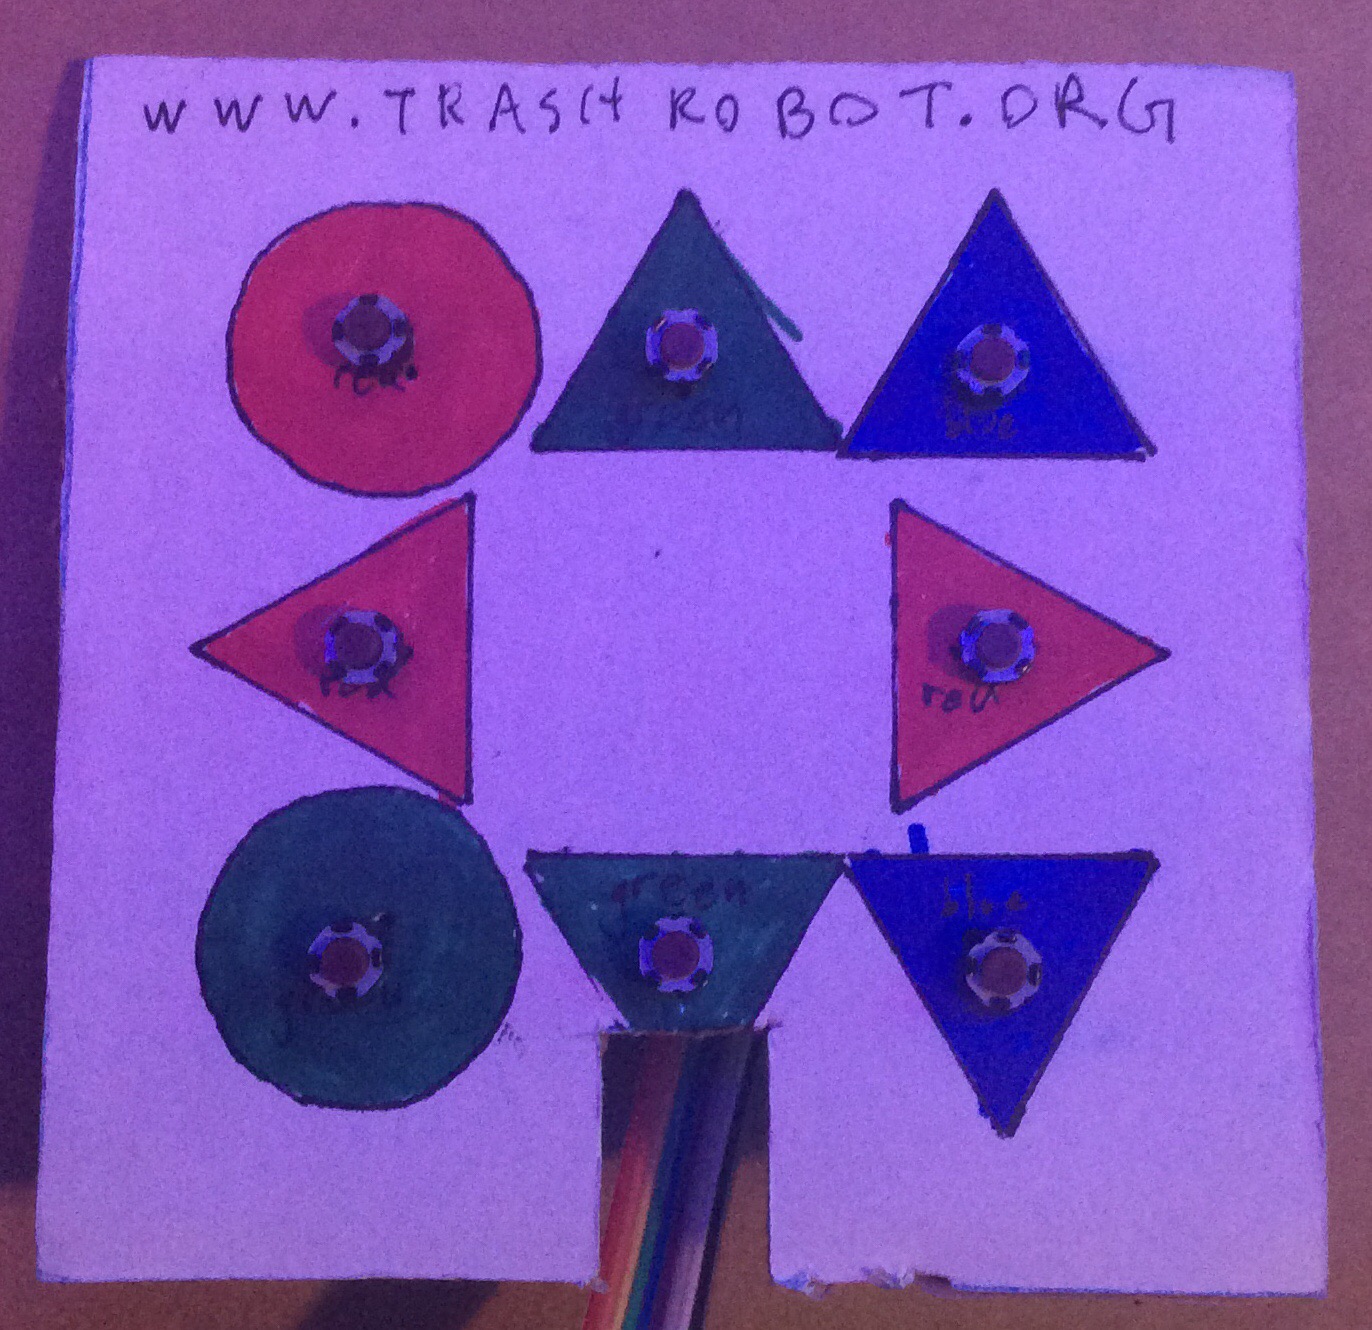
To create the Controller cube lid use the following patterns for the 4 inch outside square and 3 inch inside square. These patterns can be printed on a laser cutter to get all the labels right and the holes and cuts. Or they can be created using the Geometron ruler and shape set and a pen by hand.


Photographs of inside and outside assembly:
The base cube has the Arduino brain in it and a lid with the top cut off down to
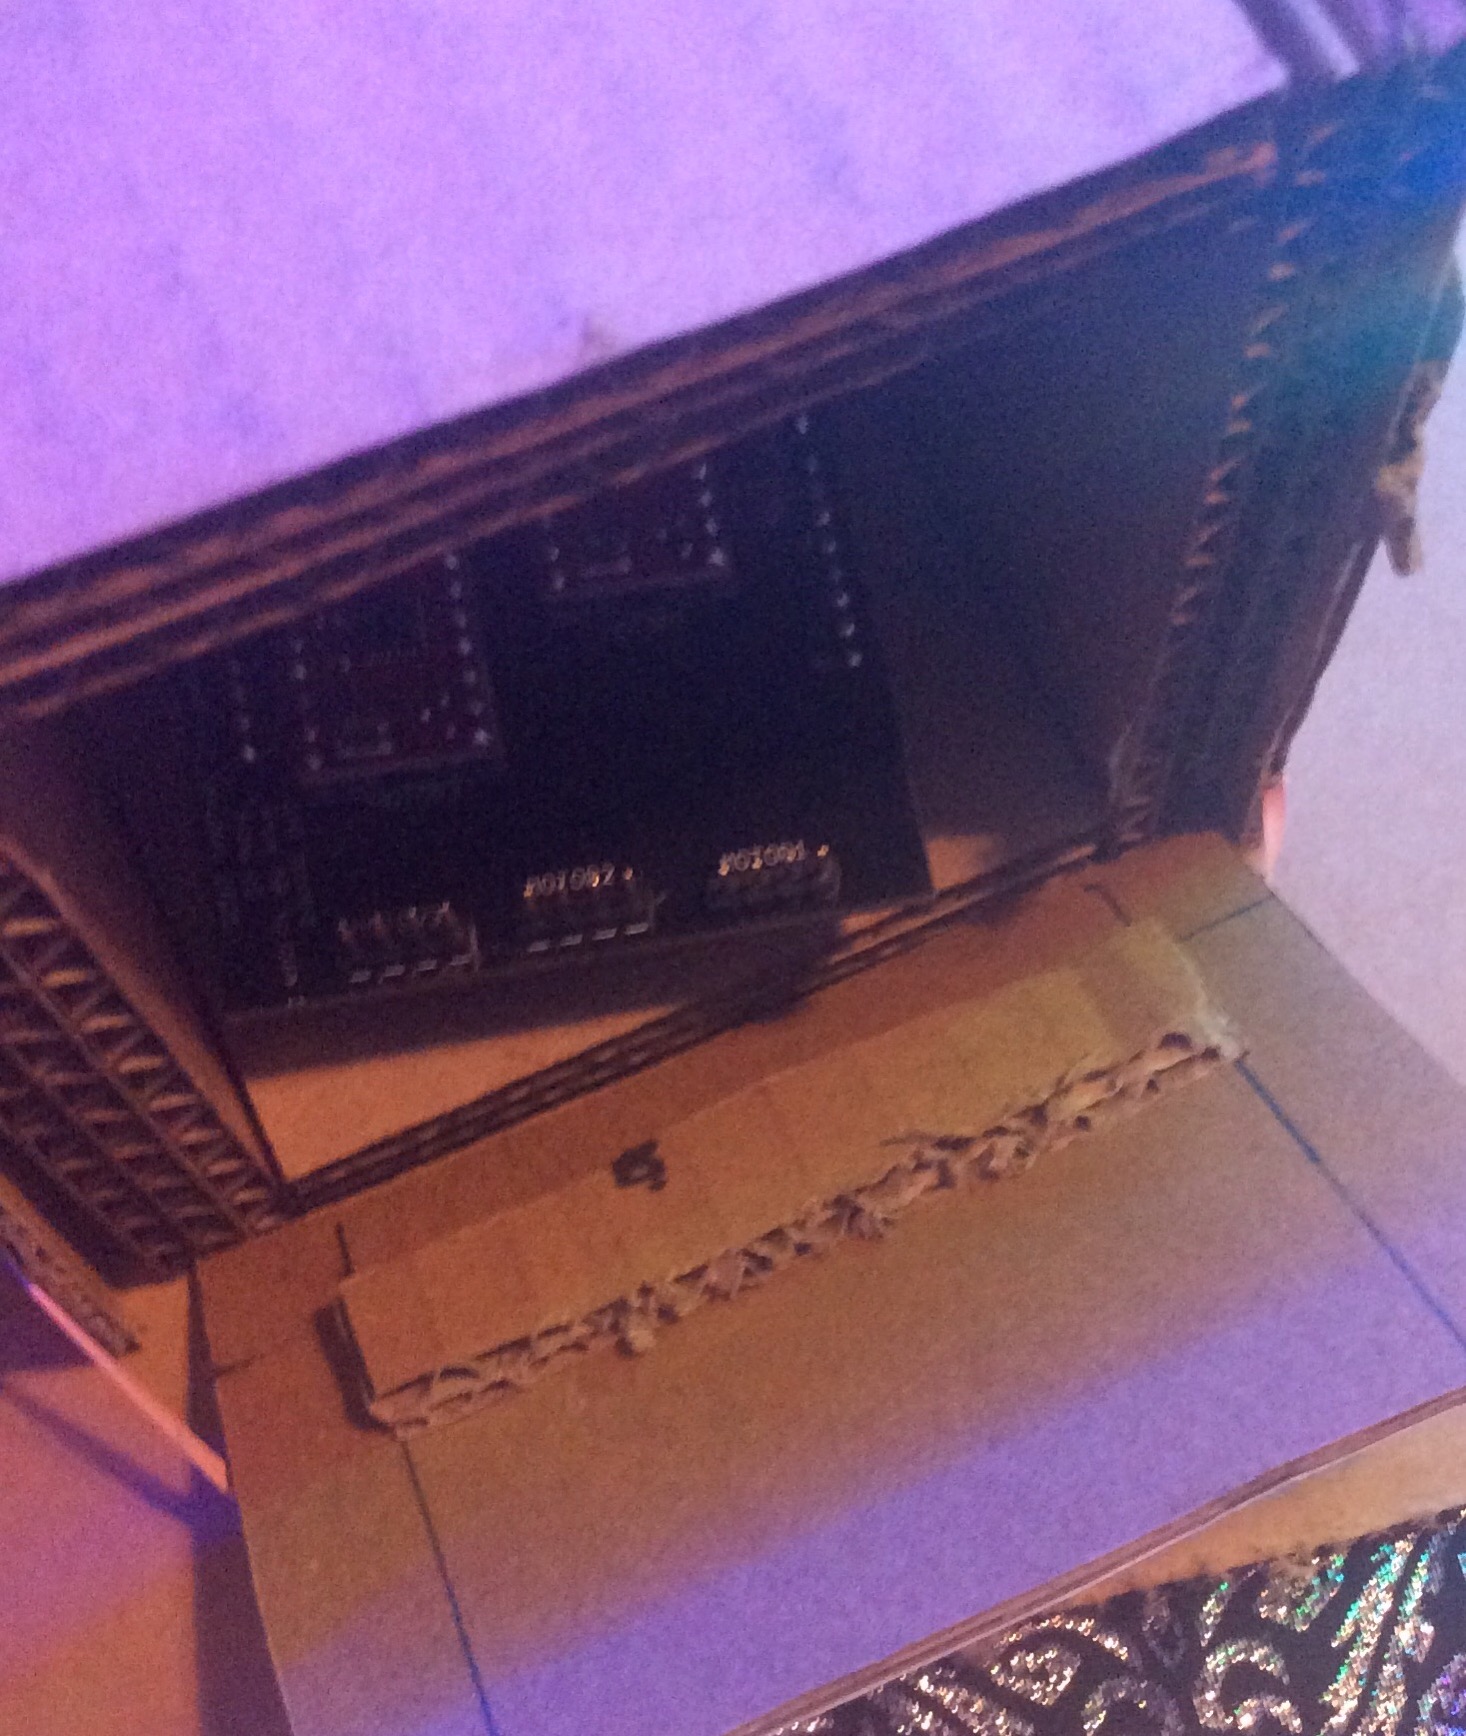
The piece on the inside of the lid is 0.5 inches by 3 inches and centered. The cutout in the back/base is 1 inch wide and 1.125 inches high. This can be cut by hand or laser cut from a bottom board.
The two bases can be just made from stacks of small cardboard cutouts cut by hand and big 4 inch square on top and bottom, or similar sized rectangular cutouts. These can be changed in orientation to control what angle of viewer can see the print as it comes out when printing in different spaces and configurations.
When all the parts are put together, further decorate with panels of whatever color, texture and material you want to make the thing look professional or have whatever aesthetic you want.
Find images, put them in the global image feed. Align the image. Trace the icon, and save it. Program the Arduino. Hit go. Hit stop to pause, hold down to reset to start new print.
Raspberry Pi is now impossible to buy. Find them donated from someone. Most people who have them don't use them or used them once and stopped due to lack of interest/time/need. Ask around! Someone will be able to donate a Pi, keyboard, mouse, screen, power supply and whatever other random things you need to get set up.
Get a SD card with 8 GB or more storage and a SD card USB reader
Download and install, then use the Raspberry Pi Imager:
https://www.raspberrypi.org/software/
Turn on the pi click through all the things, put it on the wifi network.
Open a command prompt(black link on menu bar) and type:
sudo apt update
sudo apt install apache2 -y
sudo apt install php libapache2-mod-php -y
cd /var/www/html
sudo rm index.html
sudo curl -o replicator.php https://raw.githubusercontent.com/LafeLabs/geometronmagic/main/php/replicator.txt
cd ..
sudo chmod -R 0777 *
cd html
php replicator.php
sudo chmod -R 0777 *
Check the IP address by hovering over the wifi icon, put that into the browser on another machine on the same local wifi network to see and edit the server. Or open a browser on the pi and point it to http://localhost
edit hosts file to have the IP address of the other servers and then the name you want to use, copying the format in the existing file.
sudo nano /etc/hosts
edit, and use control-x and say "yes" to save changes.
Look up "set up port forwarding raspberry pi" and follow instructions to log onto your router and forward port 80 to the raspberry pi. Use whatismyipaddress.com to get your global IP address. Now your home Raspberry pi server will be visible on that IP address. Take that address and make it a link on the remote raspberry pi terminal as well as a QR code on both.
edit the /etc/hosts file on the remote pi terminal so that home/ and remote/ point to home pi server either on the local network or on the public network. So "home" will point to the local IP address on the wifi and "remote" will point to the global IP address of the home raspberry pi server(which everyone can see).
link to setting up basic website with pi with external connection
the short but not as good way:
sudo apt-get install arduino
this installs a old version which is missing some features, namely the serial plotter. following more complicated instructions leads to non-working version which is impossible to uninstall.
how to do the tar ball thing to get a later version of arduino which has the plotting
https://www.raspberrypi-spy.co.uk/2020/12/install-arduino-ide-on-raspberry-pi/
go get the Arduino software at:
https://www.arduino.cc/en/software
and download "Linux ARM 32 bits".
Open a terminal and go to the home directory:
cd ~
Go to downloads folder:
cd Downloads
list the files with
ls
See the name of an archive with a name like "arduino-####-linuxarm.tar.xz", where #### is a version number.
extract with
tar -xf arduino-####-linuxarm.tar.xz
move the extracted information to opt directory(directory for package installation)
sudo mv arduino-#### /opt
then run the install script:
sudo /opt/arduino-####/install.sh
matplotlib install:
sudo apt install python3-matplotlib
https://www.instructables.com/Jupyter-Notebook-on-Raspberry-Pi/
sudo apt-get update
sudo apt-get install python3-scipy
sudo pip3 install --upgrade pip
reboot
sudo pip3 install jupyter
First, install XAMPP, a free open source web server for all platforms. Download from www.apachefriends.org. Click on windows to download, and click through to install everything.

After you download and install it, run it and start Apache. You should see a control panel like this:

Click on "Explorer" to get access to where the files are. From the main directory called xamp, you want the sub-directory "htdocs". Open this, delete the index.php file, and create a new file called replicator.php which you copy and paste the replicator at php/replicator.txt into, and save.

Point a web browser on the same computer to http://localhost/, then click on replicator.php. This should replicate the whole system into the directory. When this is done, click the link to go to the main page.
Now you can go make a new coin using your server.
To run a Geometron Server on an Android, we will install the commercial software ksweb pro.

link to play store to install ksweb
Install KSWEB on the Android, and turn it on. Get the paid version. It is worth it, there are lots of broken web servers out there or ones with crappy features and tons of ads. This is critical infrastructure for Geometron and it's worth supporting the developer of this useful tool. Be sure PHP is also turned on.
This is what it looks like when it is on:

Use the Editor built into the system to create a new file called replicator.php in the directory htdocs on the sd card as shown above, and to copy/paste into that the file in php/replicator.txt. Save that, and delete index.php. Point a browser to the address http://localhost:8080. Click on replicator.php and wait for the system to copy. Sometimes it might time out, try it again. When the system has replicated, make sure your phone is on a local wifi network, and turn the server off and on again, and you will get an IP address for the phone which is shown in the app. The link for any other machine on the network other than the phone is the IP address followed by colon and then "8080". E.g. http://192.168.0.19:8080/. Share this link via email, text message, and links on other servers so that anyone on your network can see your server and edit it.
- install PHP on your machine
- create a new github repository on a CC0 PUBLIC DOMAIN license and clone it on your machine
- copy the file php/replicator.txt into a file called replicator.php in the new repo directory
- run
php replicator.phpon your machine, wait for all the code to copy - push all that code up to your github repo
- in the same directory, type
sudo php -S localhost:80 - go to http://localhost and you should get back to this screen, edit all elements of the system
- use editor.php to edit the file php/replicator.txt so that the two urls are the global url for your repo for both dna and replicator
- after you've edited the code, click text2php.php to convert that to php
- push your code to your github repo
- use the new replicator code on your github repo to replicate out that instance to all other servers(linux, windows, mac, android) and forks
- when you figure this out, make youtube videos showing other people how to copy the whole system
- scroll sets
- map sets
- pi crust
- qr code
- cube voxel AR memes
- link to quantum art
- links to wikipedia pages
- link to programmer from quantum art
- screen shots of list of icons shown in this scroll
- photo of a 22 card deck
- photo of shirts and pants
- photos of all the bags
- photos of flags
- copy trashrobot.html to index.html
- copy latest README.md from github
- http://localhost/