
Antares offers an IoT platform specifically designed for any Internet of Things (IoT) projects. The platform is developed by Telkom Indonesia to support the integration of data from sensors and actuators on the internet.
This article will present a step by step example how to upload analog value of a potentiometer & DHT11 (temperature & humidity sensor) from ESP8266 NodeMCU to Antares IoT platform. Watch video below (or click here) for its demonstration, then follow these instructions to start building your project with ESP8266 NodeMCU & Antares.

To build this project, you need the following items:
- 1 ESP8266 NodeMCU board
- 1 breadboard
- 1 potentiometer
- 1 DHT11 sensor
- some jumper wires
- Arduino IDE (download here)
- DHT library (download here)
- Antares ESP8266 library (download here)
Gather your parts then follow the schematics below.
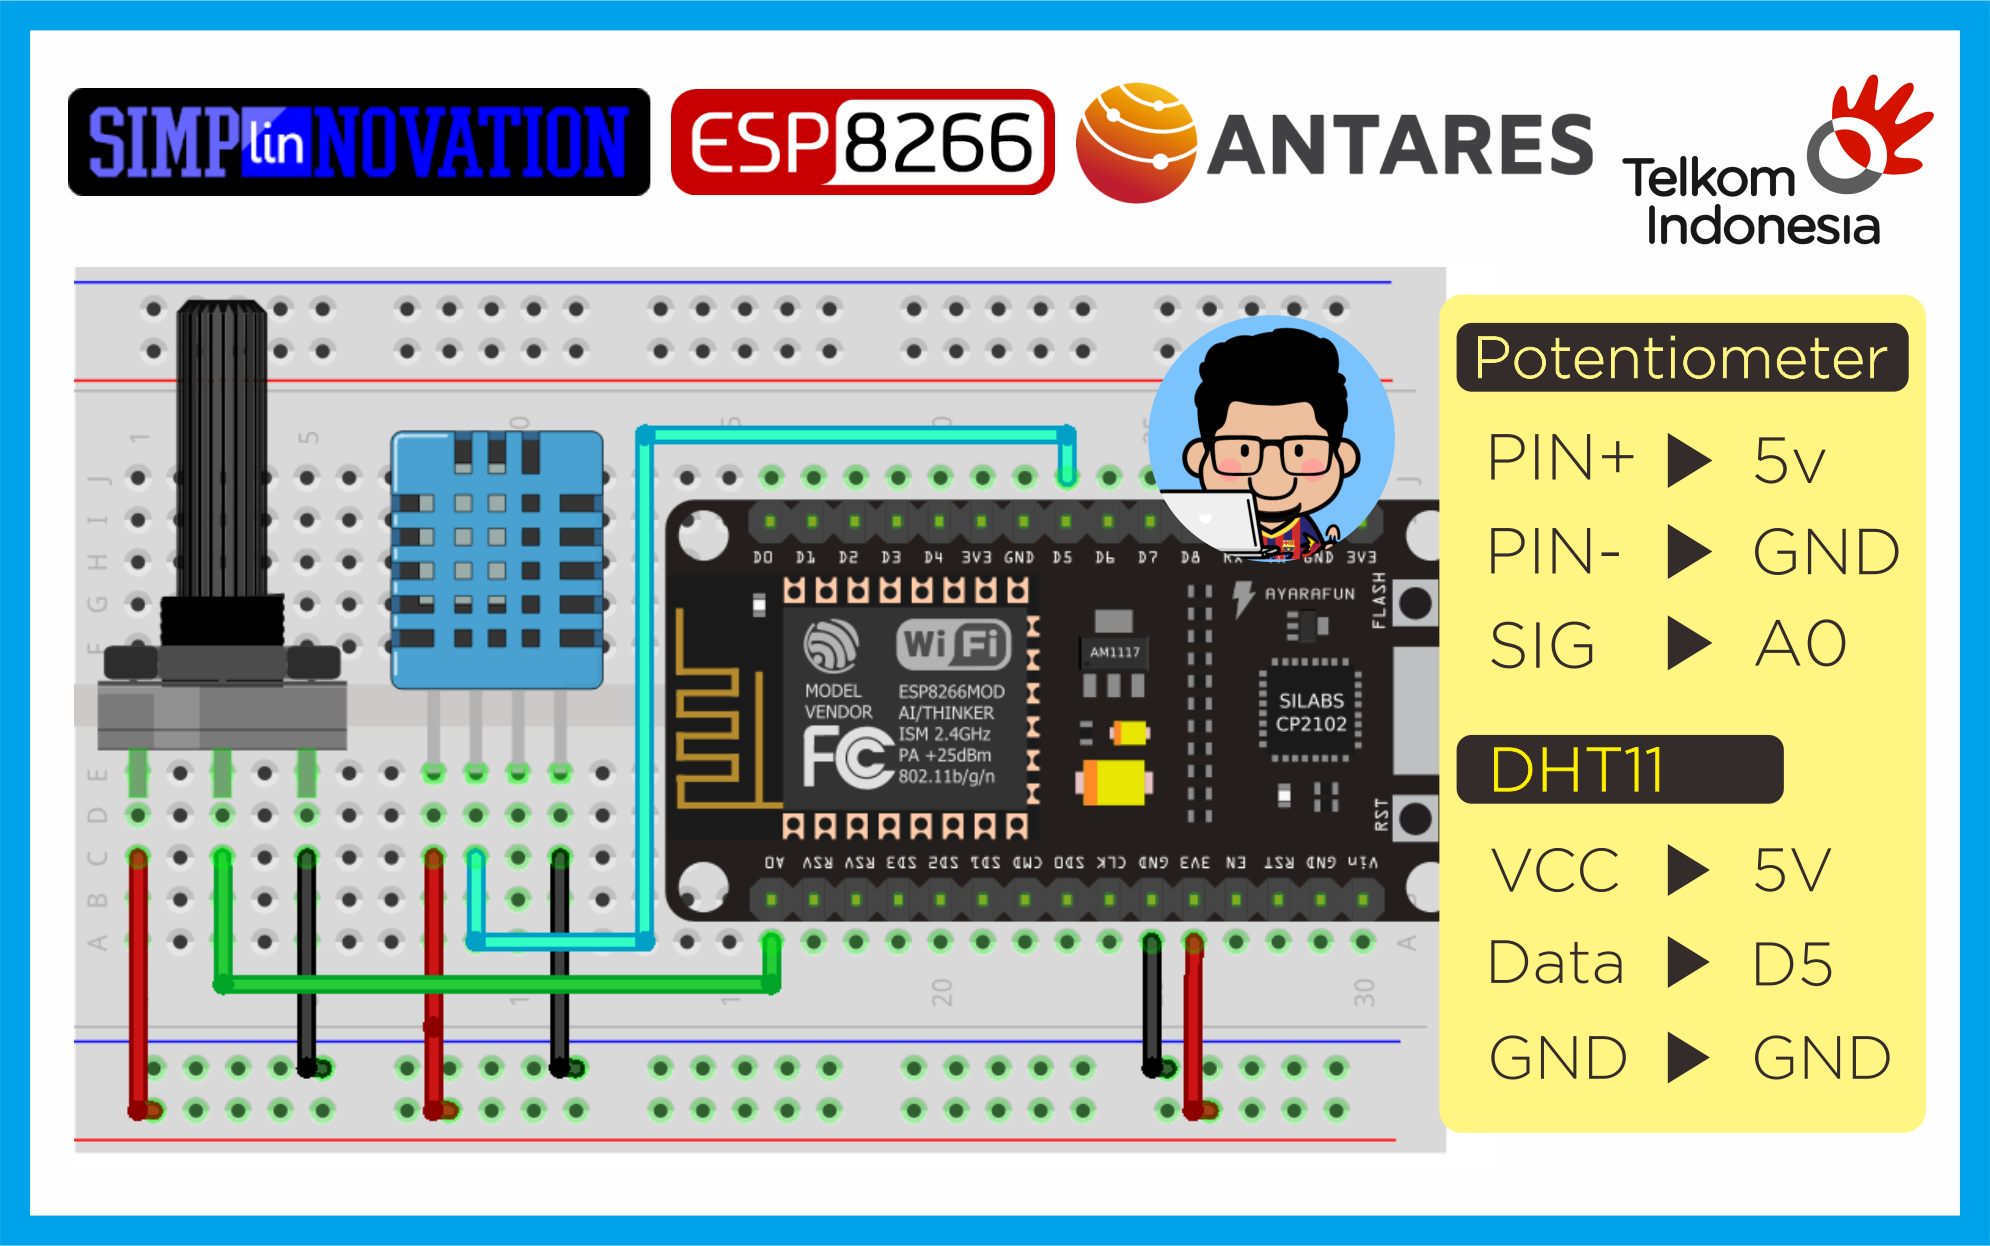
-
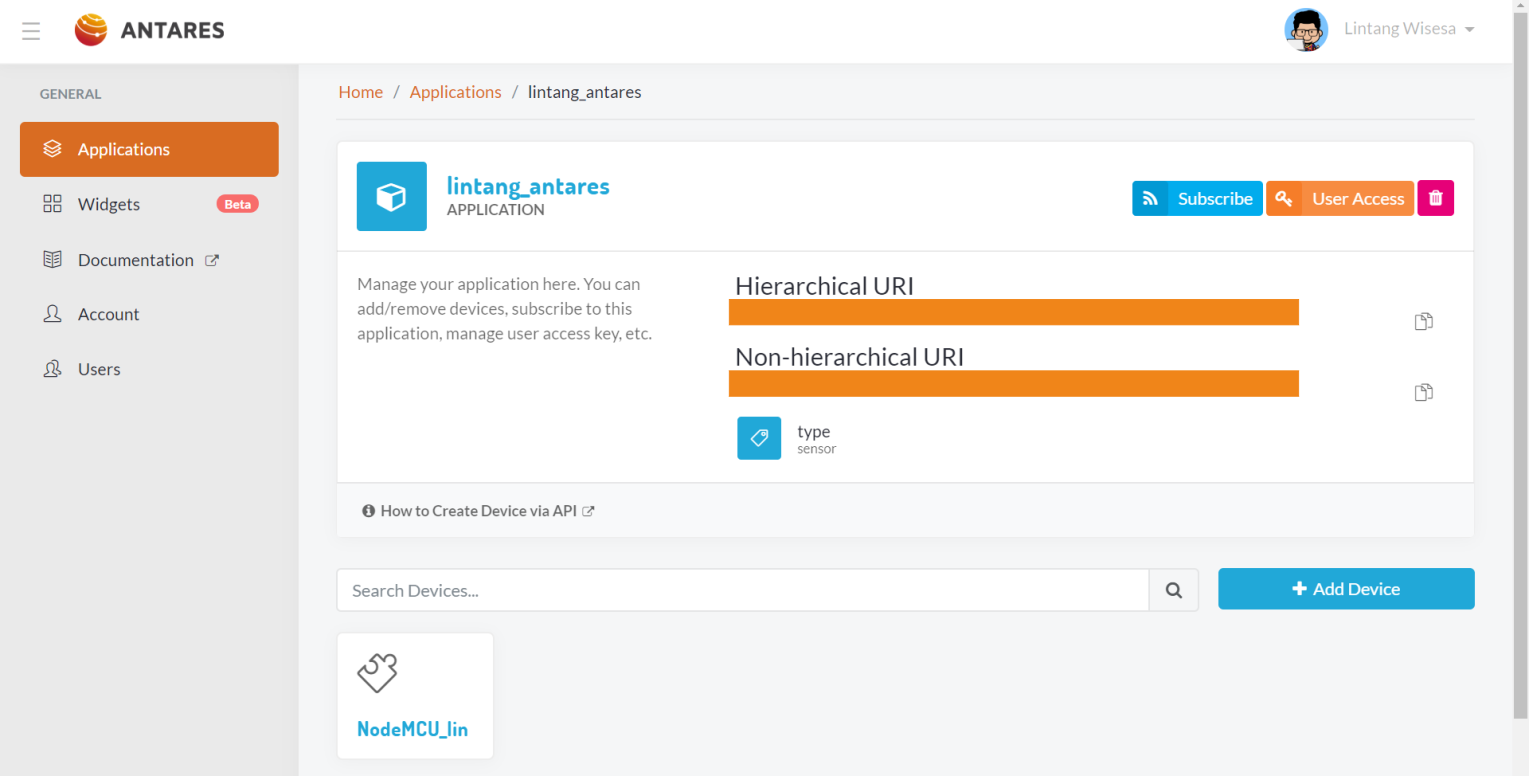
Create Antares Application & Device
Signup/login to Antares then go to Applications menu, and click +Add Application button to create a project. Fill out the forms then click +Add Device button to create your virtual device on Antares.
Please remember your application & device name, we'll use it later!
-
Get Antares Access Key
Now go to your Antares Account, grab your access key, and you're Done!

-
First you need to install ESP8266 platform on Arduino IDE, follow these instructions: click here.
-
Install manually DHT library (download here) & Antares library for ESP8266 (download here). Download, extract & copy its files to C:\...\Documents\Arduino\libraries. In my case, I have to deactivate WiFiClient library from Antares library. Simply open AntaresESPHTTP.h file, then delete/comment this line:
#include <WiFiClient.h>
-
Open your Arduino IDE, then copy sketch below to your Arduino IDE. Make sure you have chosen the right option for Board and Port under Tools menu, then upload to your NodeMCU board.
#include "AntaresESPHTTP.h"
#include "DHT.h"
#define DHTPIN D5
#define DHTTYPE DHT11
DHT dht(DHTPIN,DHTTYPE);

#define SERVER "http://platform.antares.id"
#define PORT "8080"
#define ACCESSKEY "your_antares_access_key"
#define WIFISSID "your_wifi_name"
#define PASSWORD "your_wifi_password"

String projectName = "your_antares_application_name";
String deviceName = "your_antares_device_name";

Antares antares(ACCESSKEY,SERVER,PORT);

void setup() {
    Serial.begin(115200);
    pinMode(D5,INPUT);
    antares.setDebug(true);
    antares.wifiConnection(WIFISSID,PASSWORD);
}

void loop() {
  String suhu = String(dht.readTemperature());
  String lembab = String(dht.readHumidity());
  String pot = String(analogRead(A0));

  int sizeData = 3;
  String dataName[sizeData],dataValue[sizeData];
  dataName[0]= "Suhu";
  dataName[1]= "Lembab";
  dataName[2]= "Pot";

  dataValue[0]= suhu;
  dataValue[1]= lembab;
  dataValue[2]= pot;

  Serial.println(antares.storeData(projectName, deviceName, dataName, dataValue, sizeData));
  delay(10000);
}
Now you can monitor your potentiometer & DHT11 sensor value every 10 seconds on Antares dashboard. You can also create some widgets under Widgets menu to visualize the data. For more information about Antares, read its full documentation: click here.

Lintang Wisesa 💌 lintangwisesa@ymail.com
Facebook | Twitter | Google+ | Youtube | :octocat: GitHub | Hackster