Click on  , located at the top left, for navigation of different assignments.


VID_20220914_091331097.mp4

I felt like I had no idea what I was doing and tried doing everything on the first launch pad assignment. Wiring was kind of an issue, but google exists along with the stuff provided in the assignment so everything was fine. To throw a lesson out there, check out strings and concatenating things. "Countdown: 10" is nicer than "10".
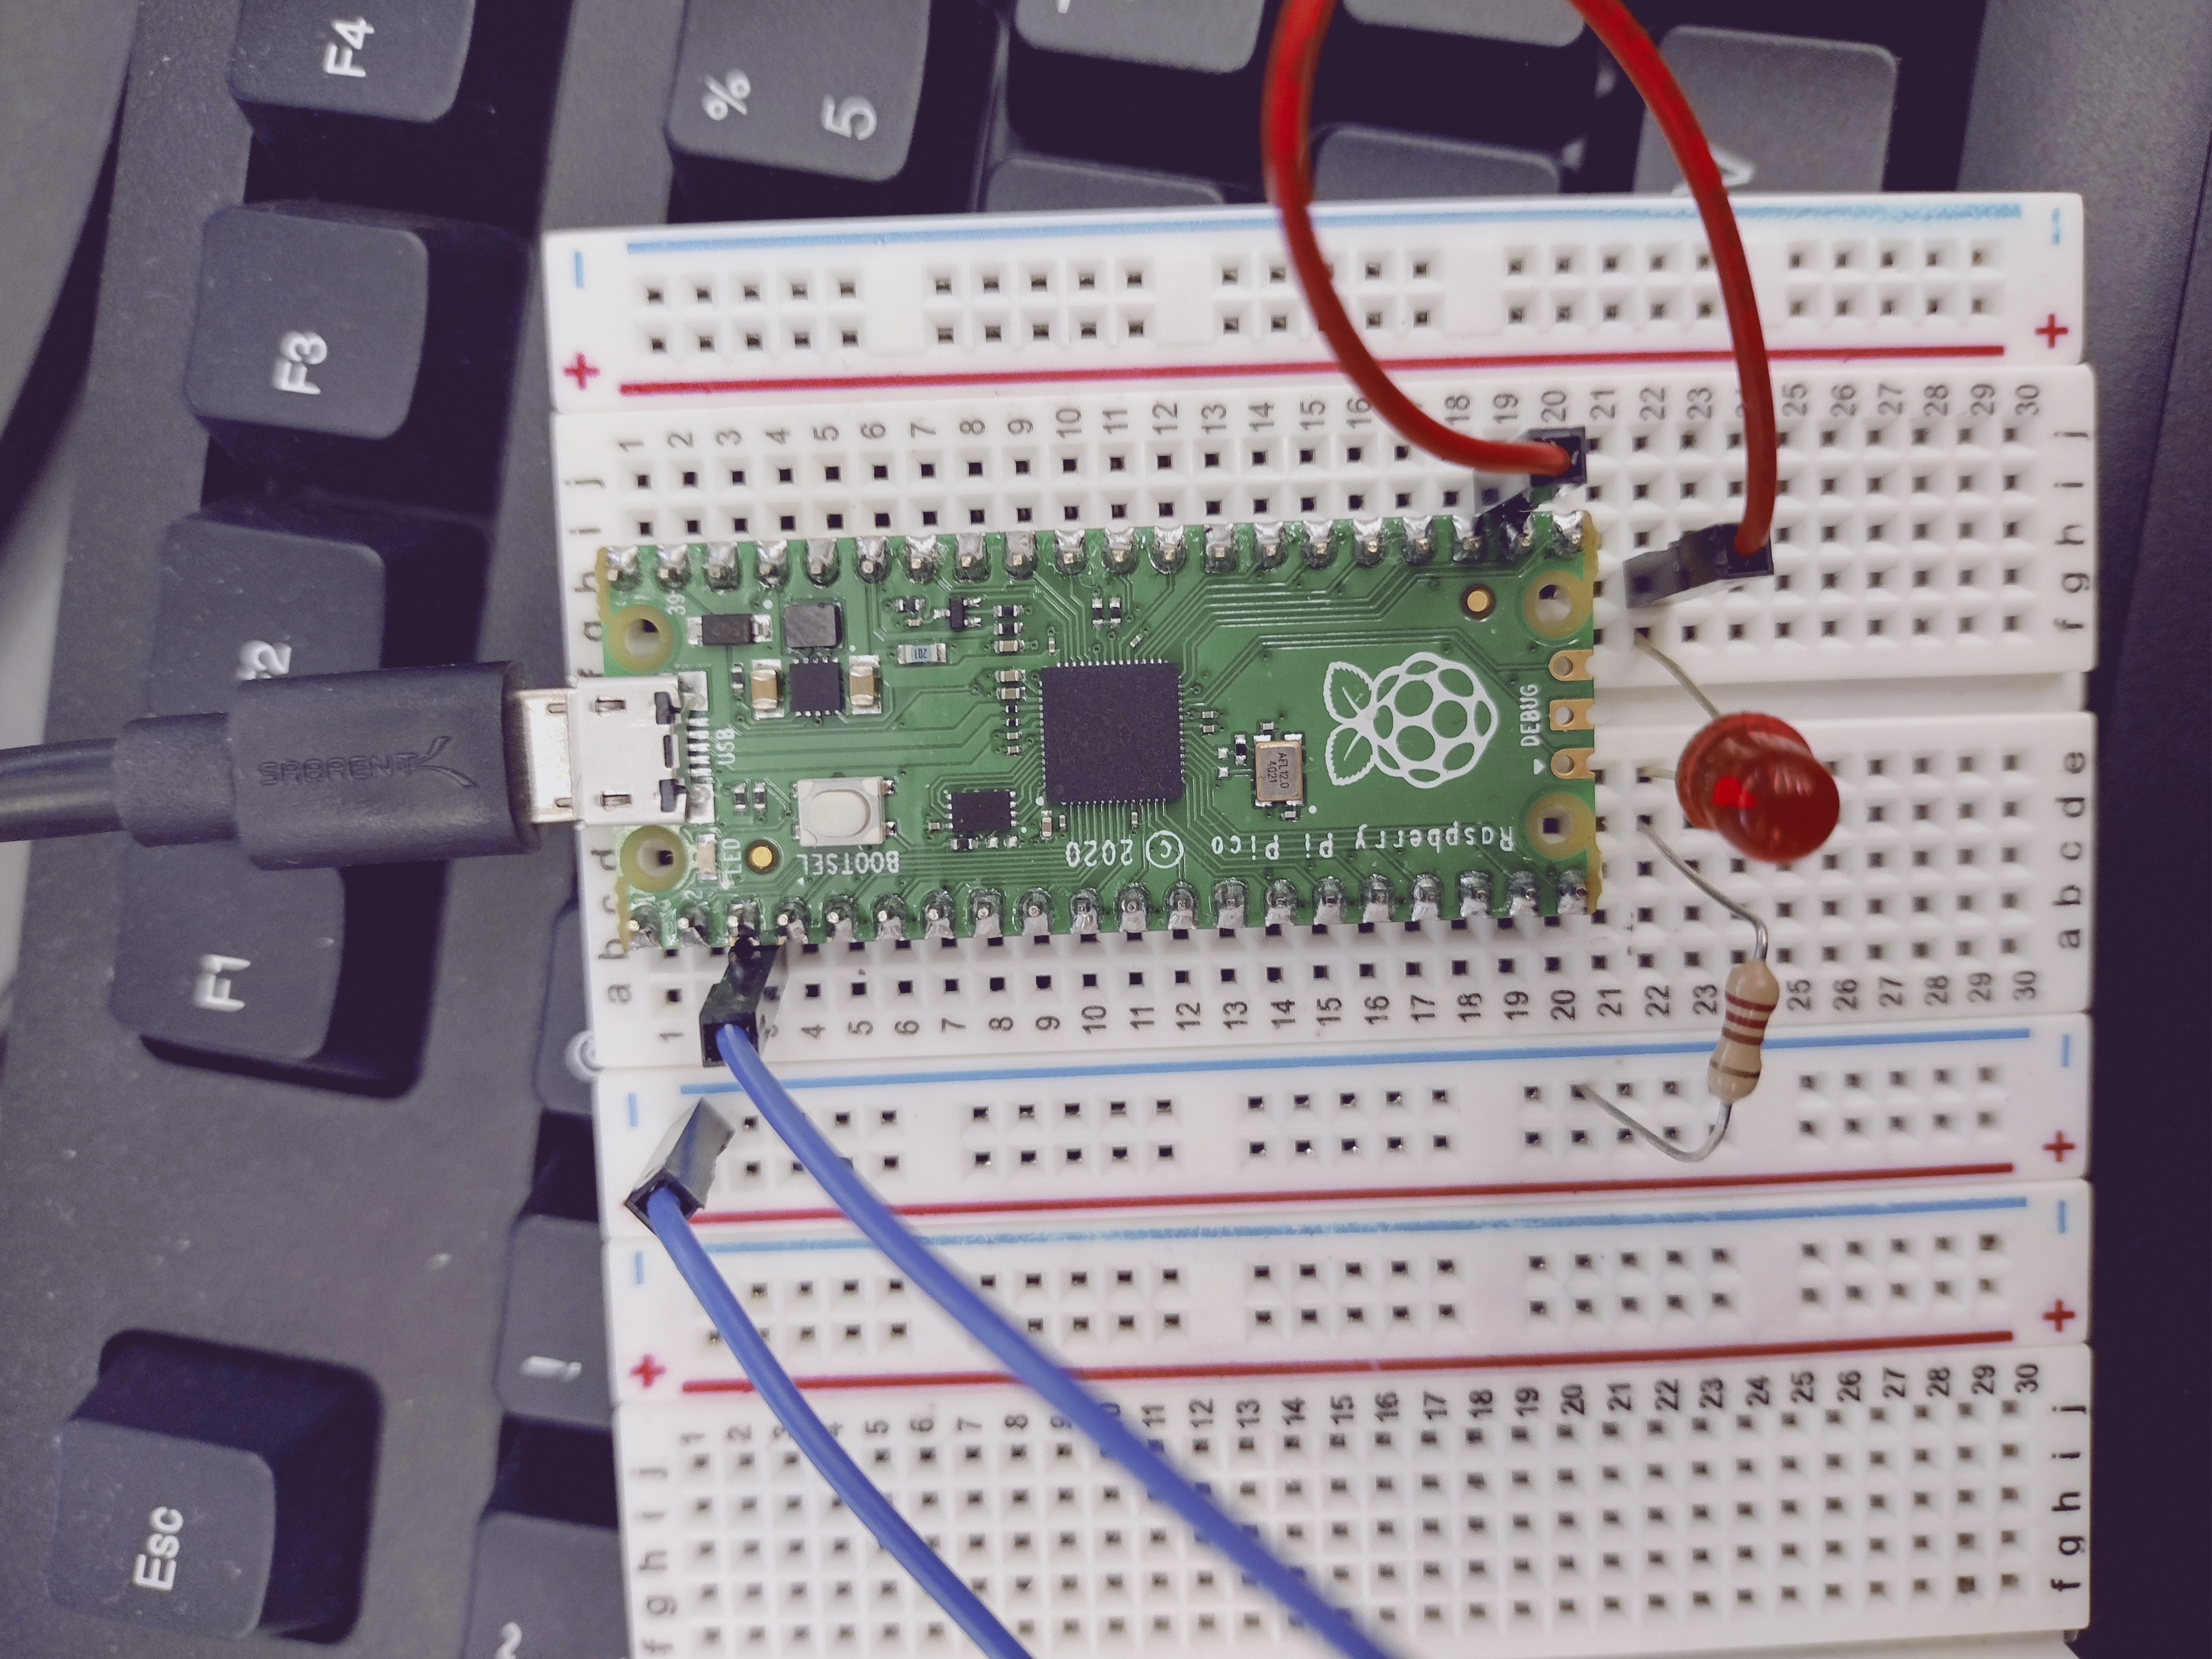
Assignment: Blink a red light each second of the countdown, and turn on a green LED to signify liftoff.
VID_20220914_092915518.mp4
Not much to reflect on. Make sure you have a resistor for your LED, remember the long end is positive, use OUTPUT, turn value to true/false.
VID_20220914_095243414.mp4
Forgot what lines of code I needed for this to work. A couple minutes later button prints stuff and yeah. There are two ways of connecting a button apparently, do the one that makes the button print "True" because that makes more sense. Use INPUT, not OUTPUT. Make sure you pull up/down resistors, I don't really understand it but it makes it work:
button1 = digitalio.DigitalInOut(board.GP18)
button1.direction = digitalio.Direction.INPUT
button1.pull = digitalio.Pull.DOWN
VID_20220916_100638061.mp4
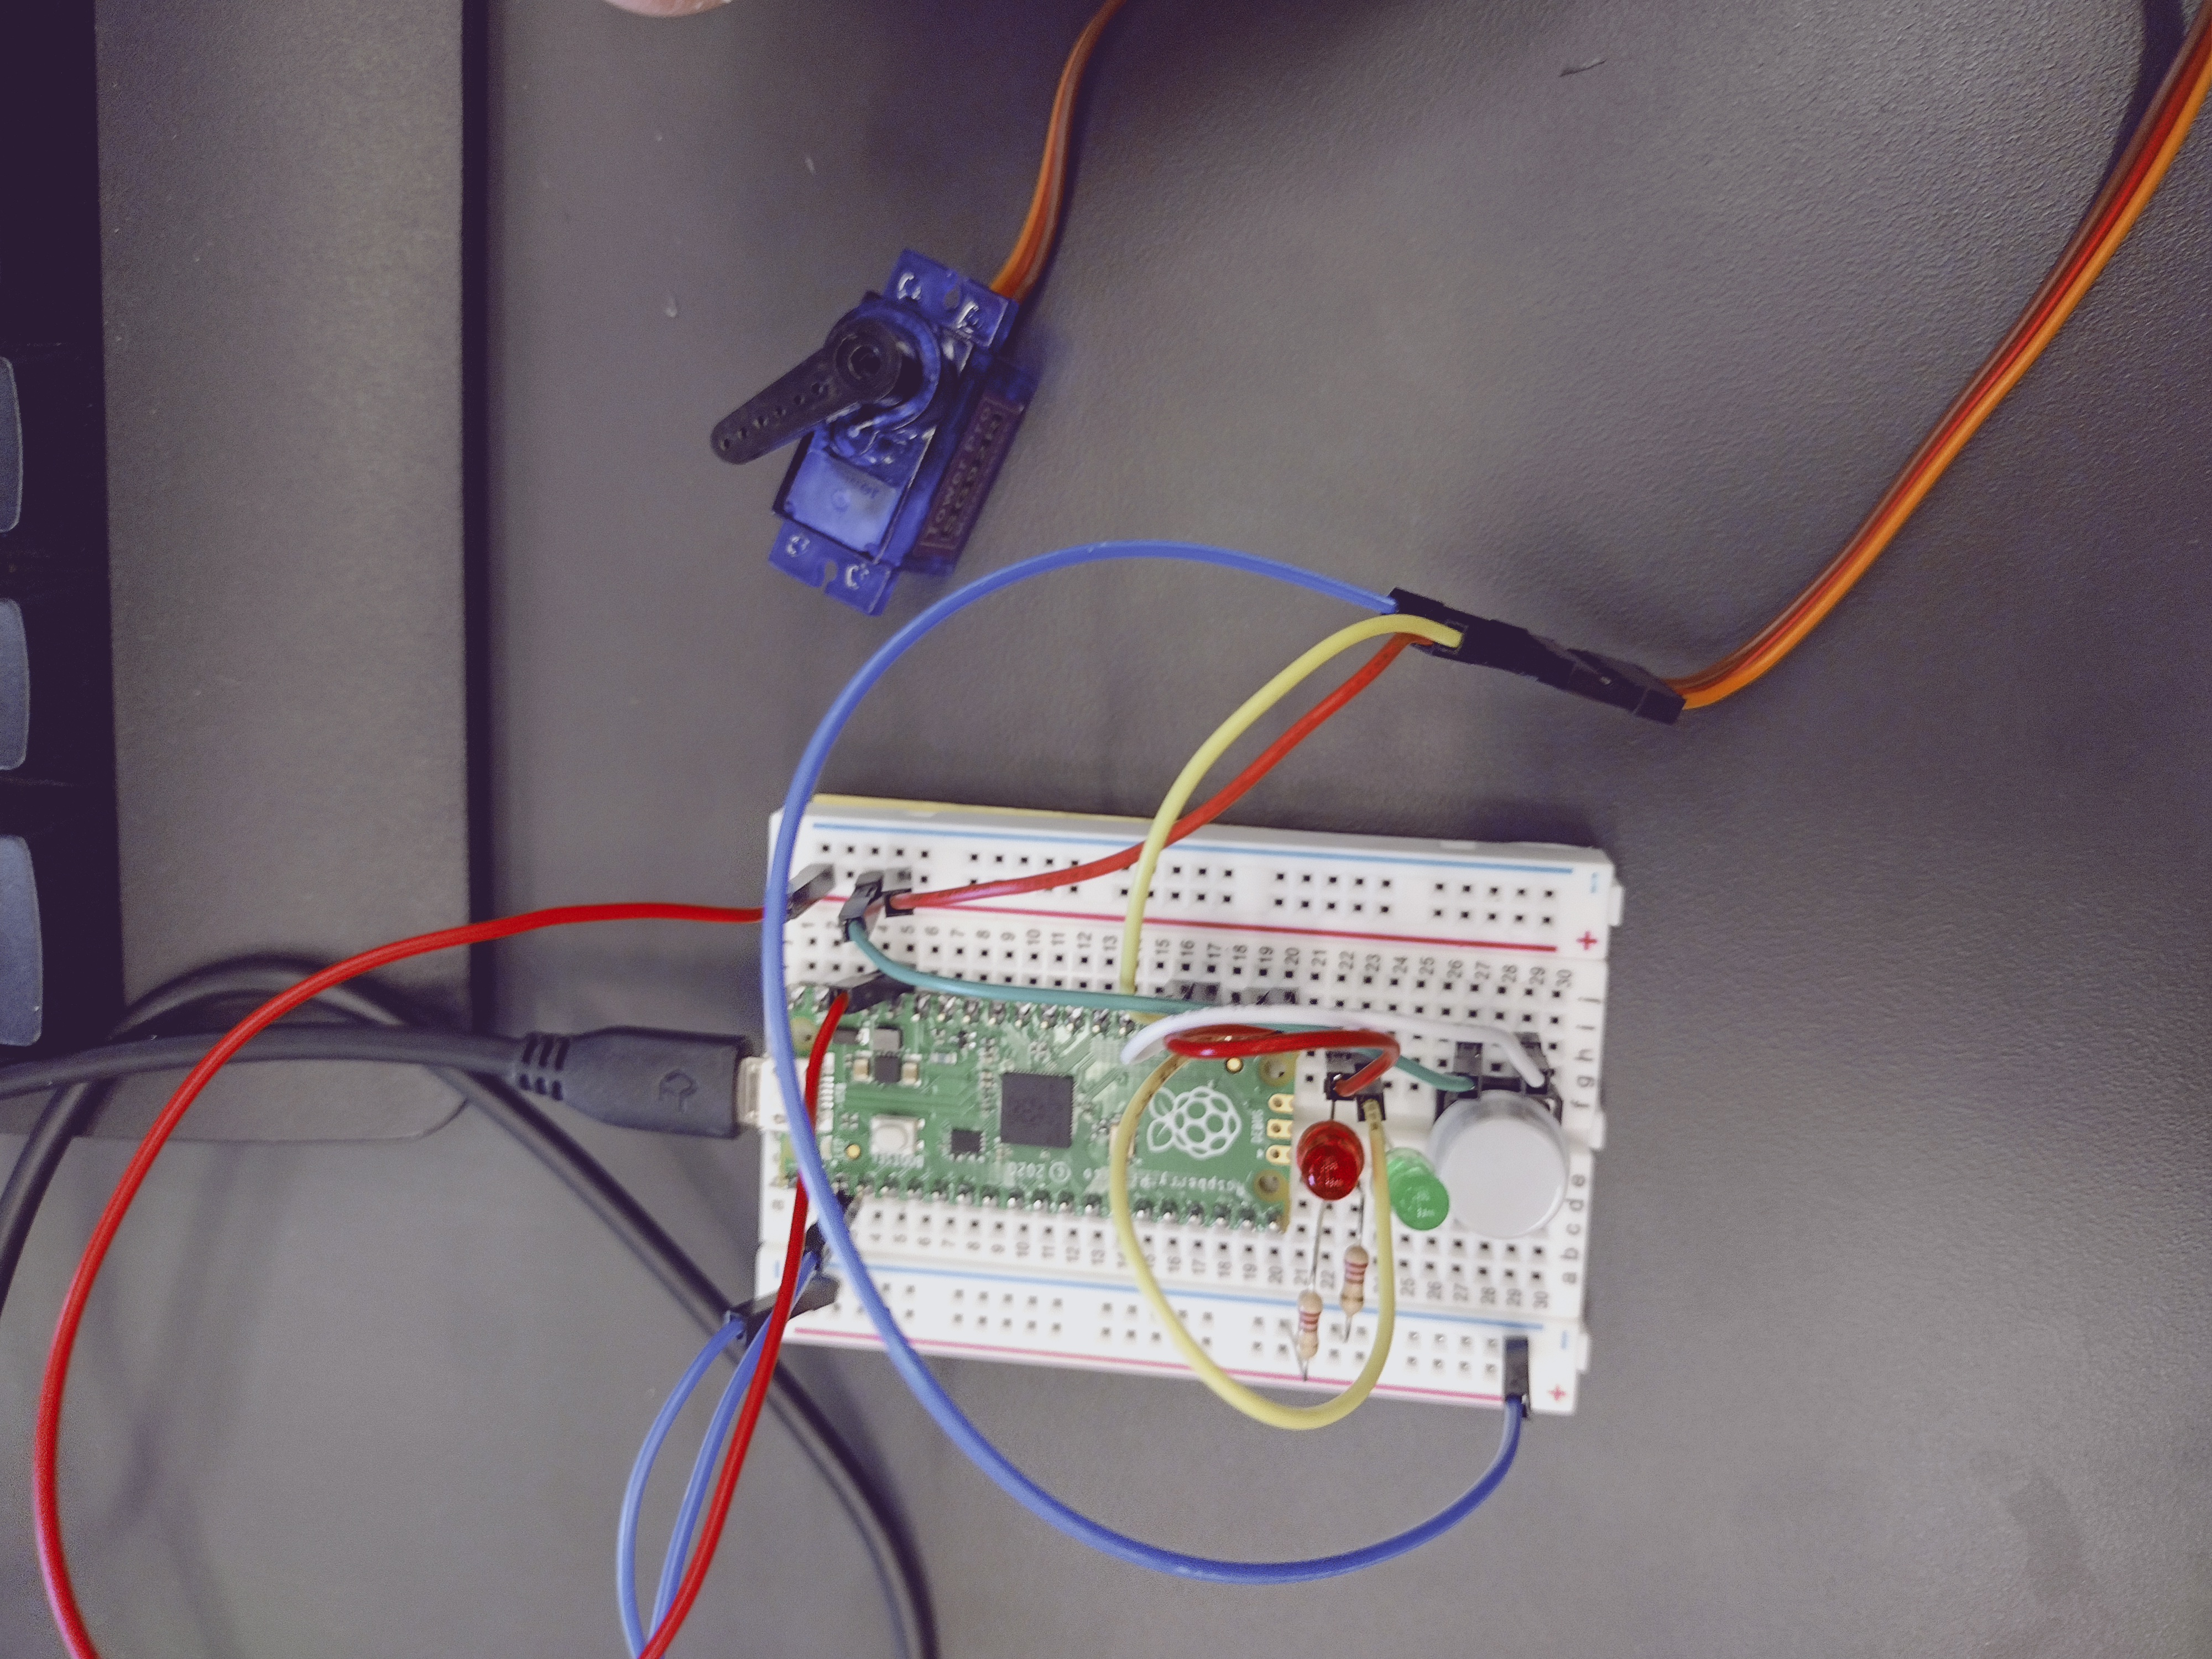
Make sure you have everything wired up correctly with the servo, pretty easy to follow as there were instructions. Oh, I guess also make sure you grab the correct servo.
Assignment: The module must have an accelerometer that continuously reports x, y, and z acceleration values on the serial monitor.
VID_20220919_102947516.mp4
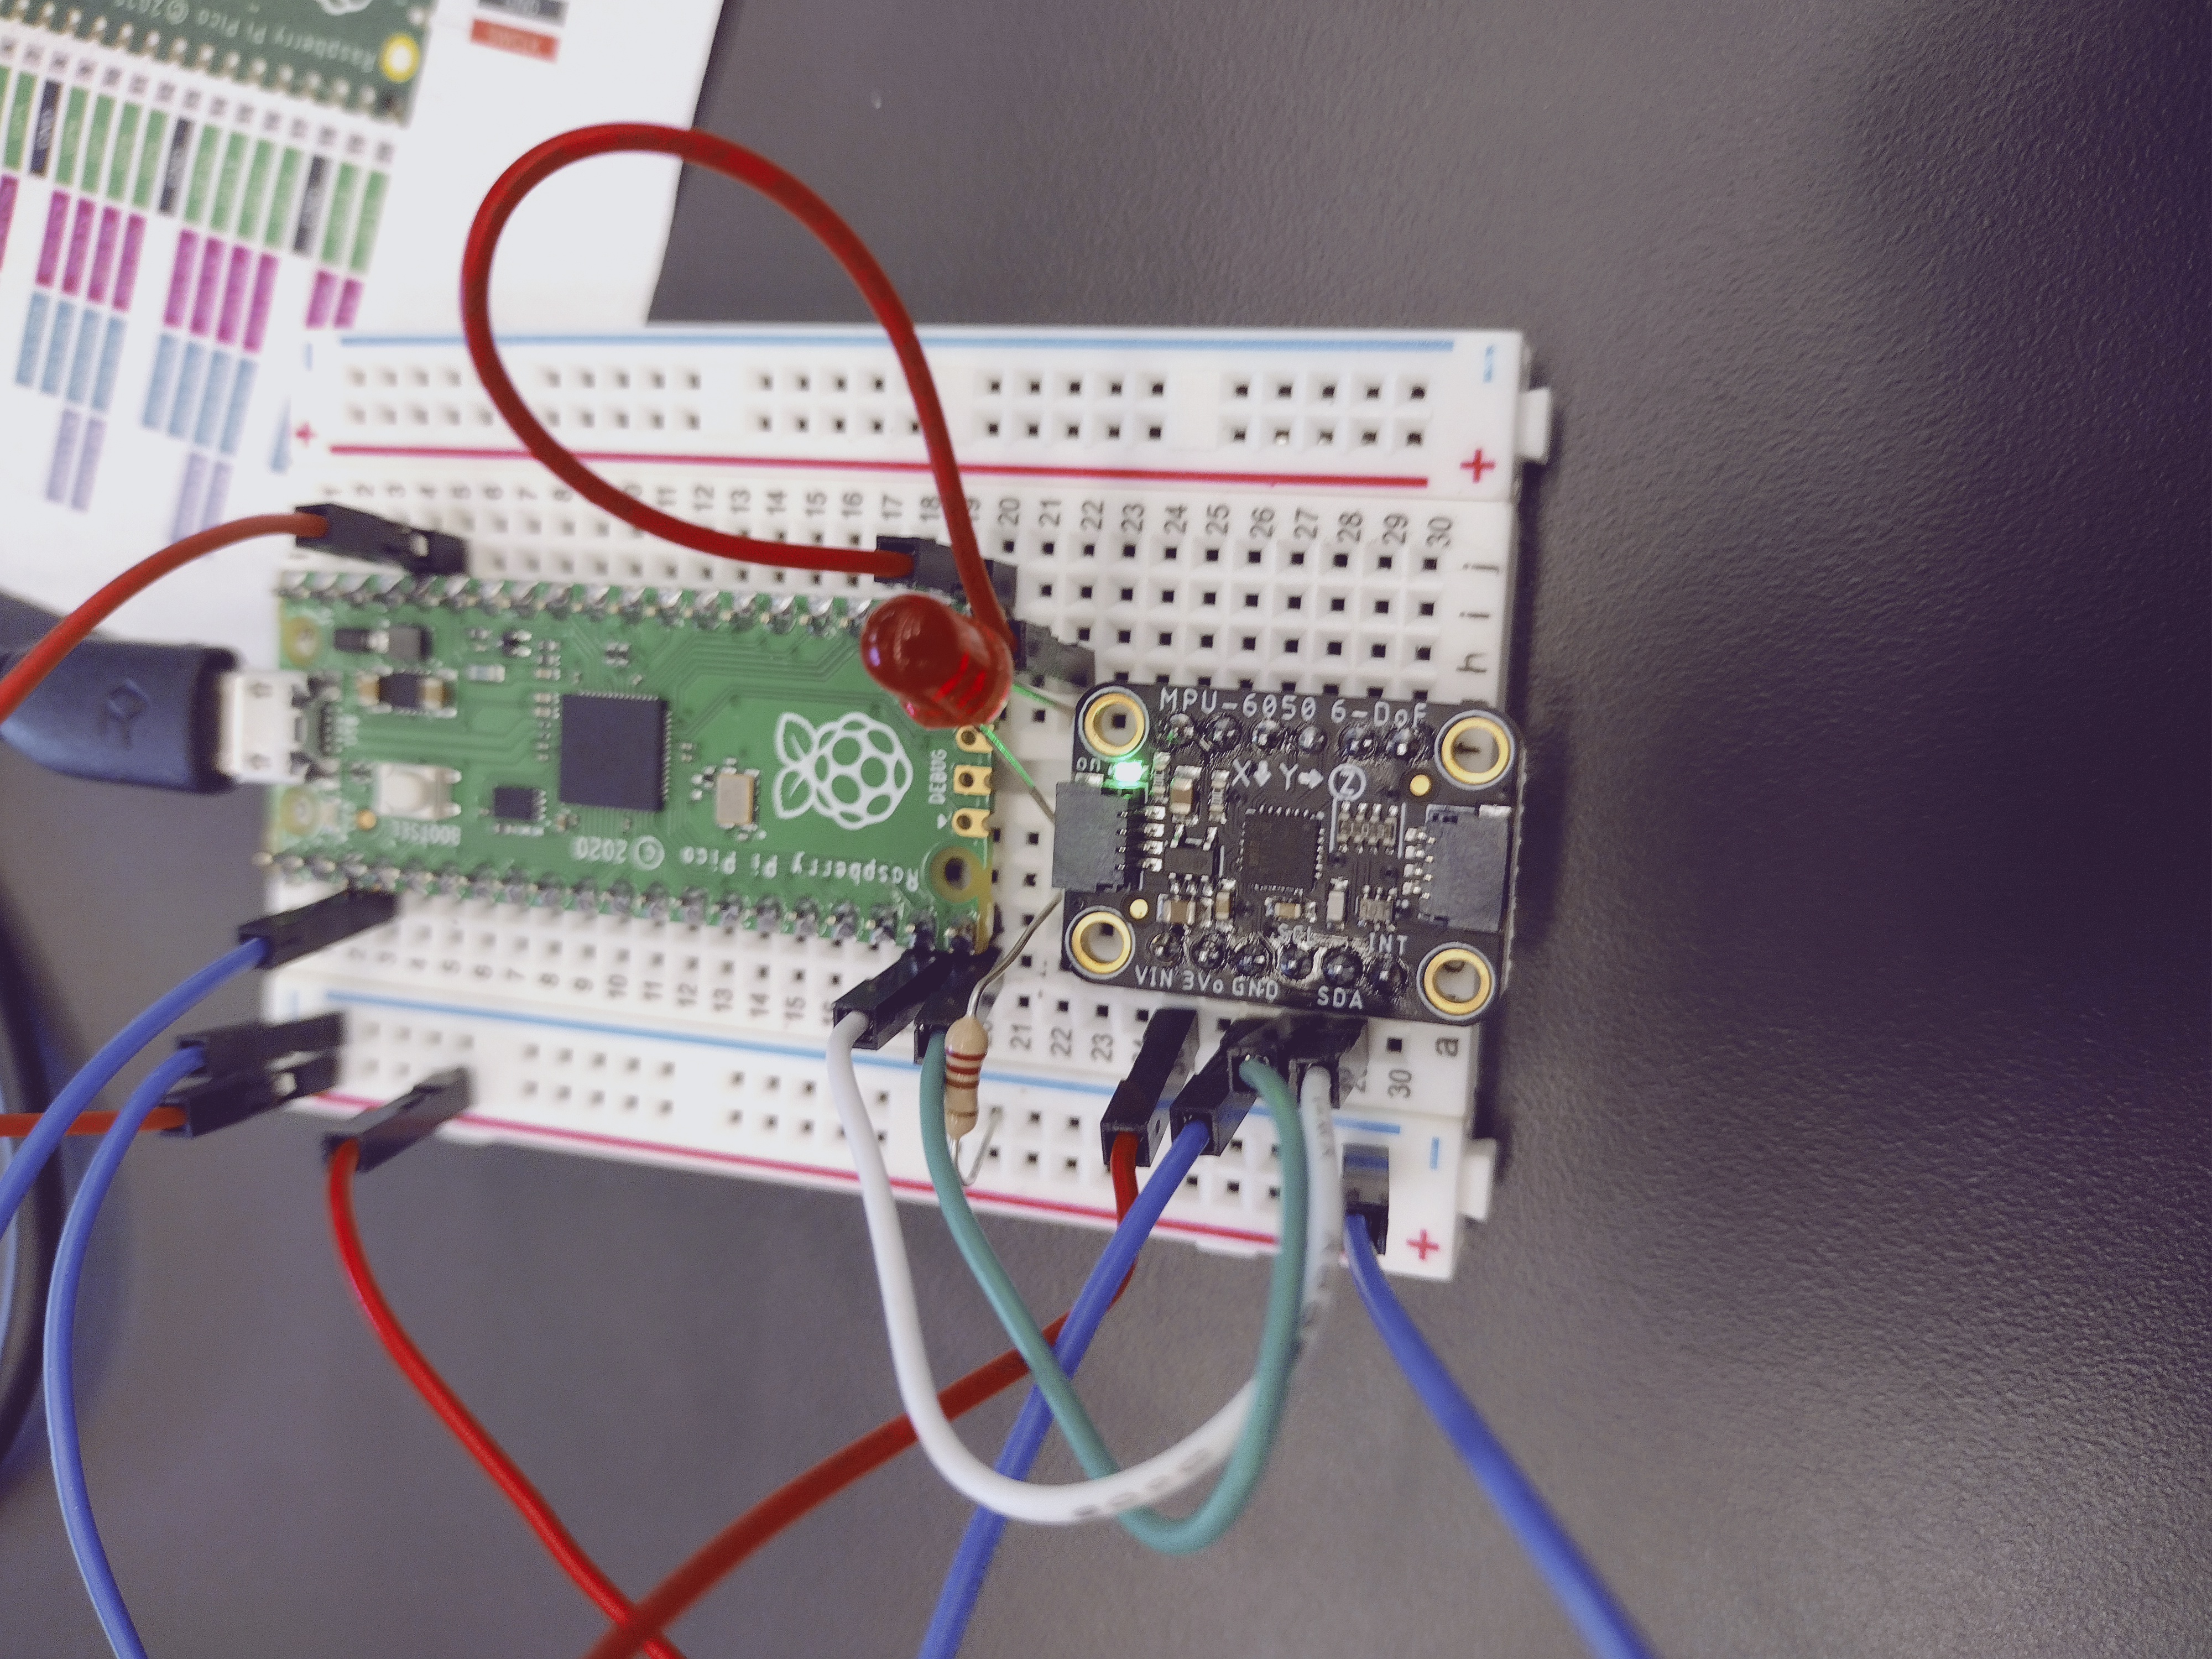
Pretty easy to follow, the printing thing was new, using fstring. I added the strings together to make sense of the info given in the prints. Gyro & Acceleration.
- The module must have an accelerometer that continuously reports x, y, and z acceleration values.
- The module must have an LED that turns on if the helicopter is tilted to 90 degrees.
- The module must be powered by a mobile power source.
VID_20220921_094354701_2.mp4

Make sure you do CTRL+S to save code, make sure the battery is charged, and that your wiring is all good. I'd say the hardest thing about this for me was just dealing with VS code, well, it was really my fault not VS code' but yeah.
The module must have an onboard screen that prints x, y, and z angular velocity values (rad/s) rounded to 3 decimal places.
VID_20220923_102537513_2.mp4
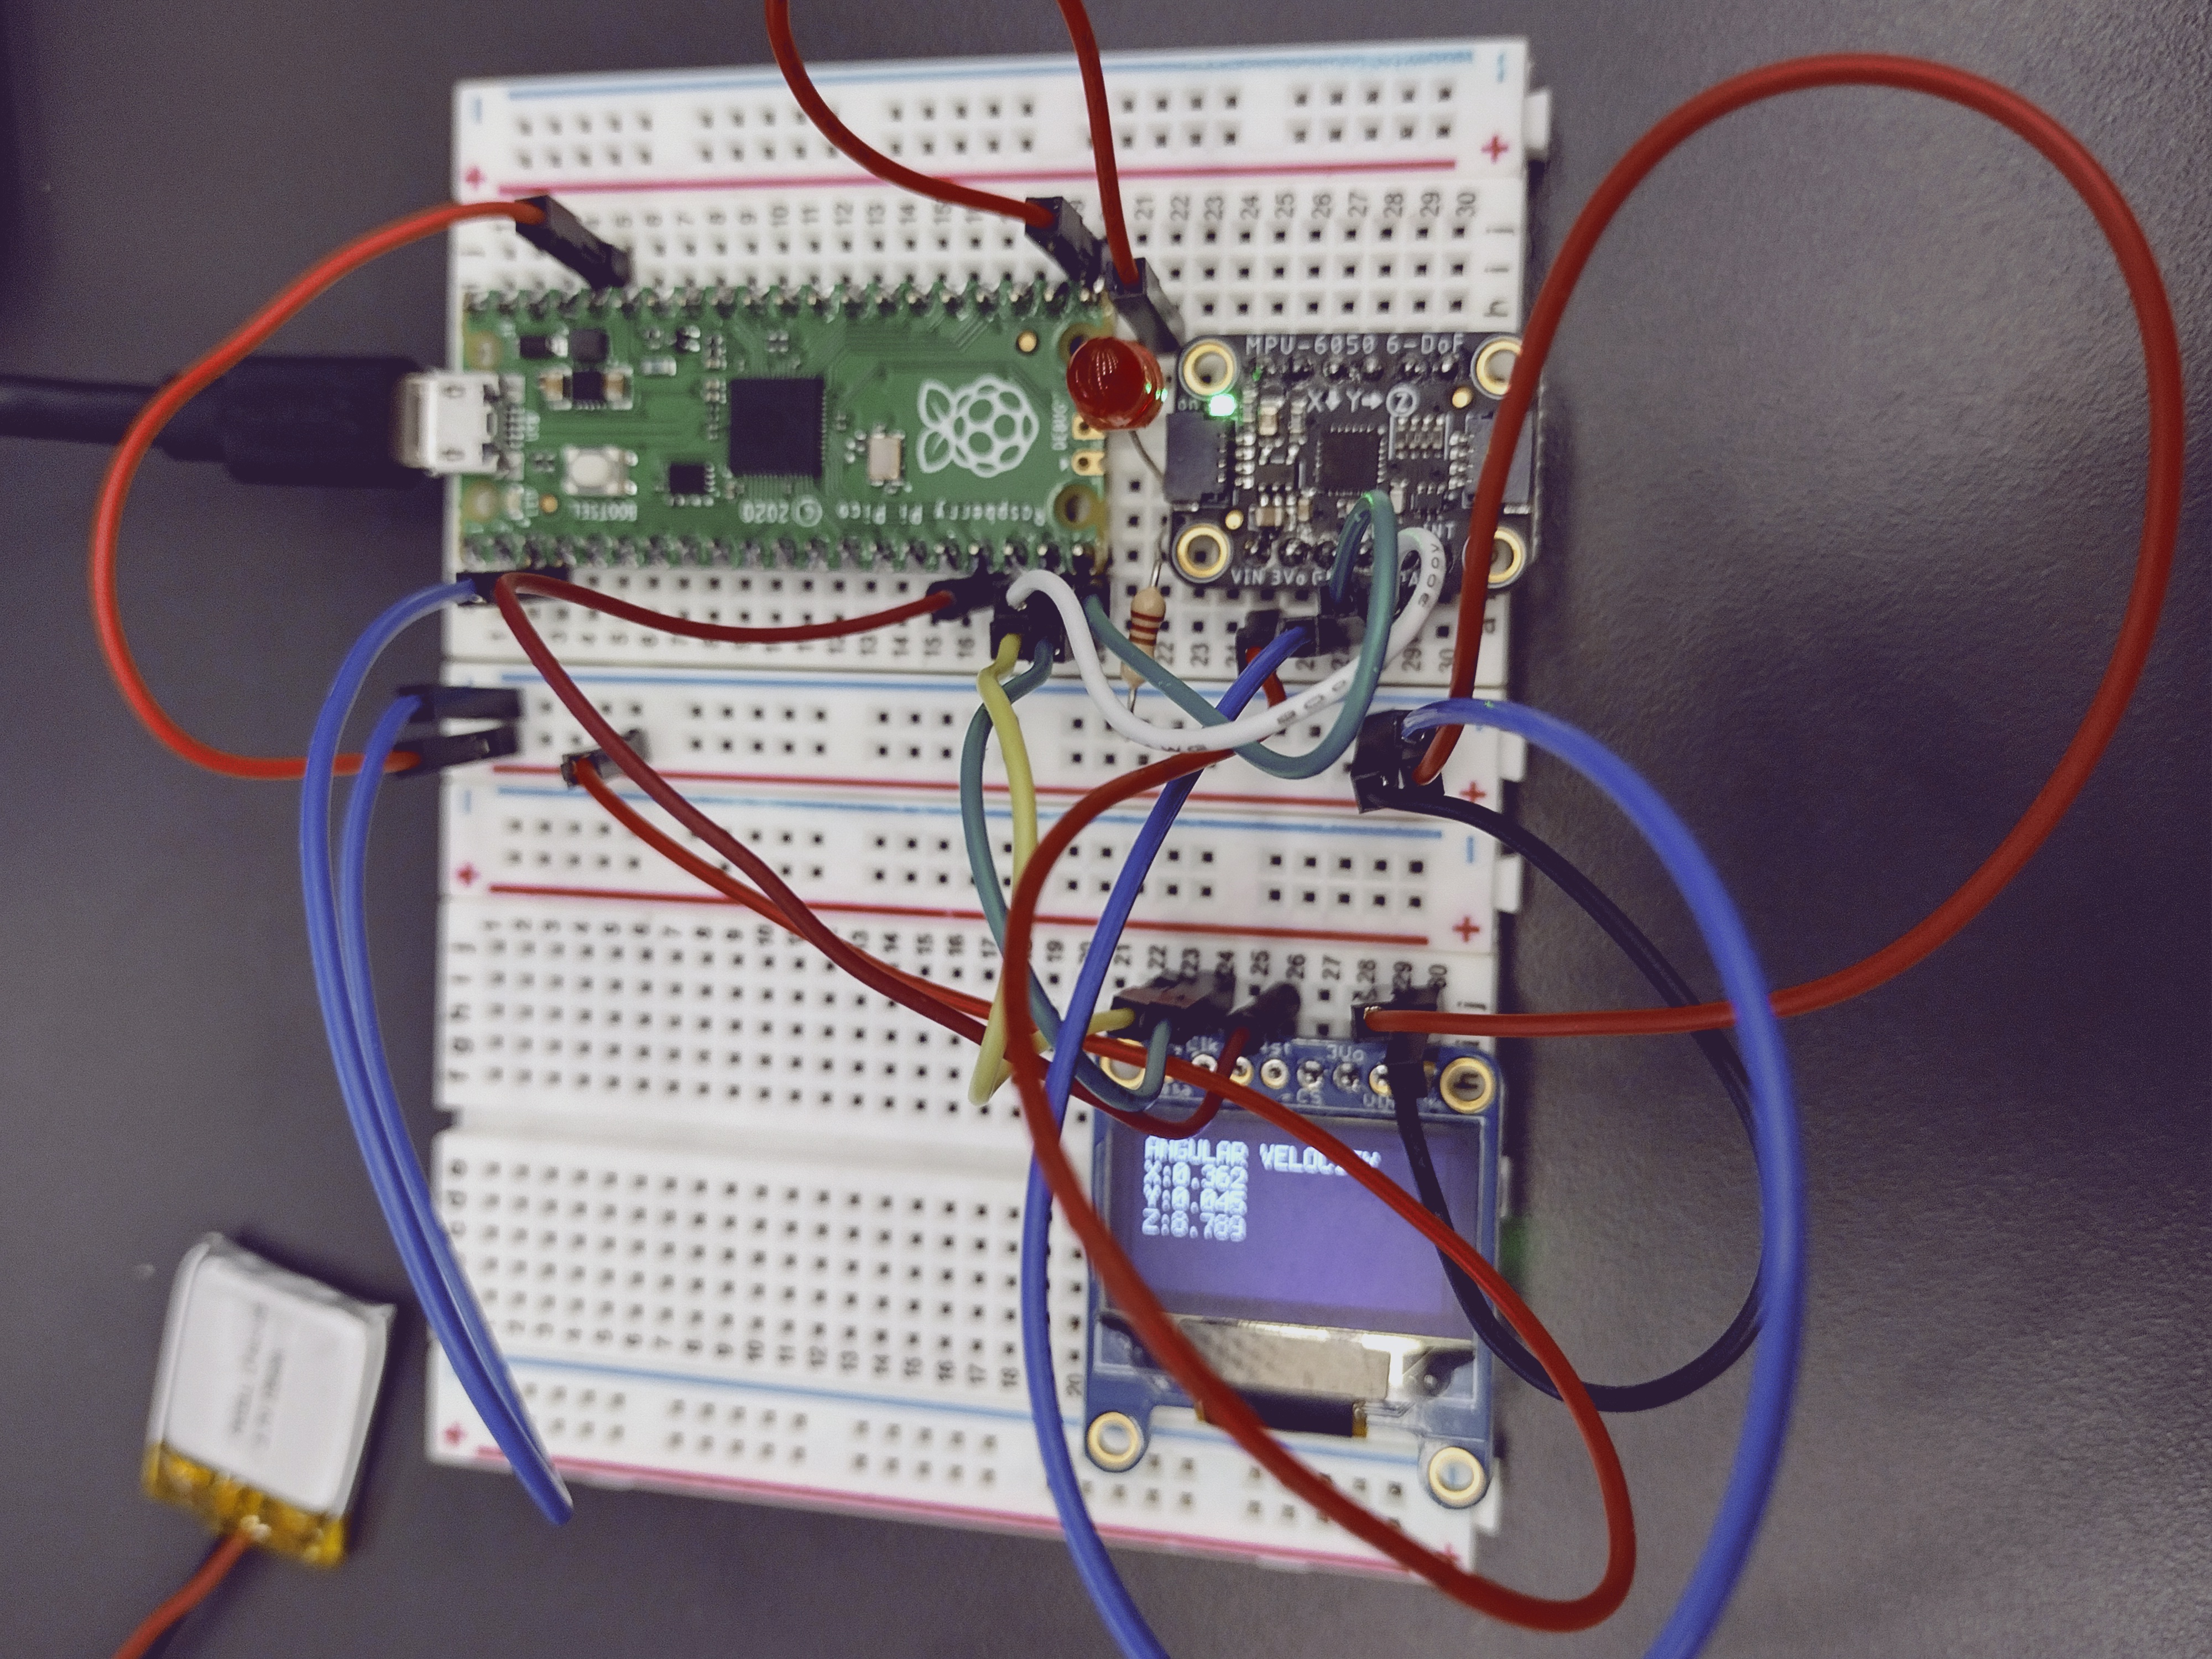
Making things actually appear on the OLED screen and stay there is annoying. Here's what you need for something basic:
splash = displayio.Group() # create the display group
toptitle = "Hello World!"
text_area = label.Label(terminalio.FONT, text=toptitle, color=0xFFFF00, x=5, y=5) # the order of this command is (font, text, text color, and location)
splash.append(text_area) # have this after line above, need it for it to work.
display.show(splash) # send display group to screen, need this.
Wiring is also sort of a headache. Make sure to have a reset pin, GP pin, and the correct i2c adress things correct.
Another code tid-bit is absolute value-ing:
abs(stuff here)
if abs(mpu.acceleration[0]) >= 9.35 and abs(mpu.acceleration[0]) <= 10.35 or abs(mpu.acceleration[1]) >= 9.35 and abs(mpu.acceleration[1]) <= 10.35: # this check values, if they are 90 or -90, then a led will turn on.
        print("Tilted 90 degrees.")
        redLED.value = True
    else:
        redLED.value = False
- The code must ask for the user to input a set of three coordinates in (x,y) format
- The triangle area must be determined using a function
- If the user inputs coordinates incorrectly (letters or improper format) the code should return to the input stage, it should not throw an error or exit the script
- The triangle area must be printed to the screen in this format: “The area of the triangle with vertices (x,y), (x,y), (x,y) is {area} square km.
- The code must return to the input stage after printing the area, and wait for user input.
VID_20220930_104404735.mp4
Everything was pretty strait-forward with the instructrions and everything, it just took a very long time. A few things:
Messing with variables inside a function, most times, requires the variable to be "global":
cords1HaveBeenDefined = False
def userInputCordsFunction1():
    cordsInput1 = input("Please enter the 1st cords in x,y format: ")
    global cords1HaveBeenDefined
    global x1
    global y1
Try execpt code bit:
# this checks if the variables are a "float"/number, if it's not it will tell you to use numbers as input.
try:
 x1 = float(xCord1)
 y1 = float(yCord1)
 print("Done.")
except:
 print("Please use numbers.")
 cords1HaveBeenDefined = False
This is how I prompted/checked things. There's a better way to do this, I'm sure, but his is how I did it. It's inside a while true loop.:
if (cords1HaveBeenDefined == False):
        cords1HaveBeenDefined = True
        userInputCordsFunction1()
    elif (cords1HaveBeenDefined == True):
        if (cords2HaveBeenDefined == False):
            cords2HaveBeenDefined = True
            userInputCordsFunction2()
        elif (cords2HaveBeenDefined == True):
            if (cords3HaveBeenDefined == False):
                cords3HaveBeenDefined = True
                userInputCordsFunction3()
            elif (cords3HaveBeenDefined == True):
                if (haveAllTheCordBeenDefined == False):
                    haveAllTheCordBeenDefined = True
                    print("All cords have been input, yay.")
                    areaBasedOfCords = x1*(y2-y3) + x2*(y3-y1) + x3*(y1-y2)
                    areaBasedOfCords = areaBasedOfCords/2
                    areaBasedOfCords = abs(areaBasedOfCords)
                    print("Based on inputs, area is: " + str(areaBasedOfCords) + " sq km")
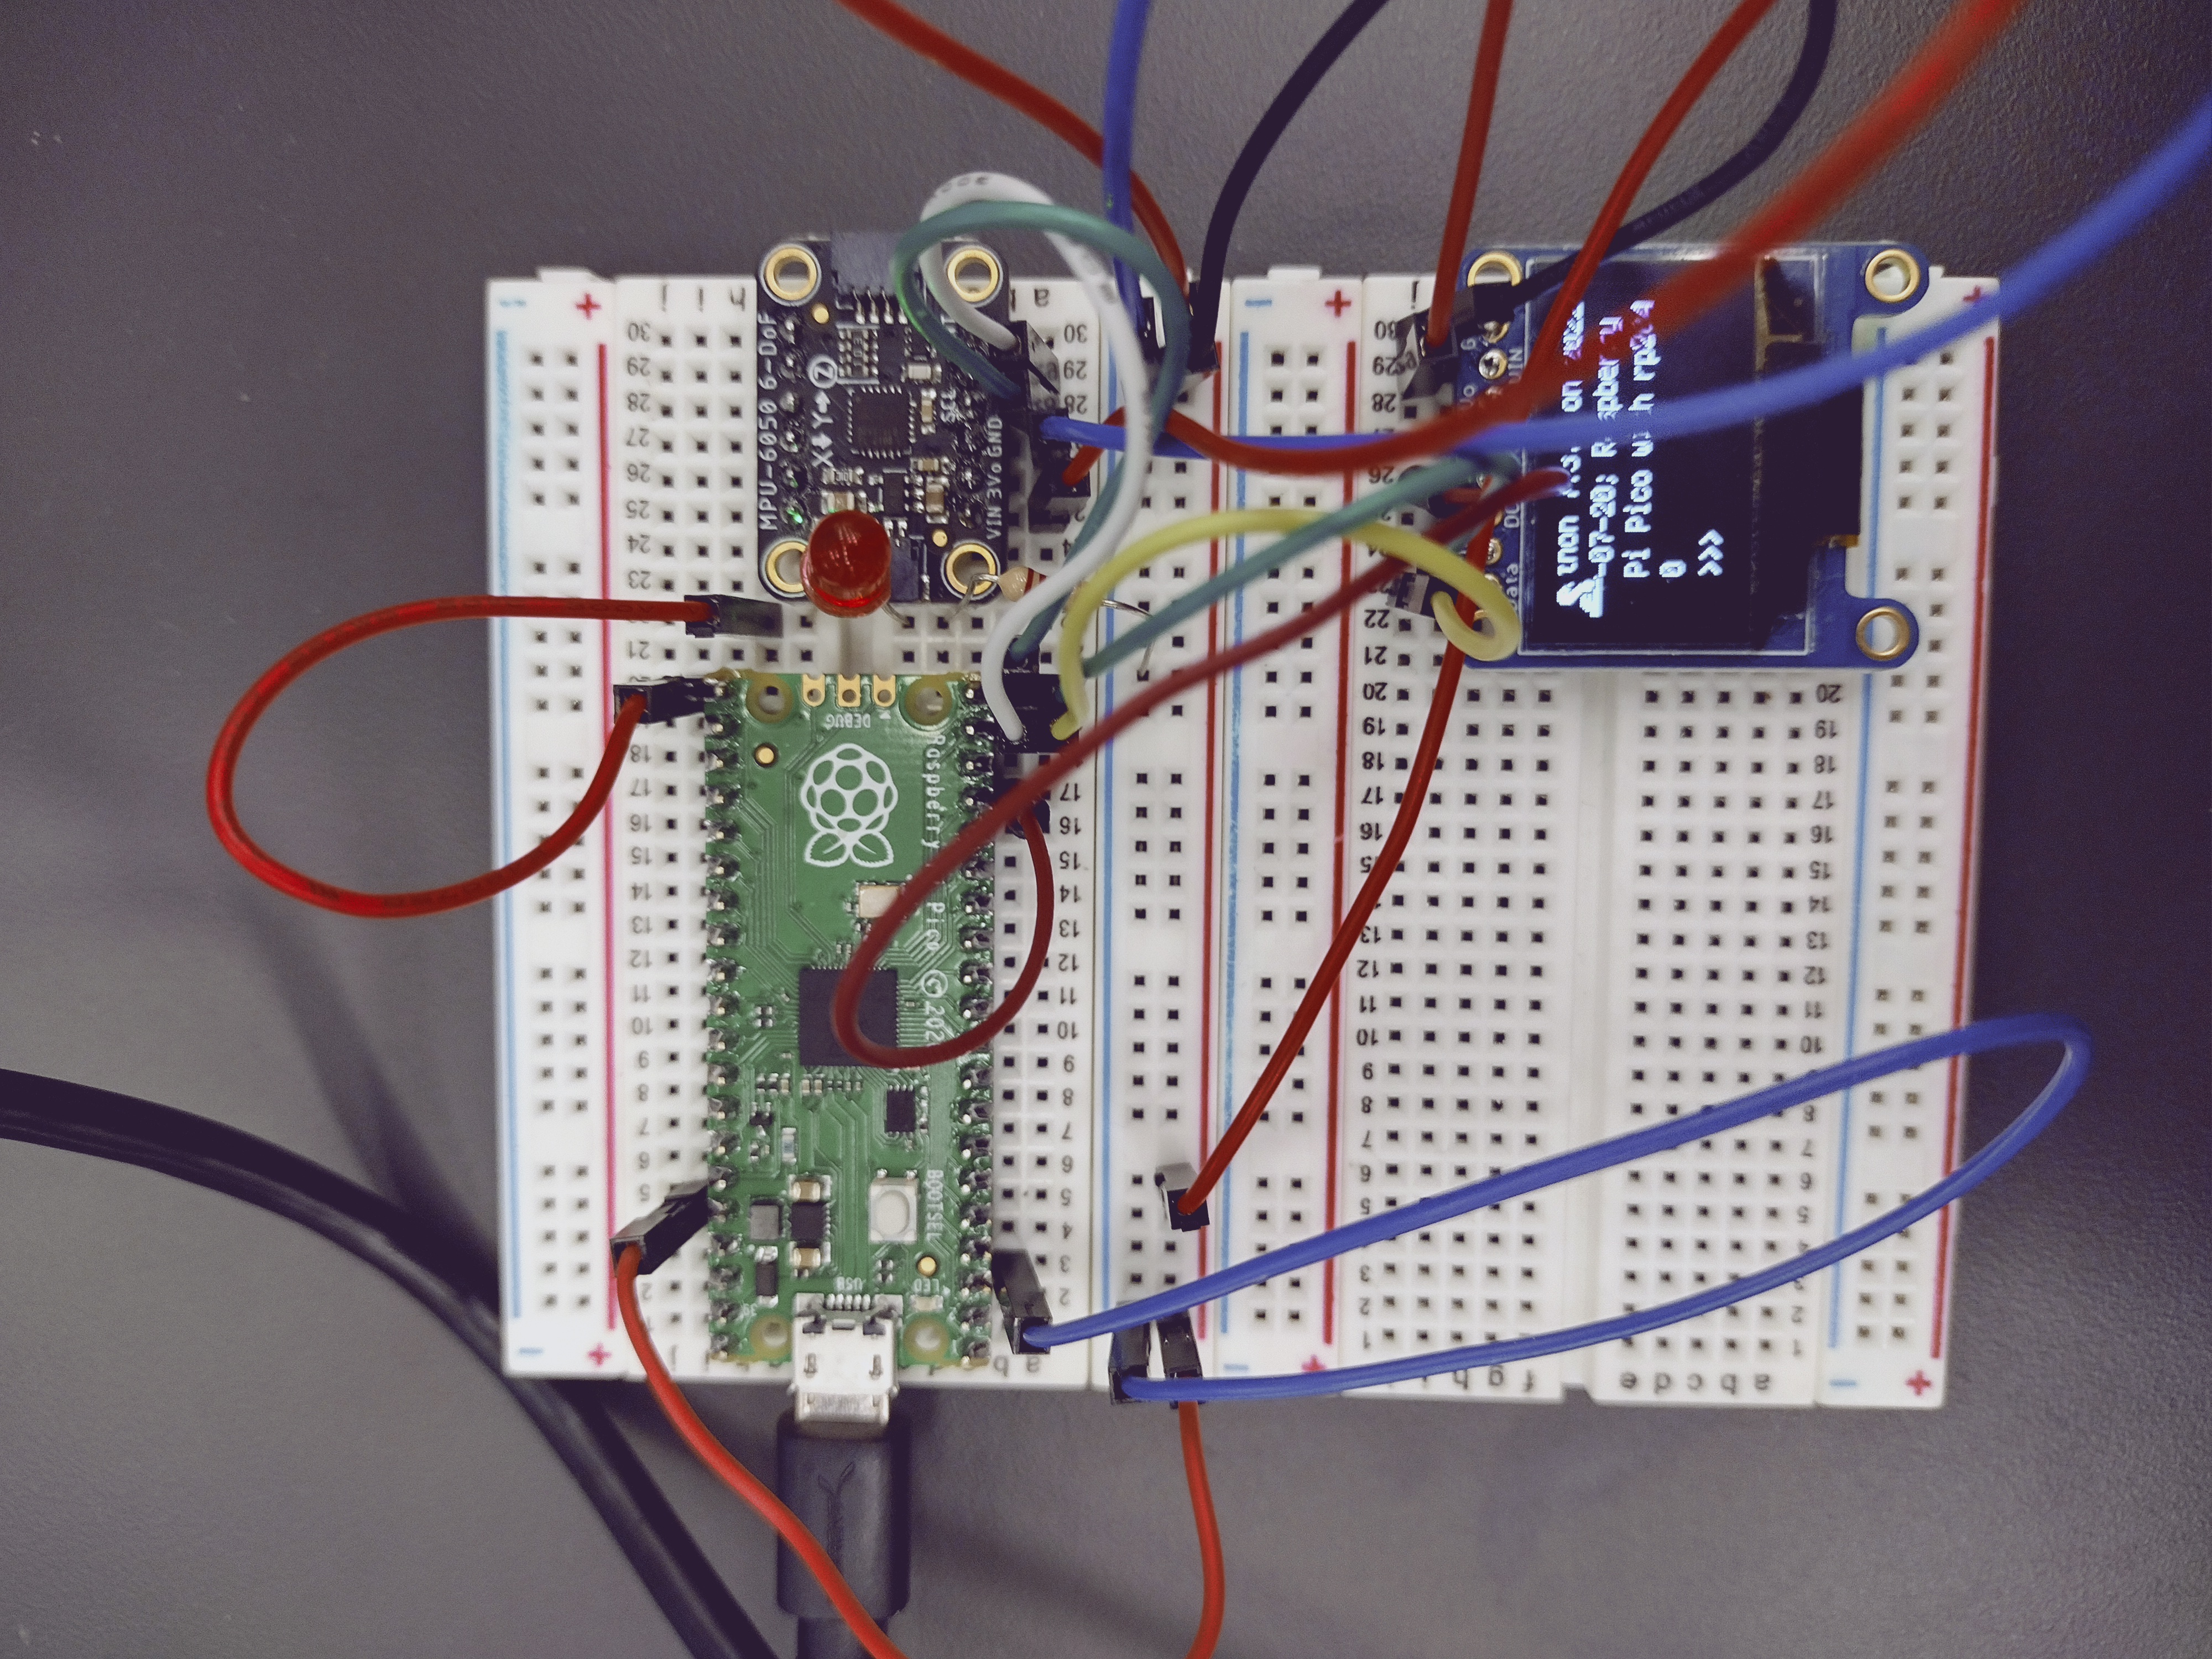
An onboard OLED screen must plot each triangle on a graph relative to the base location.
VID_20221005_101614754_2.mp4
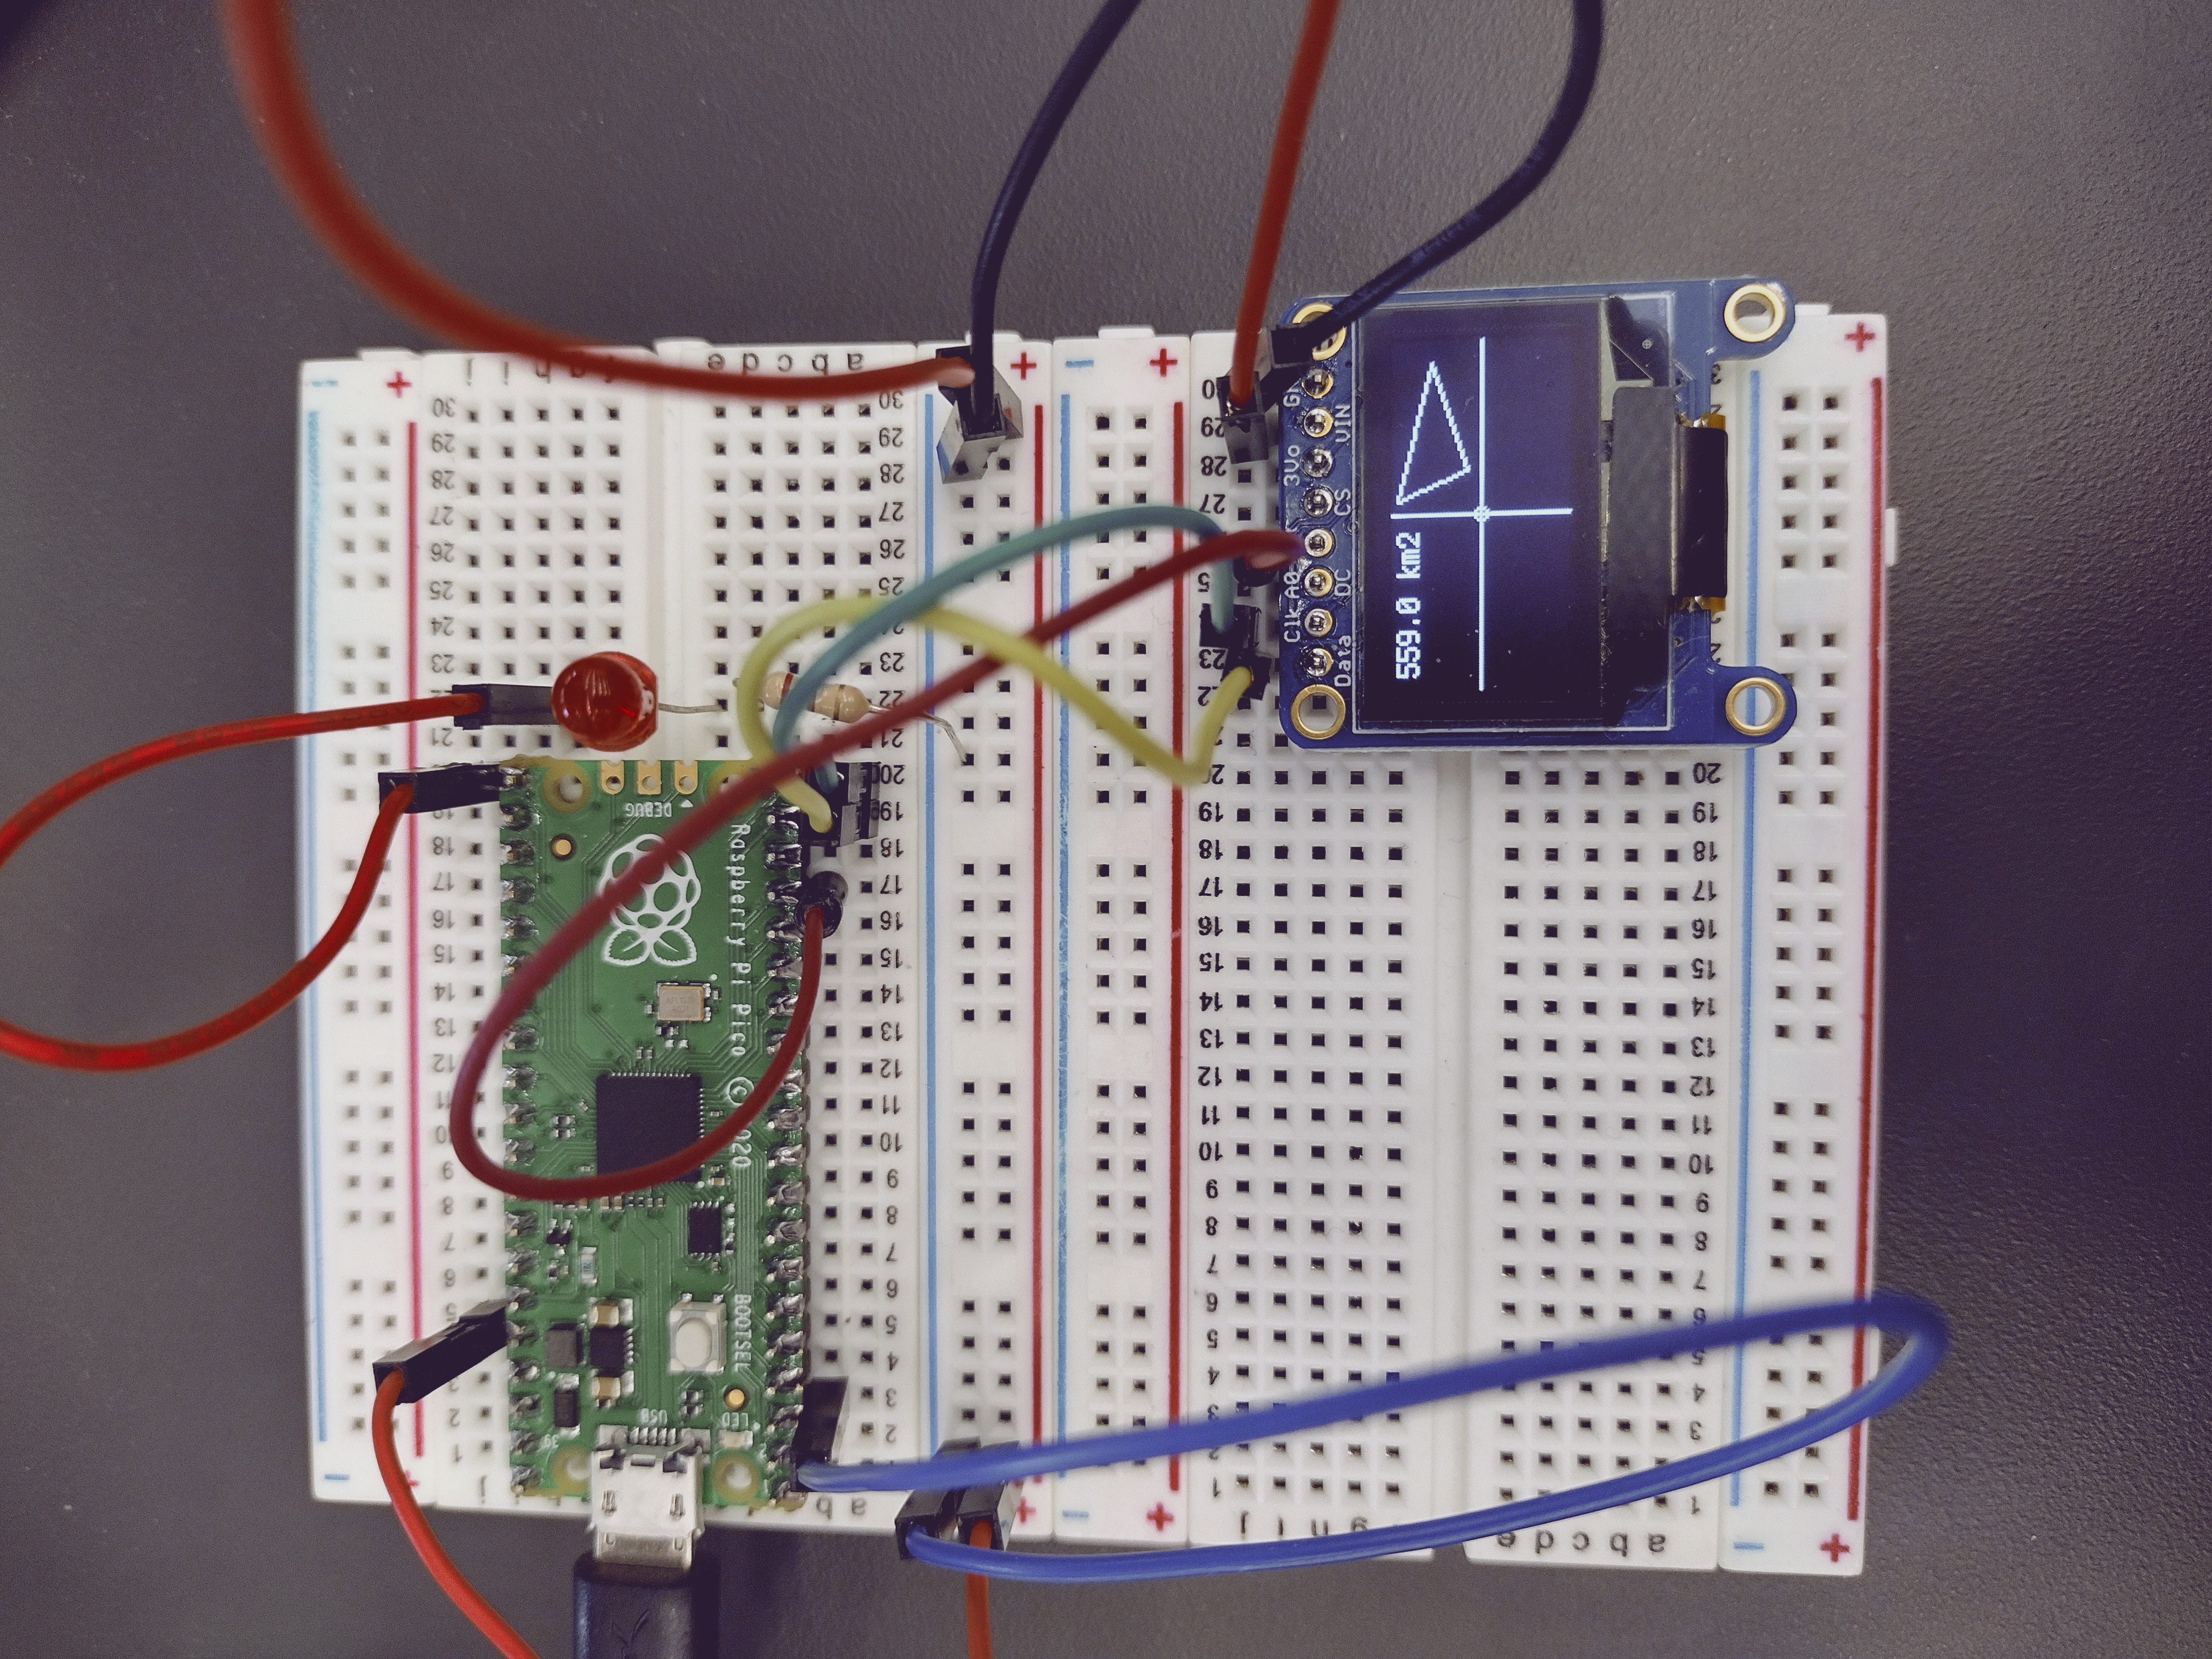
To make code actually go to quads, add 64 to the X values of the triangle. For Y, do 32 - y1, 32 - y2, ect. That took a bit to find out, this was a helpful source. Pretty much the same code as part 1, but with a bunch of random trail and error.
- Your script must accept text input by the user
- If the user types “-q”, your script must exit
- If the user types anything else, your script must translate the text to morse code dots and dashes, and print those to the monitor
- The printed text must use a space to show breaks between letters, and a slash to show breaks between words
VID_20221007_100925344.mp4
No wiring required.
I've broken up the work into different functions to make it easier, I think, to understand. Dictionary was already given so I didn't exactly need to do much on that end. Prompt User -> check if that message is "-q" -> if it's not, go to the function that translates -> Break up message character by character using "for i, v". -> add all the strings together. Boom.
The script must flash an LED to transmit the morse code message using the timing sequence shown below
VID_20221010_101901082.mp4
This is really only the new code here:
# The Morse code timing rules we will use for signaling are:
# a dot (.) lasts for 1/4 second. a dash (-) lasts for 3/4 seconds.
# the space between dots and dashes that are part of the same letter is 1/4 second.
# space between letters is 3/4 seconds
# space between words is 1+3/4 seconds

modifier = 0.25
dot_time = 1*modifier
dash_time = 3*modifier
between_taps = 1*modifier
between_letters = 3*modifier
between_words = 7*modifier


def translateMessageFromMorseToLEDMorse(morseMessageTranslated):
    for i, v in enumerate(morseMessageTranslated):
        ## print(str(v))
        if (str(v) == "."): # if character is a dot, do a short blink
            redLED.value = True
            time.sleep(dot_time)
            redLED.value = False
        elif (str(v) == "-"):   # if character is a dash, do a long blink
            redLED.value = True
            time.sleep(dash_time)
            redLED.value = False
        elif (str(v) == "/"):   # if it's between words, do a “between words” pause
            redLED.value = True
            time.sleep(between_words)
            redLED.value = False
        time.sleep(between_letters)
Make sure to pass the corrent thing in the function, I didn't do that the first time. Test this by "Print(whatever)". That isn't all the code btw, all of it is linked above. Anyways, the timing was given to me and it was basically the same thing as the previous assignment. I did kind of have an issue with the LED, make sure the one you have is wired correctly and just, ya know, works in the first place.
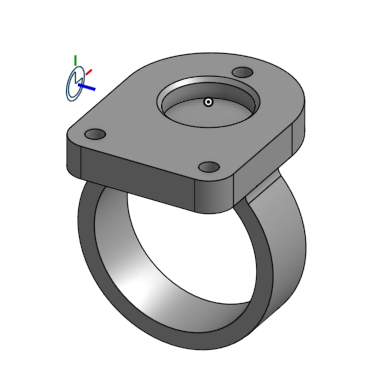
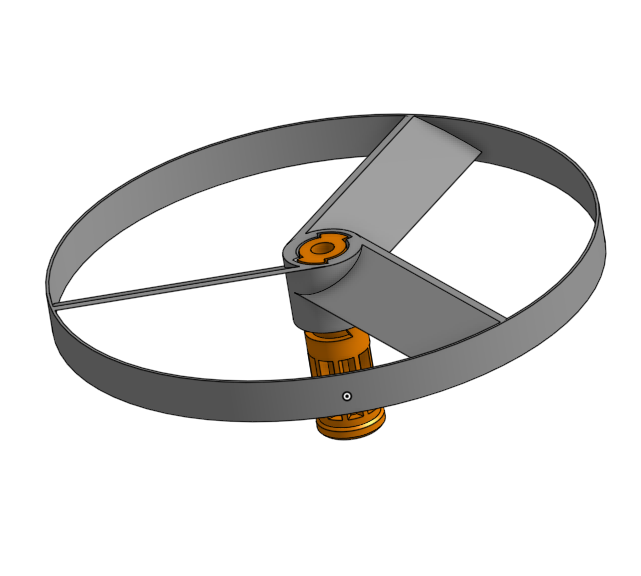
Make the parts w/ the intructions.
[Link to OnShape Document.)(https://cvilleschools.onshape.com/documents/fa6455741acdfdb9983e8f2f/w/5621f76c42eaad01b5456273/e/8fcd3372e3d5835d814da8f3?renderMode=0&uiState=6356a23ba7098a6a8486315d)
I am doing both the Spinner and the Ring which makes doing things take longer, but will be helpful in the end. I'm not that great at CAD, but I kinda have to be to get everything done. :) Anyways, the first time I did the Spinner, I got the dimentions wrong cause I used the "Use" tool on the wong thing. So, I guess, make sure you are clicking what you want when using that.
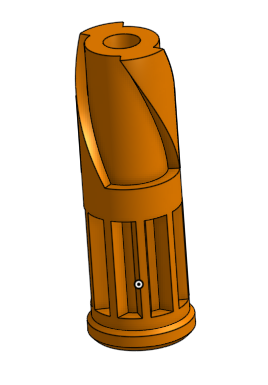
Make the parts w/ the intructions.
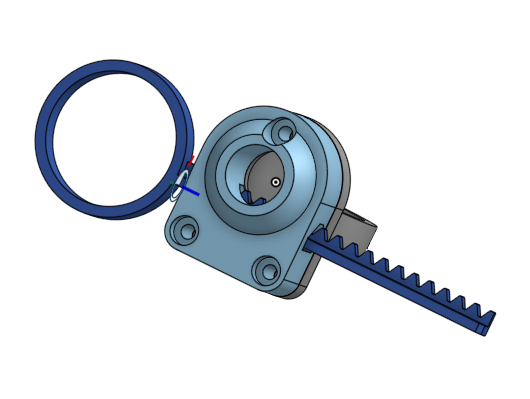
[Link to OnShape Document.)(https://cvilleschools.onshape.com/documents/fa6455741acdfdb9983e8f2f/w/5621f76c42eaad01b5456273/e/8fcd3372e3d5835d814da8f3?renderMode=0&uiState=6356a23ba7098a6a8486315d)
The key was a lot easier. I hadn't used patterns as extensively before, so now I know how to user them properly, or well, moreso than before. I don't fully understand everything, the curves in particular is not something I've used a bunch. (one or twice) Also, my mass is off and I don't understand why. I remodeled the prop, but yeah I don't know.
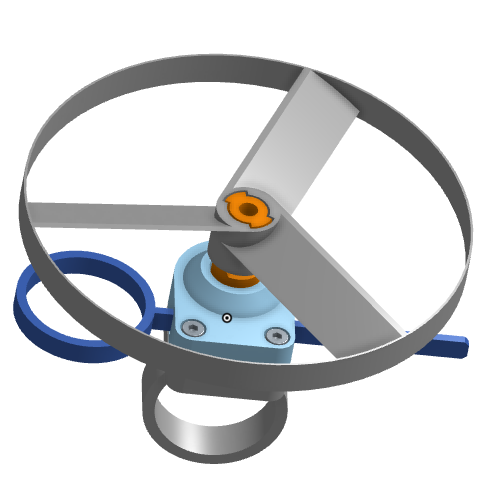
[Link to OnShape Document.)(https://cvilleschools.onshape.com/documents/fa6455741acdfdb9983e8f2f/w/5621f76c42eaad01b5456273/e/f9466776b1c150a2a8350faa?renderMode=1&uiState=6373aca03687493cd86b5d10)
Did this by myself, so I didn't really learn anything teamwork related, but assembly is pretty strait-forward. Make sure if things need to negative that they are and vice-versa. I couldn'y the animate thing, but then I watched the gif video thing and yeah. Now I know where it is. :)
VID_20221122_102955809_2.mp4
You cannot make a "share link" for simscale, you can however add people individually by email or username.
There was a ton of reading, or well, as of writing this I'm not finished with the tutorial so there's more to read. The tutorial seems outdated and the tutorial doesn't match for the "Simulations Runs" section inside the document itself. Simulations take half an hour or more so waiting is a thing. Additonally, my simulation didn't seem to work. I had to use the document provided at the bottom of the tutorial.