Home

KSP Mod Admin aOS is a mod managing tool for KSP on any OS.
It provides simple and fast mod managing and keeps your mod collection up to date.
General info: KSP MA provides for almost all controls a ToolTip, try to hover over a button if its use isn't obvious.
After you have started KSP MA aOS the first time and you have selected a KSP install folder and a language, KSP MA is ready to use. Follow the steps below to add and install a mod:
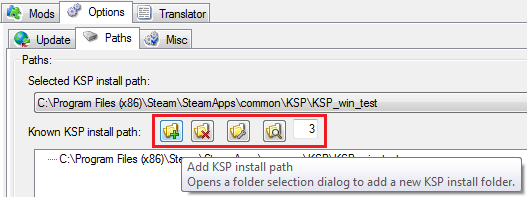
You can add additional KSP install folders (if you have more then one) via Option Tab -> Path Tab.
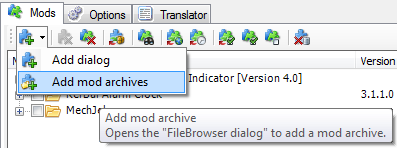
There are several ways to add a mod to your ModSelection (the TreeView on the Mod Tab).
- You can Drag & Drop a mod archive (.zip, .rar, .7zip or .craft) into the ModSelection.
- With the "Add mod archive" button. You can chose a mod archive via a file browser dialog.
- With the
"Add dialog" button.
The "Add dialog" will pop up:
(If you add a mod the first time via URL you will be asked for a download folder, where KSP MA should place the downloaded mod).
 "Add dialog" button.
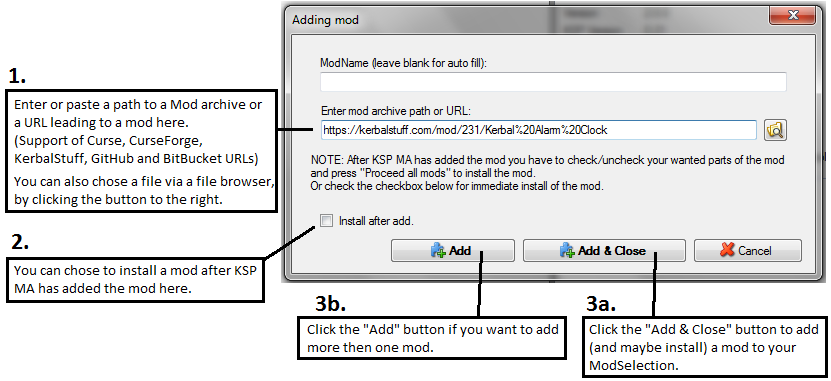
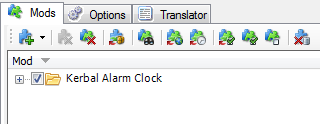
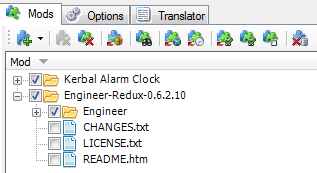
After you have (just) added a mod (and not installed already) it will be shown in the ModSelection like this:
(For this mod a install path was detected automatically)
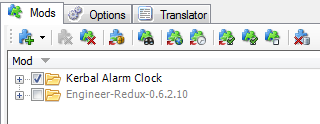
For some mods KSP MA can't detect a install path automatically they will be shown like this:
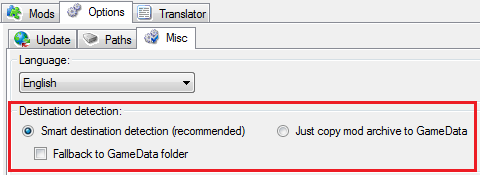
You can tell KSP MA to just dump such mods to the GameData folder with the "Fallback to GameData folder" option on the Option Tab -> Misc Tab:
But this is not recommended, cause it could lead to problems with the conflict detection.
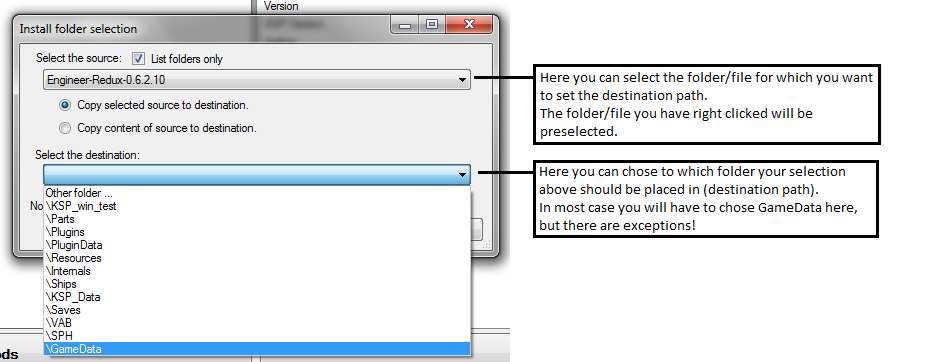
You have to select a install folder for those mod manually by right clicking it and chose "Destination" -> "Select new destination":
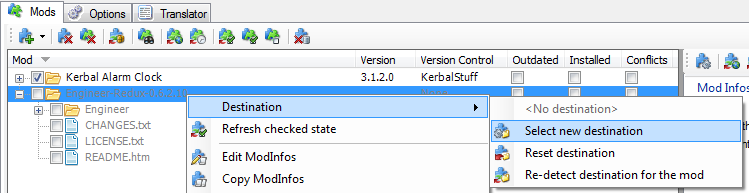
This dialog will pop up to chose a new destination:
After you have added your mods:
You can chose which parts of a mod should be installed by checking or unchecking the CheckBoxes next to a mod file/folder.
When you are ready with the selection of parts of your mods you have to click the "Process all mods"
This will start the installation or deinstallation of your mods.
Checked parts of a mod will be installed unchecked ones won't or will be deinstalled.

Now your mods are installed and ready to use in KSP.
You can change the part selection anytime you want, just remember to click the "Process all mods" button after you have changed the checked state of some mods / mod parts.
To remove a mod from KSP just uncheck it and press the precess button and the mod will be deinstalled, but stayes in the ModSelection.
To erase a mod from the ModSelection click the "Remove Mod" or "Remove all mods" button.
KSP MA will uninstall the mod and removes it from the ModSelection.

The "Mod update check" and "Mod update" feature will only be available for mods that where added via URL or mods that provide a AVC version file with the needed informations.
To check for mod updates click the "Update check for all mods" button:
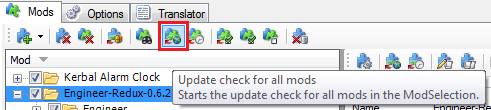
KSP MA will then check for updates for all mods with a VersionControl.
If a mod is outdated it will be displayed in blue:
To update a mod click the "Update all outdated mods" button:

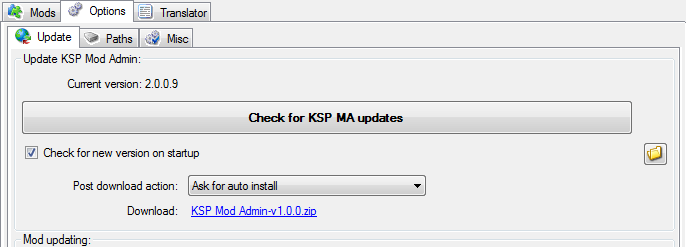
You can configure KSP MA aOS to automatically check for mod updates by the following settings:
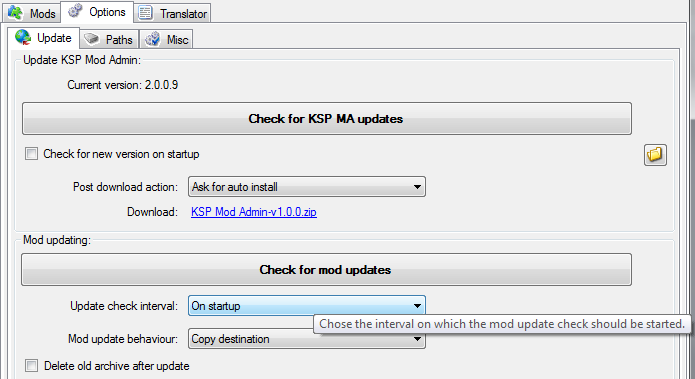
You can configure KSP MA aOS to automatically check for KSP Mod Admin aOs updates by the following settings: