This project is a docker compose installation of a single site WordPress instance using Nginx as the web server and MariaDB as the database.
- Let's Encrypt SSL enabled option using https://hub.docker.com/r/certbot/certbot/
- Work inspired by: Dockerizing WordPress with Nginx and PHP-FPM on Ubuntu 16.04
What is WordPress?
- WordPress is open source software you can use to create a beautiful website, blog, or app.
- More information at https://wordpress.org
- TL;DR - I don't want details and just want to run WordPress locally using http
- Setup and configuration - environment and configuration setup options
- .env_example - environment variable declaration for docker-compose to use
- HTTP or HTTPS? - http or https (via Let's Encrypt) to serve your content
- SSL certificates - secure socket layer encryption options
- Let's Encrypt initialization - use Let's Encrypt for SSL certificates (Important NOTE regarding DNS registration assumptions)
- Let's Encrypt renewal - how to renew your Let's Encrypt certificates
- Deploy - deploying your WordPress site
- Running site - what to expect after you deploy
- Stop and remove - clear all files associated with running the site
- Optional configuration - additional options for deploying your site
- Debugging tips - basic tips for debugging your site when something goes wrong
- Example deployment - full example deployment to https://mjstealey.com/
NOTE: assumes you are starting from the top level of the cloned repository (PWD == ./wordpress-nginx-docker)
mkdir -p certs/ certs-data/ logs/nginx/ mysql/ wordpress/
docker-compose up -d
After a few moments you should see your site running at http://127.0.0.1 ready to be configured.
Further details available here.
A .env_example file has been included to more easily set docker-compose variables without having to modify the docker-compose.yml file itself.
Default values have been provided as a means of getting up and running quickly for testing purposes. It is up to the user to modify these to best suit their deployment preferences.
Create a file named .env from the .env_example file and adjust to suit your deployment
cp .env_example .env
Example .env file (default values):
# wordpress - wordpress:php7.3-fpm
WORDPRESS_VERSION=php7.3-fpm
WORDPRESS_DB_NAME=wordpress
WORDPRESS_TABLE_PREFIX=wp_
WORDPRESS_DB_HOST=mysql
WORDPRESS_DB_USER=root
WORDPRESS_DB_PASSWORD=password

# mariadb - mariadb:latest
MARIADB_VERSION=latest
MYSQL_ROOT_PASSWORD=password
MYSQL_USER=root
MYSQL_PASSWORD=password
MYSQL_DATABASE=wordpress

# nginx - nginx:latest
NGINX_VERSION=latest

# volumes on host
NGINX_CONF_DIR=./nginx
NGINX_LOG_DIR=./logs/nginx
WORDPRESS_DATA_DIR=./wordpress
SSL_CERTS_DIR=./certs
SSL_CERTS_DATA_DIR=./certs-dataDirectories are created on the host and volume mounted to the docker containers. This allows the user to persist data beyond the scope of the container itself. If volumes are not persisted to the host the user runs the risk of losing their data when the container is updated or removed.
- mysql: The database files for MariaDB
- wordpress: The WordPress media files
- logs/nginx: The Nginx log files (error.log, access.log)
- certs: SSL certificate files (LetsEncrypt)
- certs-data: SSL challenge/response area (LetsEncrypt)
From the top level of the cloned repository, create the directories that will be used for managing the data on the host.
mkdir -p certs/ certs-data/ logs/nginx/ mysql/ wordpress/
NOTE: for permissions reasons it is important for the user to create these directories prior to issuing the docker-compose command. If the directories do not already exist when the containers are started, the directories will be created at start time and will be owned by the root user of the container process. This can lead to access denied permission issues.
There are three files in the nginx directory, and which one you use depends on whether you want to serve your site using HTTP or HTTPS.
Files in the nginx directory:
default.conf- Example configuration for running locally on port 80 using http.default_http.conf.template- Example configuration for running at a user definedFQDN_OR_IPon port 80 using http.default_https.conf.template- Example configuration for running at a user definedFQDN_OR_IPon port 443 using https.
NOTE: FQDN_OR_IP is short for Fully Qualified Domain Name or IP Address, and should be DNS resolvable if using a hostname.
Both of these are protocols for transferring the information of a particular website between the Web Server and Web Browser. But what’s difference between these two? Well, extra "s" is present in https and that makes it secure!
A very short and concise difference between http and https is that https is much more secure compared to http. https = http + cryptographic protocols.
Main differences between HTTP and HTTPS
- In HTTP, URL begins with http:// whereas an HTTPS URL starts with https://
- HTTP uses port number
80for communication and HTTPS uses443 - HTTP is considered to be unsecured and HTTPS is secure
- HTTP Works at Application Layer and HTTPS works at Transport Layer
- In HTTP, Encryption is absent whereas Encryption is present in HTTPS
- HTTP does not require any certificates and HTTPS needs SSL Certificates (signed, unsigned or self generated)
If you plan to run your WordPress site over http on port 80, then do the following.
- Replace the contents of
nginx/default.confwith thenginx/default_http.conf.templatefile - Update the
FQDN_OR_IPinnginx/default.confto be that of your domain - Run
$ docker-compose up -dand allow a few moments for the containers to set themselves up - Navigate to http://FQDN_OR_IP in a browser where
FQDN_OR_IPis the hostname or IP Address of your site
If you plan to run your WordPress site over https on port 443, then do the following.
- Replace the contents of
nginx/default.confwith thenginx/default_https.conf.templatefile. - Update the
FQDN_OR_IPinnginx/default.confto be that of your domain (occurs in many places) - Review the options for SSL certificates below to complete your configuration
What are SSL Certificates?
SSL Certificates are small data files that digitally bind a cryptographic key to an organization’s details. When installed on a web server, it activates the padlock and the https protocol and allows secure connections from a web server to a browser. Typically, SSL is used to secure credit card transactions, data transfer and logins, and more recently is becoming the norm when securing browsing of social media sites.
SSL Certificates bind together:
- A domain name, server name or hostname.
- An organizational identity (i.e. company name) and location.
Three options for obtaining/installing SSL Certificates are outlined below.
- Let's Encrypt - free SSL Certificate service
- Bring your own - you already have a valid certificate
- Self signed - you can generate your own self signed certificates to use for testing
Let’s Encrypt is a free, automated, and open certificate authority (CA), run for the public’s benefit. It is a service provided by the Internet Security Research Group (ISRG).
We give people the digital certificates they need in order to enable HTTPS (SSL/TLS) for websites, for free, in the most user-friendly way we can. We do this because we want to create a more secure and privacy-respecting Web.
- If you plan on using SSL certificates from Let's Encrypt it is important that your public domain is already DNS registered and publicly reachable.
Two scripts have been provided to help automate the Let's Encrypt interactions needed to obtain and maintain your certificates.
letsencrypt-init.sh- run once when first setting up your site to obtain certificatesletsencrypt-renew.sh- run as needed to renew your previously issued certificate
NOTE: there is an assumption that both the domain.name and www.domain.name are valid DNS endpoints. If this is not the case, you will need to edit two files prior to running the letencrypt-init.sh script.
-
modify line 95 of
letsencyrpt/letsencrypt-init.shFrom:
95. -d ${FQDN_OR_IP} -d www.${FQDN_OR_IP}
To:
95. -d ${FQDN_OR_IP} -
modify line 19 of
nginx/default.confFrom:
19. server_name FQDN_OR_IP www.FQDN_OR_IP;To:
19. server_name FQDN_OR_IP;
NOTE: these scripts can be run from the top of the repository or the letsencrypt/ directory. It is important to run the initialization script BEFORE deploying your site.
USAGE: ./letsencrypt-init.sh FQDN_OR_IP, where FQDN_OR_IP is the publicly registered domain name of your host to generate your initial certificate. (Information about updating your Let's Encrypt certificate can be found further down in this document)
$ letsencrypt/letsencrypt-init.sh mjstealey.com
INFO: running from top level of repository
mysql uses an image, skipping
wordpress uses an image, skipping
nginx uses an image, skipping
Creating network "wordpress-nginx-docker_default" with the default driver
Creating mysql ... done
Creating wordpress ... done
Creating nginx     ... done
Unable to find image 'certbot/certbot:latest' locally
latest: Pulling from certbot/certbot
407ea412d82c: Pull complete
4aa45741b61e: Pull complete
2dc54ee2e6f3: Pull complete
4d994f02f15e: Pull complete
c038ebf87349: Pull complete
f161330ec17b: Pull complete
2e3bb278a0c8: Pull complete
536d789f6905: Pull complete
3679aad0a0e7: Pull complete
2e6a120db733: Pull complete
Digest: sha256:a12831b58d3add421f4e42df2def867cdfb5cedae5f559574e2a706349d58639
Status: Downloaded newer image for certbot/certbot:latest
Saving debug log to /var/log/letsencrypt/letsencrypt.log
Plugins selected: Authenticator webroot, Installer None
Enter email address (used for urgent renewal and security notices) (Enter 'c' to
cancel): mjstealey@gmail.com

- - - - - - - - - - - - - - - - - - - - - - - - - - - - - - - - - - - - - - - -
Please read the Terms of Service at
https://letsencrypt.org/documents/LE-SA-v1.2-November-15-2017.pdf. You must
agree in order to register with the ACME server at
https://acme-v02.api.letsencrypt.org/directory
- - - - - - - - - - - - - - - - - - - - - - - - - - - - - - - - - - - - - - - -
(A)gree/(C)ancel: A

- - - - - - - - - - - - - - - - - - - - - - - - - - - - - - - - - - - - - - - -
Would you be willing to share your email address with the Electronic Frontier
Foundation, a founding partner of the Let's Encrypt project and the non-profit
organization that develops Certbot? We'd like to send you email about our work
encrypting the web, EFF news, campaigns, and ways to support digital freedom.
- - - - - - - - - - - - - - - - - - - - - - - - - - - - - - - - - - - - - - - -
(Y)es/(N)o: Y
Obtaining a new certificate
Performing the following challenges:
http-01 challenge for mjstealey.com
http-01 challenge for www.mjstealey.com
Using the webroot path /data/letsencrypt for all unmatched domains.
Waiting for verification...
Cleaning up challenges

IMPORTANT NOTES:
 - Congratulations! Your certificate and chain have been saved at:
   /etc/letsencrypt/live/mjstealey.com/fullchain.pem
   Your key file has been saved at:
   /etc/letsencrypt/live/mjstealey.com/privkey.pem
   Your cert will expire on 2019-05-07. To obtain a new or tweaked
   version of this certificate in the future, simply run certbot
   again. To non-interactively renew *all* of your certificates, run
   "certbot renew"
 - Your account credentials have been saved in your Certbot
   configuration directory at /etc/letsencrypt. You should make a
   secure backup of this folder now. This configuration directory will
   also contain certificates and private keys obtained by Certbot so
   making regular backups of this folder is ideal.
 - If you like Certbot, please consider supporting our work by:

   Donating to ISRG / Let's Encrypt:   https://letsencrypt.org/donate
   Donating to EFF:                    https://eff.org/donate-le

Stopping nginx     ... done
Stopping wordpress ... done
Stopping mysql     ... done
Going to remove nginx, wordpress, mysql
Removing nginx     ... done
Removing wordpress ... done
Removing mysql     ... done
INFO: update the nginx/default.conf file
-  4:   server_name mjstealey.com;
- 19:   server_name               mjstealey.com www.mjstealey.com;
- 40:   ssl_certificate           /etc/letsencrypt/live/mjstealey.com/fullchain.pem;
- 41:   ssl_certificate_key       /etc/letsencrypt/live/mjstealey.com/privkey.pem;
- 42: ssl_trusted_certificate /etc/letsencrypt/live/mjstealey.com/chain.pem;If you plan to use pre-existing certificates you will need to update the nginx/default.conf file with the appropriate settings to the kind of certificates you have.
USAGE: ./self-signed-init.sh FQDN_OR_IP, where FQDN_OR_IP is the CN you want to assign to the host (commonly localhost).
$ cd letsencrypt/
$ ./self-signed-init.sh localhost
INFO: making certs directory
Generating a 4096 bit RSA private key
................................................................................................................................................................................................................................................++
....................................................++
writing new private key to 'key.pem'
-----
INFO: update the nginx/wordpress_ssl.conf file
-  4:   server_name localhost;
- 19:   server_name               localhost www.localhost;
- 40:   ssl_certificate           /etc/letsencrypt/live/localhost/cert.pem;
- 41:   ssl_certificate_key       /etc/letsencrypt/live/localhost/privkey.pem;
- 42: #ssl_trusted_certificate /etc/letsencrypt/live/FQDN_OR_IP/chain.pem; <-- COMMENT OUT OR REMOVEWhat is the lifetime for Let’s Encrypt certificates? For how long are they valid?
- Let's Encrypt certificates are valid for 90 days. You can read about why here.
- There is no way to adjust this, there are no exceptions. Let's Encrypt recommends automatically renewing your certificates every 60 days.
A script named letsencrypt-renew.sh has been provided to update your certificate as needed. This script can be run at any time along side of your already running site, and if the certificate is due for renewal, it will be renewed. If it is still valid or not yet close to the expiry date, then you'll see a Cert not yet due for renewal message such as the one below.
$ letsencrypt/letsencrypt-renew.sh
INFO: running from top level of repository
Saving debug log to /var/log/letsencrypt/letsencrypt.log

- - - - - - - - - - - - - - - - - - - - - - - - - - - - - - - - - - - - - - - -
Processing /etc/letsencrypt/renewal/mjstealey.com.conf
- - - - - - - - - - - - - - - - - - - - - - - - - - - - - - - - - - - - - - - -
Cert not yet due for renewal

- - - - - - - - - - - - - - - - - - - - - - - - - - - - - - - - - - - - - - - -

The following certs are not due for renewal yet:
  /etc/letsencrypt/live/mjstealey.com/fullchain.pem expires on 2019-05-07 (skipped)
No renewals were attempted.
- - - - - - - - - - - - - - - - - - - - - - - - - - - - - - - - - - - - - - - -
Killing nginx ... done
This script can be scheduled to run via a cron task every 15 days or so to ensure an automatic renewal of your certificate.
Prior to certificate expiration the user will receive an email from The Let's Encrypt Team with expiry information.
Example email:
Hello,
Your certificate (or certificates) for the names listed below will expire in 10 days (on 18 Sep 18 02:01 +0000). Please make sure to renew your certificate before then, or visitors to your website will encounter errors.
We recommend renewing certificates automatically when they have a third of their total lifetime left. For Let's Encrypt's current 90-day certificates, that means renewing 30 days before expiration. See https://letsencrypt.org/docs/integration-guide/ for details.
For any questions or support, please visit https://community.letsencrypt.org/. Unfortunately, we can't provide support by email.
If you are receiving this email in error, unsubscribe at http://mandrillapp.com/track/unsub.php?u=12345678&id=abcdefghijklmnopqrstuvwxyz.0123456789&r=https%3A%2F%2Fmandrillapp.com%2Funsub%3Fmd_email%3Dexample%2540example.com
Regards, The Let's Encrypt Team
Running the letsencrypt-renew.sh script during an active renewal period would renew the site's certificates assuming the site has remained in good standing.
Example renewal:
$ ./letsencrypt-renew.sh
Saving debug log to /var/log/letsencrypt/letsencrypt.log

-------------------------------------------------------------------------------
Processing /etc/letsencrypt/renewal/example.com.conf
-------------------------------------------------------------------------------
Cert is due for renewal, auto-renewing...
Plugins selected: Authenticator webroot, Installer None
Renewing an existing certificate
Performing the following challenges:
http-01 challenge for example.com
http-01 challenge for www.example.com
Using the webroot path /data/letsencrypt for all unmatched domains.
Waiting for verification...
Cleaning up challenges

-------------------------------------------------------------------------------
new certificate deployed without reload, fullchain is
/etc/letsencrypt/live/example.com/fullchain.pem
-------------------------------------------------------------------------------

-------------------------------------------------------------------------------

Congratulations, all renewals succeeded. The following certs have been renewed:
  /etc/letsencrypt/live/example.com/fullchain.pem (success)
-------------------------------------------------------------------------------
Killing nginx ... done
And that's it!
Once configuration has been completed deployment is just a matter of invoking the docker-compose command. Depending on the output you want to see you can choose to daemonize the launching of the containers with -d
docker-compose up -d
docker-compose up
Issuing a ctrl-z will safely disconnect from the console without terminating the running containers. Otherwise ctrl-c will disconnect and kill the containers.
The user may notice Connection Error output from the WordPress container as the database readies itself for connections. This can be eliminated by staging the deployment of the containers until each one has properly set up.
docker-compose up -d database
wait until the database completes it's setup. This can be observed by looking at the log output using docker-compose logs database and waiting for the mysqld: ready for connections message.
docker-compose up -d wordpress nginx
Navigate your browser to http://127.0.0.1 and follow the installation prompts
-
Set language

-
Create an administrative user
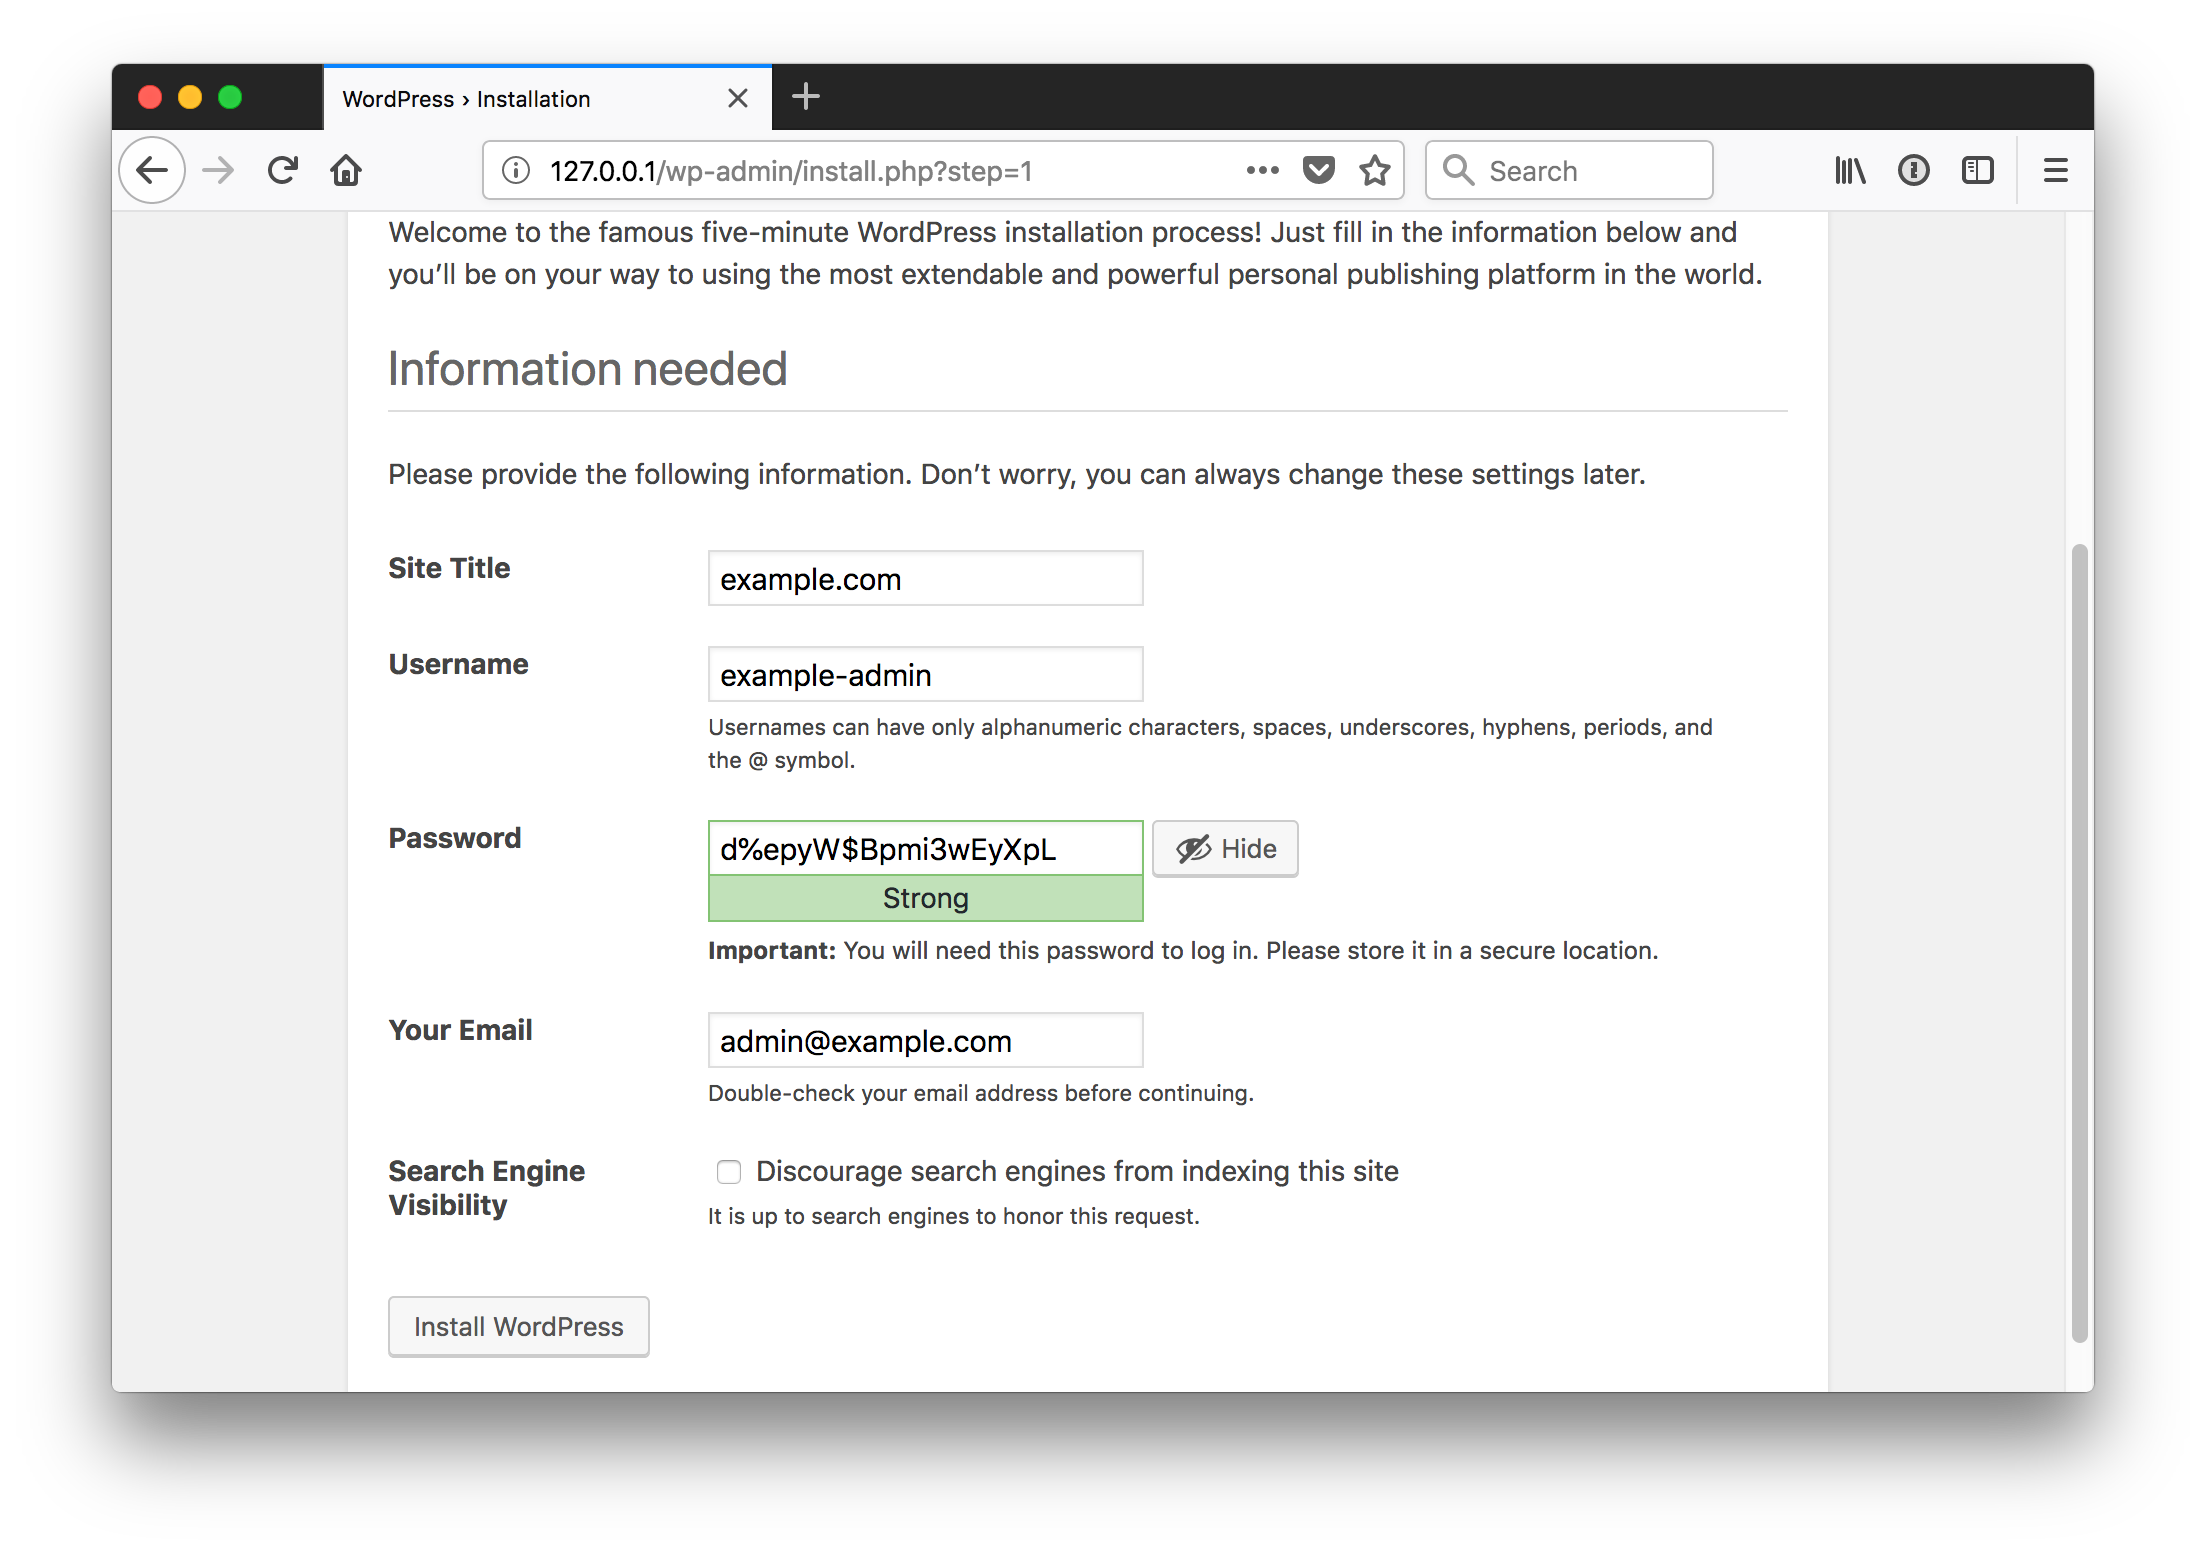
-
Success

-
Log in as the administrative user, dashboard, view site

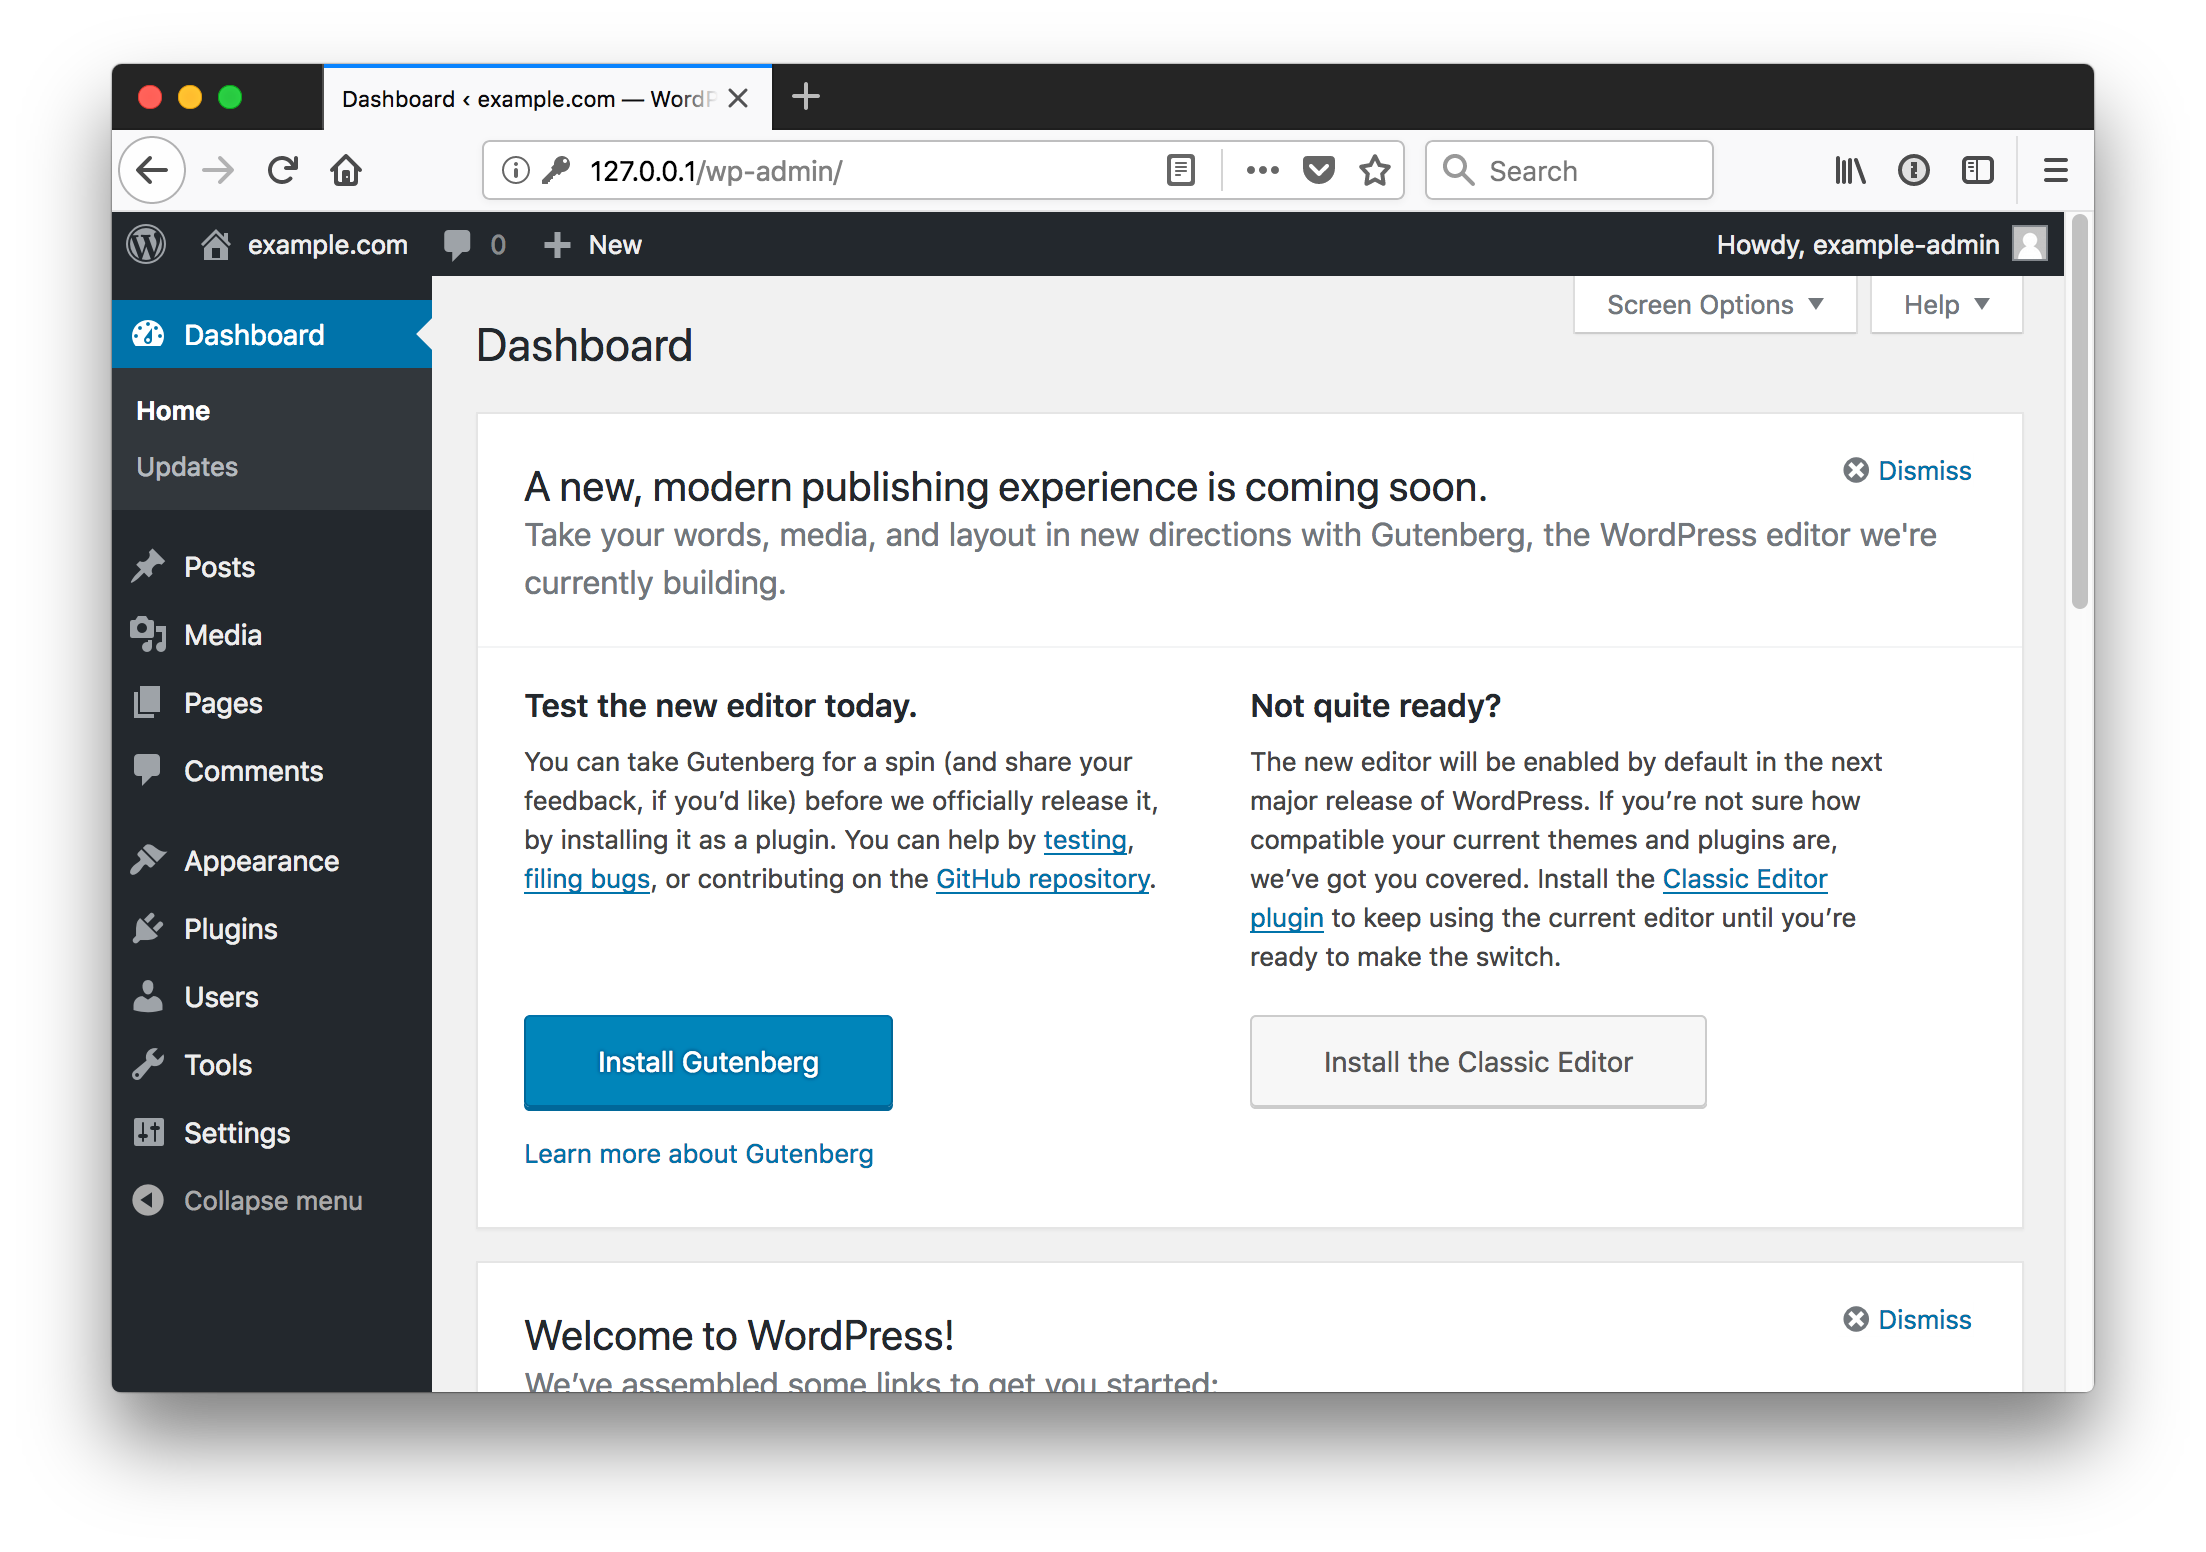
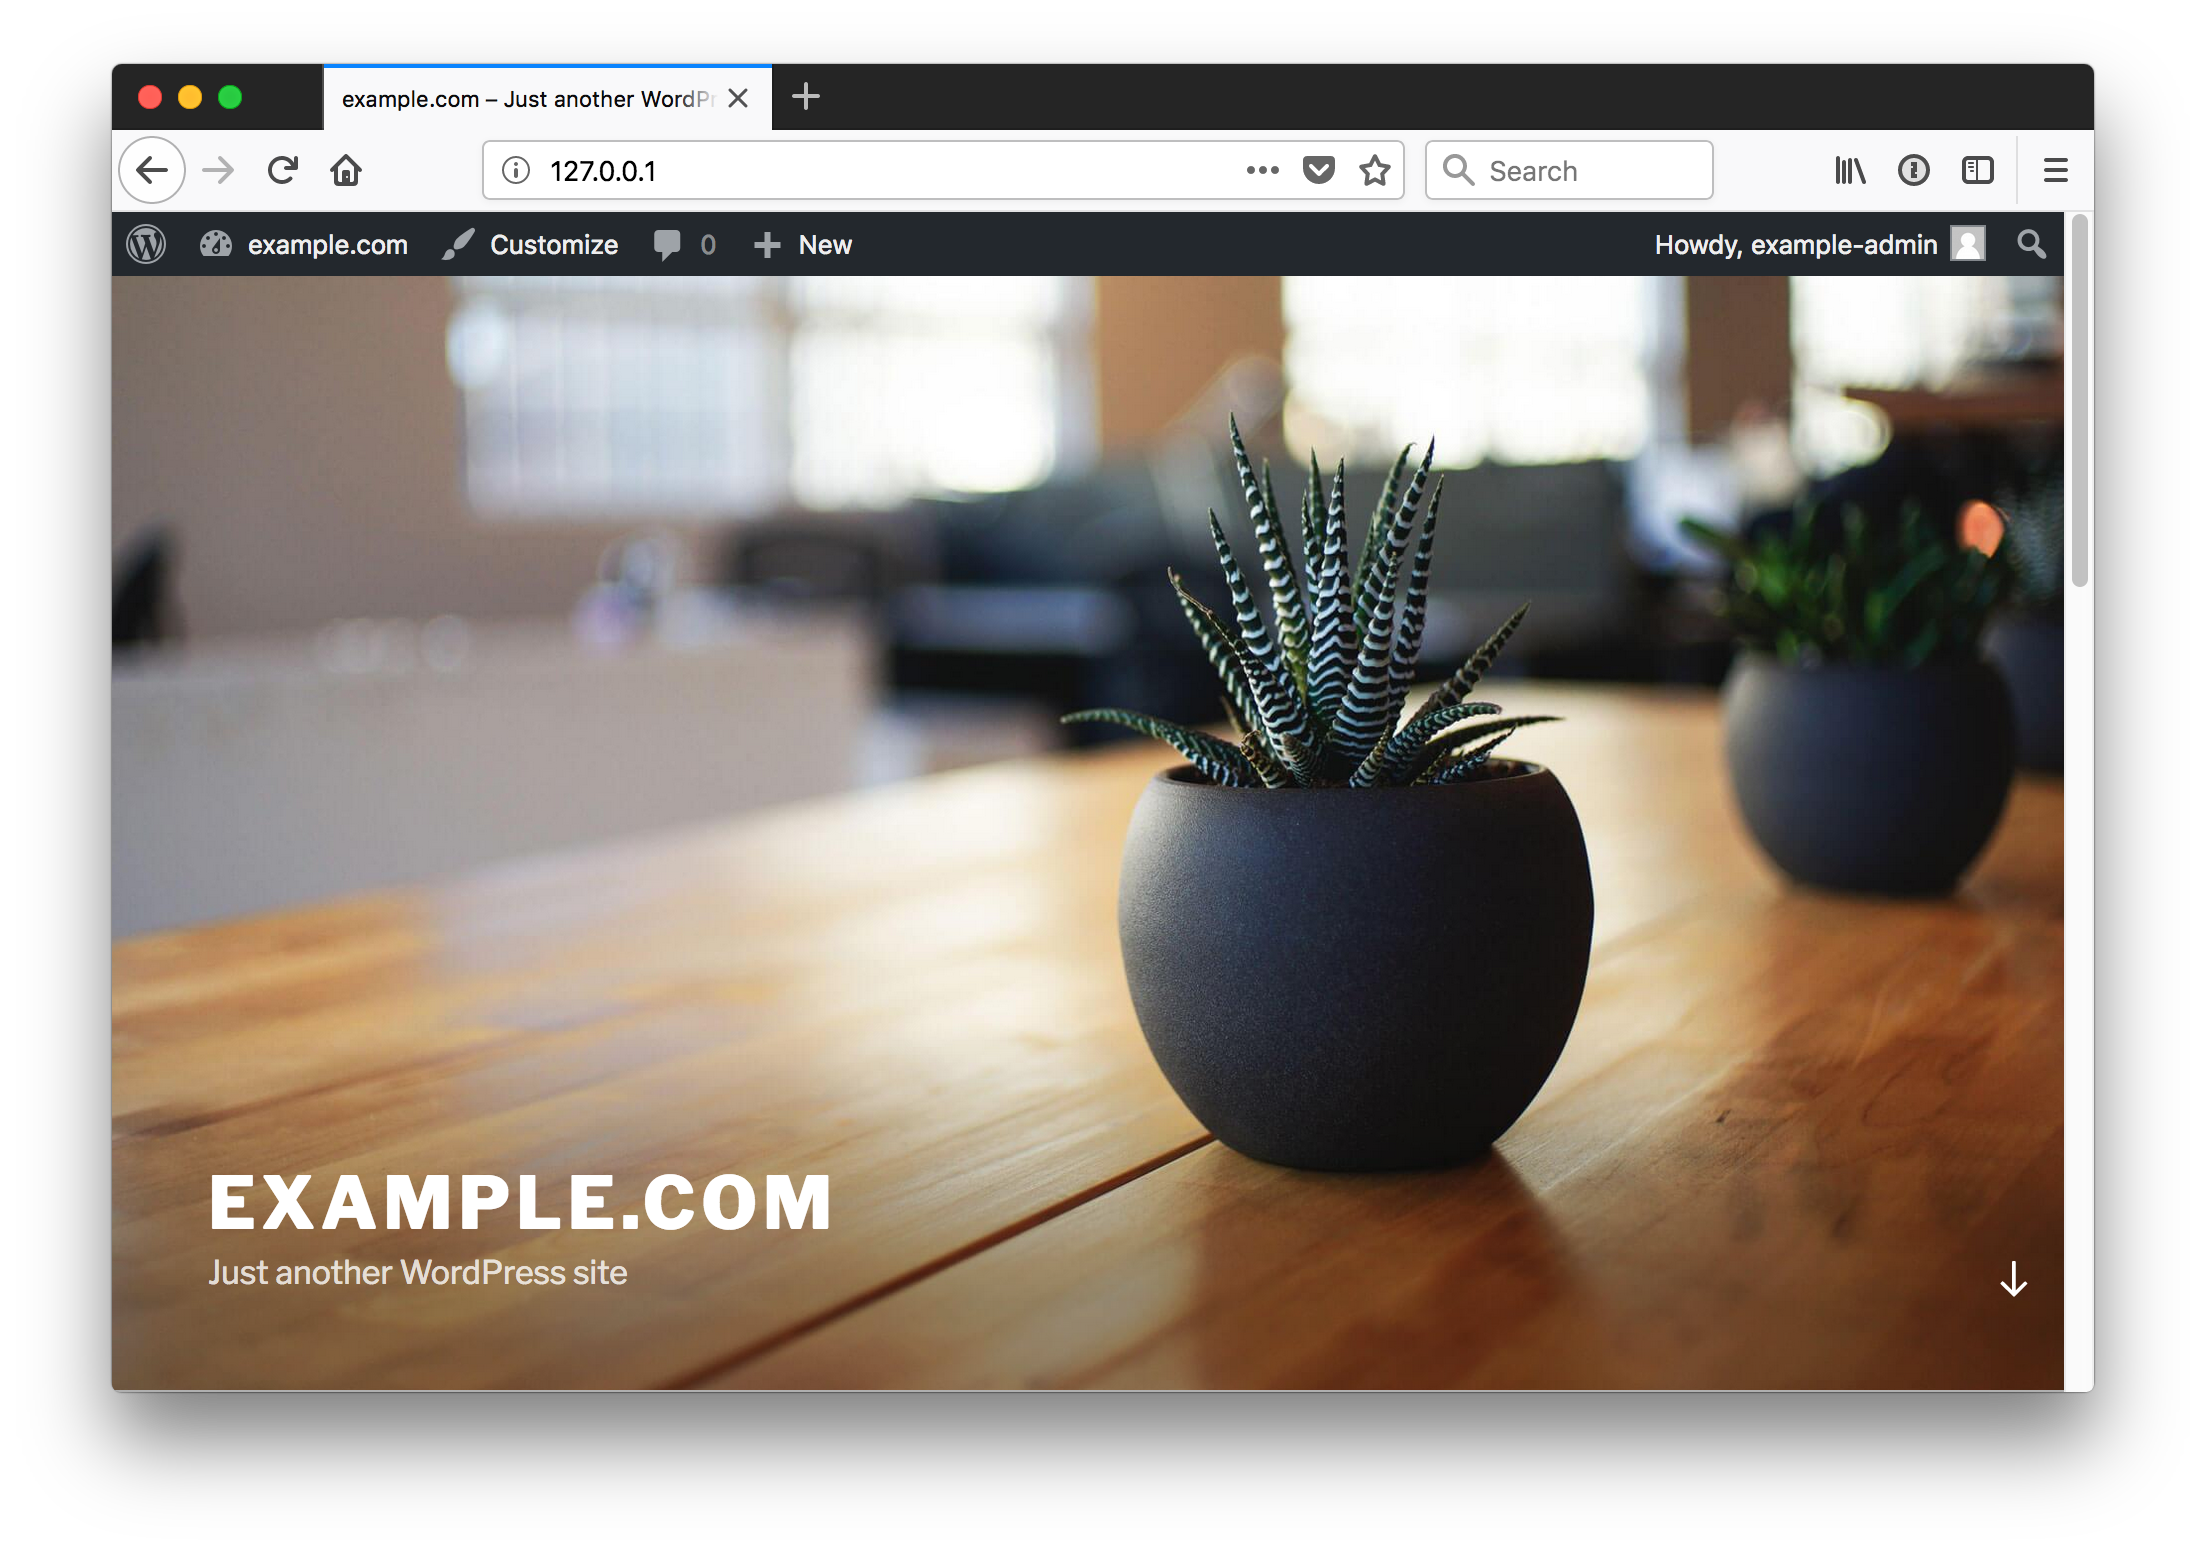
Once your site is running you can begin to create and publish any content you'd like in your WordPress instance.
Because docker-compose.yml was used to define the container relationships it can also be used to stop and remove the containers from the host they are running on.
Stop and remove containers:
$ cd wordpress-nginx-docker
$ docker-compose stop
Stopping nginx     ... done
Stopping wordpress ... done
Stopping mysql     ... done
$ docker-compose rm -f
Going to remove nginx, wordpress, mysql
Removing nginx     ... done
Removing wordpress ... done
Removing mysql     ... done
Removing all related directories:
$ rm -rf certs/ certs-data/ logs/ mysql/ wordpress/A script named stop-and-remove.sh has been provided to run these commands for you. See an example here.
WordPress environment variables. See the official image for additional information.
WORDPRESS_DB_NAME: Name of database used for WordPress in MariaDBWORDPRESS_TABLE_PREFIX: Prefix appended to all WordPress related tables in theWORDPRESS_DB_NAMEdatabaseWORDPRESS_DB_HOST: Hostname of the database server / containerWORDPRESS_DB_PASSWORD: Database password for theWORDPRESS_DB_USER. By default 'root' is theWORDPRESS_DB_USER.
    environment:
      - WORDPRESS_DB_NAME=${WORDPRESS_DB_NAME:-wordpress}
      - WORDPRESS_TABLE_PREFIX=${WORDPRESS_TABLE_PREFIX:-wp_}
      - WORDPRESS_DB_HOST=${WORDPRESS_DB_HOST:-mysql}
      - WORDPRESS_DB_USER=${WORDPRESS_DB_USER:-root}
      - WORDPRESS_DB_PASSWORD=${WORDPRESS_DB_PASSWORD:-password}
MySQL environment variables.
- If you've altered the
WORDPRESS_DB_PASSWORDyou should also set theMYSQL_ROOT_PASSWORDto be the same as they will both be associated with the user 'root'.
    environment:
      - MYSQL_ROOT_PASSWORD=${MYSQL_ROOT_PASSWORD:-password}
      - MYSQL_USER=${MYSQL_USER:-root}
      - MYSQL_PASSWORD=${MYSQL_PASSWORD:-password}
- MYSQL_DATABASE=${MYSQL_DATABASE:-wordpress}If you don't want 'root' as the WORDPRESS_DB_USER, then the configuration variables in .env can be updated in the following way.
Example:
# wordpress - wordpress:php7.3-fpm
WORDPRESS_DB_NAME=wordpress
WORDPRESS_TABLE_PREFIX=wp_
WORDPRESS_DB_HOST=mysql
WORDPRESS_DB_USER=wp_user          # new DB user
WORDPRESS_DB_PASSWORD=wp_password. # new DB password

# mariadb - mariadb:latest
MYSQL_ROOT_PASSWORD=password
MYSQL_USER=wp_user                 # same as WORDPRESS_DB_USER
MYSQL_PASSWORD=wp_password         # same as WORDPRESS_DB_PASSWORD
MYSQL_DATABASE=wordpress           # same as WORDPRESS_DB_NAME

# nginx - nginx:latest
NGINX_DEFAULT_CONF=./nginx/default.conf

# volumes on host
NGINX_LOG_DIR=./logs/nginx
WORDPRESS_DATA_DIR=./wordpress
SSL_CERTS_DIR=./certs
SSL_CERTS_DATA_DIR=./certs-dataNeither the mysql container nor the wordpress container have publicly exposed ports. They are running on the host using a docker defined network which provides the containers with access to each others ports, but not from the host.
If you wish to expose the ports to the host, you'd need to alter the stanzas for each in the docker-compose.yml file.
For the mysql stanza, add
    ports:
      - '3306:3306'
For the wordpress stanza, add
    ports:
      - '9000:9000'
If you encounter an error on the mysql container like this:
[ERROR] Plugin ‘InnoDB’ registration as a STORAGE ENGINE failed.
[ERROR] Unknown/unsupported storage engine: InnoDB
please add the following to the mysql stanza:
command: --innodb-flush-method=fsync --innodb-use-native-aio=0
This is partly because Windows (or to be precise NTFS) dosen't support Asyncronous I/Os (see this for more details).
Don't forget to docker-compose stop AND to manually remove everything under ./mysql/ before retrying.
TODO:
container logs
permissions