Read Get Started with Flutter Authentication to learn how to build the application hosted in this repository.
Flutter is Google's cross-platform UI toolkit created to help developers build expressive and beautiful mobile applications. In the article, you will learn how to build and secure a Flutter application with Auth0 using the open-source AppAuth library with the flutter_appauth wrapper plugin.
 |
 |
|---|---|
 |
 |
-
Clone project.
-
Install dependencies by clicking "Pub get" in your IDE or run the following command in the project root:
flutter pub getAuth0 is an Identity-as-a-Service (IDaaS) platform that provides developers with features such as Social and Passwordless Login, among others, to ease online identity management.
To integrate Auth0 into your Flutter app, you need an Auth0 account. If you have an existing account, you can use it. If you don't, click here to create a free account.
After creating an Auth0 account, follow the steps below to set up an application:
- Go to the Applications section of your dashboard.
- Click on the "Create Application" button.
- Enter a name for your application (e.g., "Flutter Application").
- Finally, select Native as the application type and click the Create button.

Your application should have at least one enabled Connection. Click on the "Connections" tab on your application page and switch on any database or social identity provider (e.g., Google).
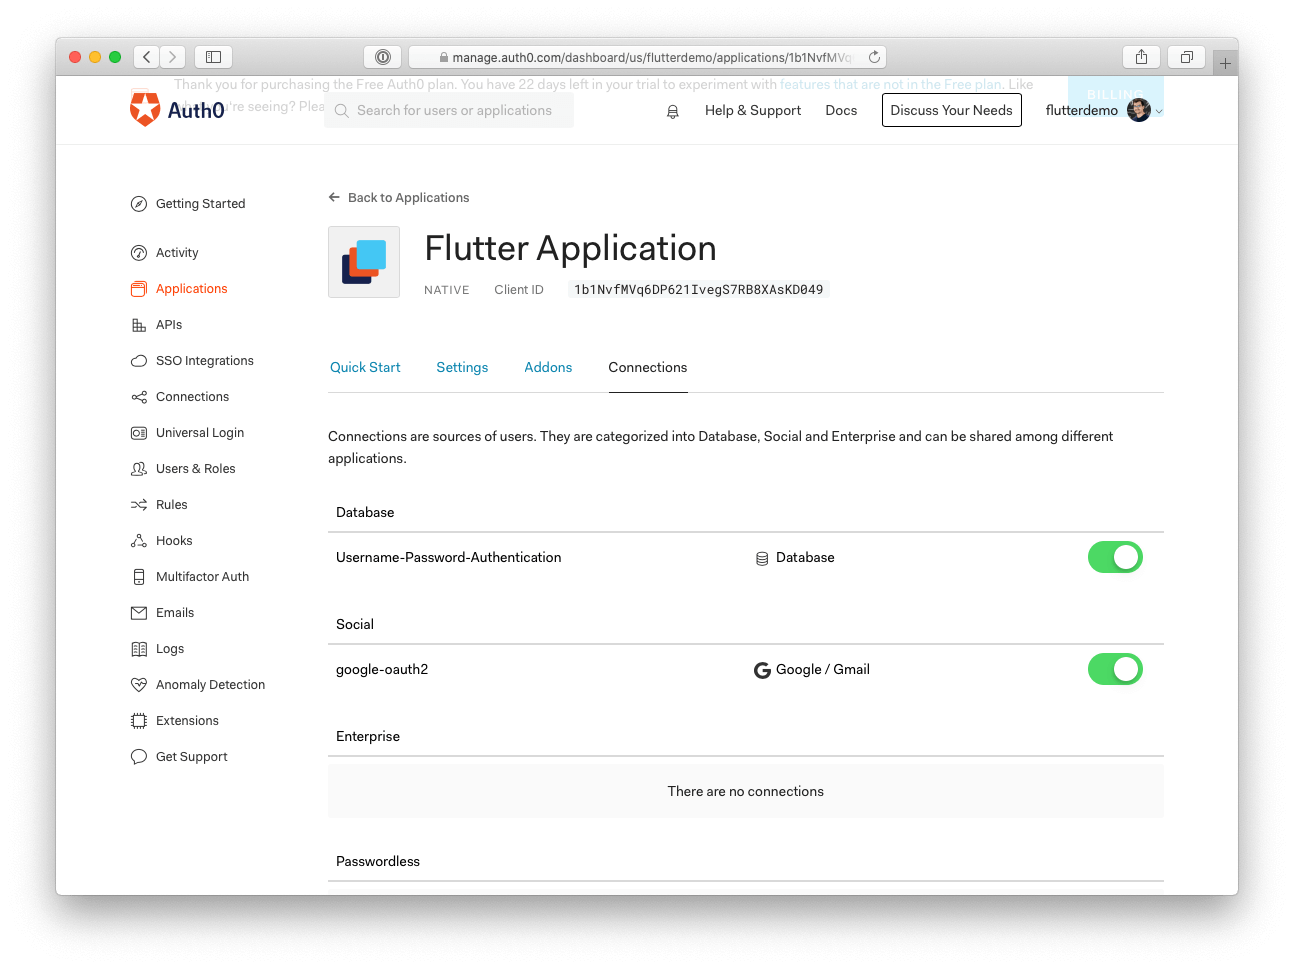
Finally, navigate to the "Settings" tab on your application page and set a callback URL in the Allowed Callback URLs field. For this demo, your callback URL should be the following value:
com.auth0.flutterdemo://login-callback
Here is how it should look in your Application settings page:

Once you set the callback URL value, scroll to the bottom of the page and click on the "Save Changes" button. You should receive a confirmation message stating that your changes have been saved.
The purpose of the callback URL is to provide a mechanism by which an authorization server communicates back to your Flutter application.
Open lib/main.dart and update the "Auth0 Variables" section with the values from your Auth0 Application settings:
-
AUTH0_DOMAINis the value of the Domain. -
AUTH0_CLIENT_IDis the value of the Client ID.
Launch either the iOS simulator or Android emulators, then run the application on all available devices like so:
flutter run -d all