The keyword "native" on Java allow us to call native libraries, by using the JNI.
That document was based on Baeldung post and Prof. Gustavo Leitão video about JNI.
The JNI (Java Native Interface) allows Java to access codes on C and C++.
Commonly used for specifics performance cases, to handle hardwares or even use an existing library (not to need to rewrite).
When we are working with JNI, the native key word need to be used.
That key word says for JVM: "That method has an implementation on other language".
Here is an example of a native method:
public native void myNativeMethod();
Native methods are like abstracts one, with the difference that its implementation will be done in a separated native code file instead of a .java one.
In order for the JVM to use the native code, it is necessary to use the static method System.loadLibrary(String libName). That one will load the provided library from the file system into our memory.
Here is a call example:
System.loadLibrary(mylibrary);
It is very important to say that all library's name needs to start with the prefix "lib", for example: "libmylibrary". When loading through System.loadLibrary, the prefix can not be included on library's name.
Alternatively, we can use the command System.load(D:\\my\\library\\path\\libmylibrary.dll.
After a simple introduction, let's make an example.
The first step is to create our Java class and declare its methods to be implemented on another language. As said before, we need to load our library, by using the method System.loadLibrary(mylibrary).

Note that, after compile the file, there are no errors.

Java's compiler allows us to generete our C header automatically, using the command below:
javac Calculator.java -h ../c/
Where:
javac: Executes the Java compiler.
Calculator.java: Is the class that needs to be implemented in C.
-h: Says for compiler where to save the native header file.
../c/: Is the path where the header is going to be saved.
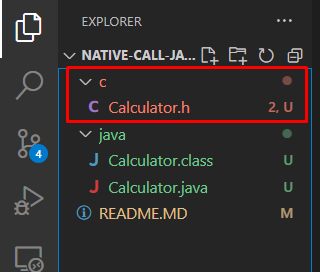
After execute that command, a new .h is generated. There, we can see all method's signature that we defined as native using the "native" key word.
After all these steps, now we need to create the implementation of C code to the Java declared methods.
Let's create a new .c file, there, we included the generated header file and implement a function for all methods, following its signature.

Notice that the methods signature was copy from the generated header, with the difference that all parameters have been changed to have a name that can be referenced in the code.
For compile the C class, I will use the GCC. If you are using Windows (like me), use that step-by-step for stalling it. If you are using Linux, you must already have it installed.
To compile it, we can use the following command (you will have to change it for your case).
gcc -o libcalculator.dll -shared -I"your\java\home\include" -I"your\java\home\include\win32" -I"your\project\c" ./Calculator.c;
Where:
gcc: Executes the GNU Compiler C.
-o: Says for compiler where to save the generated file.
libcalculator.dll: Is the name of the generated file.
-shared: Says for compiler to create a shared library.
-I"your\java\home\include": Is the location of jni.h, that is used by Calculator.h.
-I"your\java\home\include\win32": Is the location of jni_md.h for Windows, that is also used by Calculator.h.
-I"your\project\c": Is the location of Calculator.h, that is used by Calculator.c.
./Calculator.c: This is the file we want to compile
All that code needs to be executed in one line. After it, a libcalculator.dll will be generated.

After all these steps, we are able to execute our program. Just do it by using the following command on your/project/java:
java -Djava.library.path=location/of/libcalculattor Calculator 2 2
NOTE: If you used the System.load instead of System.loadLibrary, the -Djava.library.path=location/of/libcalculattor argument does not need to be provided.
The following image shows the application working:
