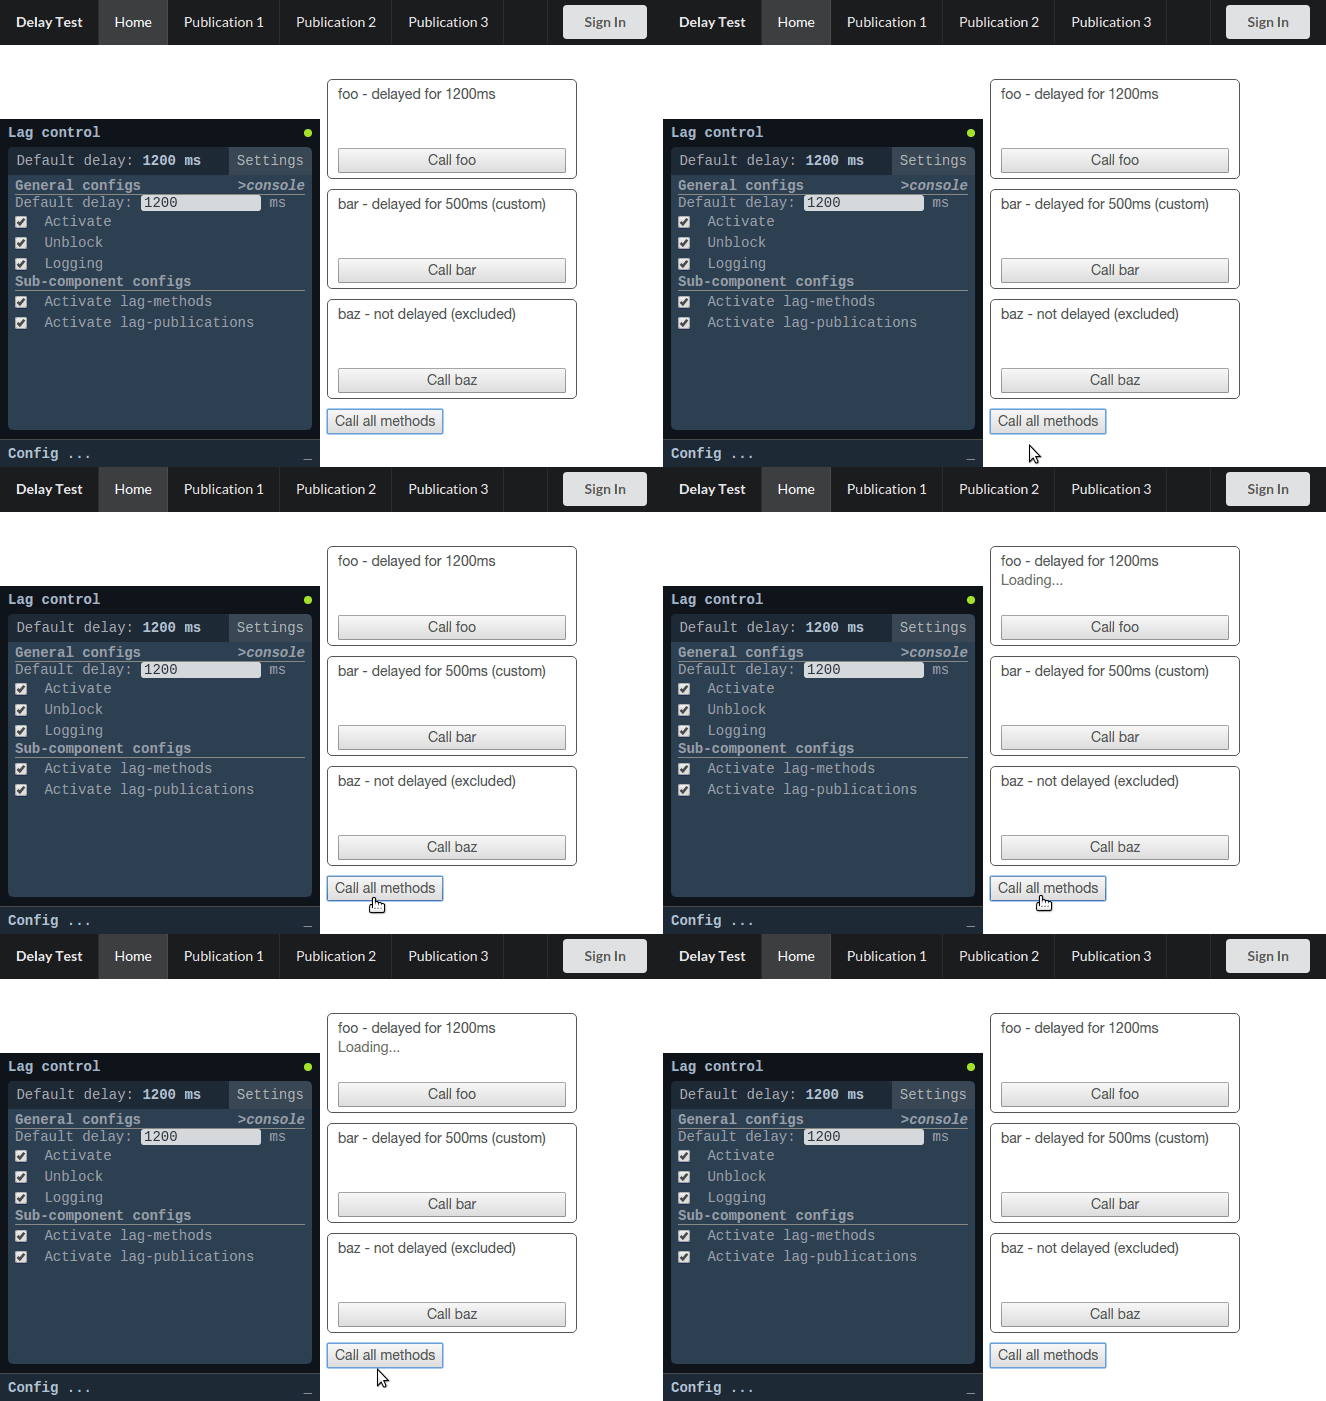
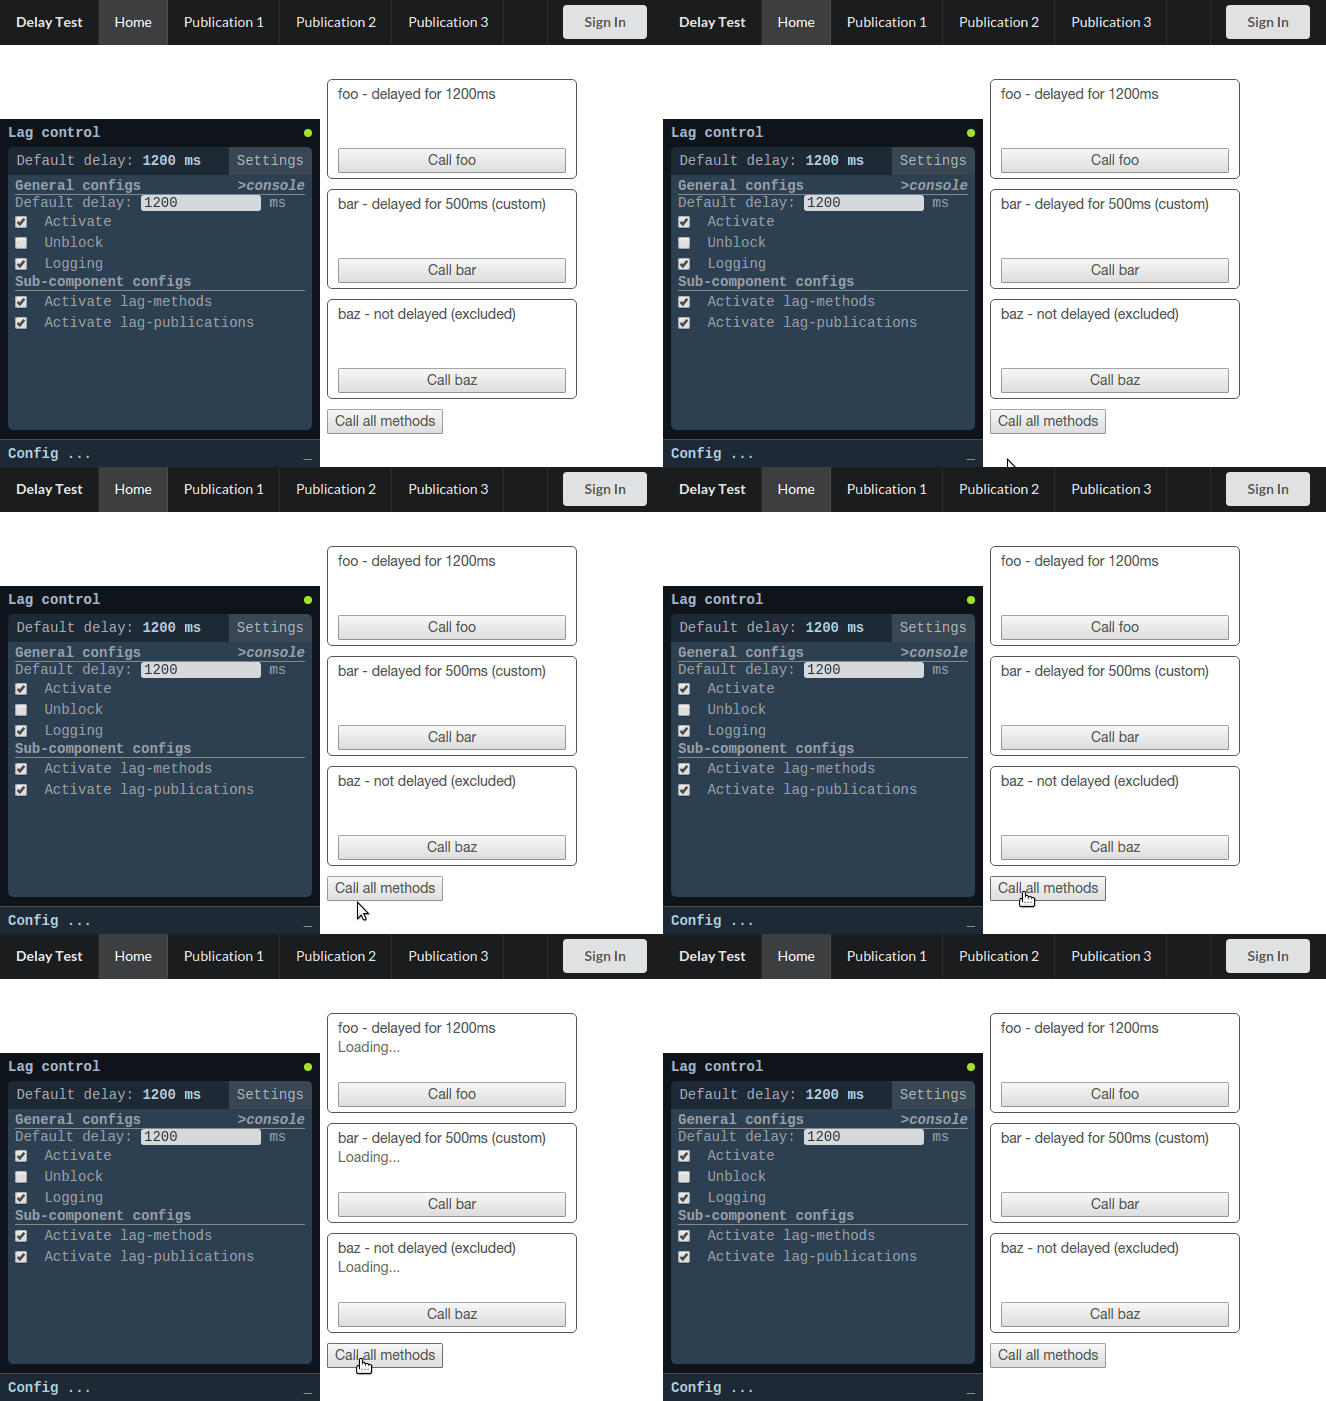
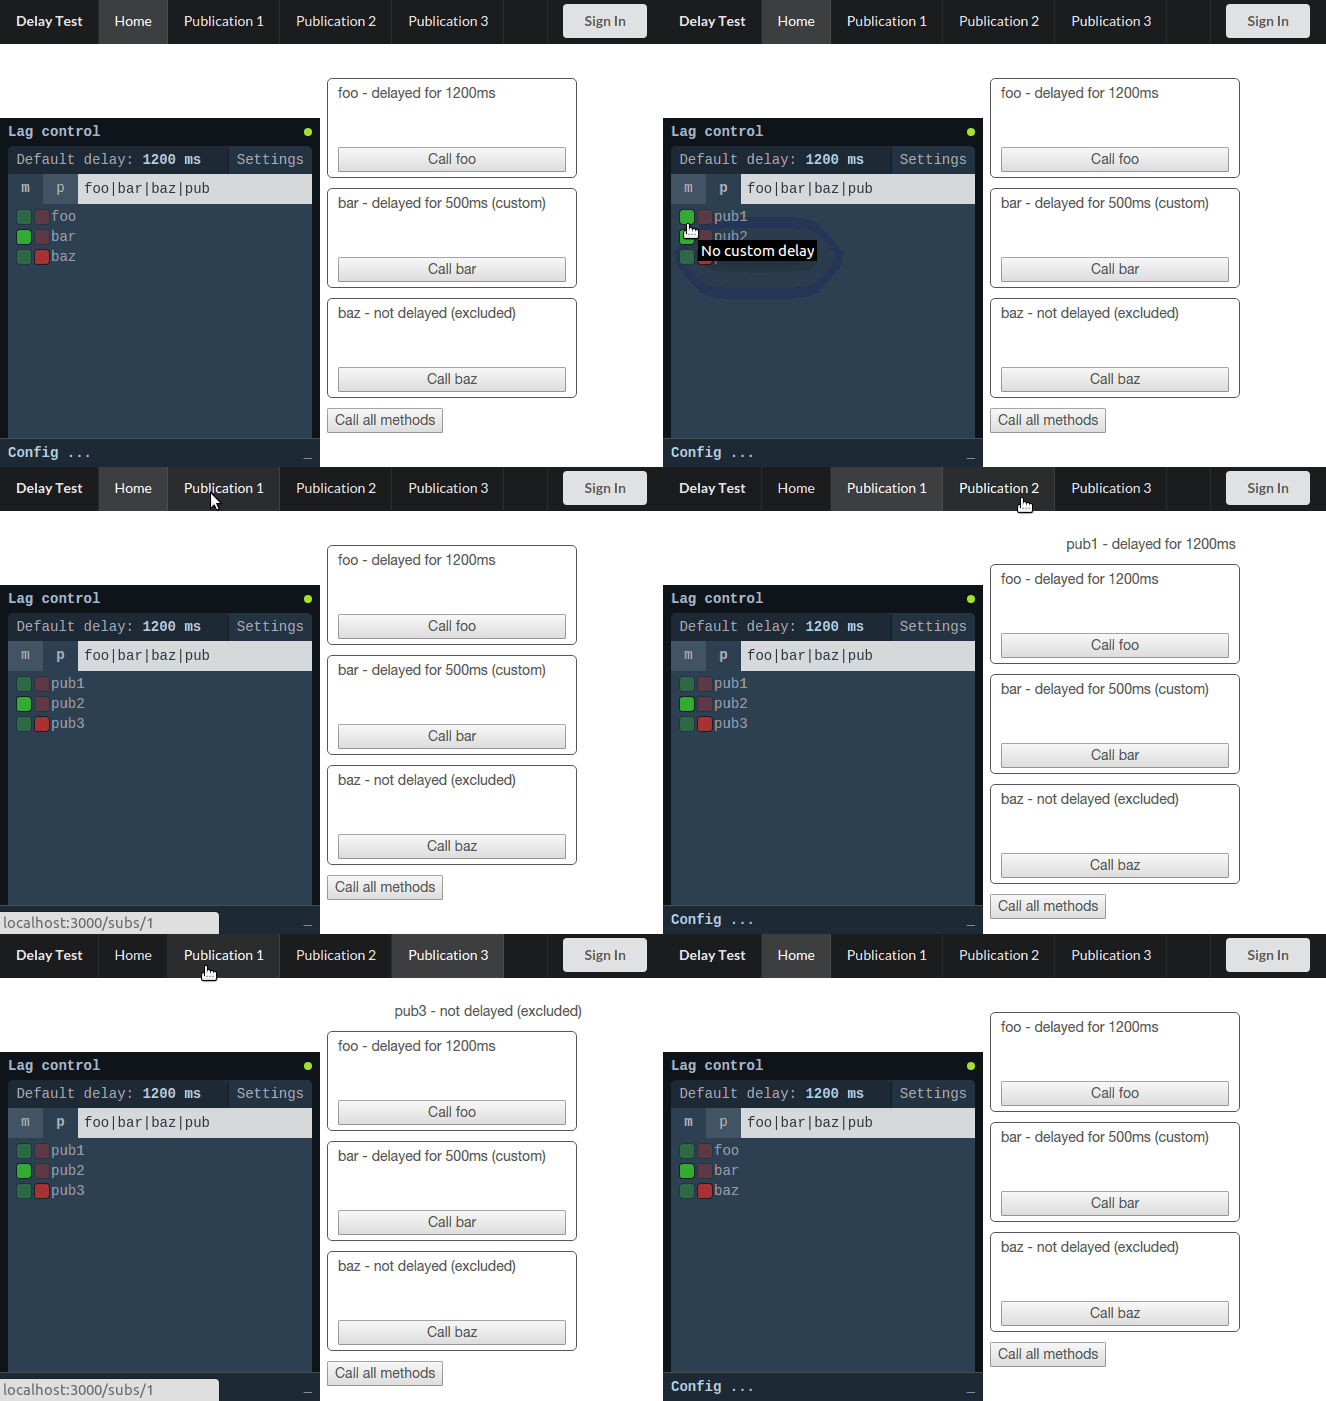
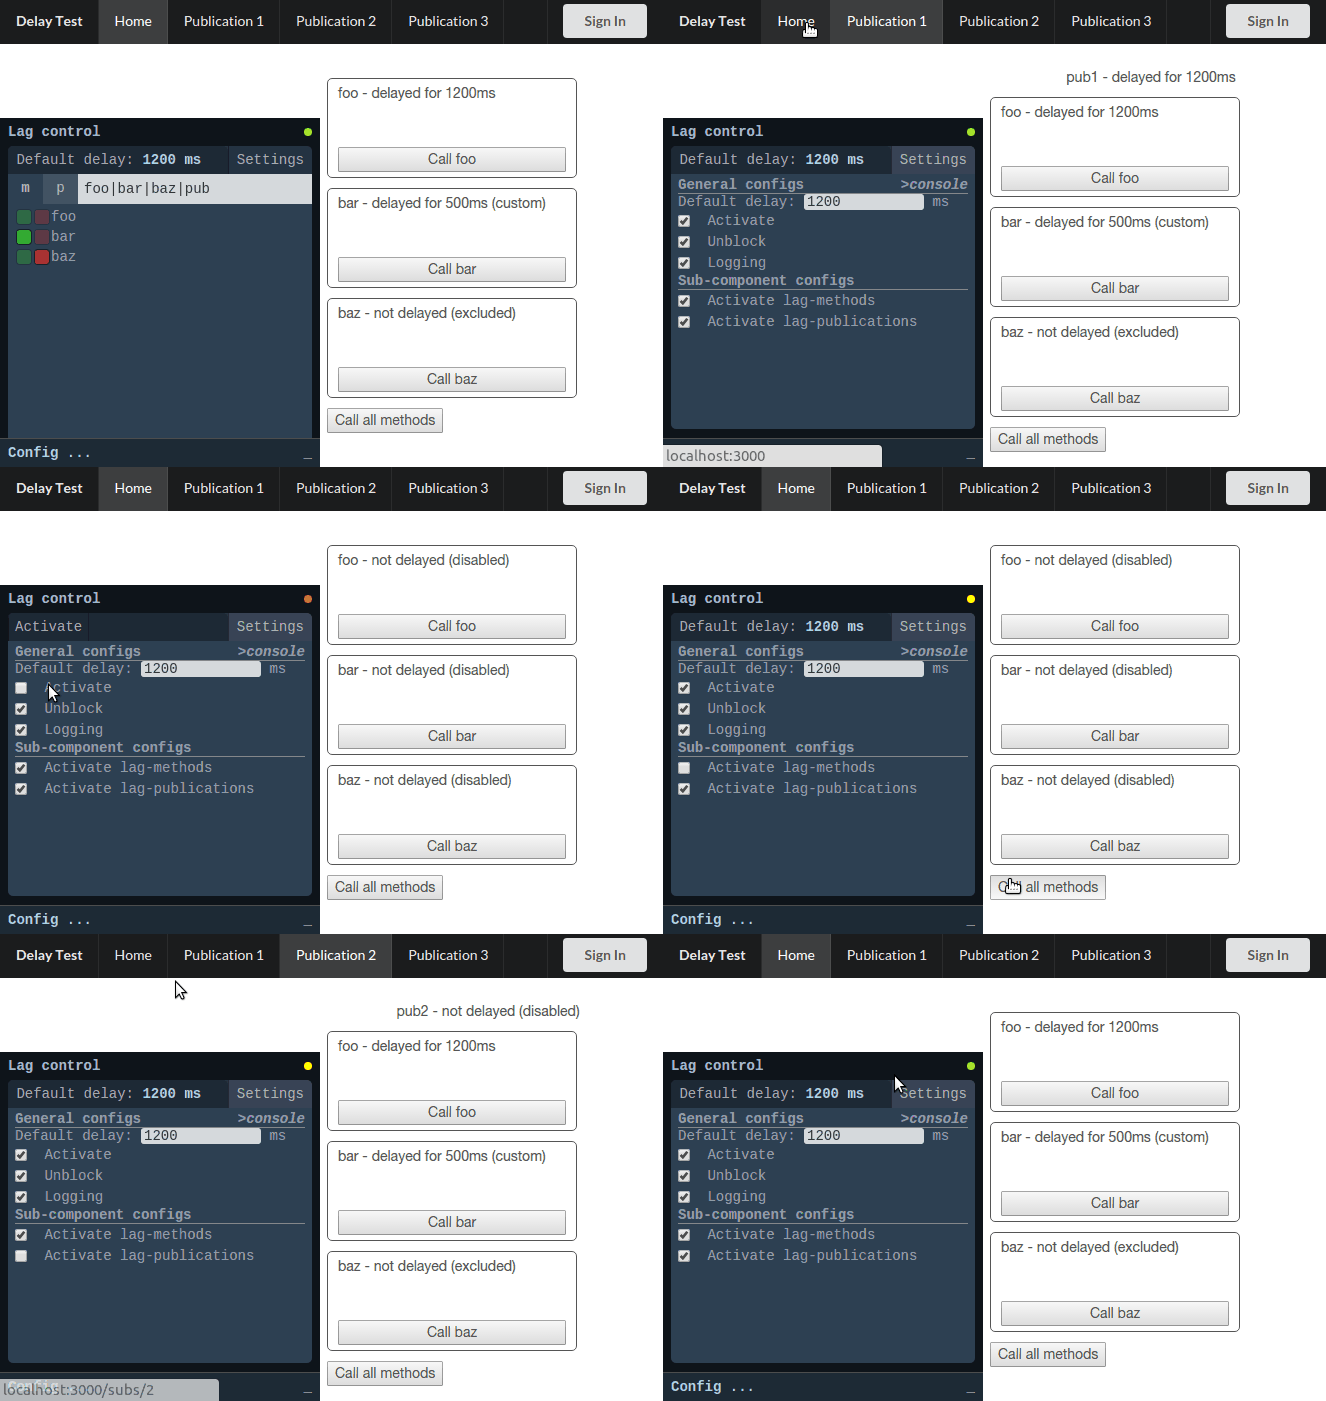
A plugin for constellation:console that provides a UI controls for alon:lag-methods and alon:lag-publications.
It allows you to simulate actual UX in a clean way that only affects your development machine, by adding delay to methods and publications on your local server.
$ meteor add alon:lag-consoleA demo of the package is available on delay.meteor.com. The source is available on GitHub.
Use Ctrl+C to toggle the console.
You can use this package to see what your fancy animations and transitions look like without polluting your code with calls to Meteor._sleepForMs().
- Installation
- demo
- TL;DR
- Table of Contents
- Introduction
- Configuration
- Usage
- terminology
- main panel
- settings tab
- filter
- activate
- default delay
- per-target configuration options
- exclude a target
- set a custom per-target delay
- unblock
- publications
- granular activation
- logging
- print config to console
- login example
- Running tests
- Changelog
- Thanks
Since development is often done on a powerful local machine without much load, the round-trip is usually very quick. Any UI changes that reflect the intermediate state often appear as a short flash of content before the view renders with the new data or state.
This behavior is different from the one that will be experienced by users of the production server, and therefore developers sometimes resort to quick and dirty ways for adding delay to their method calls (by calling Meteor._sleepForMs() - or dirtier solutions - directly in method code). If left alone and not cleaned up, it could eventually cause undesired delay of the deployed application.
This package is intended to provide a cleaner alternative to those dirty fixes.
The package adds delay to methods on the server only. Different delays can be configured for specific methods and the default delay can also be set (it is 2000ms by default).
You may configure alon:lag-methods and alon:lag-publications to your liking.
All of the config options (and other useful info) are specified in the README files (methods, publications - the config options are very similar between them).
The only thing that has to be manually configured is the persist option, in case you want your configuration to survive server restarts (this option is off by default).
In this case, just add this to your json config file.
{
  "lagConfig": {
    "persist": true,
  }
}
Note that turning this feature on creates a MongoDB collection on the development server.
The delay is disabled on startup by default. To change this behavior, use the following configuration option:
{
  "lagConfig": {
    "console": {
      "disableOnStartup": false
    }
  }
}The package adds a tab to the Constellation panel.
This tab allows you to view and control almost all of the relevant configs.
For the following examples, the following configuration file was used:
{
  "lagConfig": {
    "base": {
      "defaultDelay": 1200,
      "log": true
    },
    "methods": {
    	"delays":{
     	   "bar": 500
    	},
      "exclude": [
        "baz"
      ],
      "forceBlocking": [
        "dummy"
      ]
    },
    "publications": {
    	"delays":{
     	   "pub2": 500
    	},
      "exclude": [
        "pub3"
      ],
      "forceBlocking": [
        "pub3"
      ]
    },
    "console": {
      "disableOnStartup": false
    }
  }
}
Details regarding the various configuration options can be found in the README files (methods, publications), as mentioned earlier.
Assuming it is located in <your app's root dir>/config/settings.json, you can start Meteor with it by using the following command in your terminal:
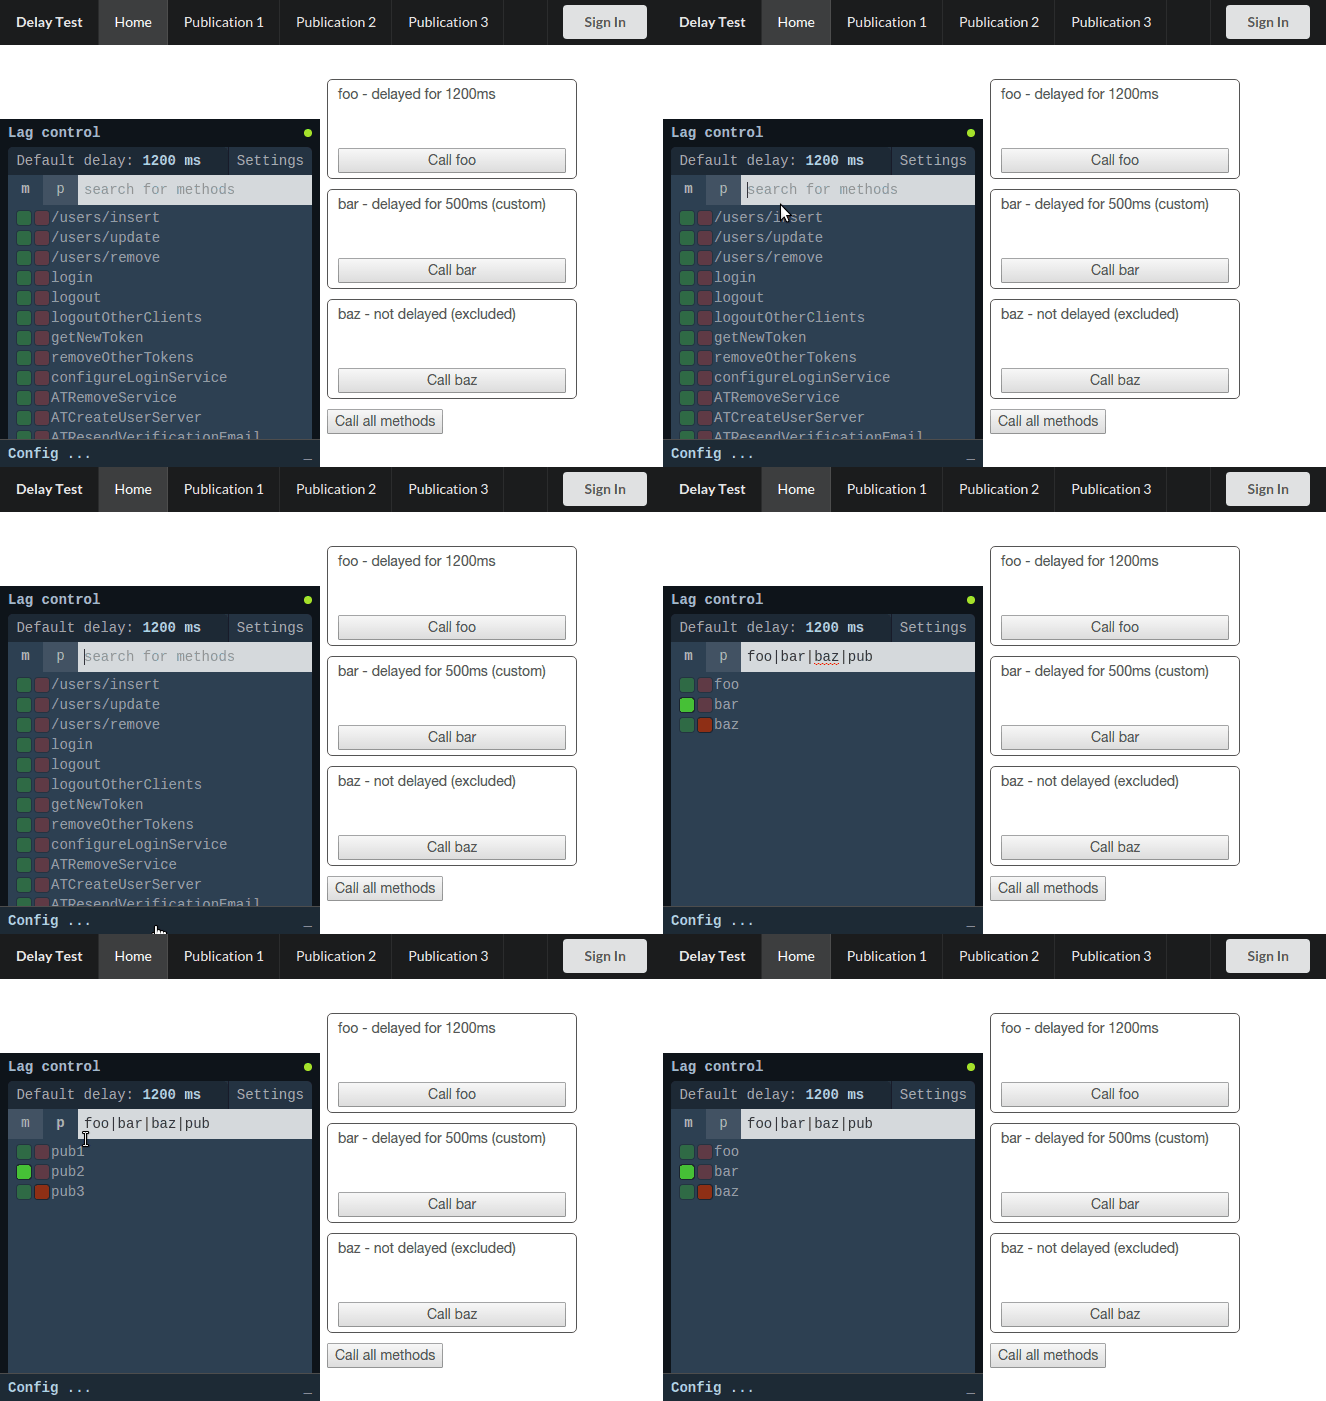
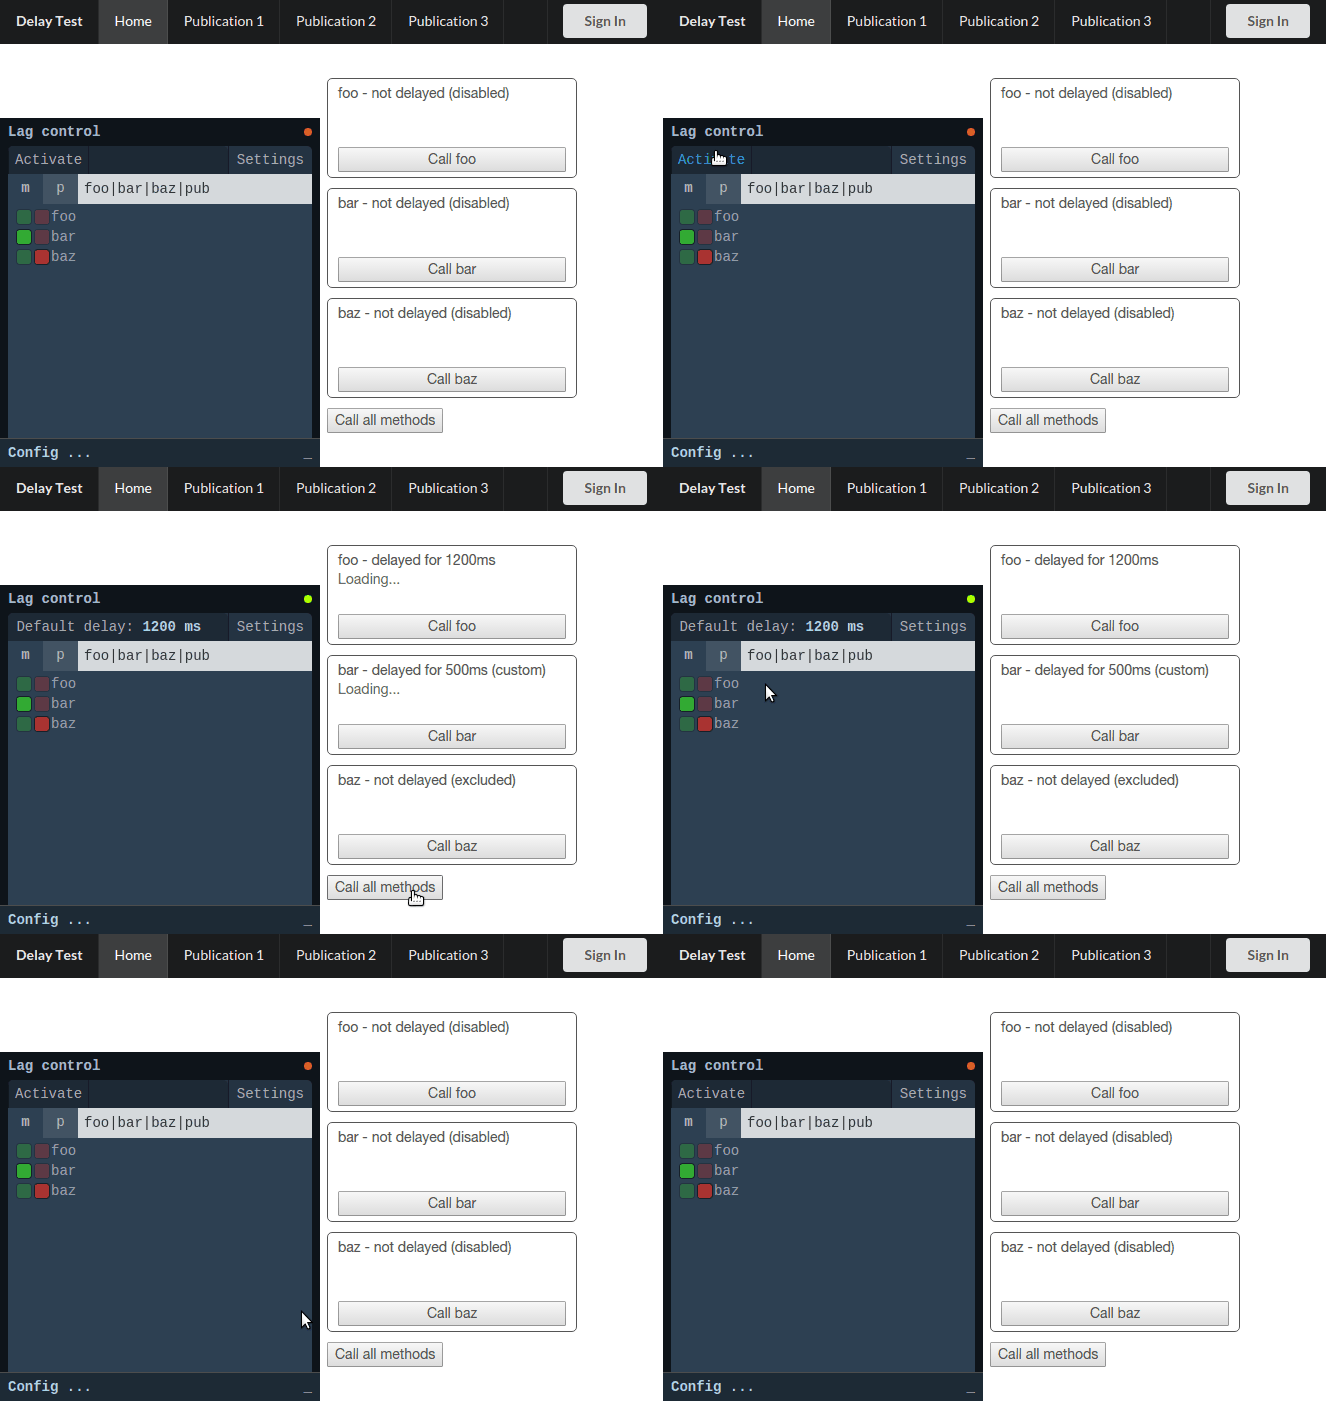
$ meteor run --settings config/settings.jsonHere are some short screencasts that demonstrate the functionality (the captured colors are a bit different from the actual screen colors).
Note: the UI in the current version may differ slightly from the one in shown the examples below.
Methods and publications are collectively referred to as targets.
The main panel contains:
- The menu, which shows the default delay and contains the settings toggle button.
- The tab and search bar.
- The tab bar switches between the method and publication lists (m=methods, p=publications).
- The search bar allows you to filter the list. The filter value is applied to the list that corresponds to the active tab.
- The method/publication list, that contains the names of the matching methods/publications, their configuration status and controls.
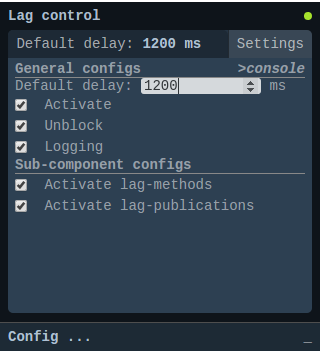
The settings tab contains controls for the general configuration options. You can:
- change the default delay.
- print the configuration options that match the current state to the console.
- toggle the activity state of the methods, publication and global delays.
- change other general options.
The search bar can accept a regular expression and filter the relevant list. The expression is preserved when switching tabs, and re-applied to the active tab.
There are several ways to activate/deactivate the plugin.
- Click on the
Default delay(orActivate, when deactivated). - Check and uncheck the
Activatebox in the settings screen. - Click on the indicator light in the top right corner on the panel. This method can be used even when the panel is collapsed.
If disabled, none or the method calls and publications will be delayed.
The plugin has a default delay setting, which is specified in milliseconds.
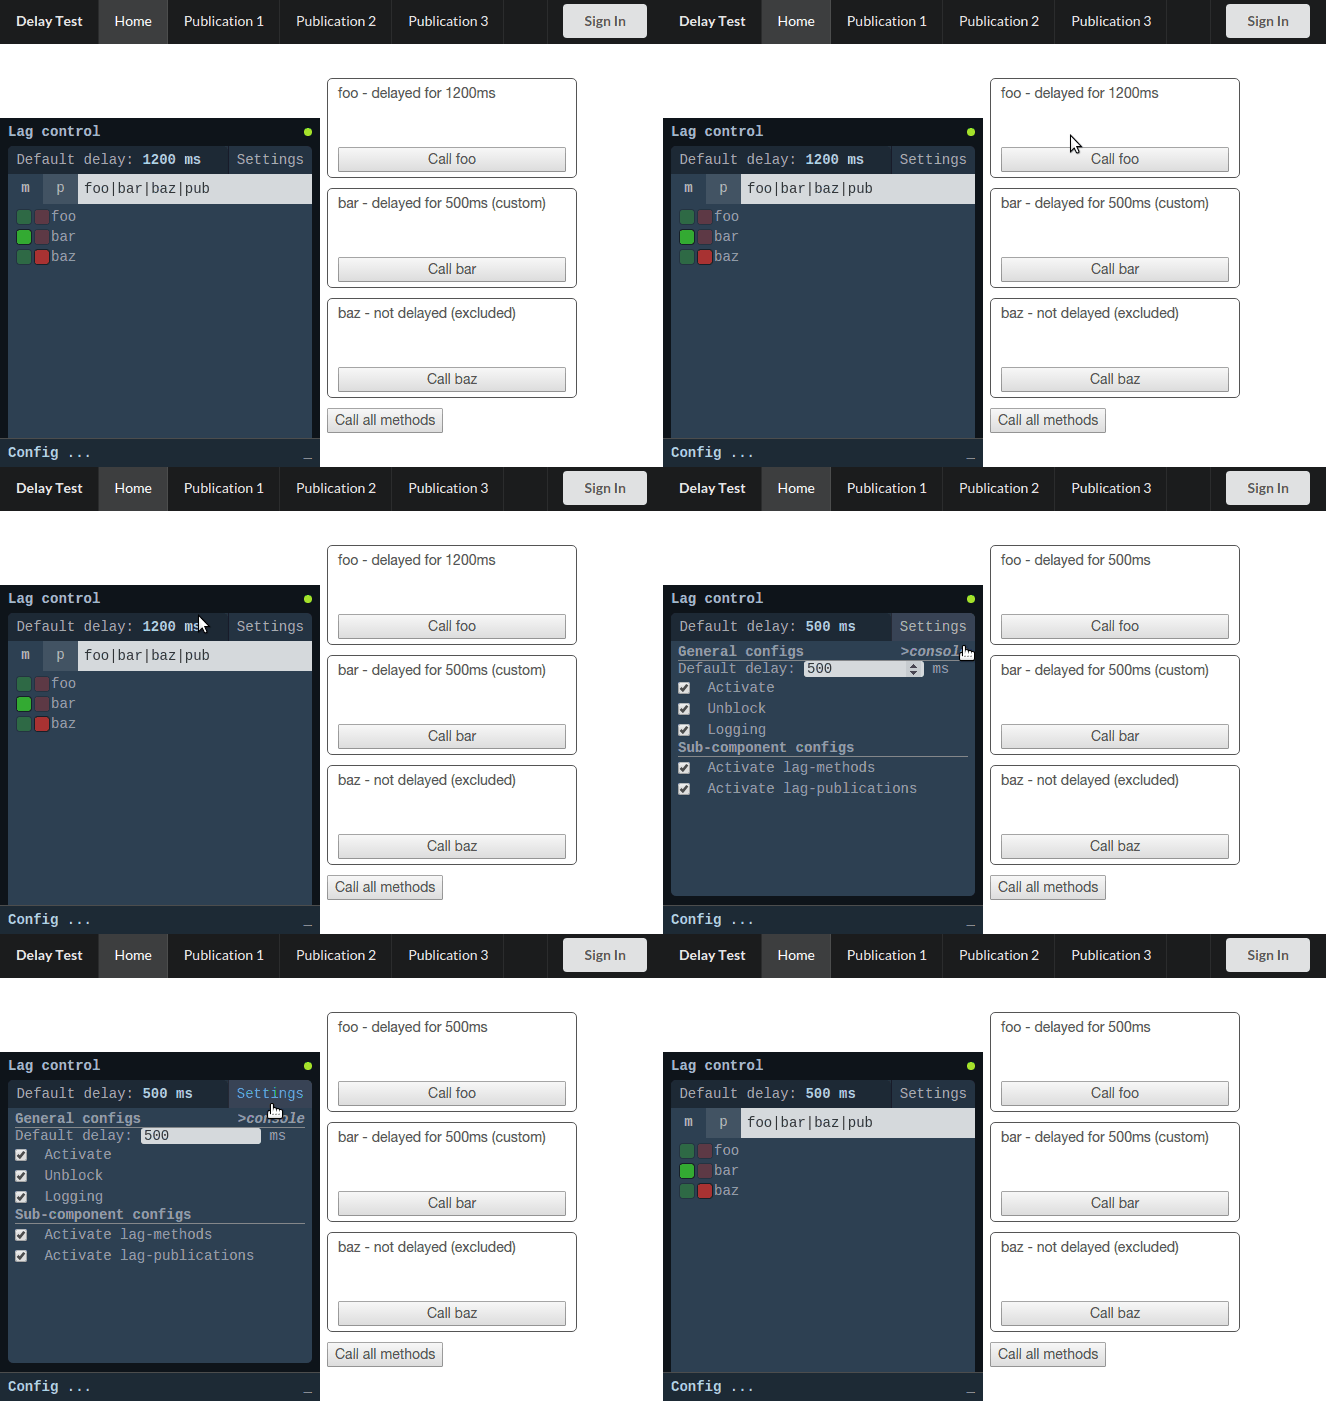
Clicking on the default delay value in the menu bar focuses the default delay input in settings.
It can also be accessed directly.
You can use the arrow keys or type in a new value.
If you set it to 0[ms], only methods/publications that have custom delays will be delayed.
Each target can be configured individually to have a custom delay or to be excluded and have no delay.
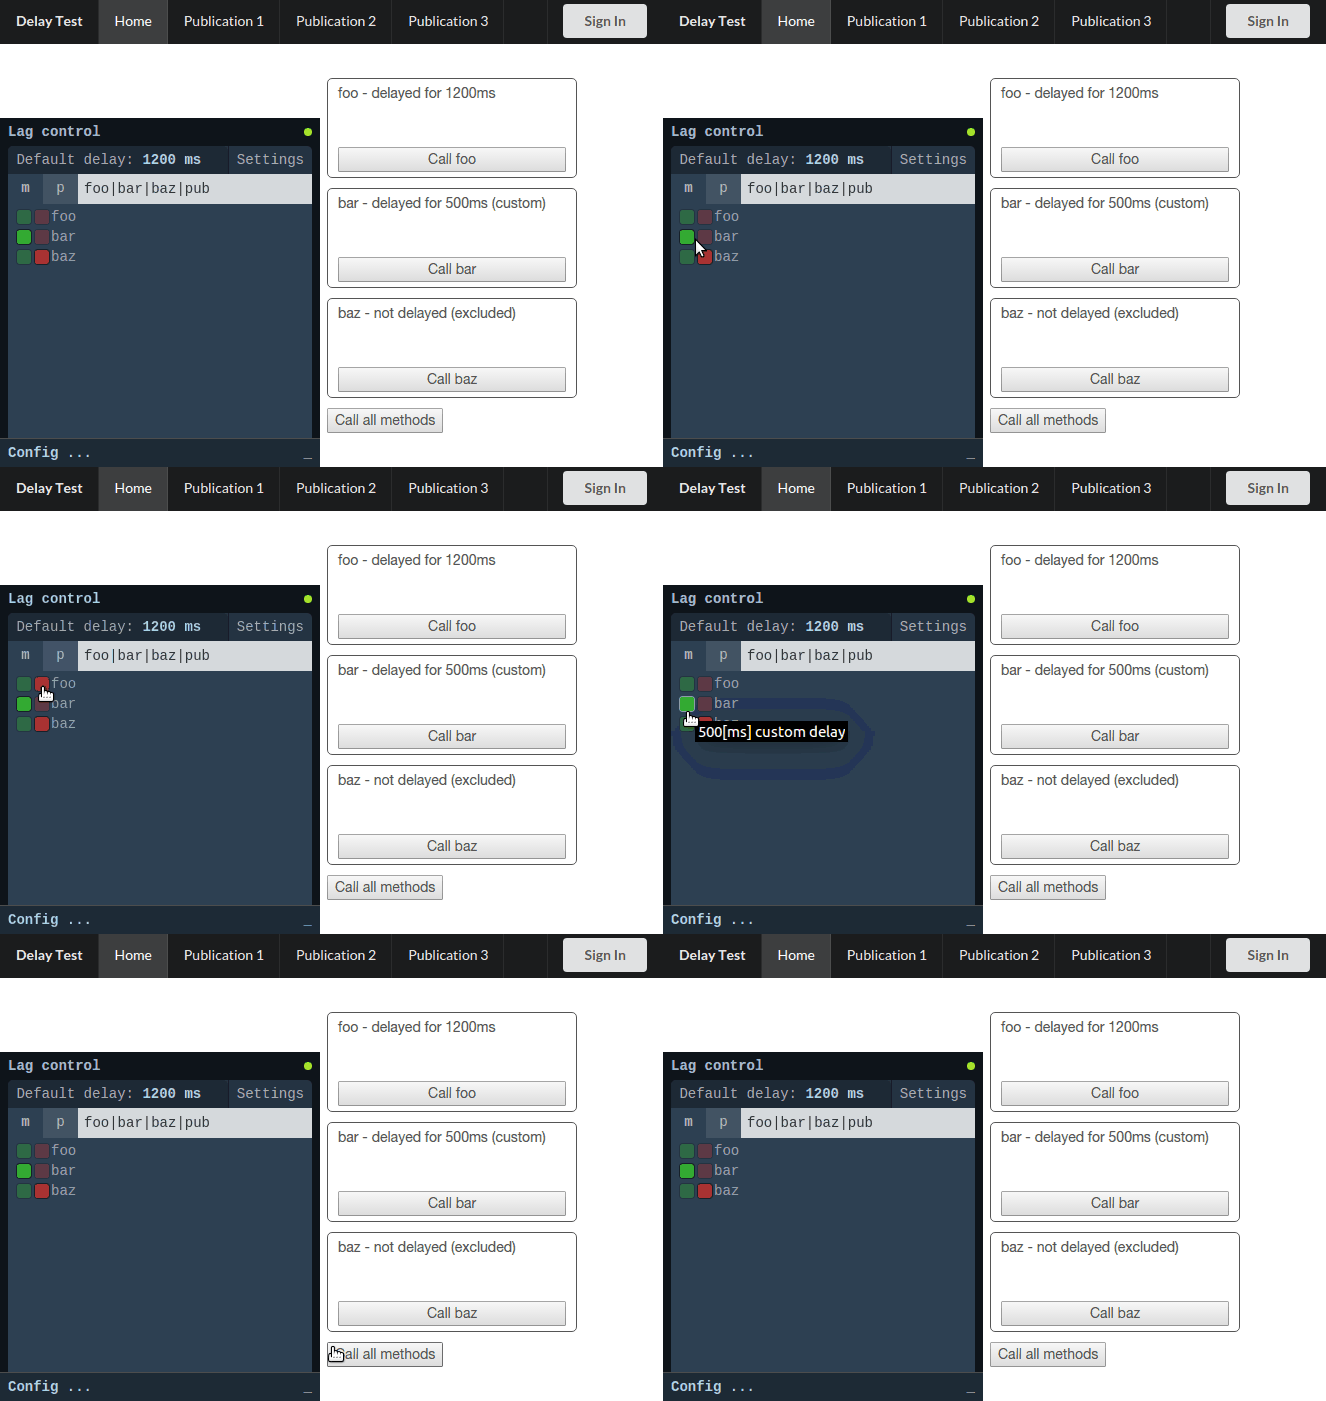
To the left of each target's name there are 2 small indicators/buttons:
- a green indicator - controls custom delay.
- a red indicator - controls exclusion.
Each of them shows a messaged when hovered.
The indicators are highlighted if there is a custom delay or if the target is excluded and are washed out otherwise.
As seen in the image above, hovering over the indicators shows that foo has no custom delay and is not excluded, and therefore will be delayed for the default time set (which is 1200 ms, as can be seen by looking at the default delay at the top-of the panel).
The method bar has a custom 500ms delay set and is not excluded. The custom delay will override the default one, so bar will be delayed by 500ms when called.
The method baz is excluded and therefore will not be delayed. It wouldn't be delayed even if it had custom delay set for it.
Clicking the indicators sets or unsets the respective option. For more info, see the following sections.
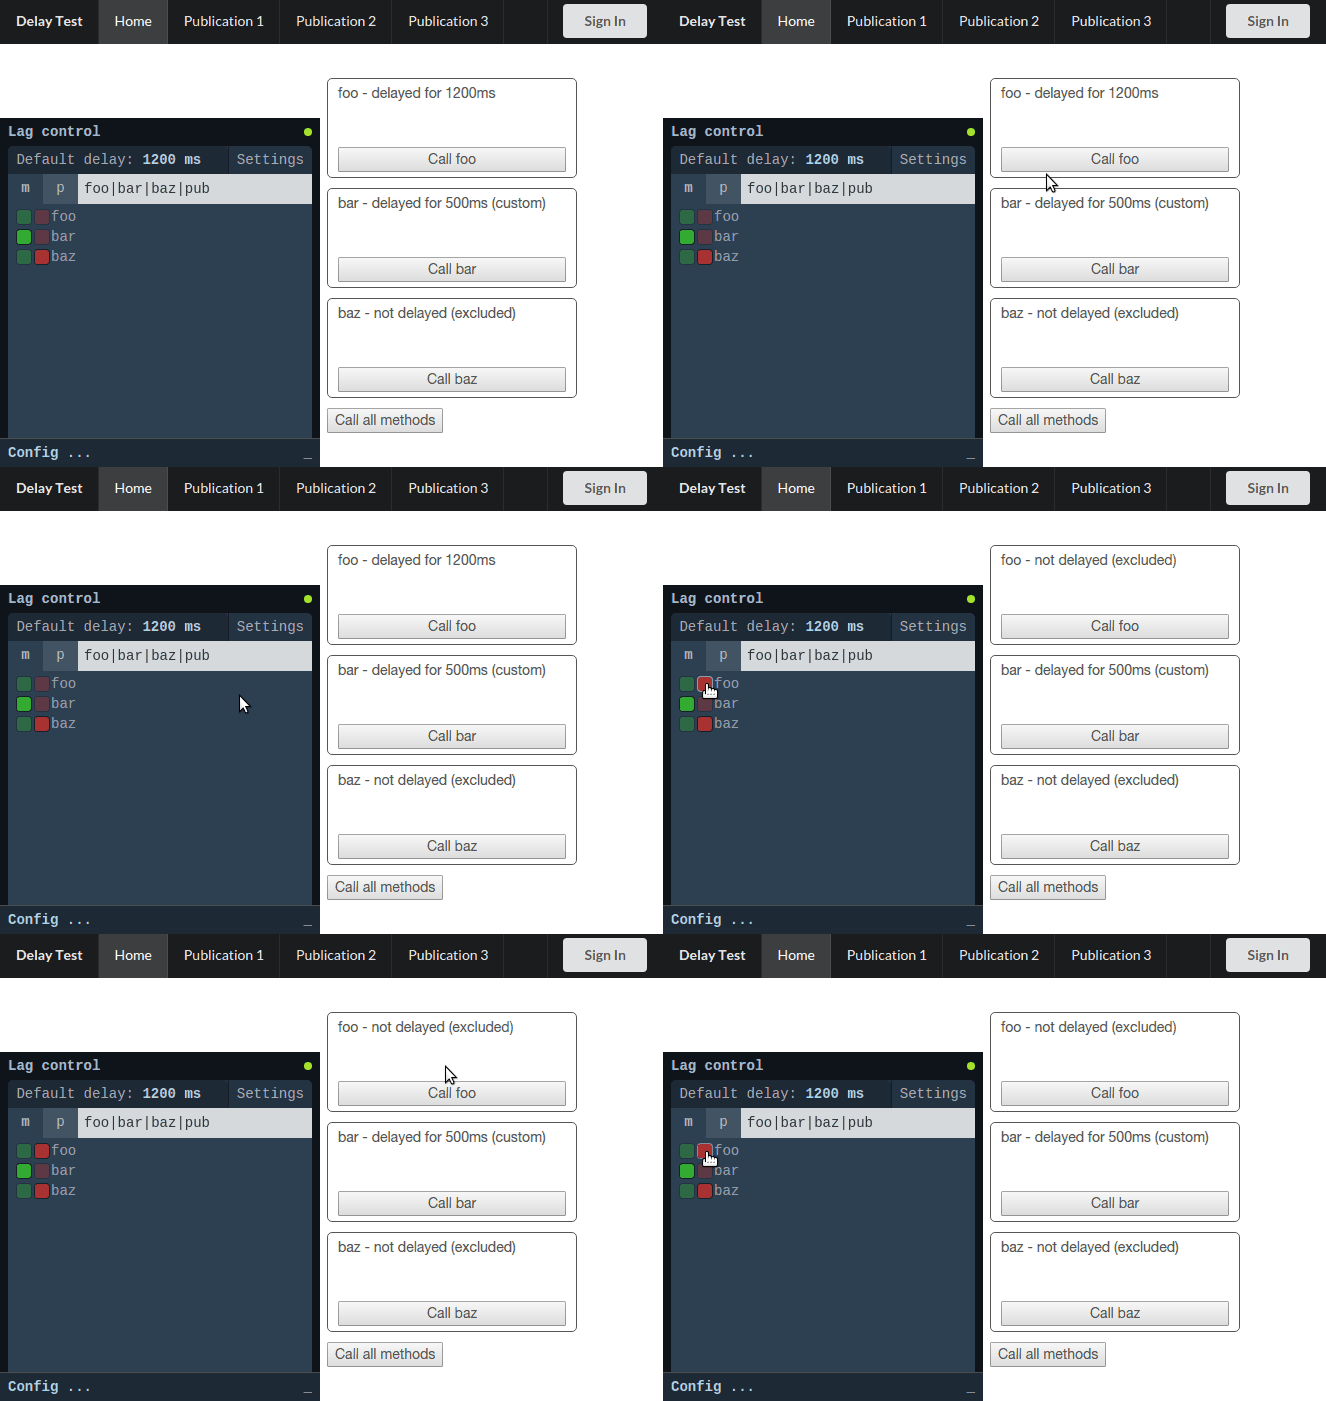 Clicking the red indicator toggles the corresponding target's
 excluded configuration.
Some target are excluded by default, such as the methods that apply the configuration settings for this package.
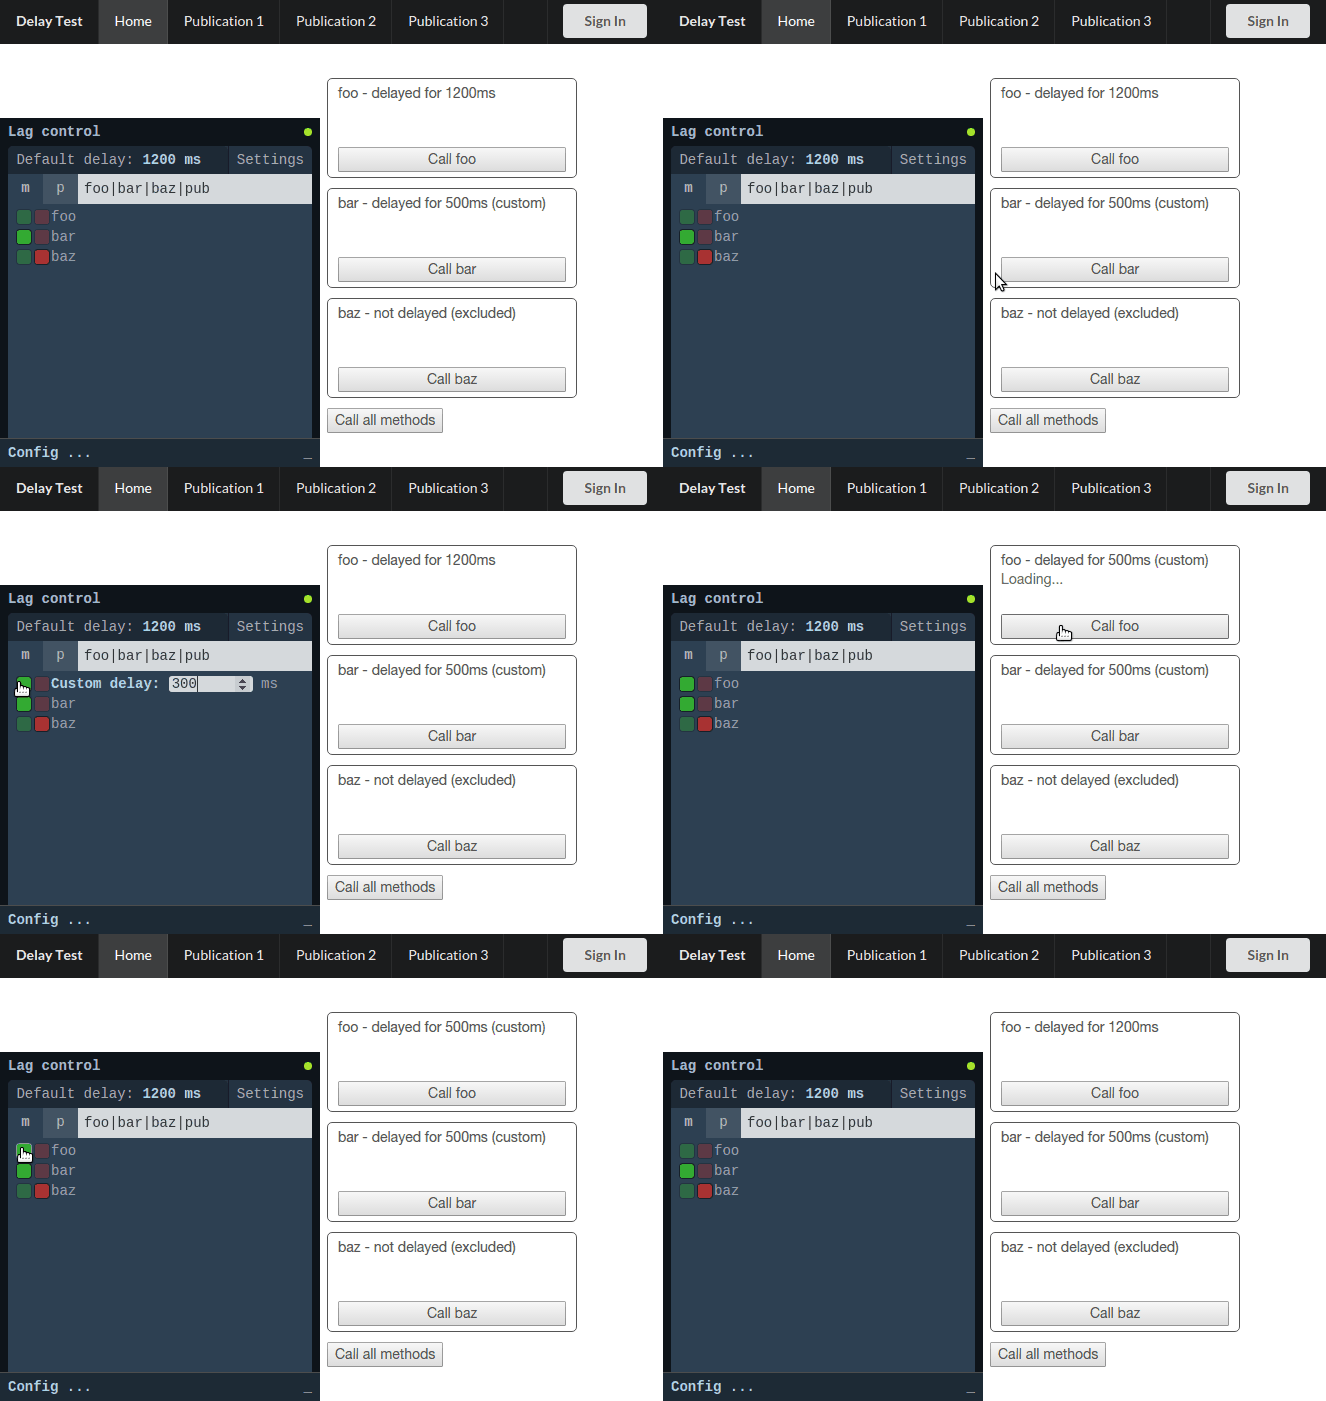
Setting a custom delay for a target is done by clicking on the green indicator, filling the desired delay (in milliseconds) and clicking enter. The green indicator should turn highlighted and display the new custom delay when hovered.
The custom delay can be unset by clicking on the green indicator.
In the example screencast, at first foo has no custom delay and therefore is delayed for the default delay of 1200 ms. After setting a custom delay of 500ms (notice the indicator is now highlighted), and now the Loading indicator appears for a significantly shorter time. Another click on the green indicator unsets the custom delay.
Calling this.unblock() in a method allows it to be run in parallel to other methods called by the user (when possible).
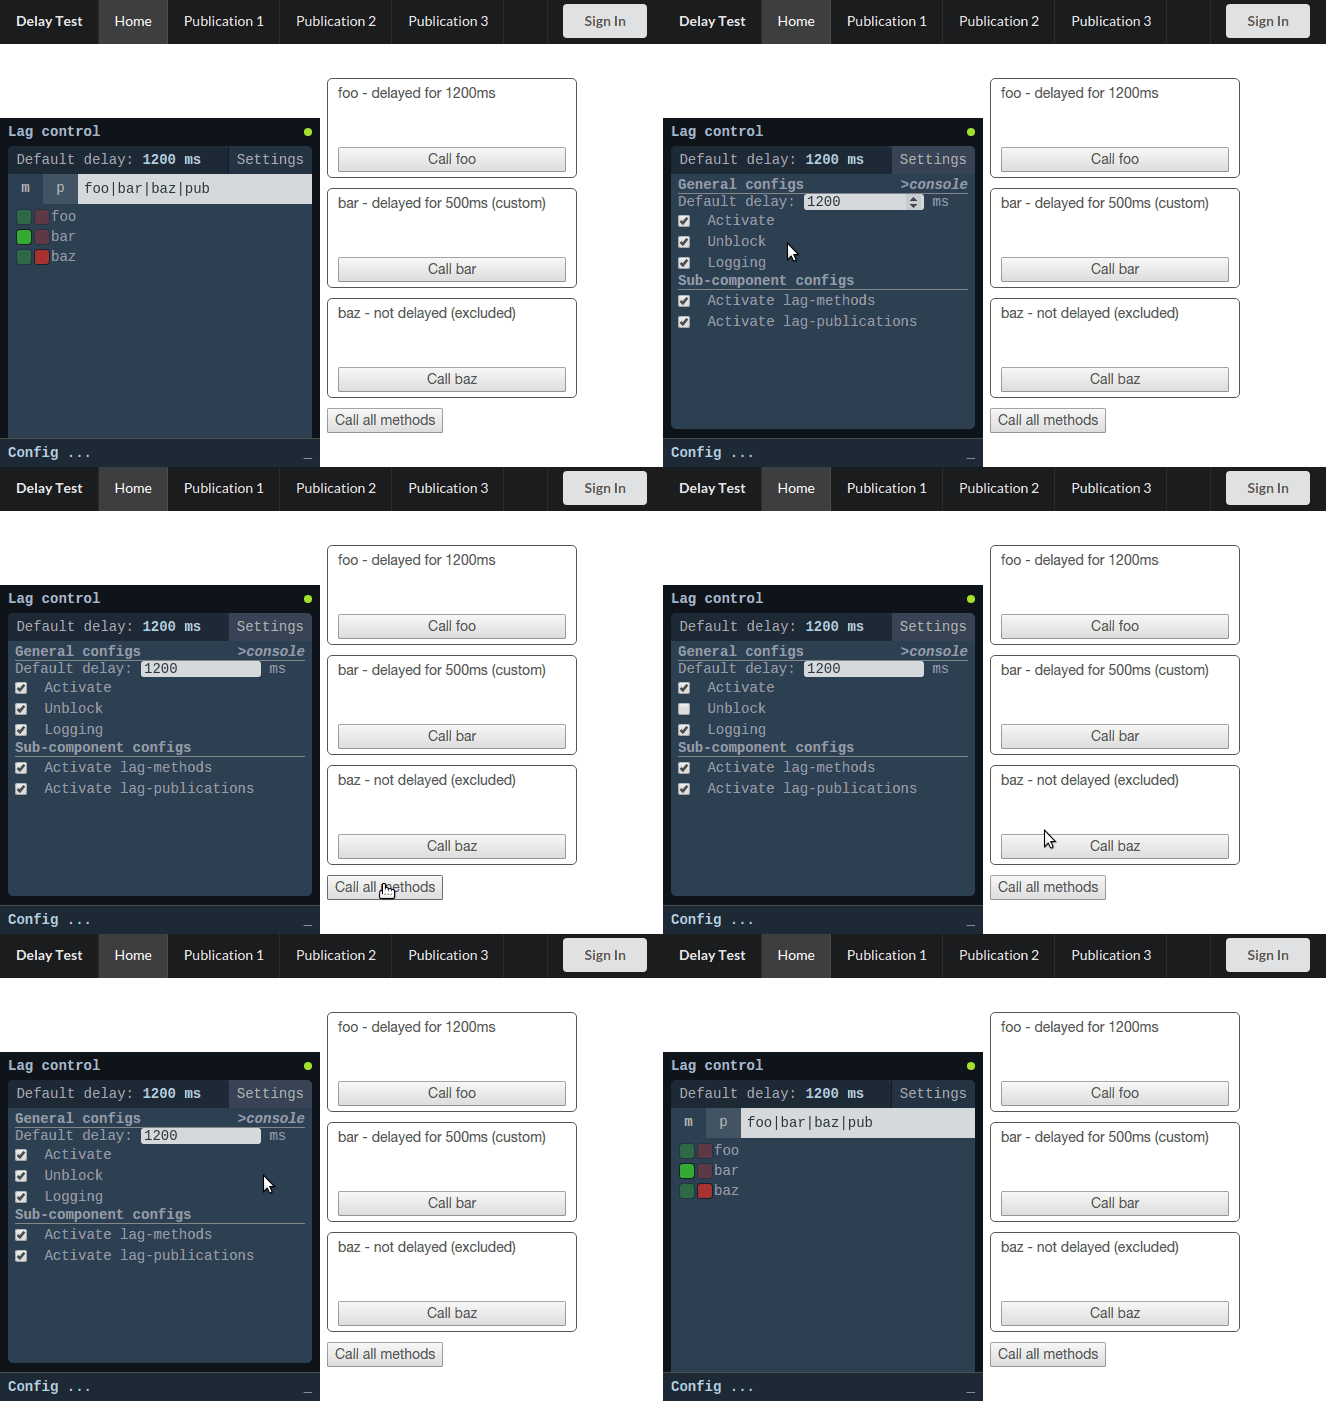
The settings button at the top right corner toggles the settings view.
When the settings view is visible, check/uncheck the unblock option to enable/disable this option.
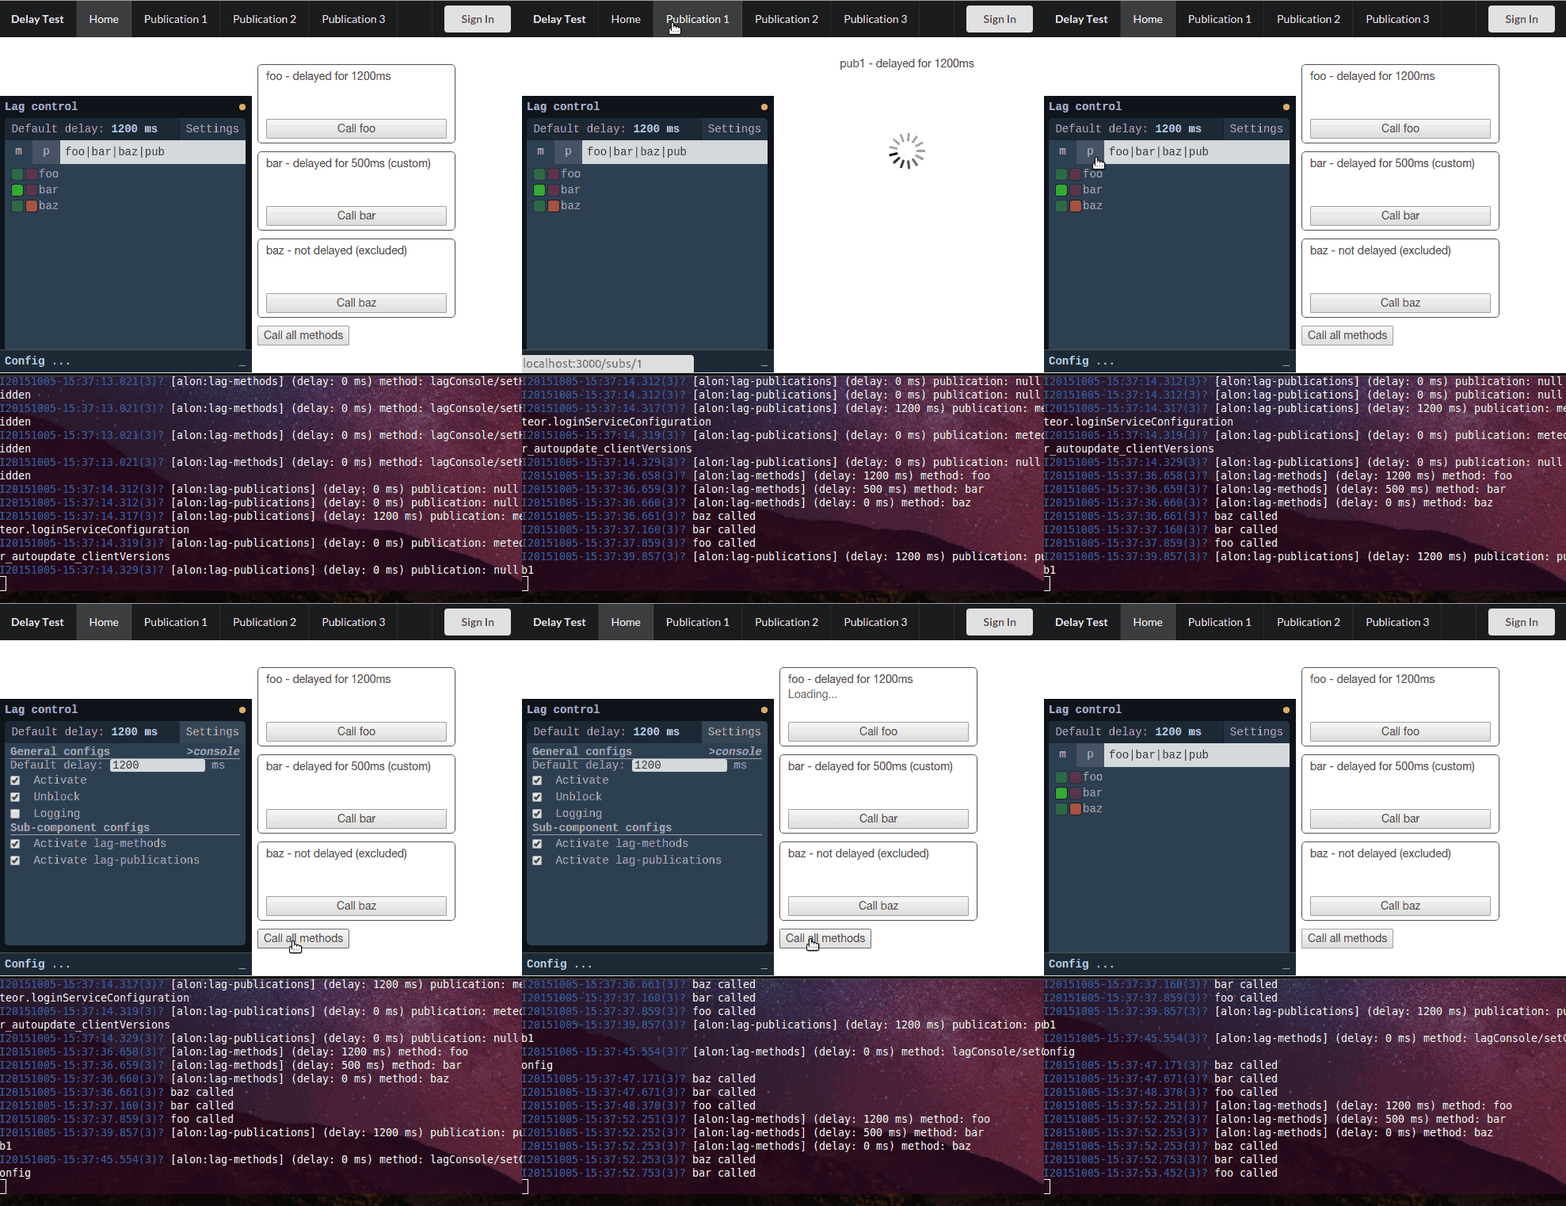
In this example:
foohas no custom settings, so it will be delayed for the default delay (1200 ms).barhas a custom delay of 500 ms.bazis excluded, and will therefore not be delayed.
The methods are called in the order foo>bar>baz.
unblock enabled
All of the methods run in parallel, so baz returns almost immediately, while bar runs and responds after 500 ms and foo finishes last, after 1200 ms.
unblock disabled
This time foo runs first, with a 1 second delay. Only after it is done, bar is processed. It is delayed for 500 more milliseconds and then baz starts running immediately, so foo returns approximately 1000 ms after the button is clicked and bar and baz return after approximately 1700ms.
Publications are configured in the same way methods are. The Publication pages in the demo above are waiting on publications to be ready. It shows the effects of setting custom delays and excluding publications.
Methods and publications delays can be individually deactivated. If the global "Activate" option is not checked, nothing will be delayed. If it is on, it is possible to disable only one of the target types. In such case, the indicator in the top right corner will turn yellow.
Toggle the Logging checkbox to enable/disable this option.
When enabled, the package will log each target call with the delay calculated for it based on its settings.
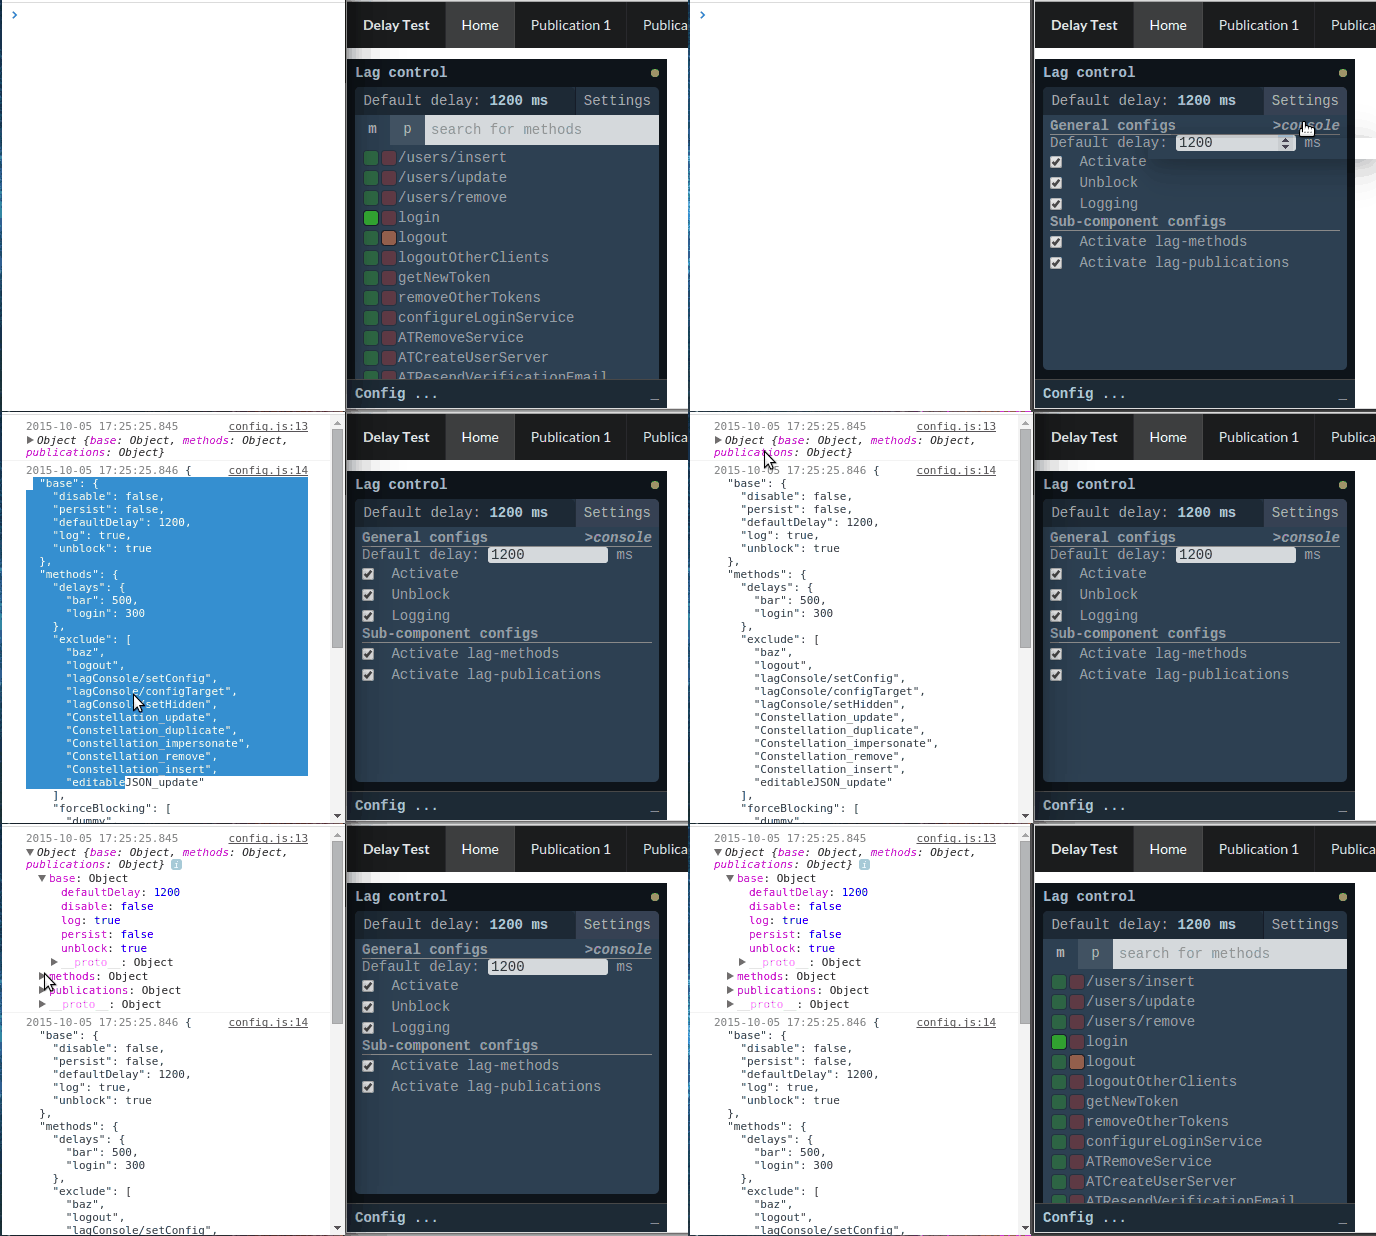
Clicking on the designated text prints the current configuration to the console, both an object itself and a JSON representation of it. It can then be edited and placed in the json configuration file.
At the moment this feature is rather crude and prints options that are set by default (such as the default force-blocking methods).
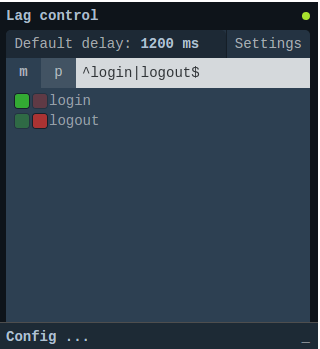
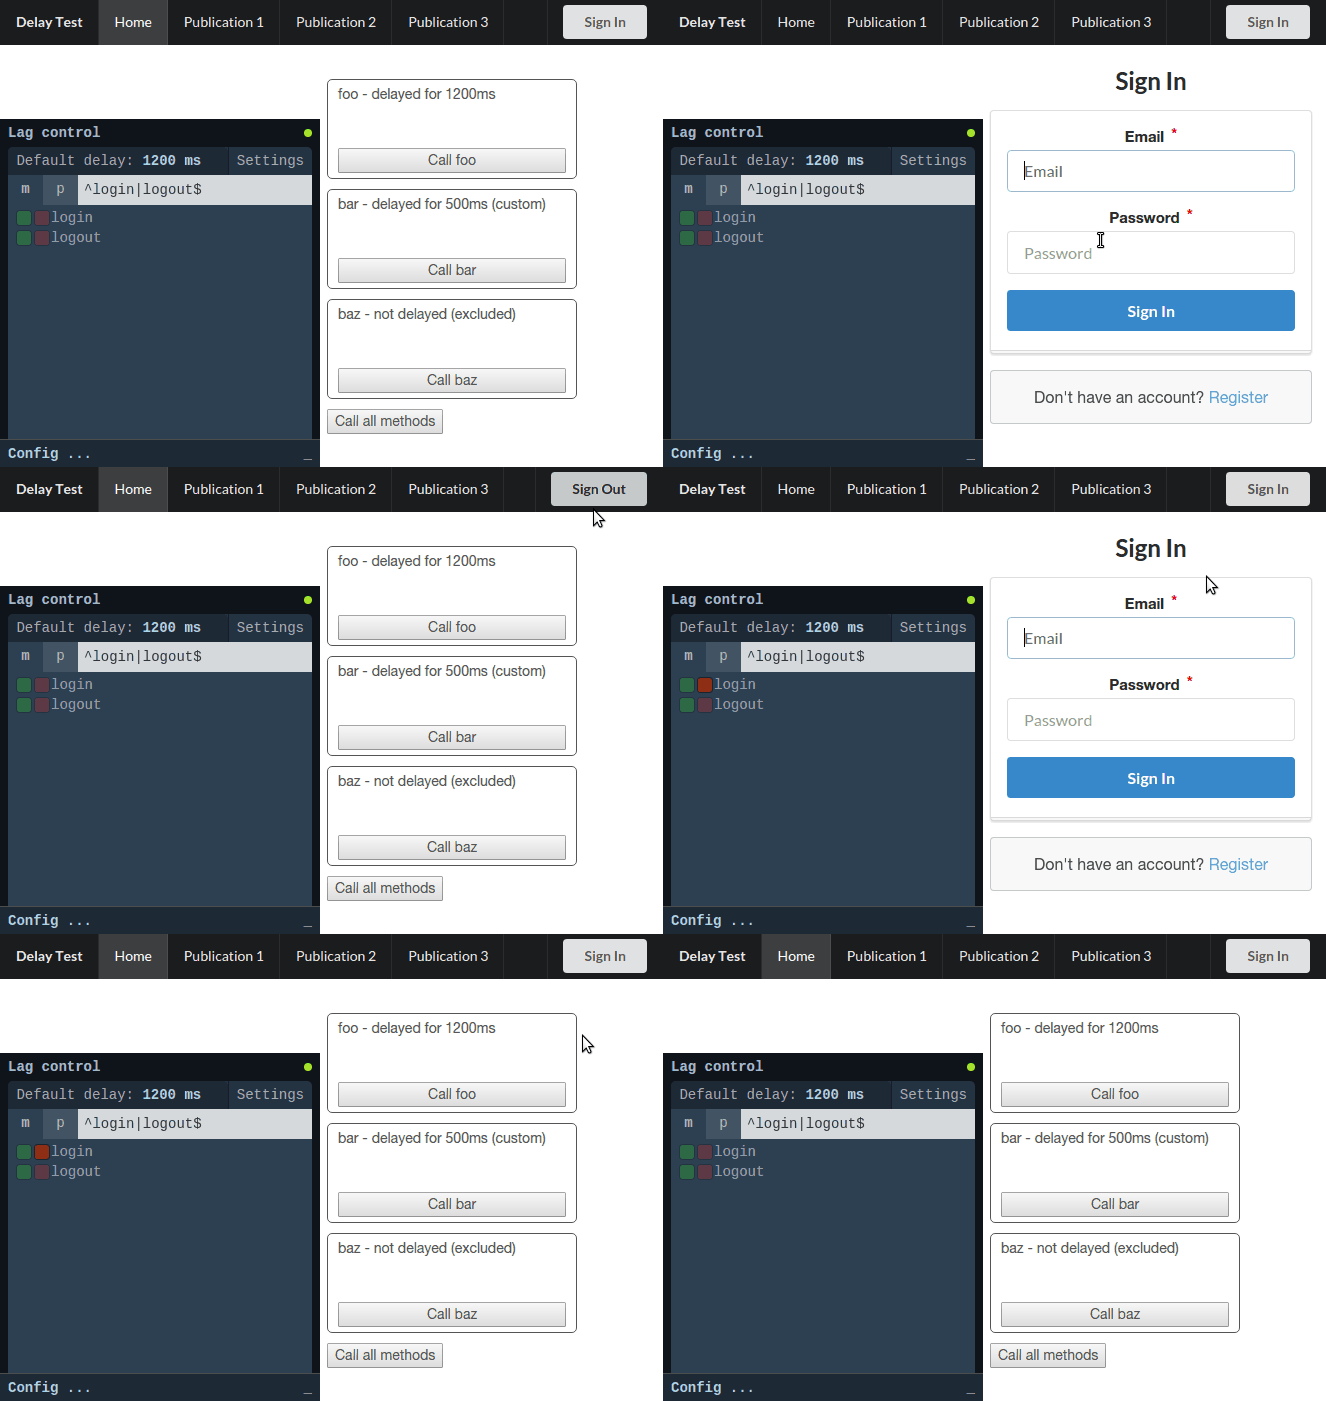
This example shows the effect of setting method delays on the login/logout action.
$ git clone https://github.com/MasterAM/meteor-lag-console.git
$ cd meteor-lag-console
$ meteor test-packages ./
and pointing your browser to the relevant URL (usually http://localhost:3000).
See the changelog file.
Brent Abrahams for his kind advice and contributions.
