Setup Authentication for Google Assistant Unofficial Desktop Client
-
Head on to Actions Console
-
Click on the "
New Project" button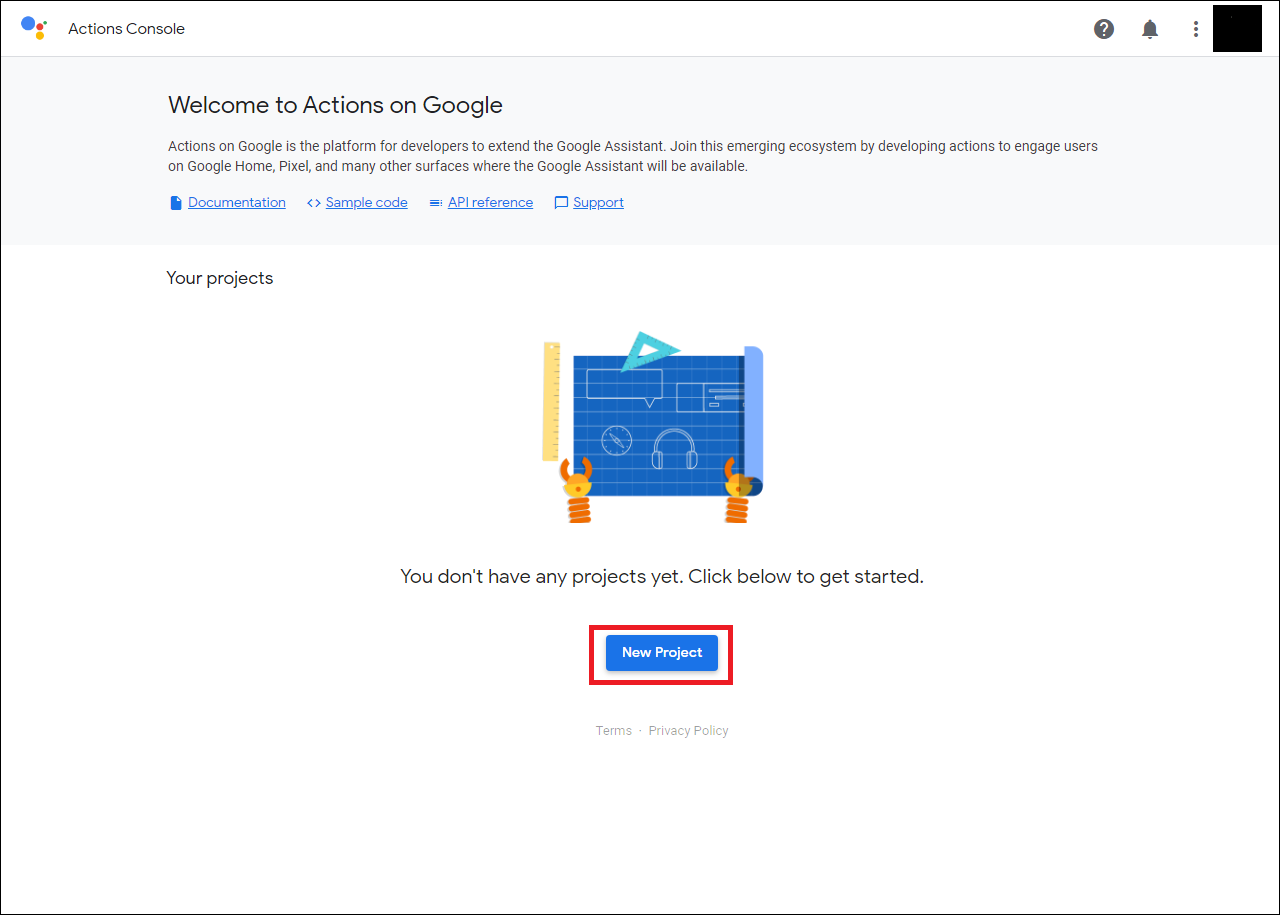
-
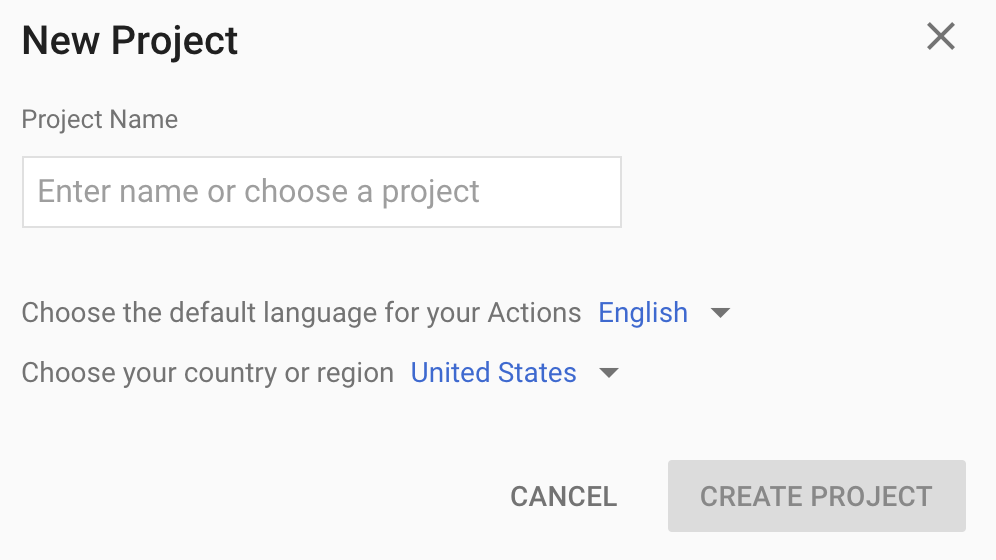
You will see a "New Project" popup. Enter any project name and set other options accordingly and click on "Create Project button"
-
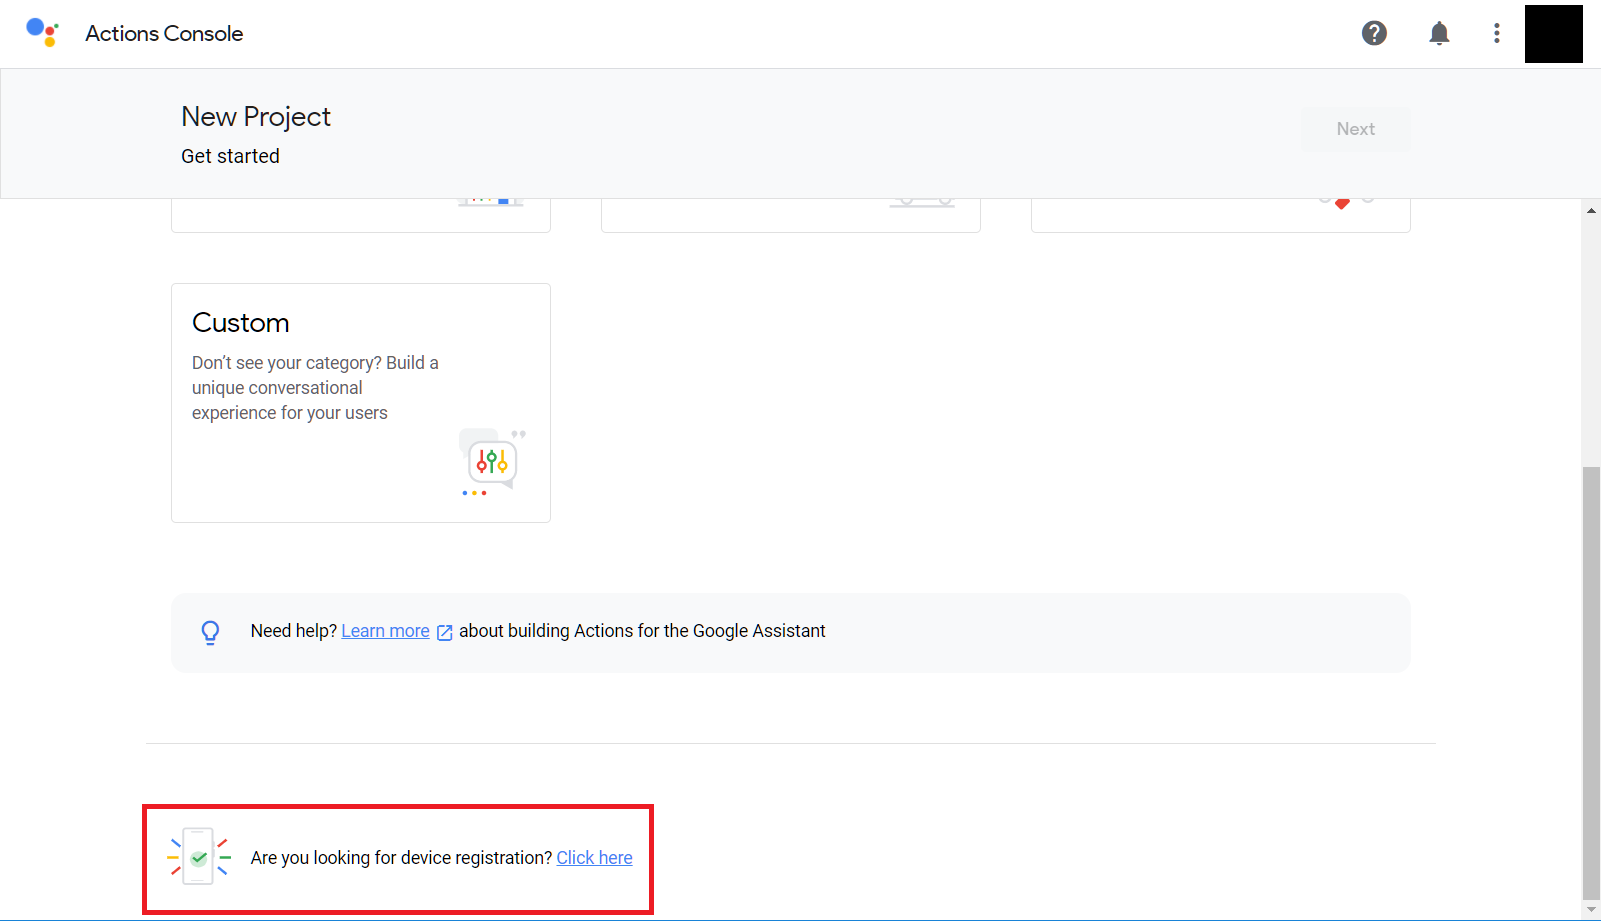
Now, after your project is created, you will see the "onboarding" page. Just scroll to the bottom and click on the "click here" link right after the text "Are you looking for device registration?" to proceed to Device Registration
-
Wait until your project is created...
-
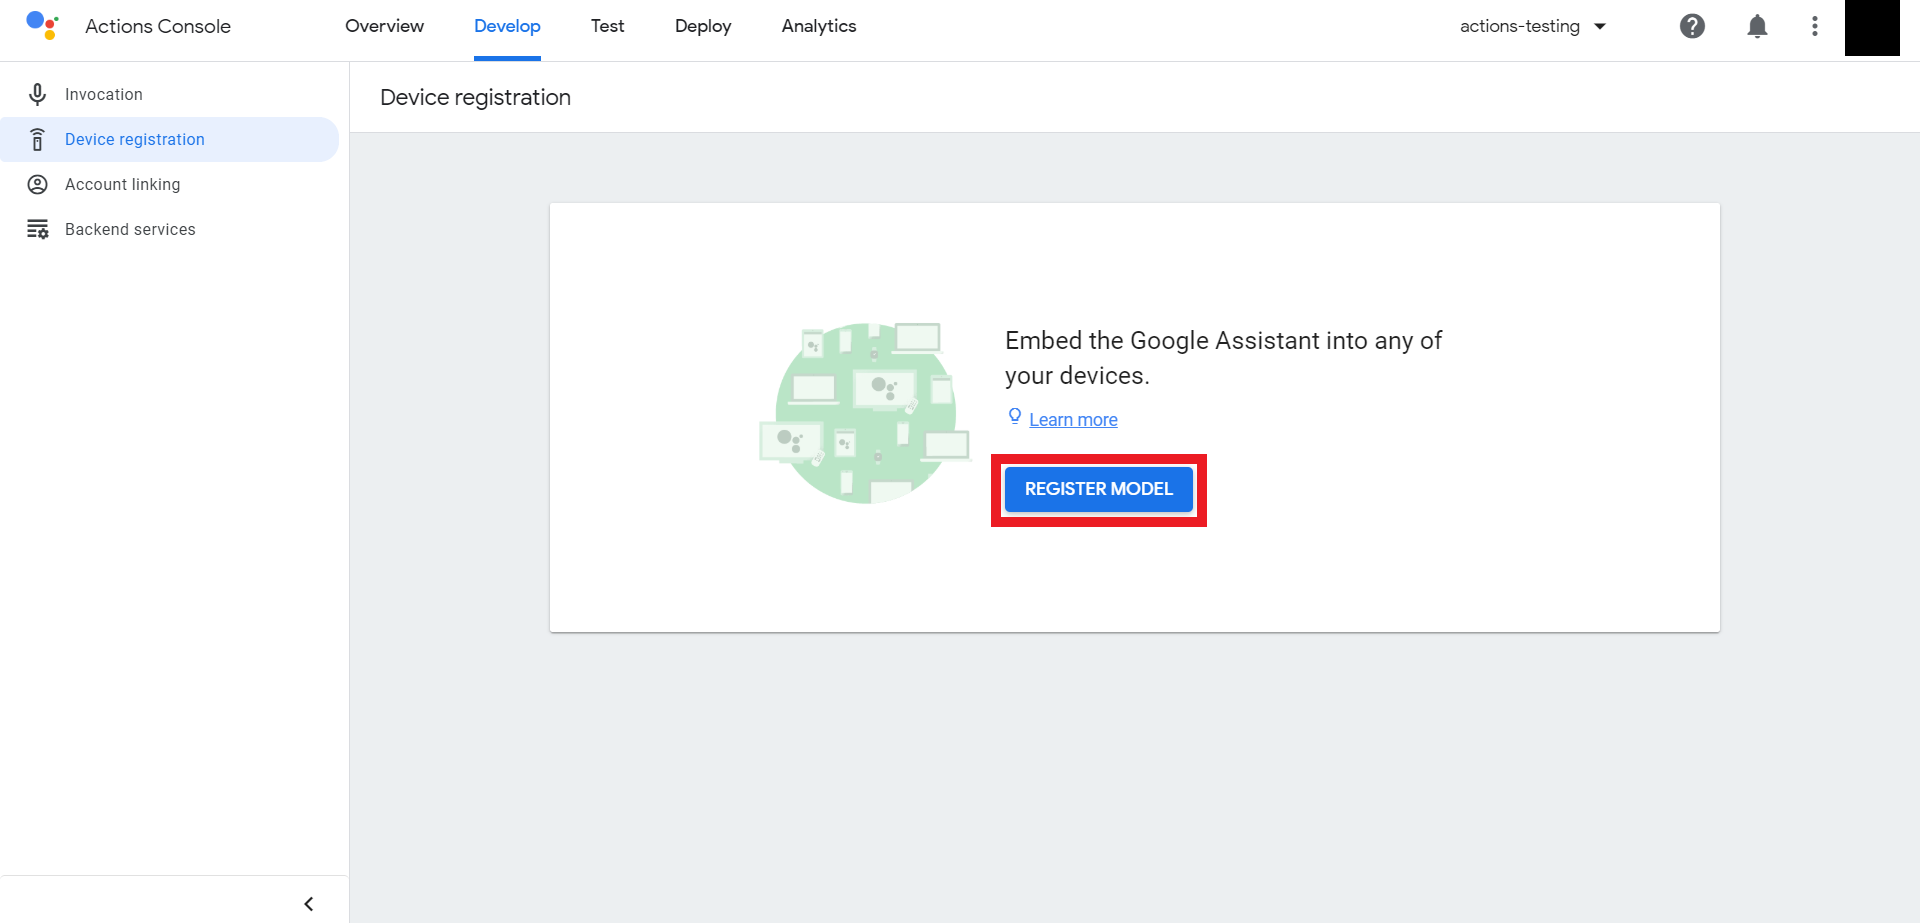
Now, you will be landed in the "Device Registration" page. Here, click on "Register Model" button
-
You will see a "Register Model" popup, fill all the details and for device type, select any (eg:
light). Then, finally click on "REGISTER MODEL"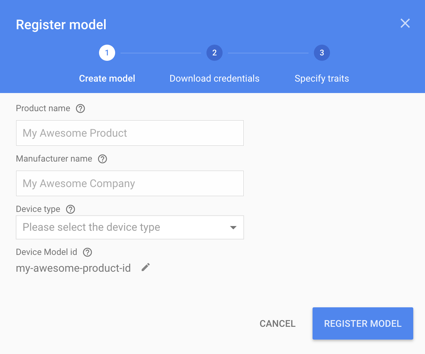
-
Now, after you have created a model, you will be asked to download the credentials. Skip this by clicking on Next.

Now, you are done with the registration process. But in order to authenticate, you have to "Configure Consent Screen"
-
Head on to Cloud Console
-
In the Navbar beside the logo, click on the button to select a project

-
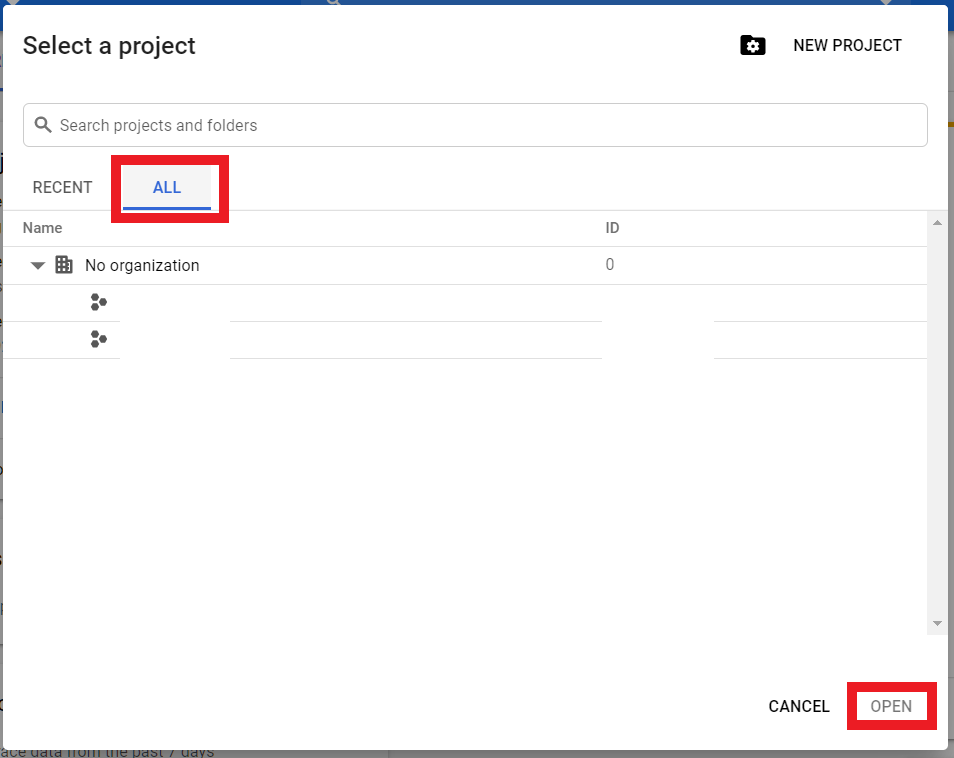
You will see a popup titled "Select a project". Click on the "ALL" tab and select the name of the project you just created. Then, press OPEN to continue
-
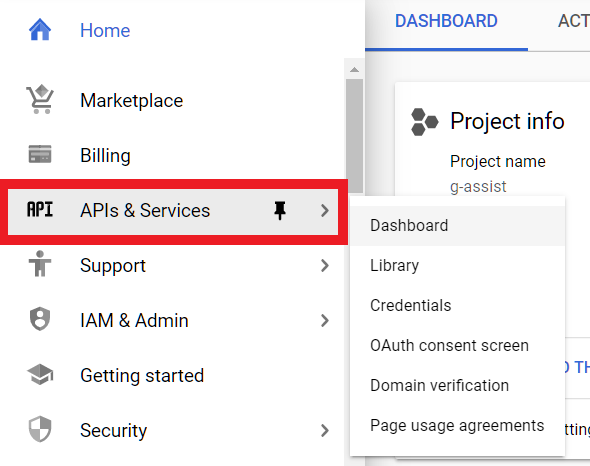
Now, from the hamburger menu, select "APIs & Services"
-
Click on "ENABLE APIS AND SERVICES"

-
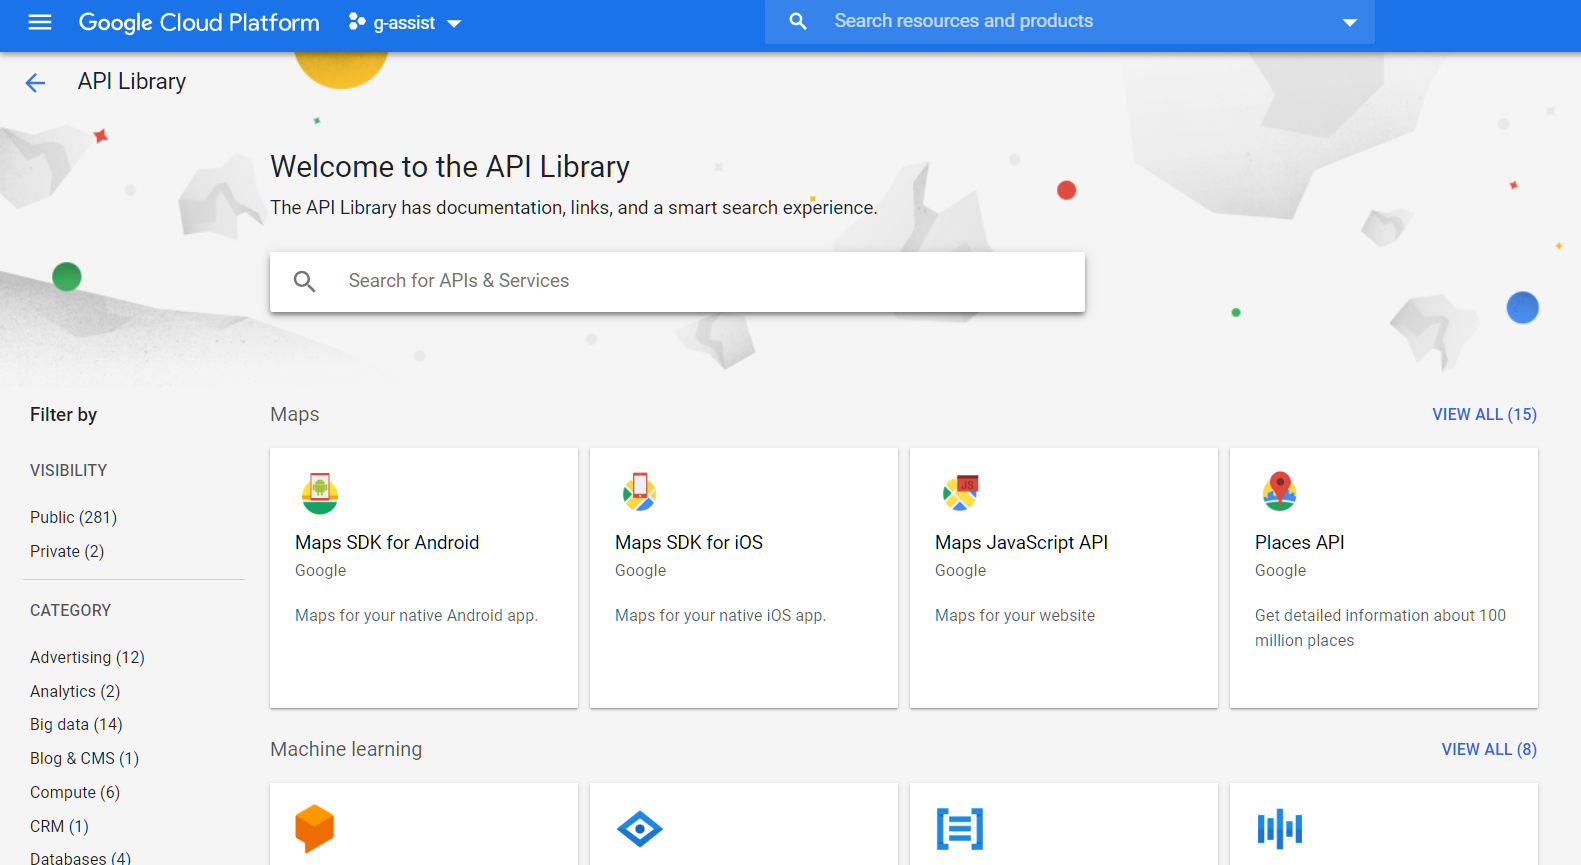
You will be landed in "API Library"
-
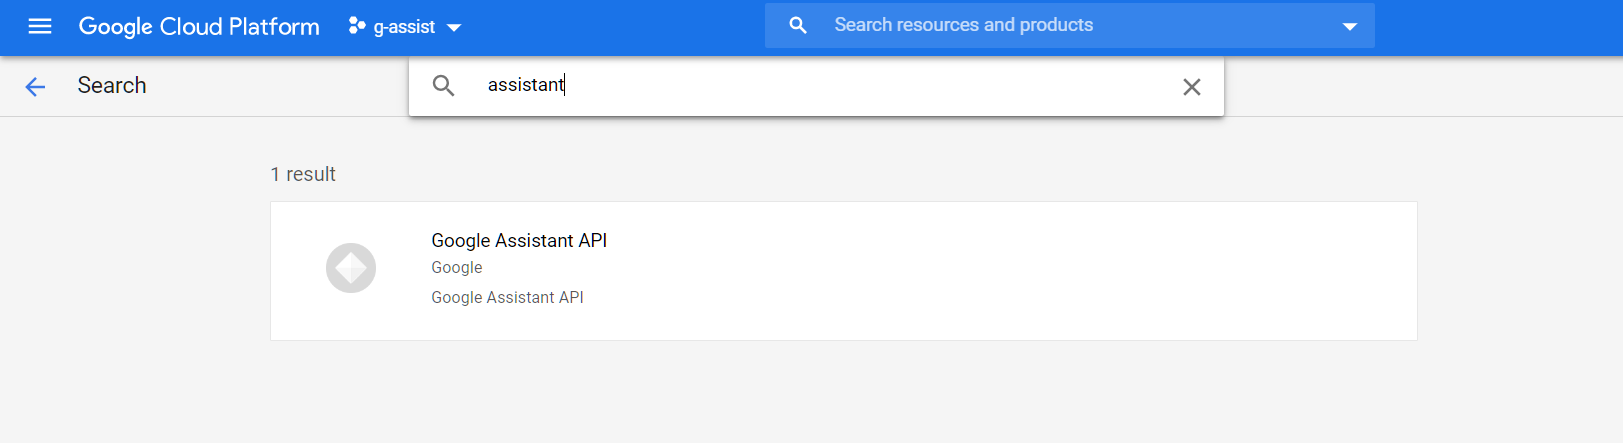
In the search bar, type "Google Assistant" and click on "Google Assistant API"
-
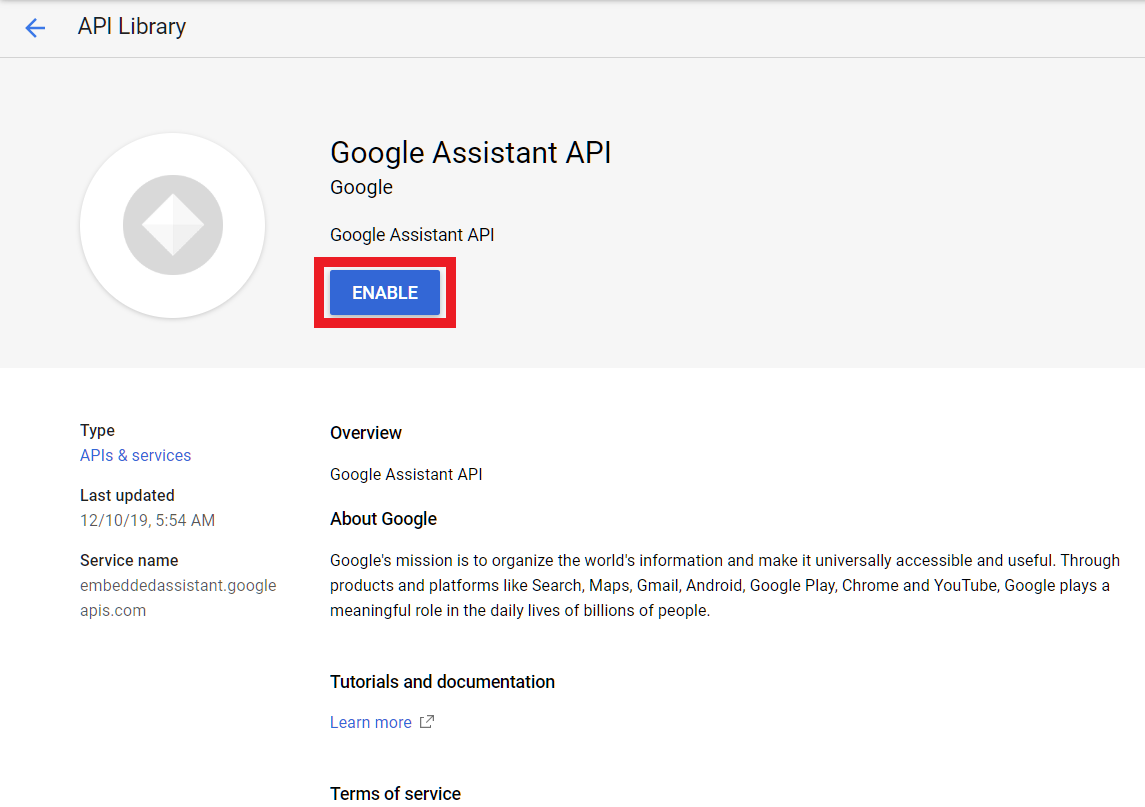
Press "ENABLE" button to enable the API
-
Wait until the API is enabled
-
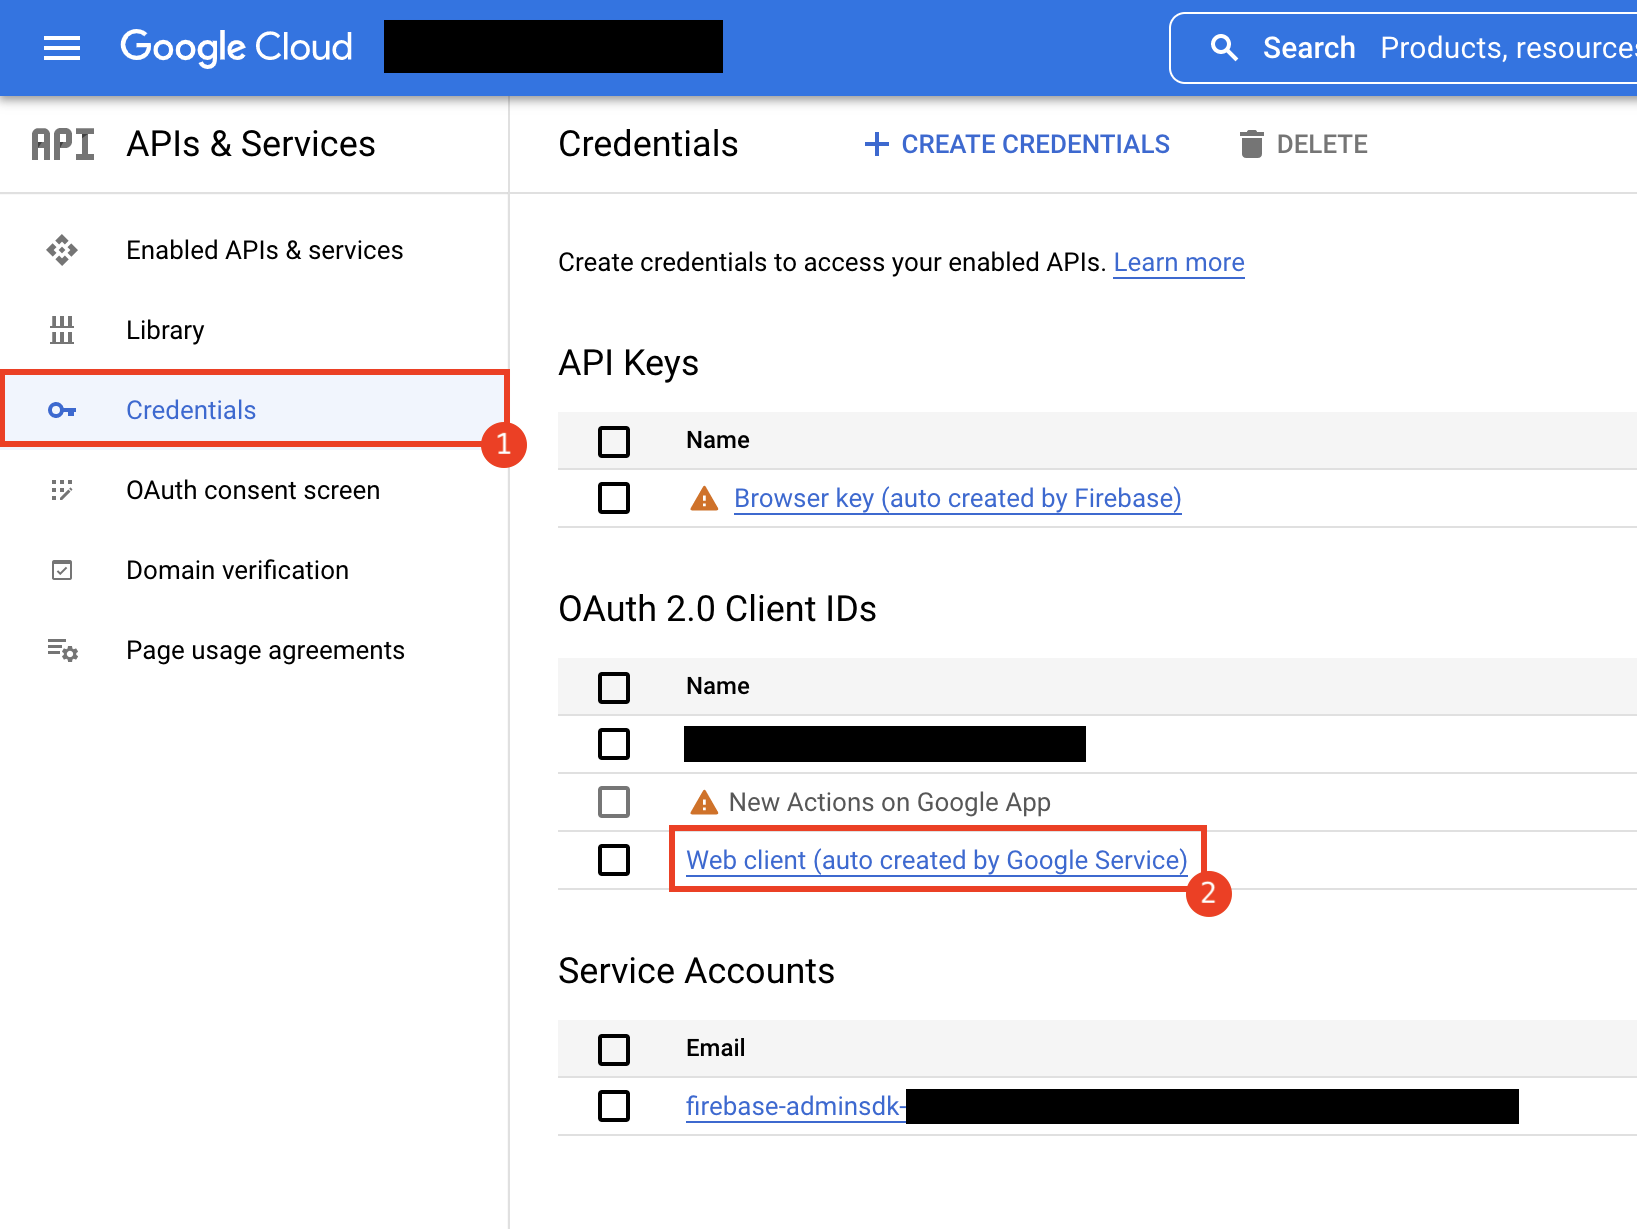
Now, from the hamburger menu, click on "Credentials"
-
Click on the "CONFIGURE CONSENT SCREEN"

-
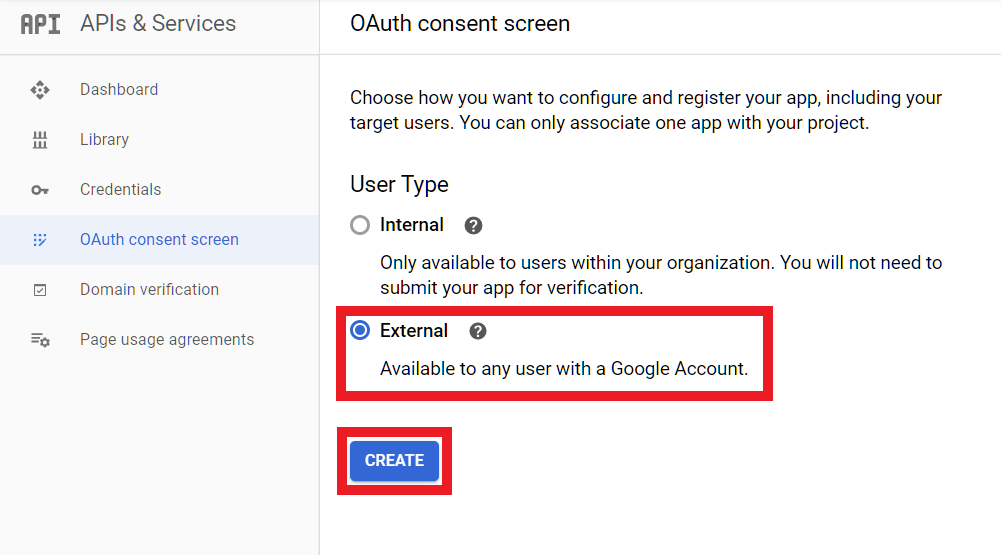
In the OAuth Consent Screen under User Type, select External. Then, click CREATE
-
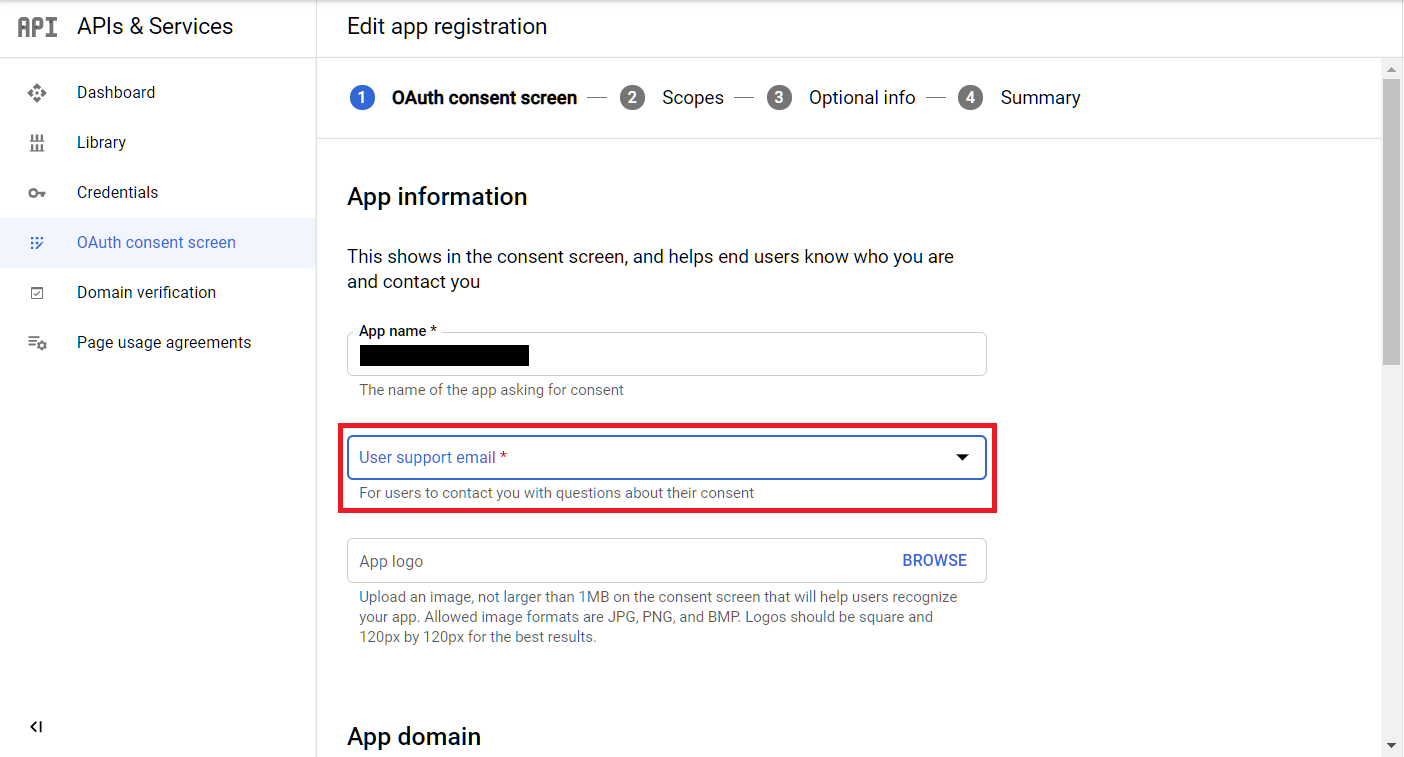
In the next page, under "App Registration" select your email for "User Support email"
-
Scroll down to the bottom of the page. Under "Developer Contact Information", fill in your email address for "Email addresses" and click on SAVE AND CONTINUE

-
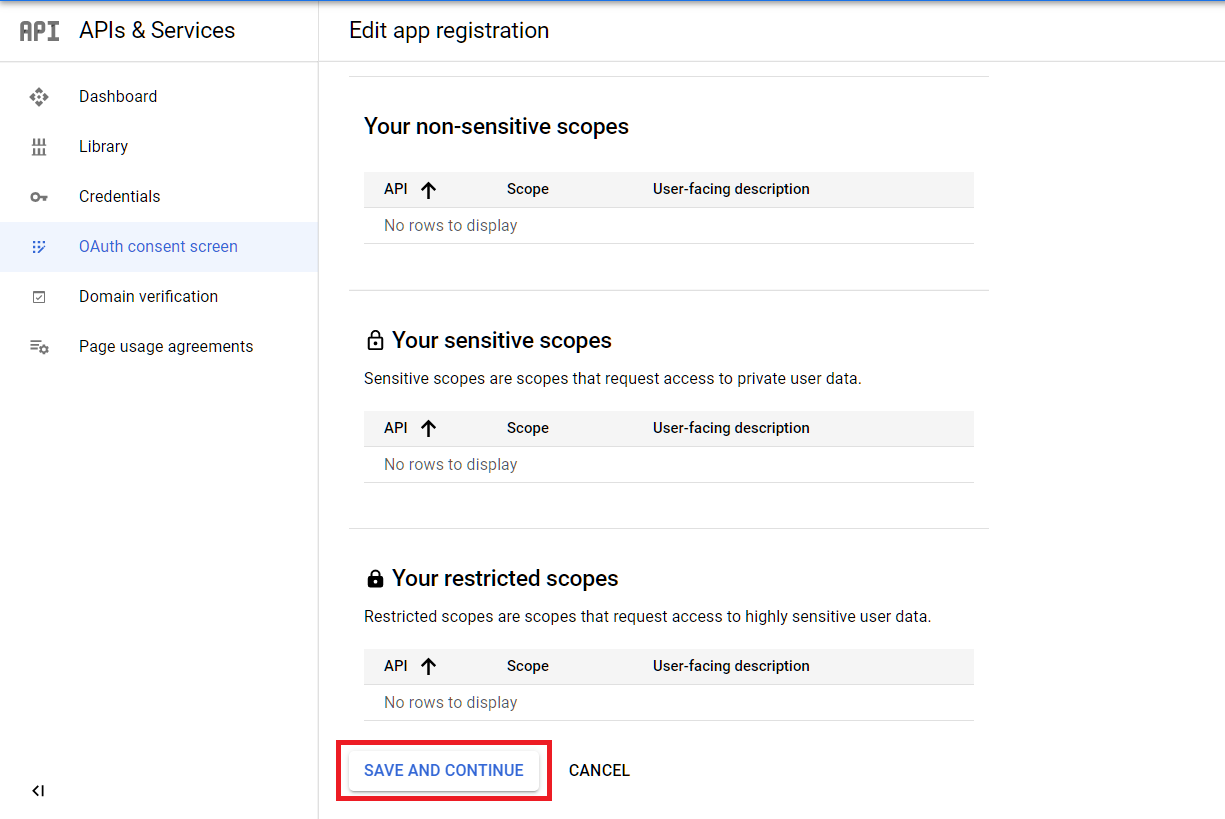
Now skip the "Scopes" screen by clicking on SAVE AND CONTINUE
-
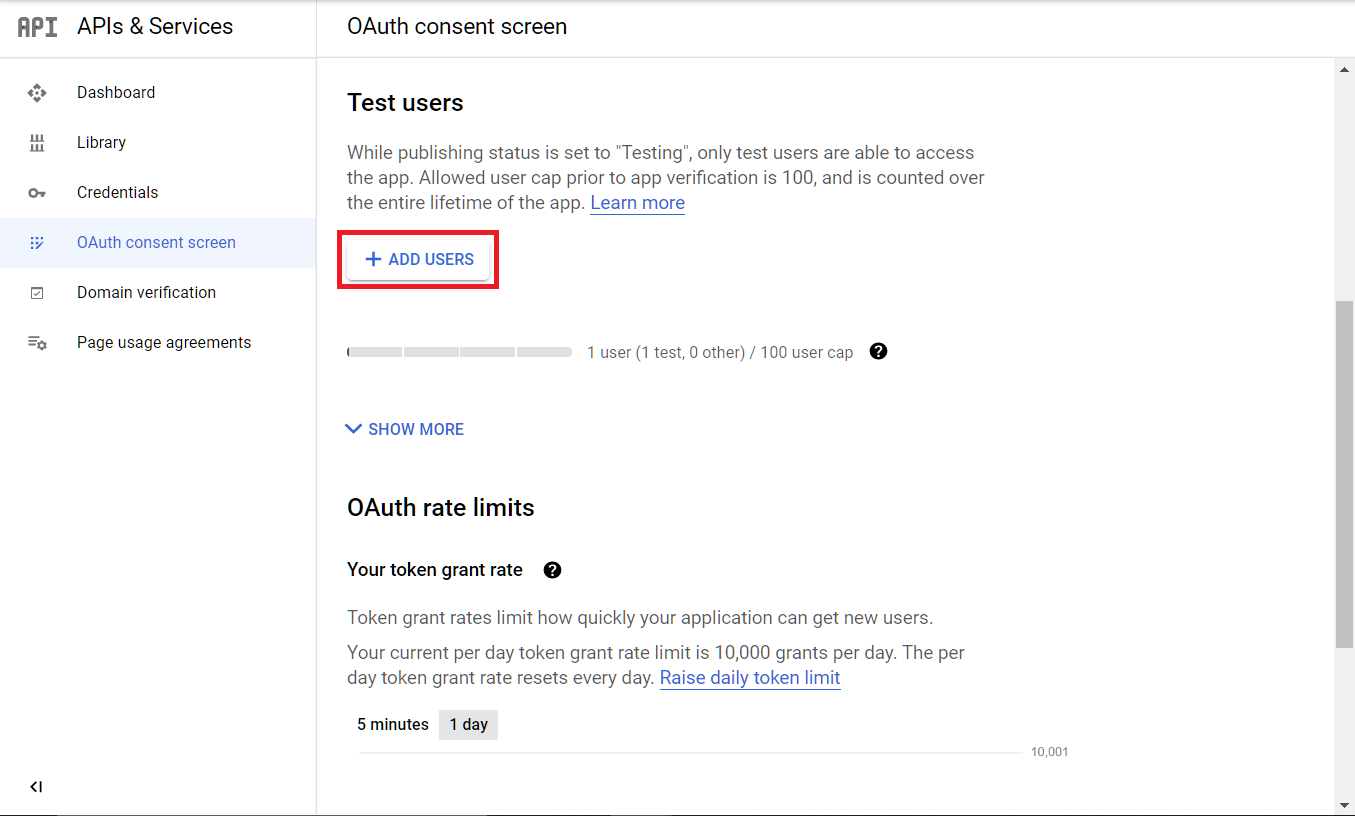
Under "Test Users" click on "ADD USERS" button
-
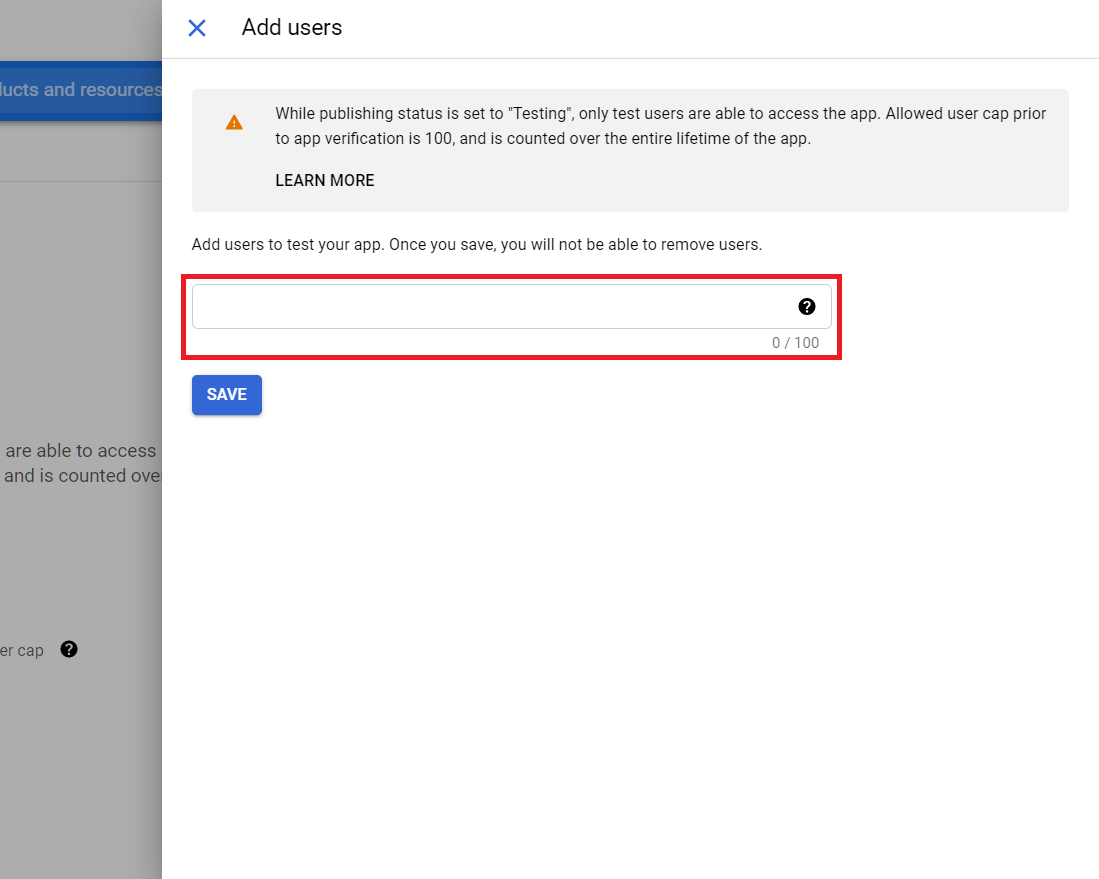
Under "Add Users", type the email address of the Gmail account that you will use to authenticate (preferably your current Gmail account). You can add multiple Gmail accounts by adding a comma after each of the Gmail accounts.
-
Select Credentials from the sidebar. Then, under the OAuth 2.0 Client IDs, click on Web Client to edit the web client credentials.
-
Update the redirct URI under the Authorized redirect URIs section to:
http://localhost:5754/auth/handler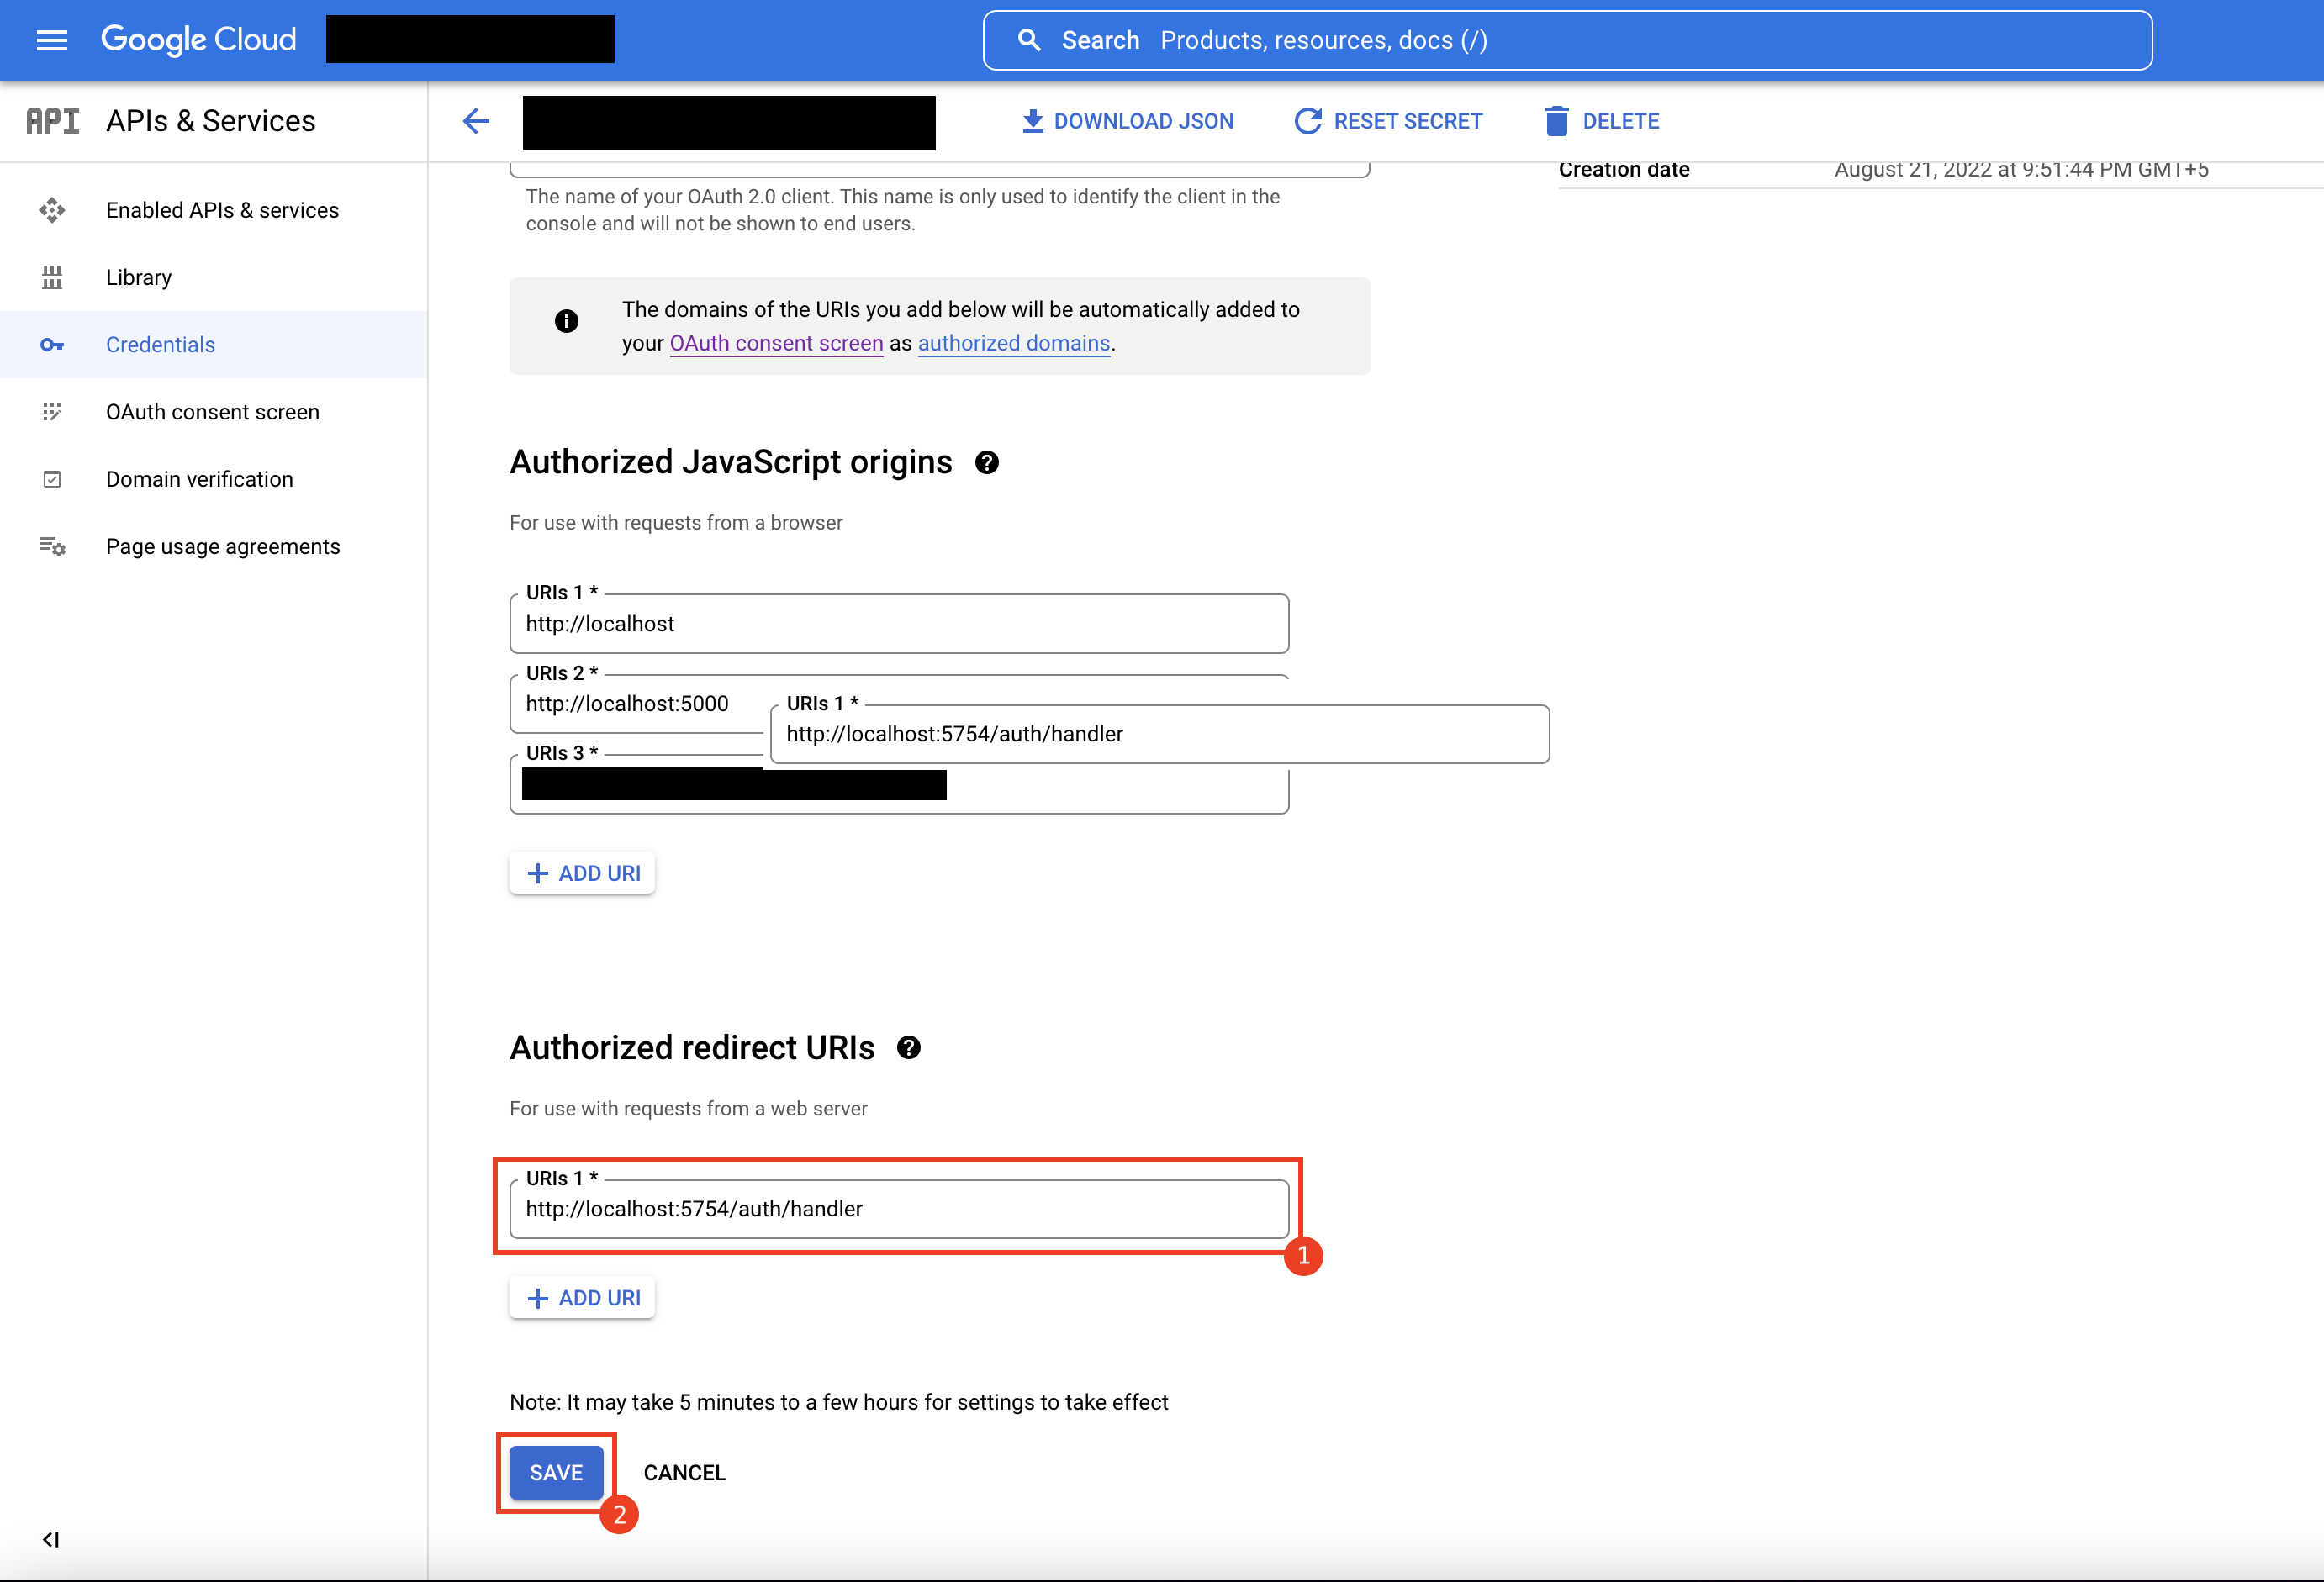
-
Now, click on Save. This will redirect you back to the credentials page.
-
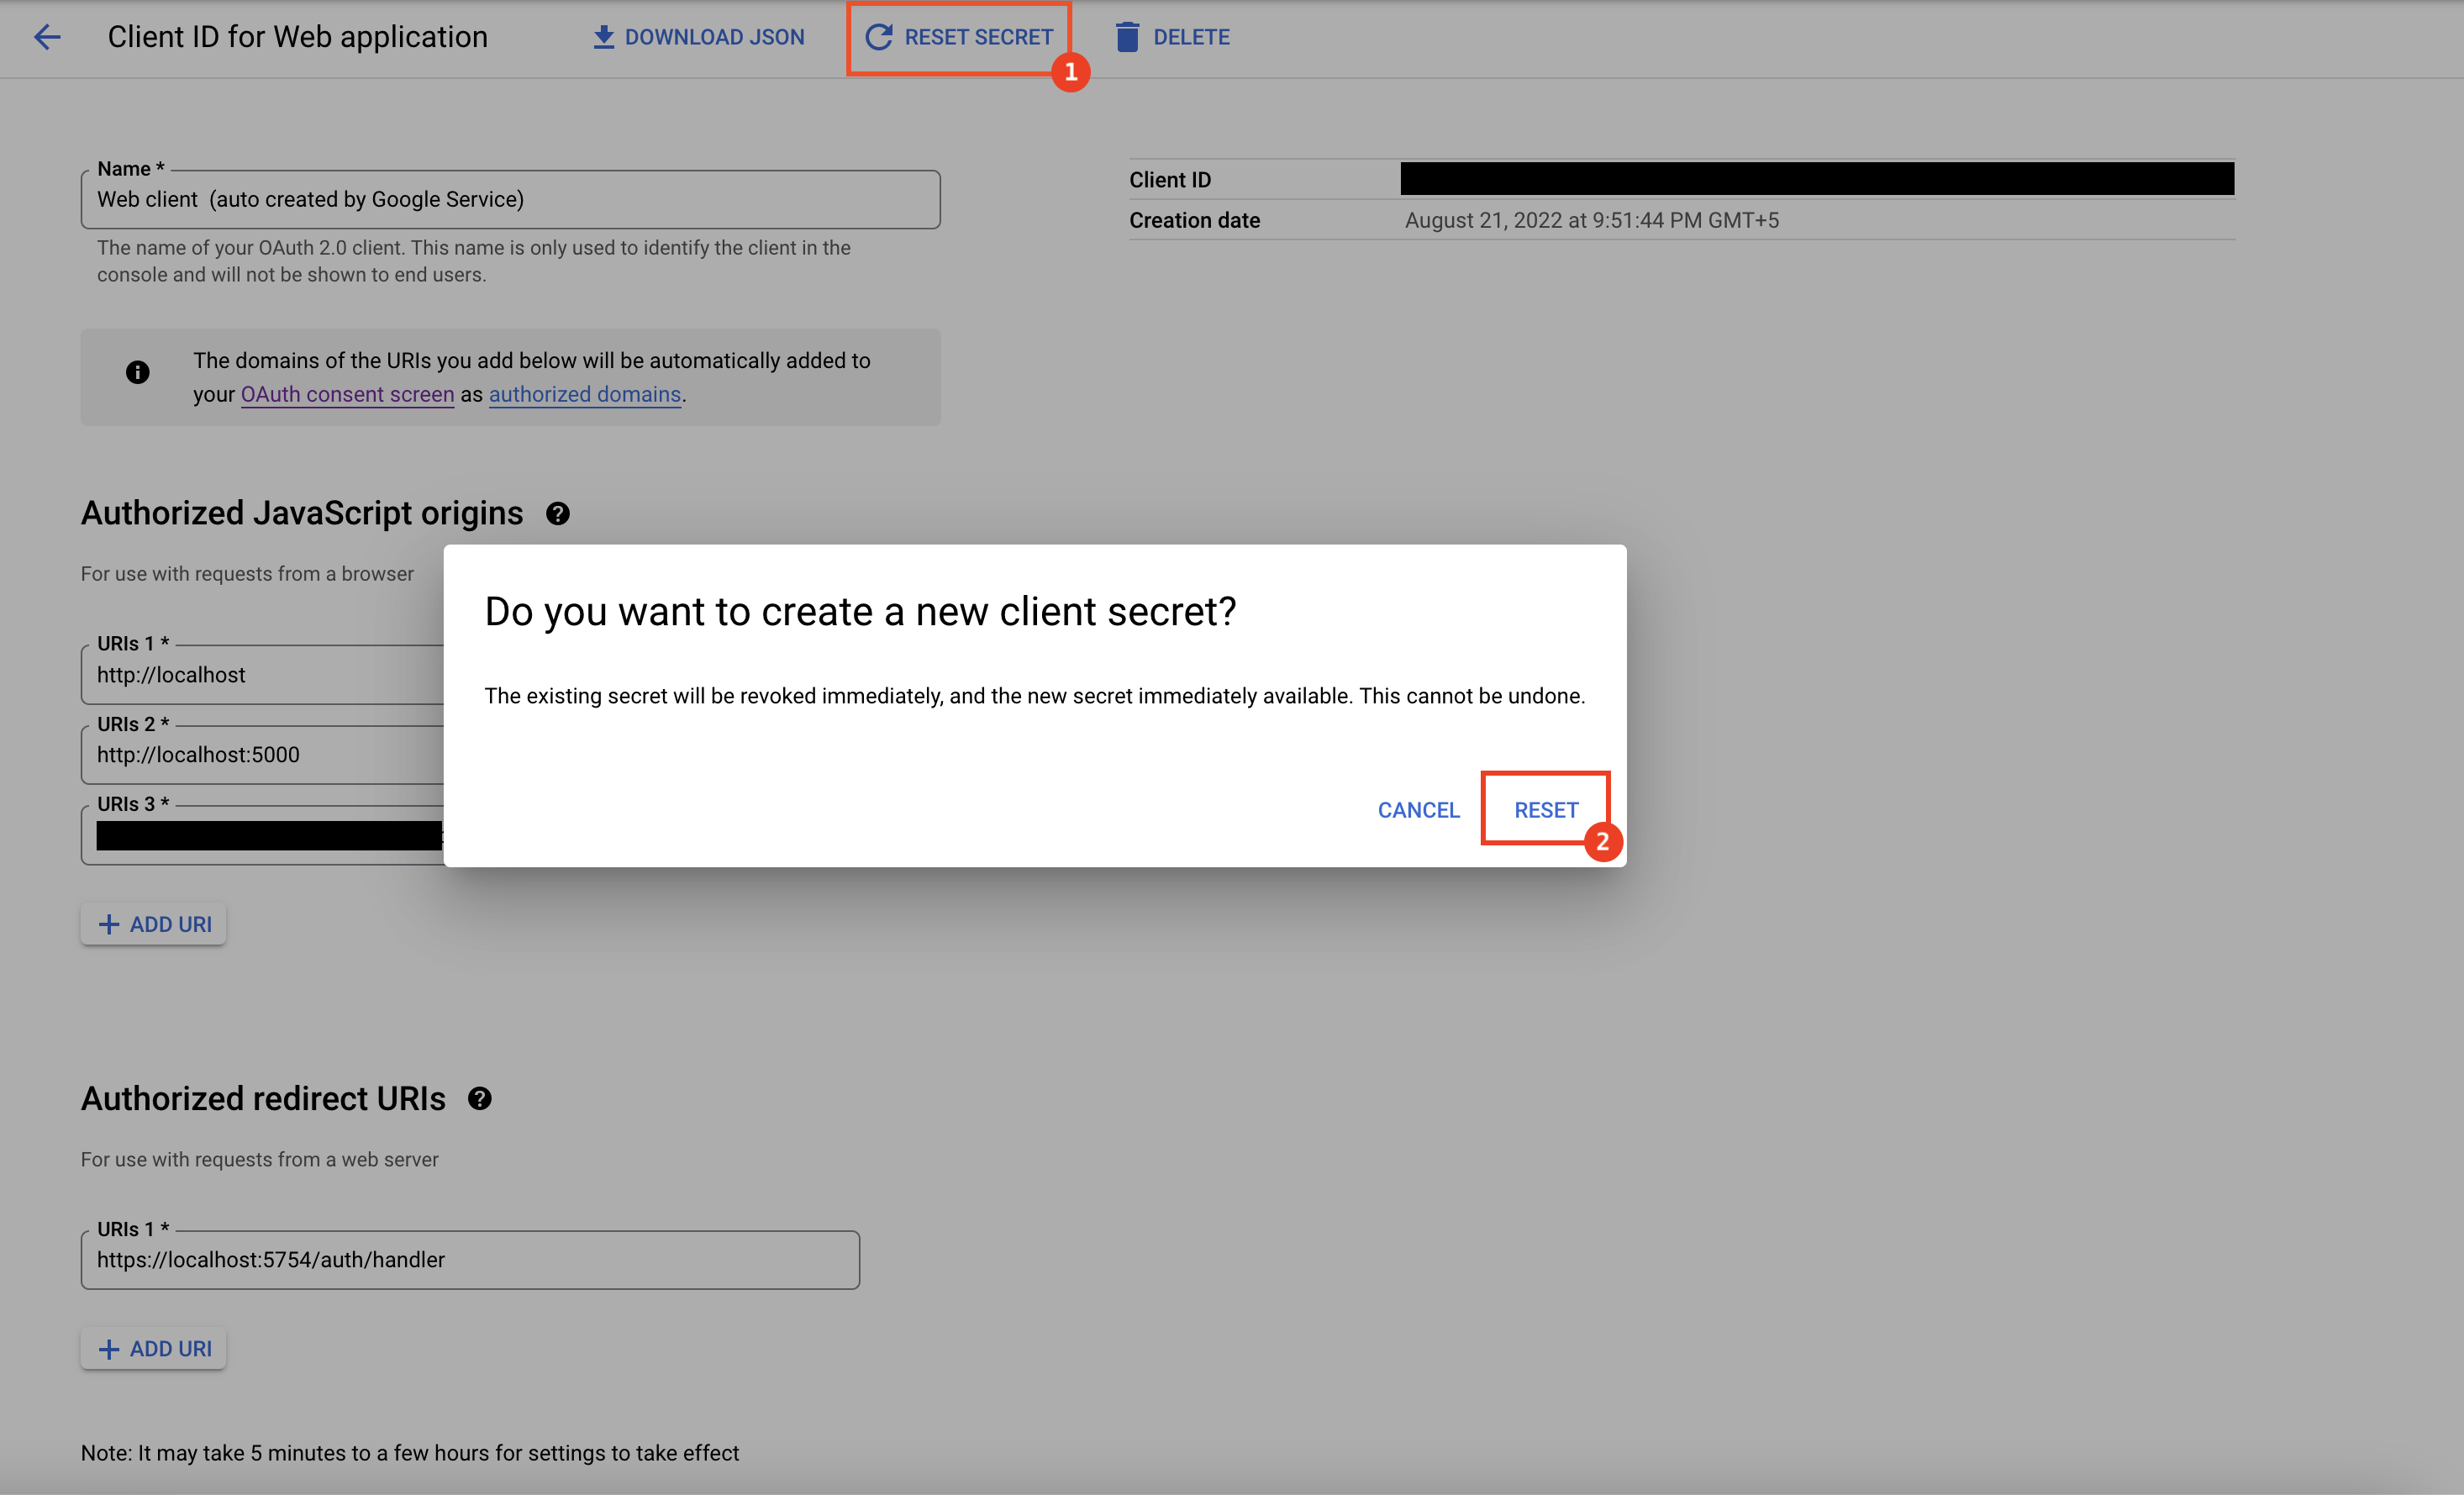
Click on Web Client again in order to reset the client secret.
-
Click on Reset Secret on the top. This will display a popup for confirmation. Click on Reset to confirm.
-
Click on Save again.
-
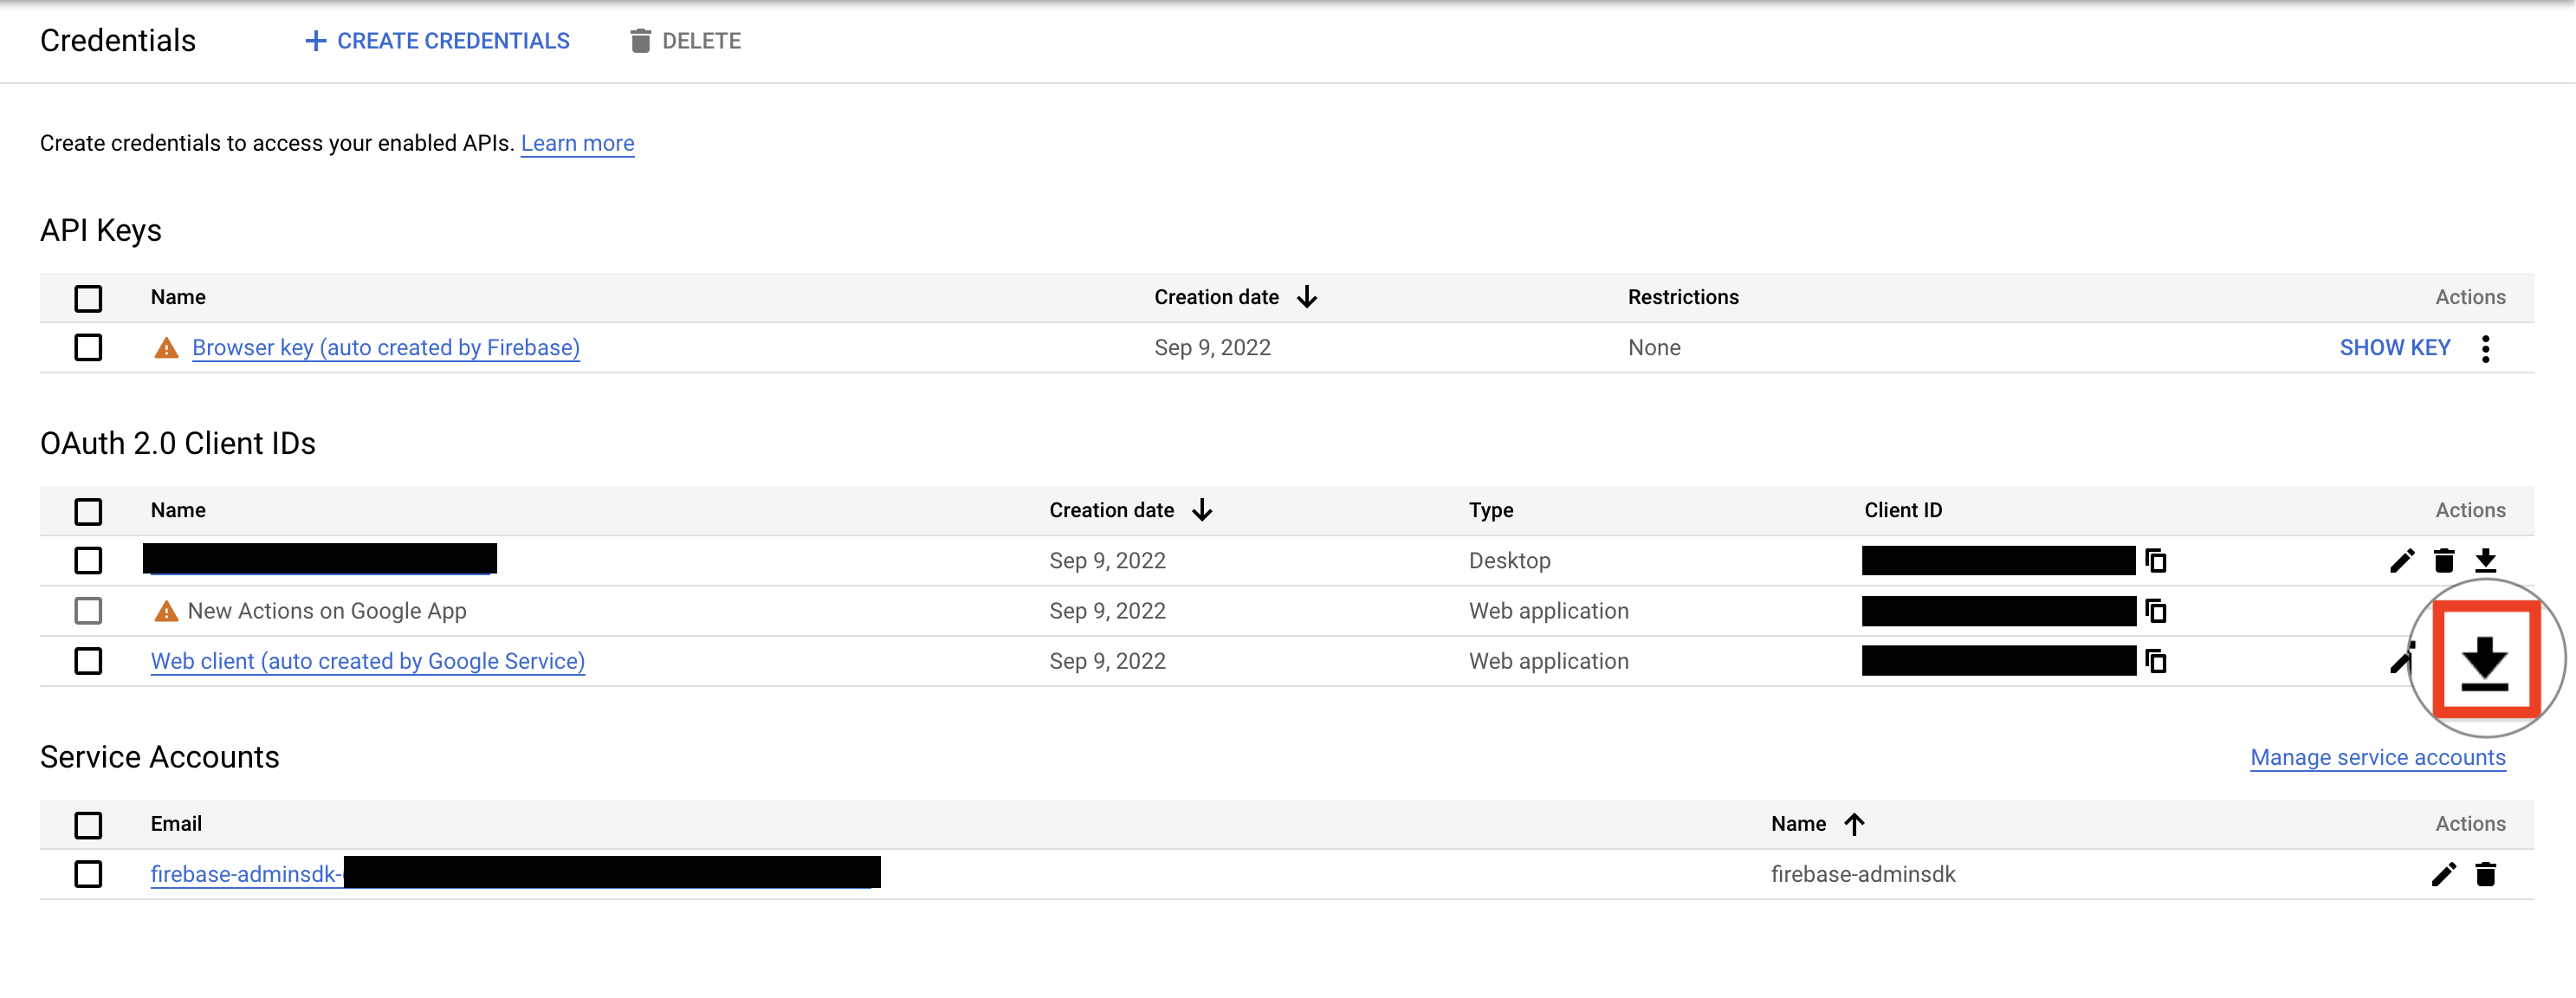
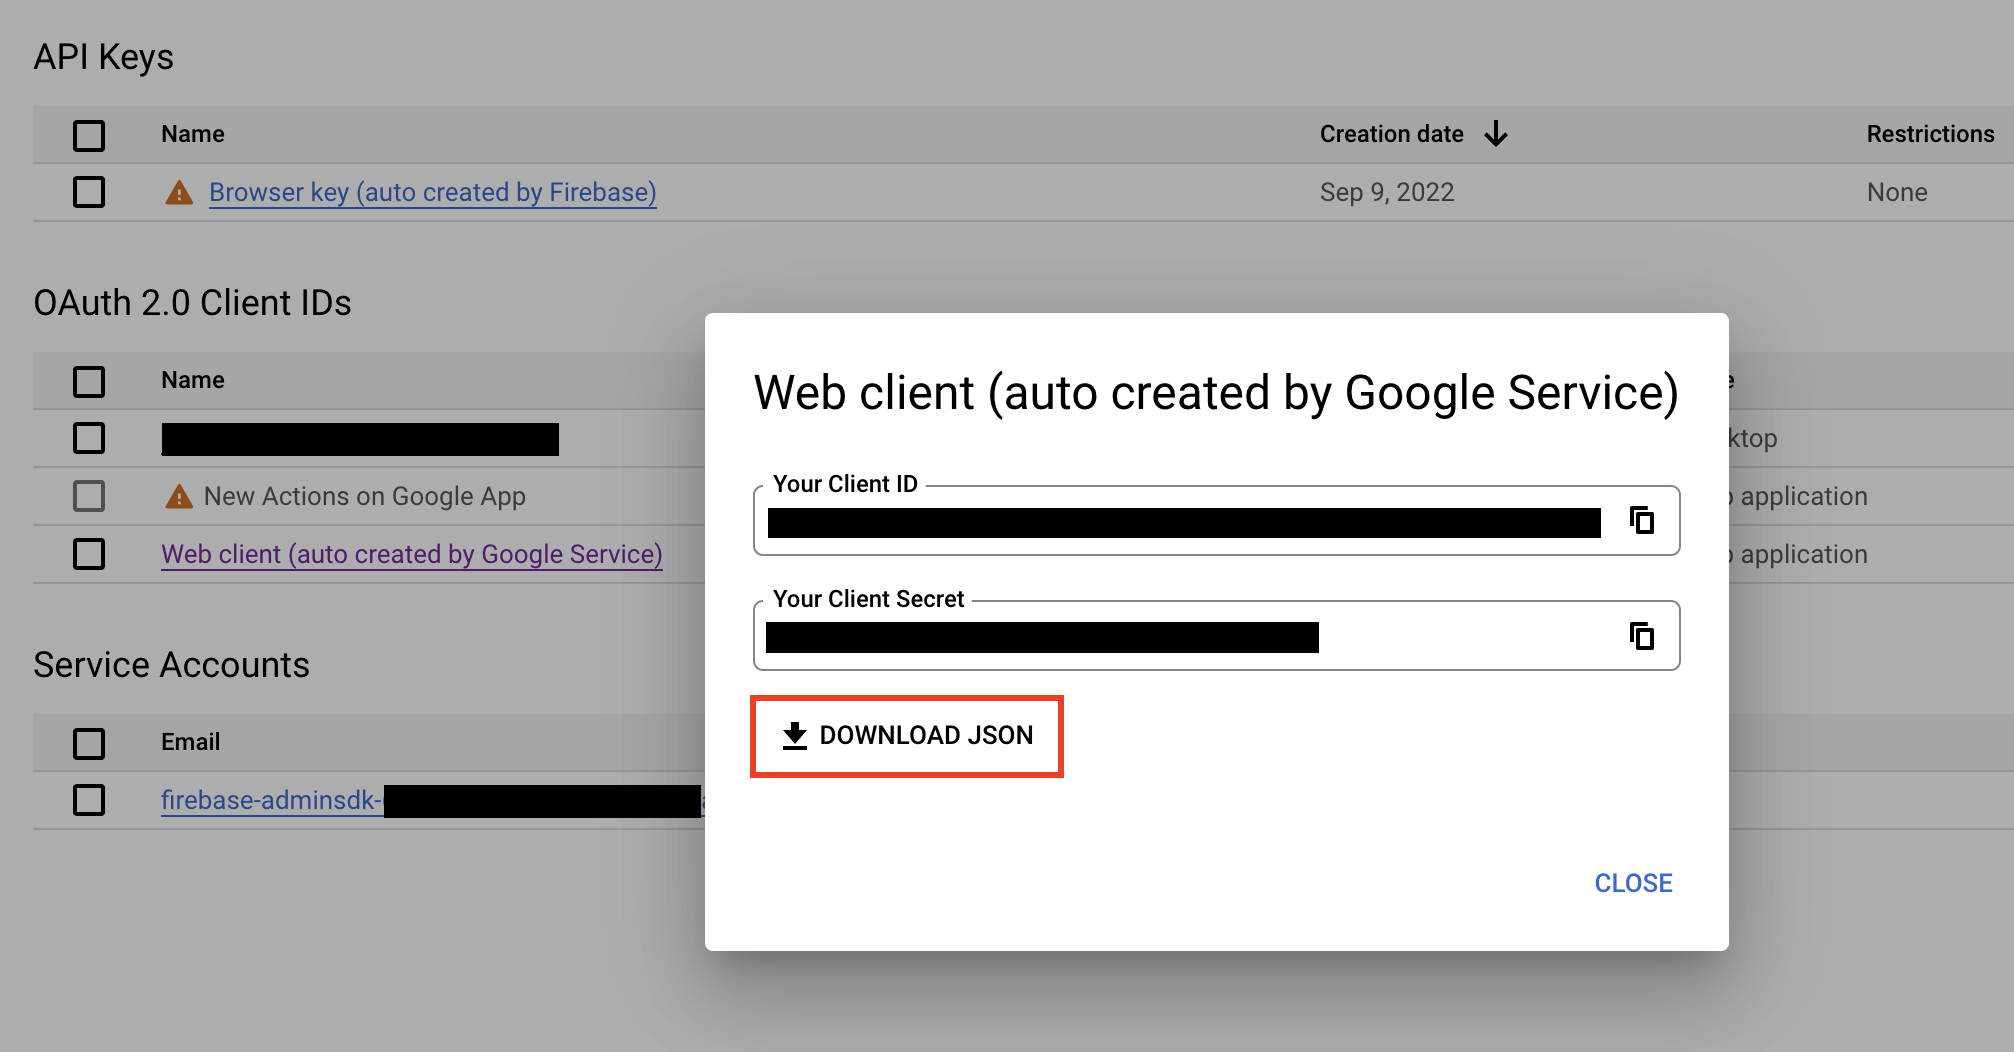
Now, click on the download button against Web Client
-
This will open a popup dialog. Click on Download JSON button. This is your OAuth 2.0 Credential.
-
Run and launch the Google Assistant Unofficial Desktop Client app
-
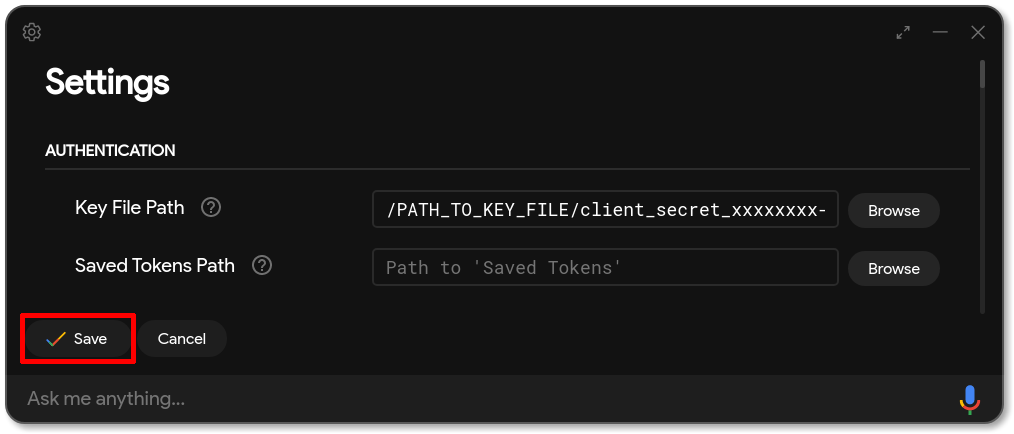
Click on the "Settings" button in the top-left corner of the application
-
Under the "Authentication" section, set the "Key File Path" to the path where you have kept the "OAuth 2.0 Credentials" and leave the "Saved Tokens Path" empty. Now click on "Save" button
-
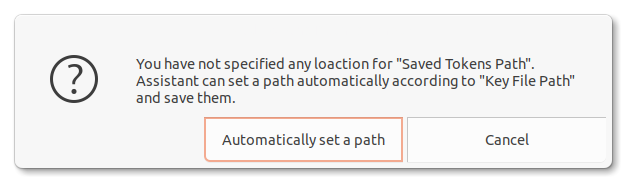
You will be prompted to automatically create a path for "Saved Tokens Path". Click on "Automatically set a path"
-
You will be asked to reload the Assistant. Click on "Relaunch Assistant" button

-
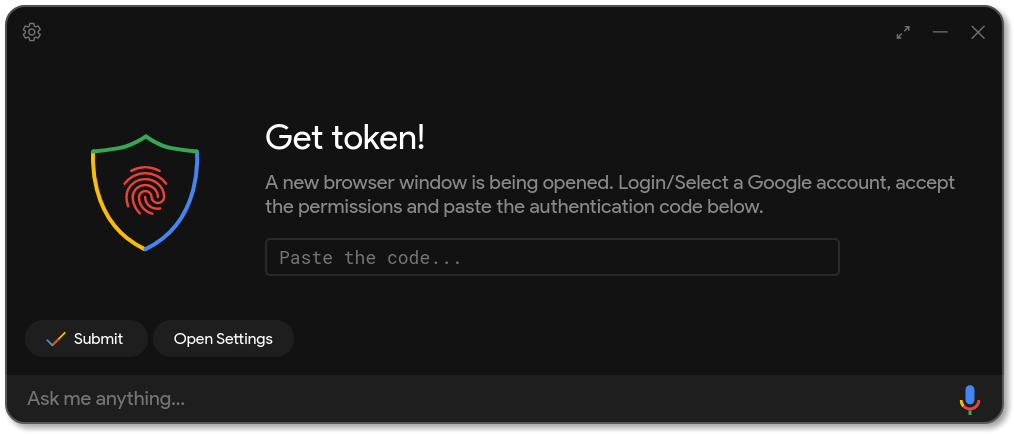
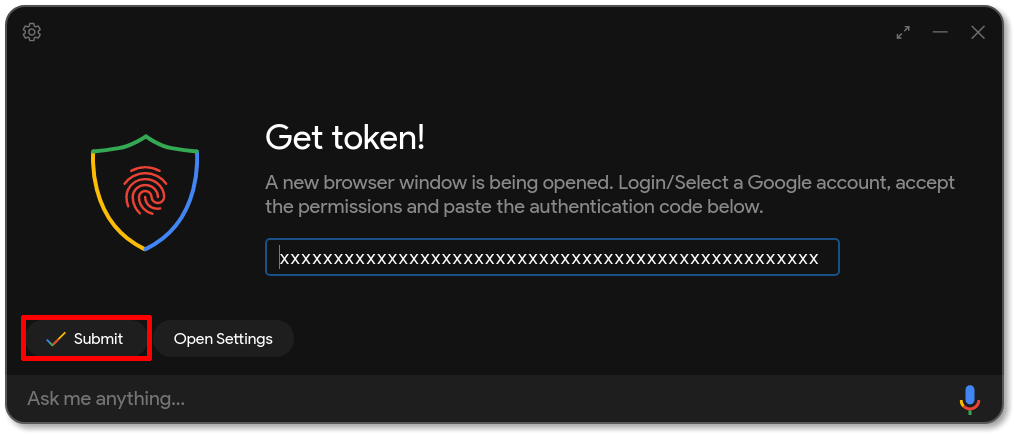
Now, you will be presented with the "Get Token!" screen. An authentication page will be opened in your default browser
-
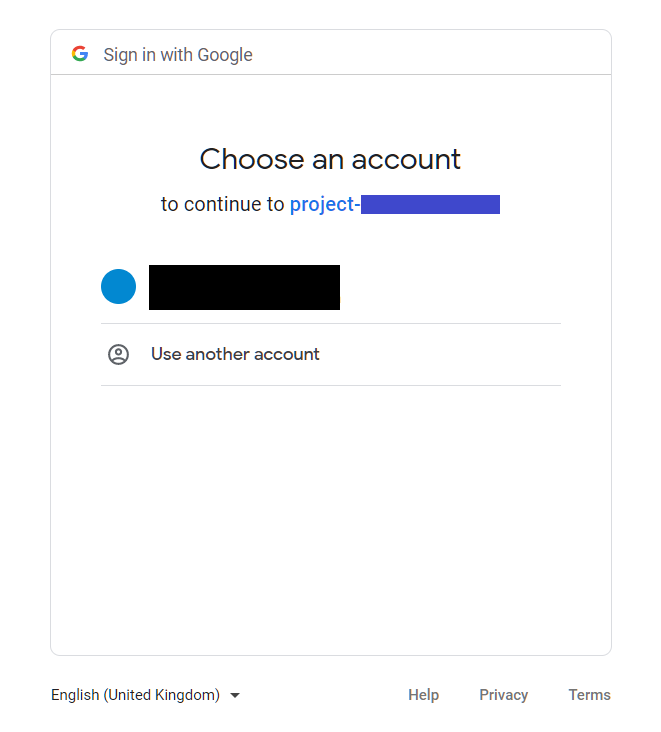
Select the preferred Gmail account to authenticate
-
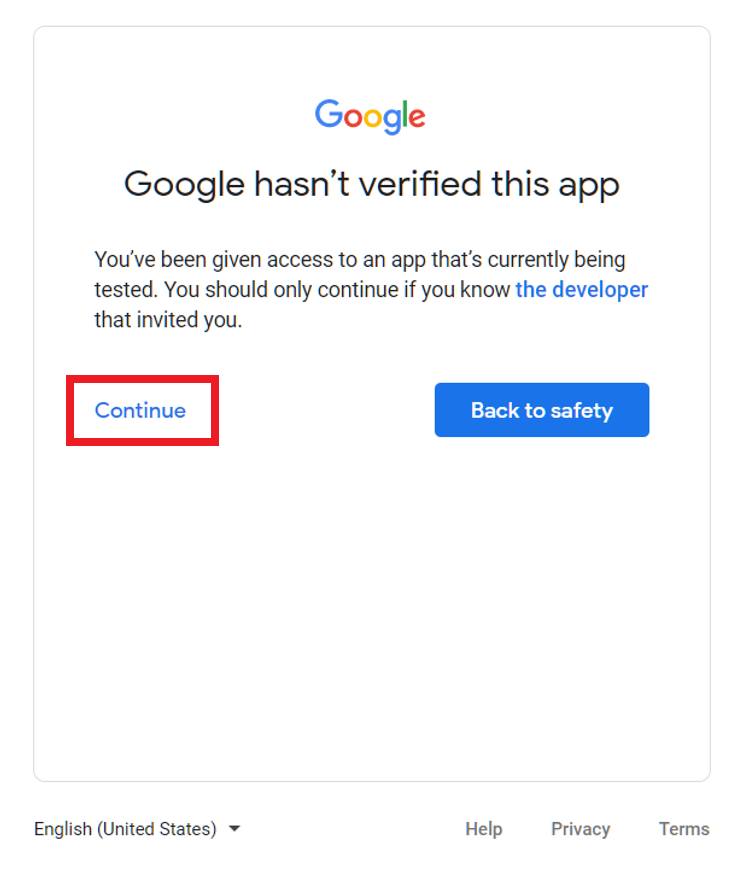
You might come across the following warning: "Google hasn't verified this app". Since the project is created by you, this should be safe to proceed with. Click on "Continue"
-
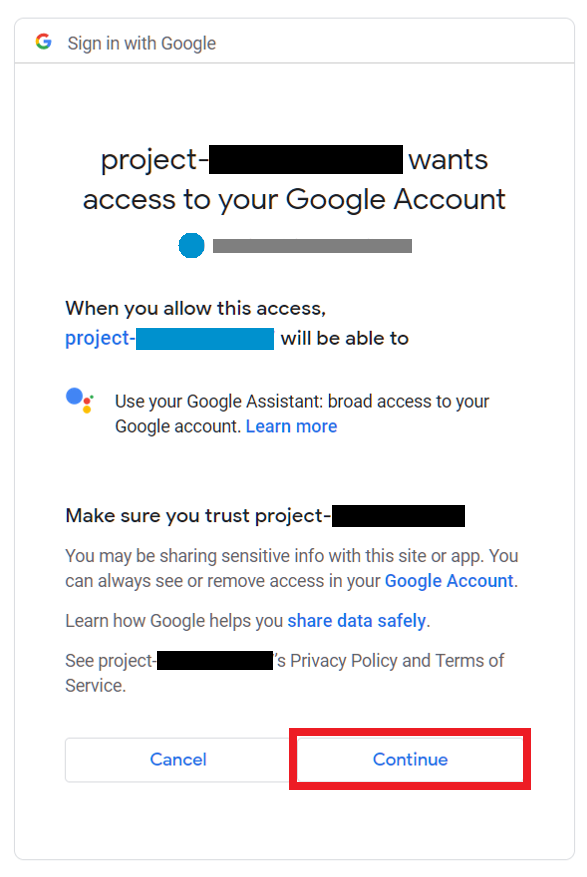
Now grant permission to the project by clicking on "Continue"
-
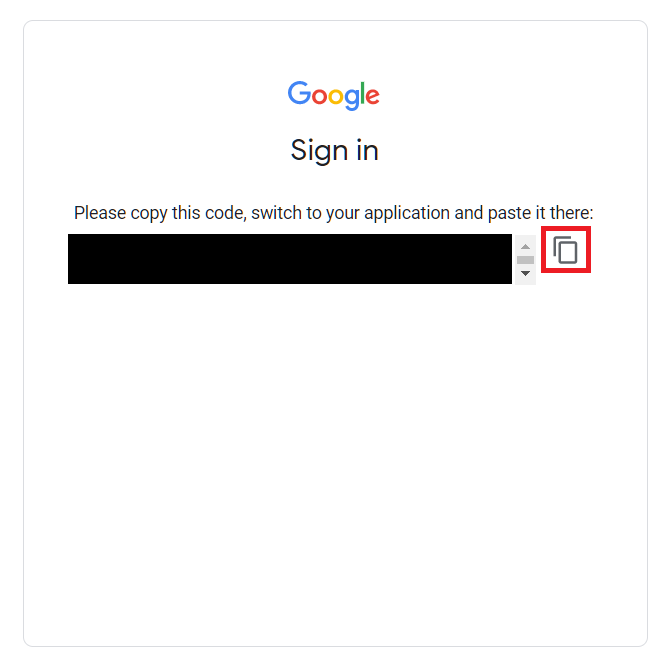
You will now be presented with the authorization code screen. Click on the copy button
-
Switch to the application and paste the code in the respective field. Now click on "Submit"
-
You will be prompted to relaunch the app again. Click on "Relaunch Assistant"
Now, you are all set! You can finally use the Google Assistant Unofficial Desktop Client and customize it the way you want... 😉
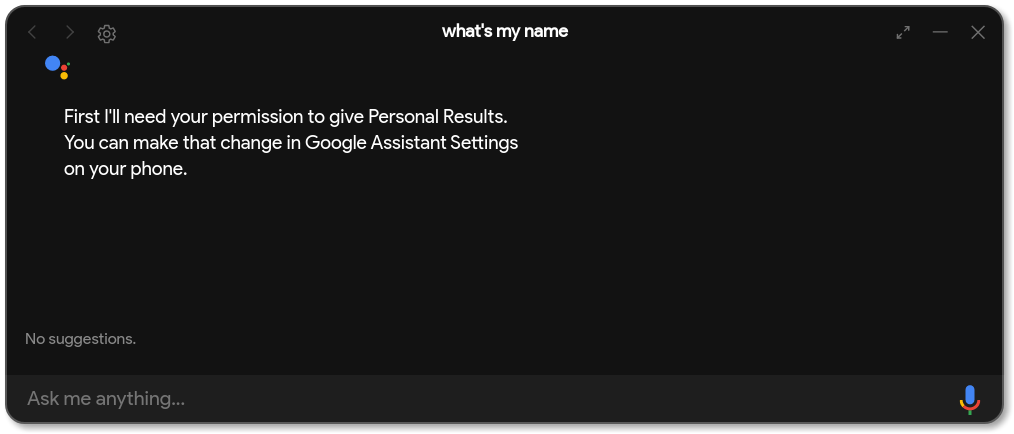
Personal results are results that are fetched from Google Services like Gmail, Google Calendar, Google Photos, etc. These results are not shown by default as they might be part of user activity and personal data. If you want the assistant to show you your personal results when asked for it, you must explicitly enable it. Below are the steps to help you enable personal results.
-
Once your assistant app is ready to use after having followed the proper steps, you must ask the assistant specific queries to trigger personal results. For example, "What's my name?", "Show me my photos" or "What's on my calendar next?".
-
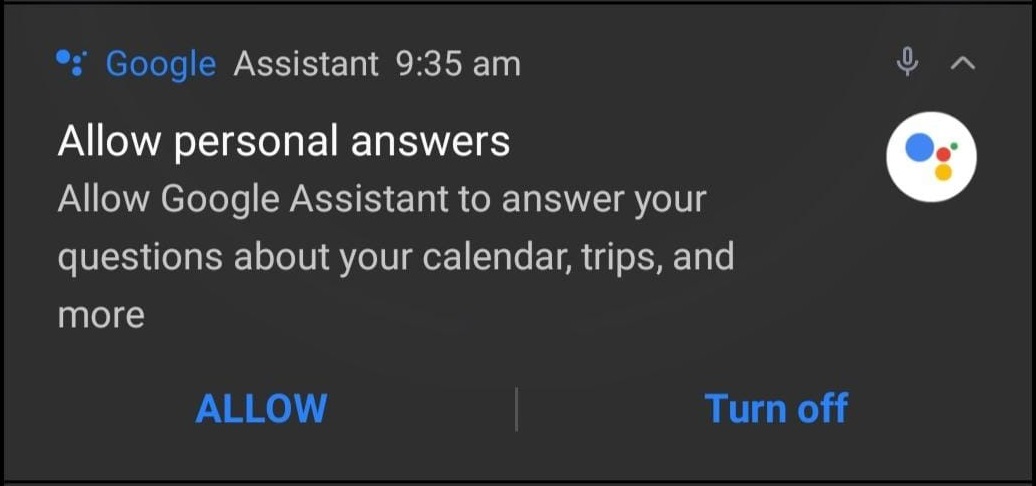
As mentioned in the above screenshot, you might receive a notification on your phone to turn on personal results. Tap on the notification.
-
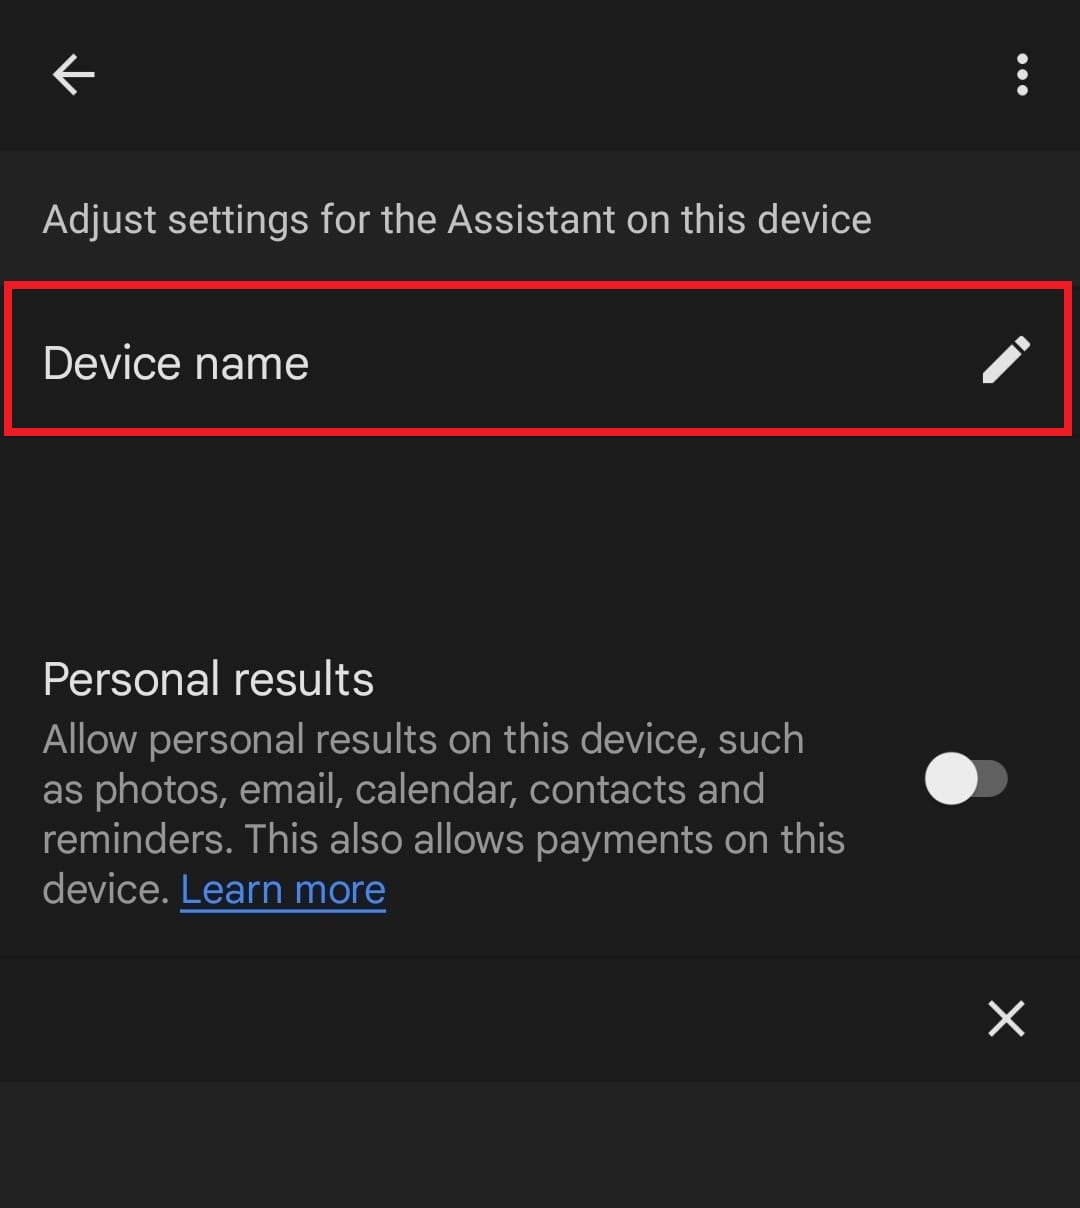
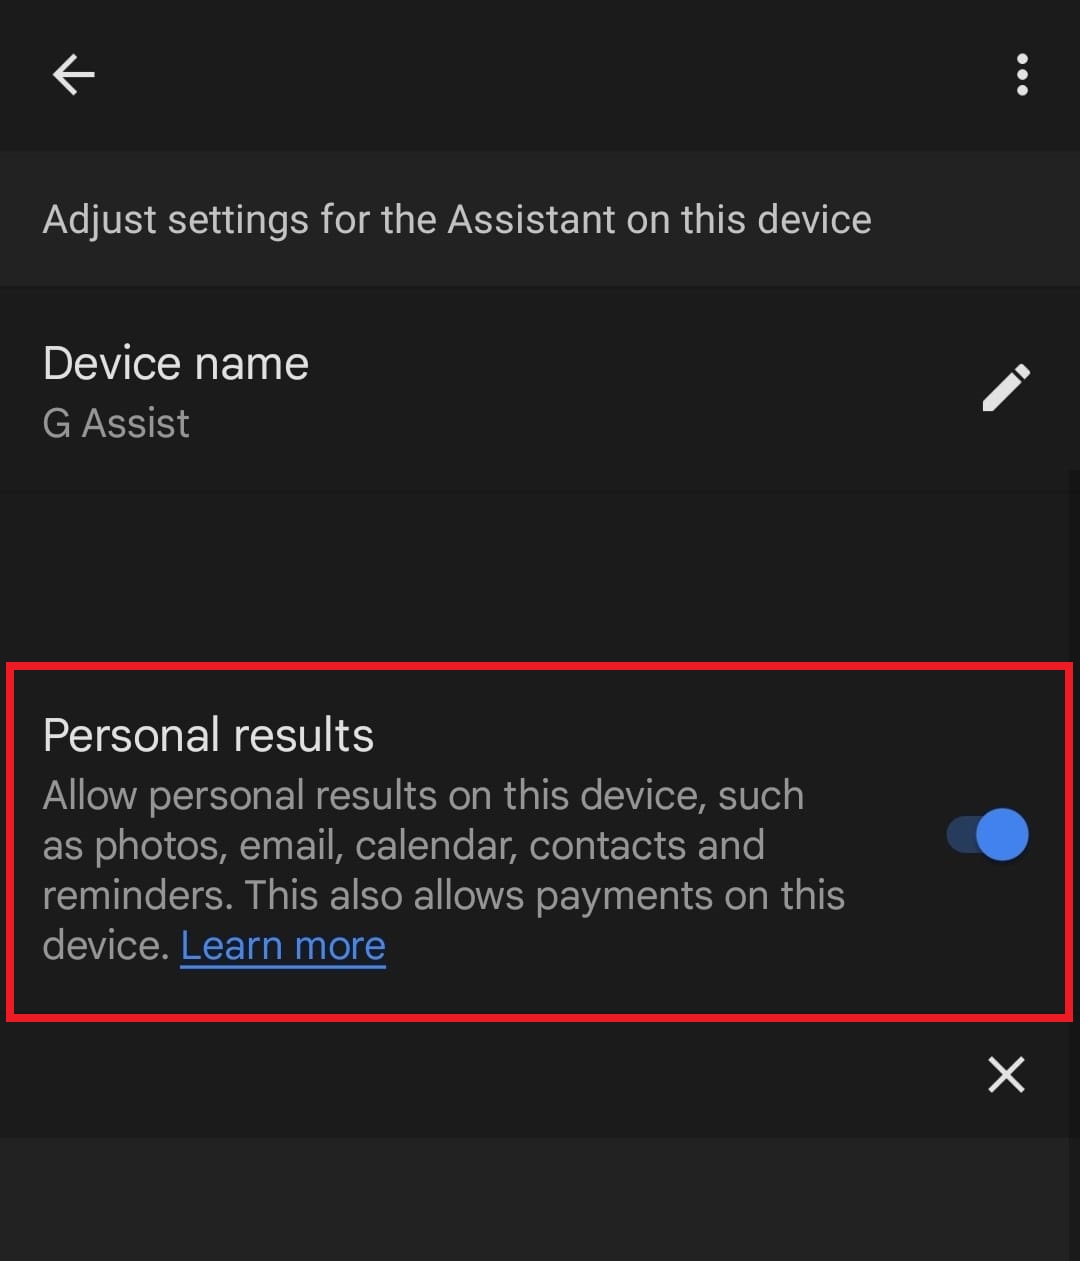
You will come across a screen like the one below. Tap on "Device Name". (Do not toggle Personal Results right away)
-
Now, enter any device name, say, "G Assist" and tap on "OK".

-
After the device name has been set, tap on "Personal Results" to enable personal results.
That's it. Now, you can ask the assistant to show your personal results. If you are still prompted to allow personal results, that probably means that personal results could not be enabled in your current project. In this case, you might have to start afresh and create a new actions project if you want to enable this feature.
You can check out the Frequently Asked Questions (FAQ).
Device Registration using UI:
Device Registration using Command Line Tool: