Project Overview:
This project was designed to expand my knowledge of JavaFX following the graph generating program. This page covers the end-user functionality of a 3D modelling program developed using JavaFX without any external libraries. The program enables users to create, manipulate, and visualize 3D objects such as cuboids and spheres.
The program features a toolbar with various functions, including rotation, duplication, configuration, and deletion of selected objects, as well as creating new 3D objects and adjusting lighting. Users can interact with the 3D model by rotating, panning, zooming, and adding or removing light sources. The program utilizes JavaFX's Shape3D for rendering 3D objects, adapting it for custom functionality.
For more on the code and how I used JavaFX's 2D centric framework to make 3D modelling go to this page
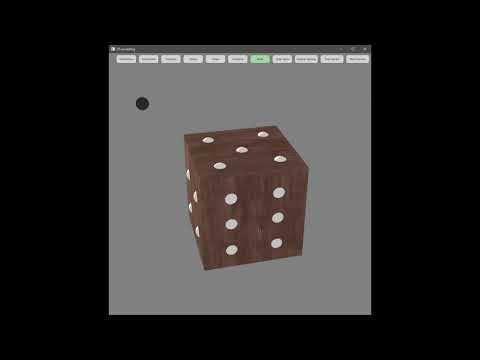
Here is a video of me making a dice from scratch in the program. The creation of it is sped up by 7x making the total time to make the dice from scratch just under 8 mins with my program:
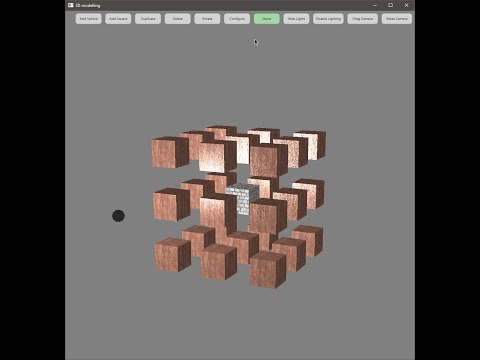
Below is a video of the whole system working and systematically showing each feature :
You can select an object by left clicking it with the mouse.
You can deselect an object by left clicking it with the mouse again.
You can select multiple obejects at once.
To select an object you can left-click it with the mouse and this will then cause a transparent blue outline to appear around the object. You can select multiple objects at once. This object will then be affected when you click some of the buttons ranging from configuration to rotation and all the selected objects will then be affected. To unselect an object you just have to left-click the object again with the mouse and it will be deselected making the blue outline disappear.
To rotate on the x axis press s or down arrow to decrease x axis and press w or up arrow to increase x axis rotation.
To rotate on the y axis press a or left arrow to decrease y axis and press d or right arrow to increase y axis rotation.
To rotate on the z axis press q to decrease z axis and press e to increase z axis rotation.
You must first click the button labeled 'Rotate' and then to rotate an object you first need to select it then you can press the corresponding key mentioned above to rotate it. Multiple objects can be rotated at a time and any rotated object will stay at the angle it is rotated to until you change it. You can stop rotating by deselecting the object, clicking the 'Rotate' button or just stop pressing the key.
To translate on the x axis press a or left arrow to decrease x axis position and press d or right arrow to increase x axis position.
To translate on the y axis press s or down arrow to decrease y axis position and press w or up arrow to increase y axis position.
To translate on the z axis press q to decrease z axis position and press e to increase z axis position.
You must first click the button labeled 'move' and then to move an object you first need to select it then you can press the corresponding key mentioned above to move it. Multiple objects can be moved at a time and any moved object will stay at the position it is moved to until you change it. You can stop moving by deselecting the object, clicking the 'Move' button or just stop pressing the key.
![]()
To edit a shape via a configuration box over key press you must click the button labeled 'configure'. Upon clicking the button all the selected shapes will be unselected as you can only configure one shape at a time and then when you click a shape a configuration box will appear. You can edit the rotation, position, dimensions, material and enable/disable the shape being a lightbox. Closing the configuration box will unselect the object.

To duplicate a shape or multiple shapes you must first select them and then click the button labeled 'duplicate'. Upon clicking the button all the selected shapes will be unselected and a copy of that shape will be selected but that shape will be translated positively by one on the x-axis so it's clear that it's a new shape. This can be done infinitely and for as many selected objects as you want. Everything is copied when duplicating a shape including material and whether its a lightbox or not.

To delete a shape or multiple shapes you must first select them and then click the button labeled 'delete'. Upon clicking the button all the selected shapes will be unselected and deleted. The deletion also includes the light if the shape is a lightbox.

To create the cuboid you just need to click the button labeled 'Add Square' and then fill out a configuration box with the details of the cuboid you want to create. You can create cuboids of any dimension (depth width or height), at any position and rotation. In addition, you can select which material you want from wood, cobble, none (plain white) and a material called lightbox which is a slightly transparent black. Finally, you can make the cuboid a lightbox which means it gives off a light.
Here is the configuration box that appears when the 'Add Square' button is clicked.

To create the sphere you just need to click the button labeled 'Add Sphere' and then fill out a configuration box with the details of the cuboid you want to create. You can create spheres of any radius, at any position and rotation. In addition, you can select which material you want from wood, cobble, none (plain white) and a material called lightbox which is a slightly transparent black. Finally, you can make the sphere a lightbox which means it gives off a light.
Here is the configuration box that appears when the 'Add Sphere' button is clicked.

You can zoom in by scrolling forward with the mouse and zoom out by scroll back with the mouse
You can zoom in to see more detail at any point by scrolling forward with the mouse and vice versa to scroll out. If you zoom in too close and you clip into the item then the item will no longer be visible, the same is also true if you zoom out too far then the objects will at some point no longer be visible.

By default the camera is in rotate mode You must be rotate mode and then just hold right click and move your mouse to rotate the screen
To be able to see the model at different angles you can rotate the camera in any direction effectively as if the camera was on the surface of a sphere with the center being the 0,0 by default but you can drag the camera to change this. By default, you are in the rotate mode so you just have to hold right-click and move the mouse about to rotate the screen. Once you no longer want to rotate just stop holding the right click and the angle will stay at whatever position you stop at.

You must be drag mode and then just hold right click and move your mouse to drag the screen
While rotating the camera is great to see the model at different angles you might want to move the camera up, down or sideways in case the model looks off-center or you just want to pan around the model. So to enable this I made a drag camera mode, by default when loading the program the camera is in rotate mode but clicking the button labeled 'drag mode' will switch mode. Then you just have to hold right click like you would with rotate and just move the mouse about to drag the screen. Once you no longer want to drag just stop holding the right click and the position will stay at whatever position you stop at. To leave the mode and go back to rotating you just have to click the same button which will now be titled 'rotate mode' and it will switch back to rotation mode.

As my program does not have different colored lines for each axis that you can translate the shape along or rotate the shape along you need a point of reference. Therefore I made a button labeled 'reset camera', what this does is reset the camera orientation to remove any rotation applied by the user, as sometimes you can be moving the shape via the x-axis but you actually want to move it via the y-axis, its just the orientation of the camera is confusing. Ideally, the program in a future update should have a blue, green and red line for each axis so that you know what direction what axis is, however currently I have not implemented the multi-color lines as references.
You can add lightboxes by adding a new shape and selecting enable on lightbox, configuring an existing shape and enabling the lightbox or by duplicating an existing lightbox.

You can remove lightboxes by configuring an existing shape and disabling the lightbox or by selecting an existing lightbox and clicking the button labled 'Delete'.

You can hide the physical bodies of all lightboxes if you want them to still affect lighting but not be visable by clicking the button labled 'Hide Lights'. This will also deselect any selected lights. To make the lights phyiscally visable again you need to click the same button which will now be labled 'Show Lights'.

You can disable all lightboxes emitting light by clicking the button labled 'Disable Lights'. To make the lights emit light again you need to click the same button which will now be labled 'Disable Lights'.

Closing Thoughts:
The 3D modeling program I made ended up being very user-friendly and really pushes JavaFX to its limits. At the same time it forced me to think beyond just using premade functions/classes and think about how I could extend the existing system.