Debugging_the_module_with_eclipse
In order to have the Eclipse Java debugger run the Module Java code and step through it, the Modelio Modeler application has to be run in the Eclipse IDE.
Therefore, to have the process working smoothly, special attention must be paid to the configuration of Eclipse.
-
As Modelio is based on RCP, you have to deploy the Plug-ins Development Environment (PDE) as plug-in in Eclipse. This is mandatory to set the debug environment. See the PDE project page for more information.
-
A debug configuration has to be defined in Eclipse in order to have the Modelio application run in the Eclipse debugger and to be able to debug the Module Java code.Creation of the debug configuration is a three steps procedure:
-
Creating a JRE configuration because Modelio provides its own JRE
-
Creating a target configuration because Modelio is an RCP application
-
Creating a debug configuration based on the JRE and target configurations.
-
When the Eclipse IDE has been properly configured, the overall debugging procedure is as follows:
-
Generate and package the Module in Eclipse using the pom.xml file.
-
Launch Modelio in the Eclipse debugger.
-
Open a Modelio test project in which the Module is deployed (deploy it if it is the first time).
-
In the Eclipse debugger, set up breakpoints in the Module code where useful.
-
Launch the Module commands to be debugged.
For bug fixing simply do the following:
-
Edit and fix the code directly in Eclipse.
-
Re-compile in Eclipse.
-
Re-run Modelio, re-open the test project.
-
Test and check the fix.
-
When done, repackage the module using the pom.xml file.
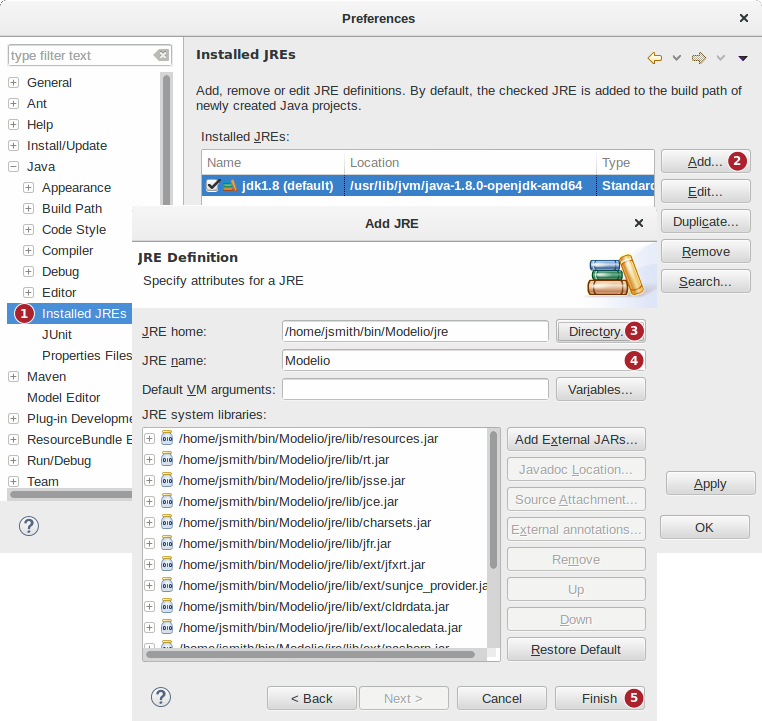
Because Modelio provides its own copy of a standard JRE, it is recommended to use it when debugging Modelio module. Note that it can work with the system standard JRE but sometimes it fails.
Open the preferences window (Window –> Preferences)
-
Select Java / Installed JREs
-
Click on the Add… button and choose the Standard JVM
-
Enter the path of Modelio JRE directory. All the required fields will be automatically filled in by Eclipse.
-
Give a name for the JRE Definition (for example: Modelio)
-
Click on the Finish button, select the new JRE definition as the active one.
Modelio is RCP based so a specific target configuration is required to debug Modelio module. This target configuration will then be used in the debug configuration. The procedure is as follows:
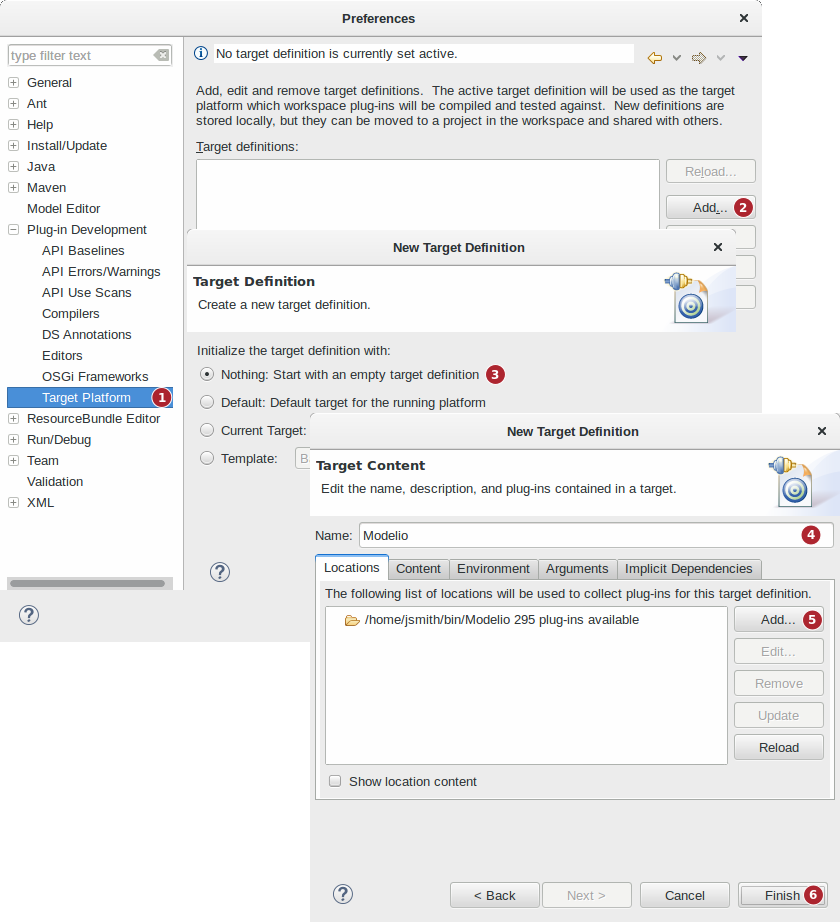
1. Open the preferences window (Window –> Preferences) and select Plug-in Development / Target Plateform (if this entry is not available, it means that PDE should be installed)
-
Click on the “Add…” button
-
Select “Nothing: start with an empty target definition” then “Next>” button
-
On the new dialog, fill in the name with Modelio for example.
-
Then in the Locations tab, select “Add…” button, then Directory, then select the root directory where Modelio is installed. Then Eclipse automatically adds all the Modelio plug-ins.
-
Select Finish button
-
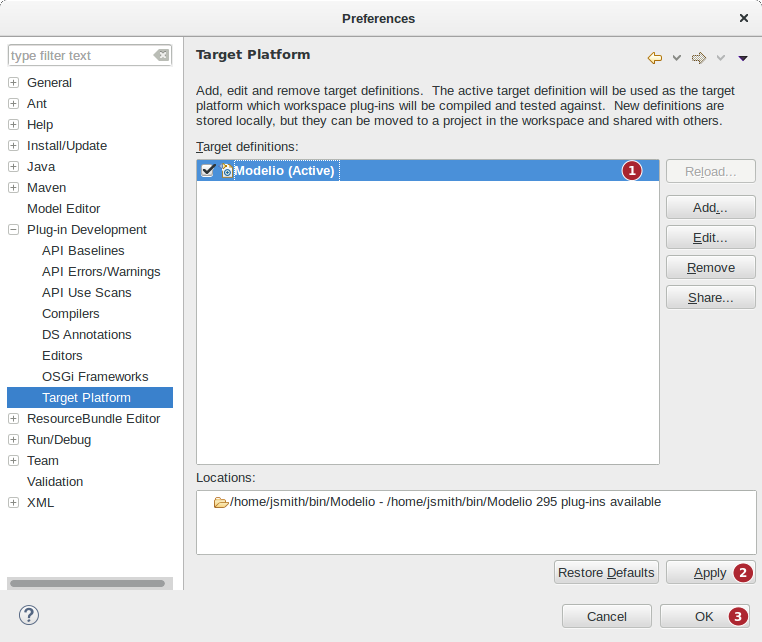
Select the new target definition as the active one.
-
Click an Apply button
-
Then click on OK button and we are done with the target configuration for Modelio.
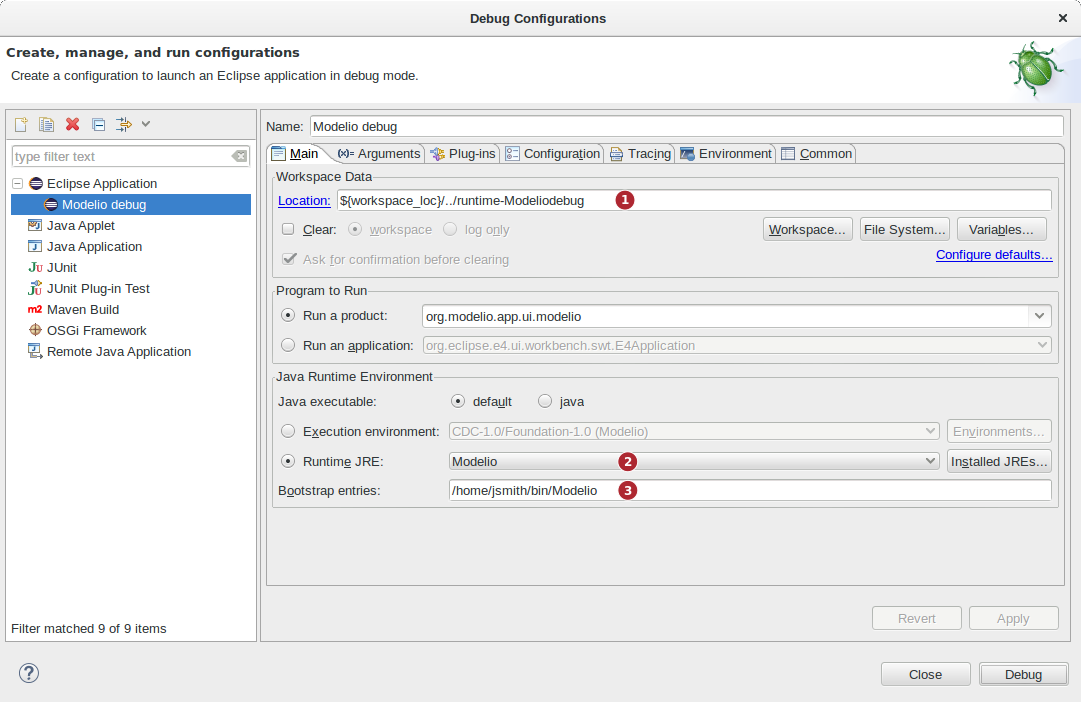
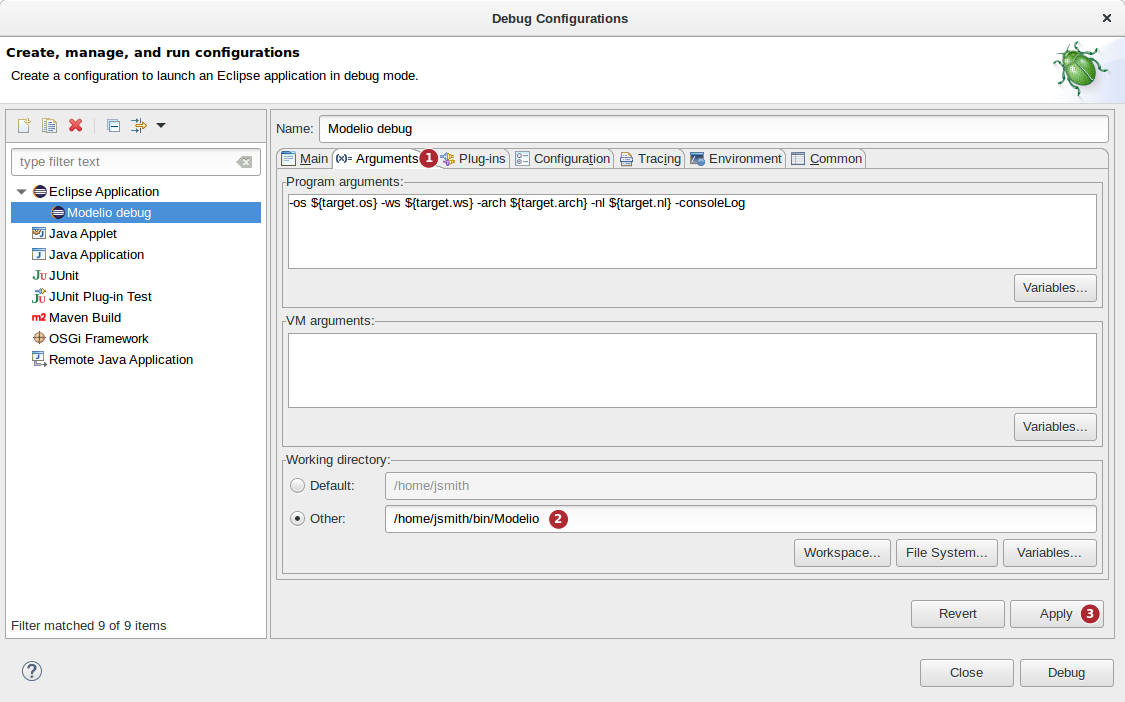
Now that the target configuration is defined and activated, prior to run Modelio within Eclipse we should create a debug configuration.
-
Creation

-
Select the menu Run –> Debug Configurations…
-
Create a new Eclipse Application
-
-
Configuration
-
Fill in the Name field with something like Modelio debug (1)
-
Check that the Runtime JRE field is set to Modelio JRE (2)
-
Fill in the Bootstrap entries field with the installation directory of Modelio (3)
-
Select the Arguments tab
-
Fill in the Other field in Working directory frame with the installation directory of Modelio
-
Click on Apply button
-
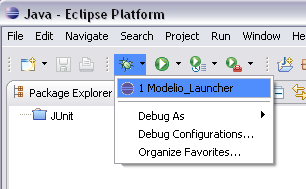
To debug your module, follow this process:
-
Run Modelio from the Debug menu of Eclipse (using the launcher created previously)
-
Open a database with the module deployed,
-
Use the module (run its commands, apply its stereotypes, etc.)
When Eclipse runs the configuration, it launches an application from a different working directory (remember, we had to change the location).
The direct consequence is that Eclipse cannot retrieve the source path for our project at first launch when hitting a breakpoint. This is illustrated in the figure below:
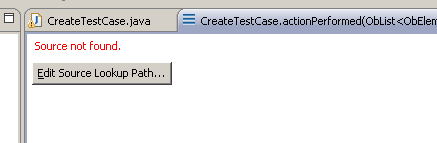
The solution consists in configuring the edit path and adding a source path.
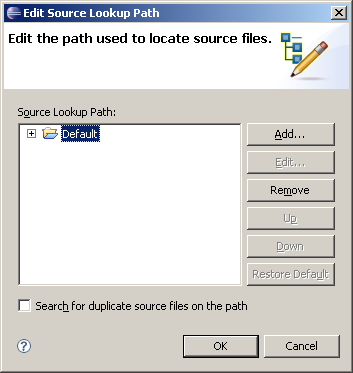
Select a java project source and check the JUnitModule
Note
To be sure that the module Java code is generated with all the options that allow comfortable debugging, the code should be compile with Eclipse compiler, not with javac invoked from the module pom.xml file. If it happens that debugger doesn’t stop at the expected lines, a full recompilation from Eclipse is recommended. To do this:
-
Stop any debugging session
-
Ensure the menu option Project –> Build automatically is ticked
-
Clean the module Java project. Project –> Clean…
-
Wait until Eclipse has recompiled all the source code
-
Then, trigger the packaging of the module