Getting Started
1. Quick Start
1.1. Install Runtime Dependencies
1.2. Download Source Code
1.3. Start the Server
1.4. Run the Example Script
1.5. Explore the Example Script
2. Running Lipstick on your Hadoop cluster
2.1. Installation Requirements
2.2. Build
2.3. Deploy on Tomcat
2.4. Properties file
2.5. Run
(For users of Hadoop-2 branch — see wiki page on hadoop-2)
Graphviz – install via http://www.graphviz.org/Download..php. Ensure Graphviz is on your PATH.
git clone https://github.com/Netflix/Lipstick.gitFrom the cloned directory (lipstick by default), run “./gradlew run-app”. (This may take several minutes depending on connection speed and already present build dependencies.)
You should see something similar to the following as the last lines of output:
|creating dev client
| INFO  WEBrick 1.3.1
| INFO  ruby 1.9.3 (2014-08-27) [java]
| INFO  WEBrick::HTTPServer#start: pid=20853 port=9292
From the “quickstart” sub-directory, run “./example1”.
You should see something similar to the following within the last lines of output:
Navigate to http://localhost:9292#job/{jobId} to view progress.
...
(orange,ORANGE)
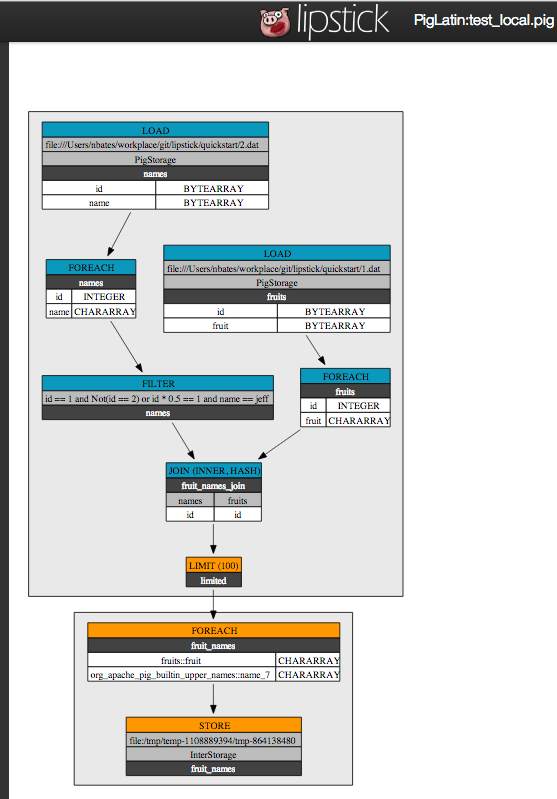
Enter the link http://localhost:9292#job/{jobId} from the previous step into your browser (replacing {jobId} with the appropriate id) or refreshing the main Lipstick page and clicking on the new job. Here you can get a graphical representation of the example script. Since this job was run in local mode, the information that you get doesn’t include job statistics.

Before proceeding please see the Quick Start section to clone the project and build.
- Create an Elasticsearch cluster
Build the war and jar files. Navigate to the directory where Lipstick was cloned from github (lipstick by default).
$ cd lipstick
$ ./gradlew
This will create the lipstick-server-[version].war and the lipstick-console-[version].jar and place them in the top level build directory.
Deploy the war file on Tomcat. For instructions on how to do this, please see: http://grails.org/Deployment
Create a properties file for Lipstick “/etc/lipstick.properties”. Here’s where you’ll configure how to talk to Elasticsearch. There are three ways currently to configure the way lipstick
discovers the Elasticsearch cluster:
1. Use Netflix Eureka
discovery.type = eurekaa list of Elasticsearch cluster transport addresses. In this case
the following properties must also be set:
eureka.datacentereureka.serviceUrl.default
2. Use Zen (Multicast) Discovery
discovery.type = zenwhich makes use of multicast to discover nodes.
3. Static List
discovery.type = listlist of urls. elasticsearch.urls must be defined as a comma separated
string.
transport.tcp.port is a required property and is the transport port
to use when creating Elasticsearch transport clients.
cluster.name is a required property and is the name of the Elasticsearch
cluster to connect to.
lipstick.index is a required property and is the name of the Elasticsearch
index to use. Once the cluster is discovered the first time, Lipstick will
create the index and type mappings.
Example /etc/lipstick.properties:
lipstick.index=lipstick
cluster.name=lipstick_cluster
discovery.type=zen
transport.tcp.port=7102We are not currently providing a wrapper for running Lipstick on your cluster. The simplest way is to run the command as follows:
hadoop jar lipstick-console-[version].jar -Dlipstick.server.url=http://$LIPSTICK_URL