Classifying x-ray images from a dataset using AutoML. This project is a walkthrough (beta) for the upcoming Artificial Intelligence for Product Managers Nanodegree. The goal is to teach students how to setup and use AutoML for AI projects (biomedical emphasis).
To follow this example, please complete the following steps:
- Download the dataset images from: https://www.kaggle.com/paultimothymooney/chest-xray-pneumonia/downloads/chest-xray-pneumonia.zip/2 NB: The dataset is not perfect and has some duplicates. Please prune these during your training process.
- Sign in (or create) an account for AutoML https://cloud.google.com/automl/
- Create a new project (specify image classification)
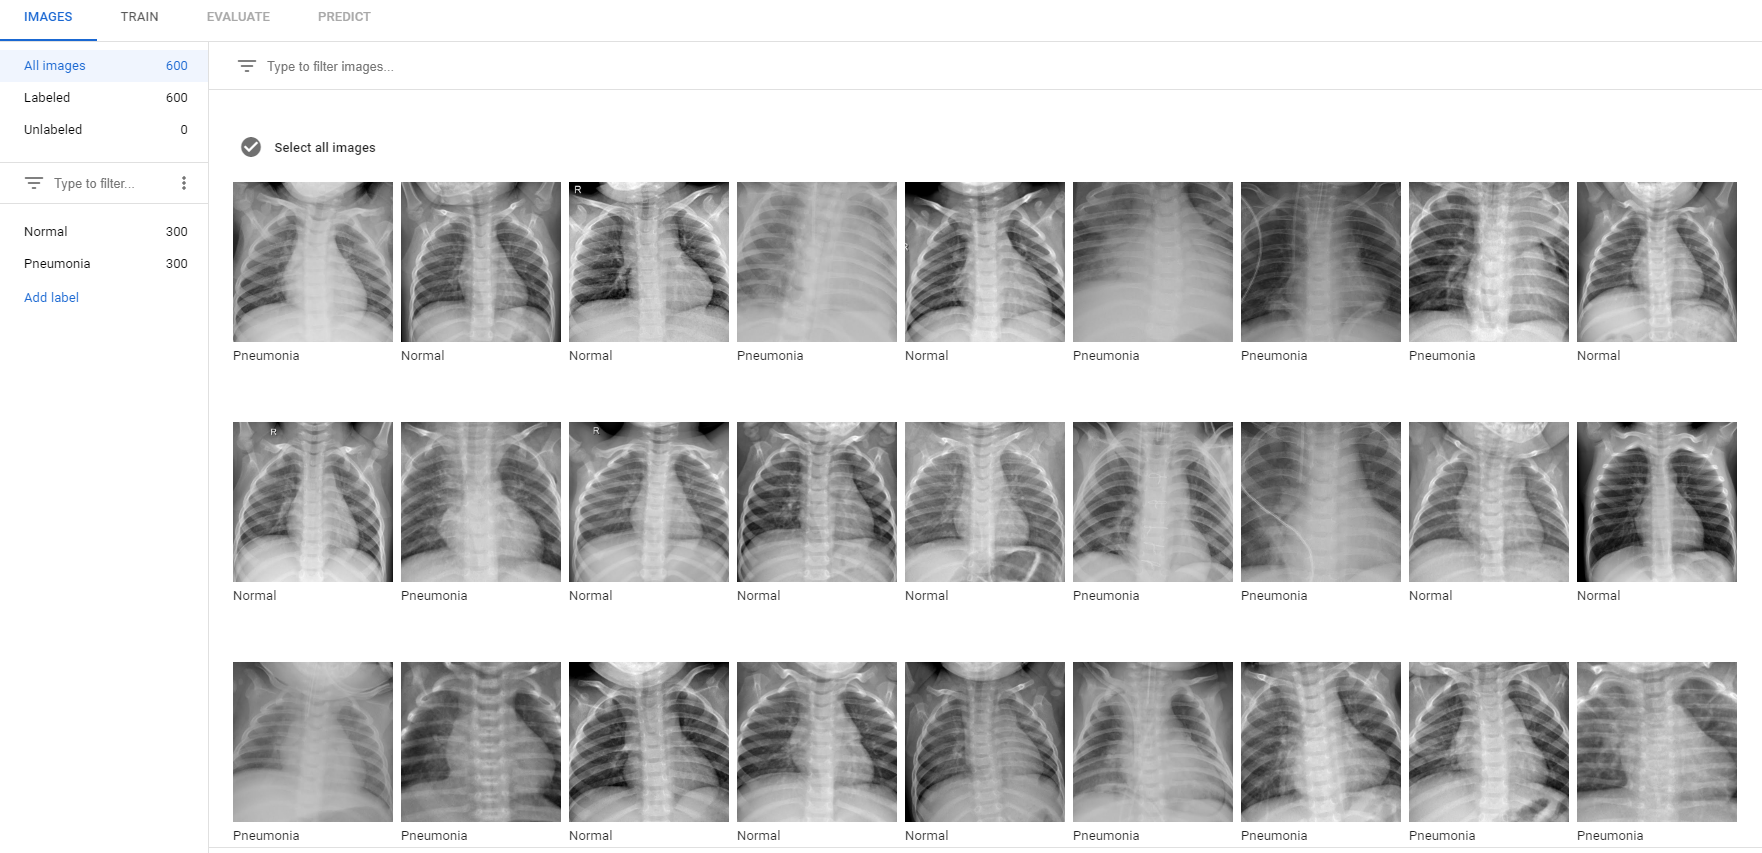
- Create folders (local) based on their labeled classification (Normal, Pneumonia).
NB: These labels will allow for AutoML to automatically assign a ground truth (i.e., it recognizes the keyword 'normal') - Add an balanced number (i.e., 300 and 300) of images to each folder from the train folder to the new folders
NB: I recommend using between 300 and 500 images per dataset without exceeding 1000 images total (so you can use the free node) - Place each of these folders into a single folder (i.e., AutoMLDataset)
- Zip the master folder
- Upload this zipped folder as a dataset to the AutoML project (this will take several minutes depending on the number of images)

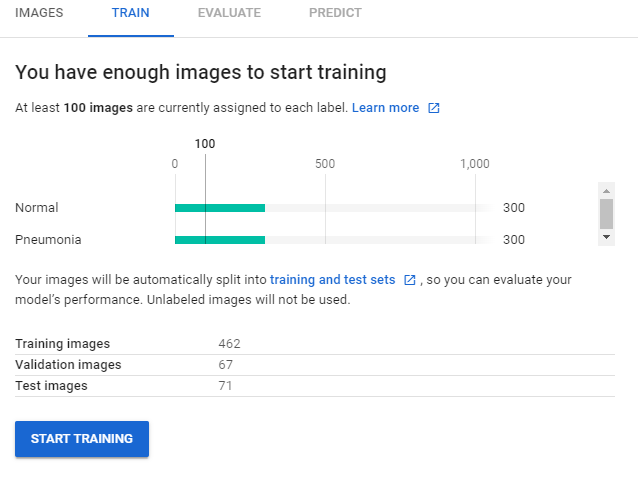
- Select 'Train' to train the network. Ensure that you have an equal number of initial images for each category

- Do some exercise while you wait. This will improve your brain function ;)
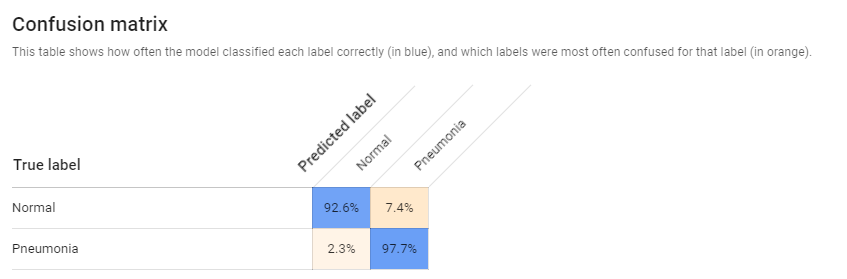
- After training is completed, select the 'Evaluate' option


- Not too bad, right? Let's make sure by validating our model with an image we did not (!) use before
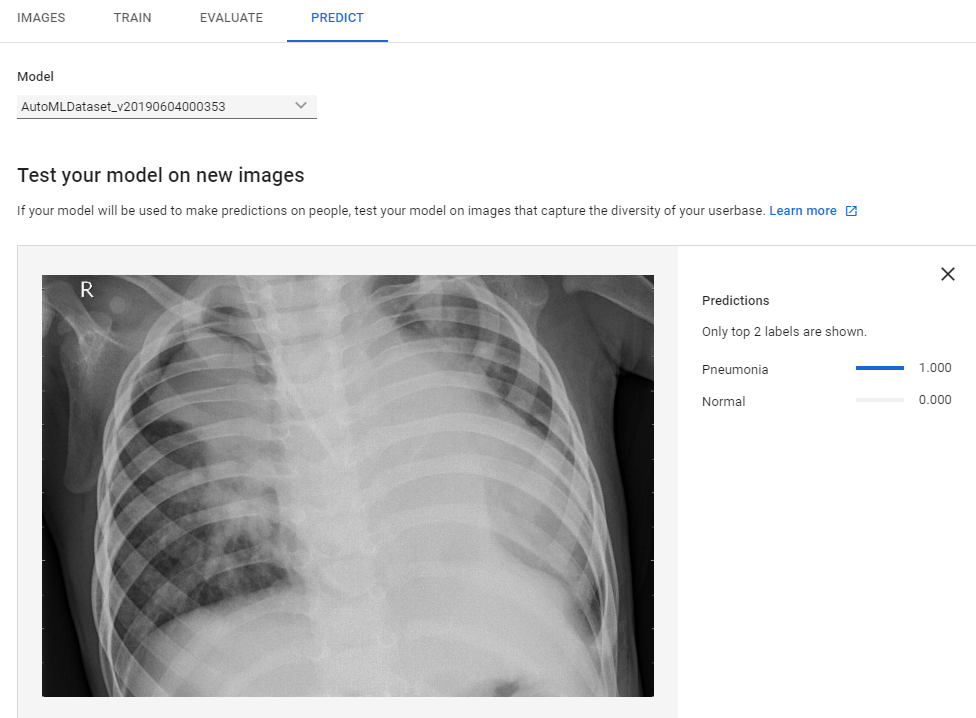
- Click on the 'Predict' tab and upload a new image


- That's it! You should now be able to create custom models for your own needs. If you would like to explore this dataset more, you can see that there are actually two type of pneumoia: bacterial and viral. You can separate these images into their own training sets and then repeat the steps to make predictions/classifications based on different types of the ailment.


Good luck with your nanodegree and career!