
Head to https://www.originprotocol.com/developers to learn more about what we're building and how to get involved.
Warning! This repo contains only our protoyping work around ERC 725. It is now out of date and should not be used. Our current identity contracts are here.
This app is a working implementation of the ERC 725 and ERC 735 proposals for managing a unique identity on the blockchain.
Using ERC 725, a smart contract can protect function calls from being executed unless the sender has a verified claim from a trusted issuer.
You can try a deployed version of this app at http://erc725.originprotocol.com/#/
It has several Certifiers pre-populated that are not present when running the demo locally.
The screenshot walkthrough below shows an example of verifying a claims of a person's identity.
Imagine we want to deploy a Listing contract to sell a concert ticket, but only allow interactions from users with a verified email address. How can we accomplish this with ERC 725?
First, lets define the entities that will be interacting:
- The Consumer is an identity who wants to buy the ticket.
- The Issuer is an identity which issues claims of type 'EMAIL_VERIFIED'.
- The Listing will only allow Consumers with an EMAIL_VERIFIED claim from an Issuer they trust.
This leaves us with a few questions...
- How does the trusted Issuer verify an email address?
- How does the Consumer get an EMAIL_VERIFIED claim onto their Identity?
- How can the Listing verify that the Consumer has an EMAIL_VERIFIED claim from a trusted Issuer?
To answer these questions, lets go through the process of setting up all the required contracts and services, starting with the Issuer.
The job of the Issuer is to act as a trusted third party. In the future, trusted organizations may deploy their own Issuer identity contracts onto the blockchain, which third parties can then trust. Origin plan to offer their own basic Issuer contracts for verifying email addresses, phone numbers, Facebook accounts, Twitter accounts, etc. Third parties will then be able to trust that these Origin Issuer contracts only issue claims if they are, in fact, true.
How will an email verifier work? A typical verification service may involve an application, for example http://example.com/verify-email. This application will have a standard interface for verifying an email address, whereby a user is sent an email with a special code which they then submit back to the application. Now that the email address has been verified, it can be signed with a private key known only to the email verifier app. The corresponding public key is on the issuer's identity. This is how a claim is verified.
More explanation to follow...
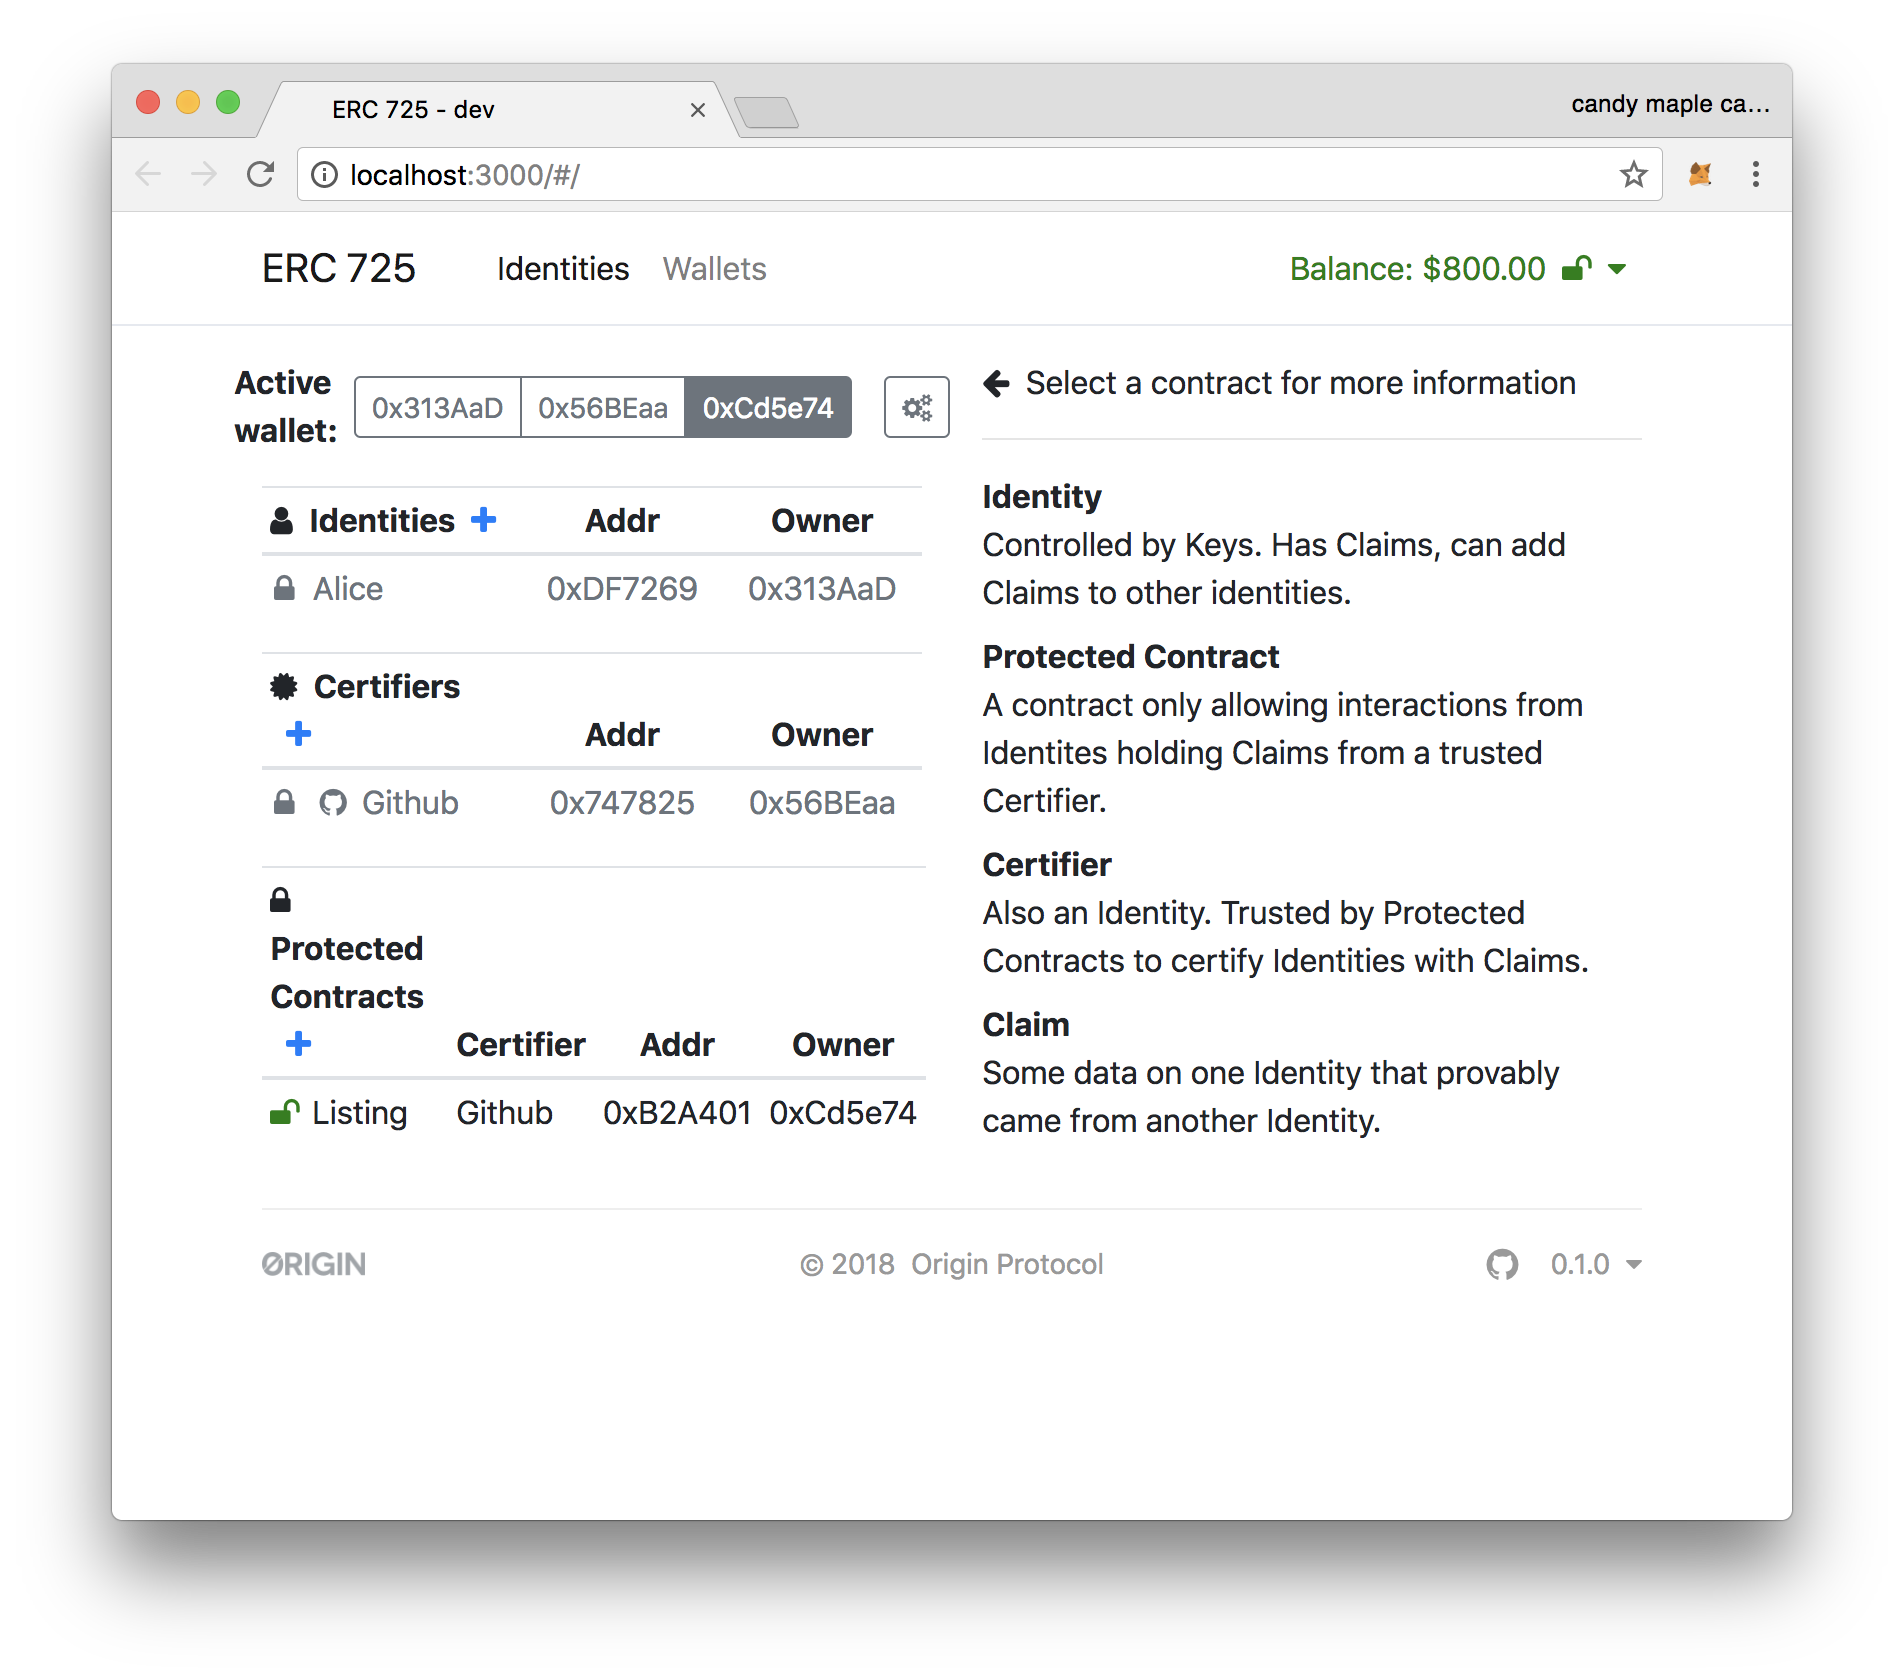
- Screen upon loading

-
Confirm that the first wallet ID is active. (
0x313AaDin our screenshot) We are playing the role of a person who desires a blockchain identity. -
Click "Add an Identity" and deploy an identity contract with name "Alice".

You can see the address of the contract, as well as the wallet ID of the owner.
-
Switch the active wallet to the second. (
0x56BEaain our screenshot) We are now playing the role of a service that can verify a GitHub account. -
Click "Add a Certifier" and deploy a certifier contract called "Github". For now we'll use an example URL for our service.

Again, you should see the address of this contract, and the walled ID of the owner of this contract.
-
Switch the active wallet to the third. (
0xCd5e74in our screenshot) We are now playing the role of an eBay-like application that wants to restrict access to only people with verified Github accounts. (A marketplace for developers, perhaps!) -
Click "Add a Protected Contract" and deploy a contract called "Listing" with certifier of "Github". This is the contract which will be limited to interacting to people with verified Github accounts.

- The screen should now look like this.
- Switch to the first wallet, belonging to "Alice".
- Click on the "Listing" contract.
- Click on "Run Protected Method", and switch the desired Claim Type to "Has GitHub",
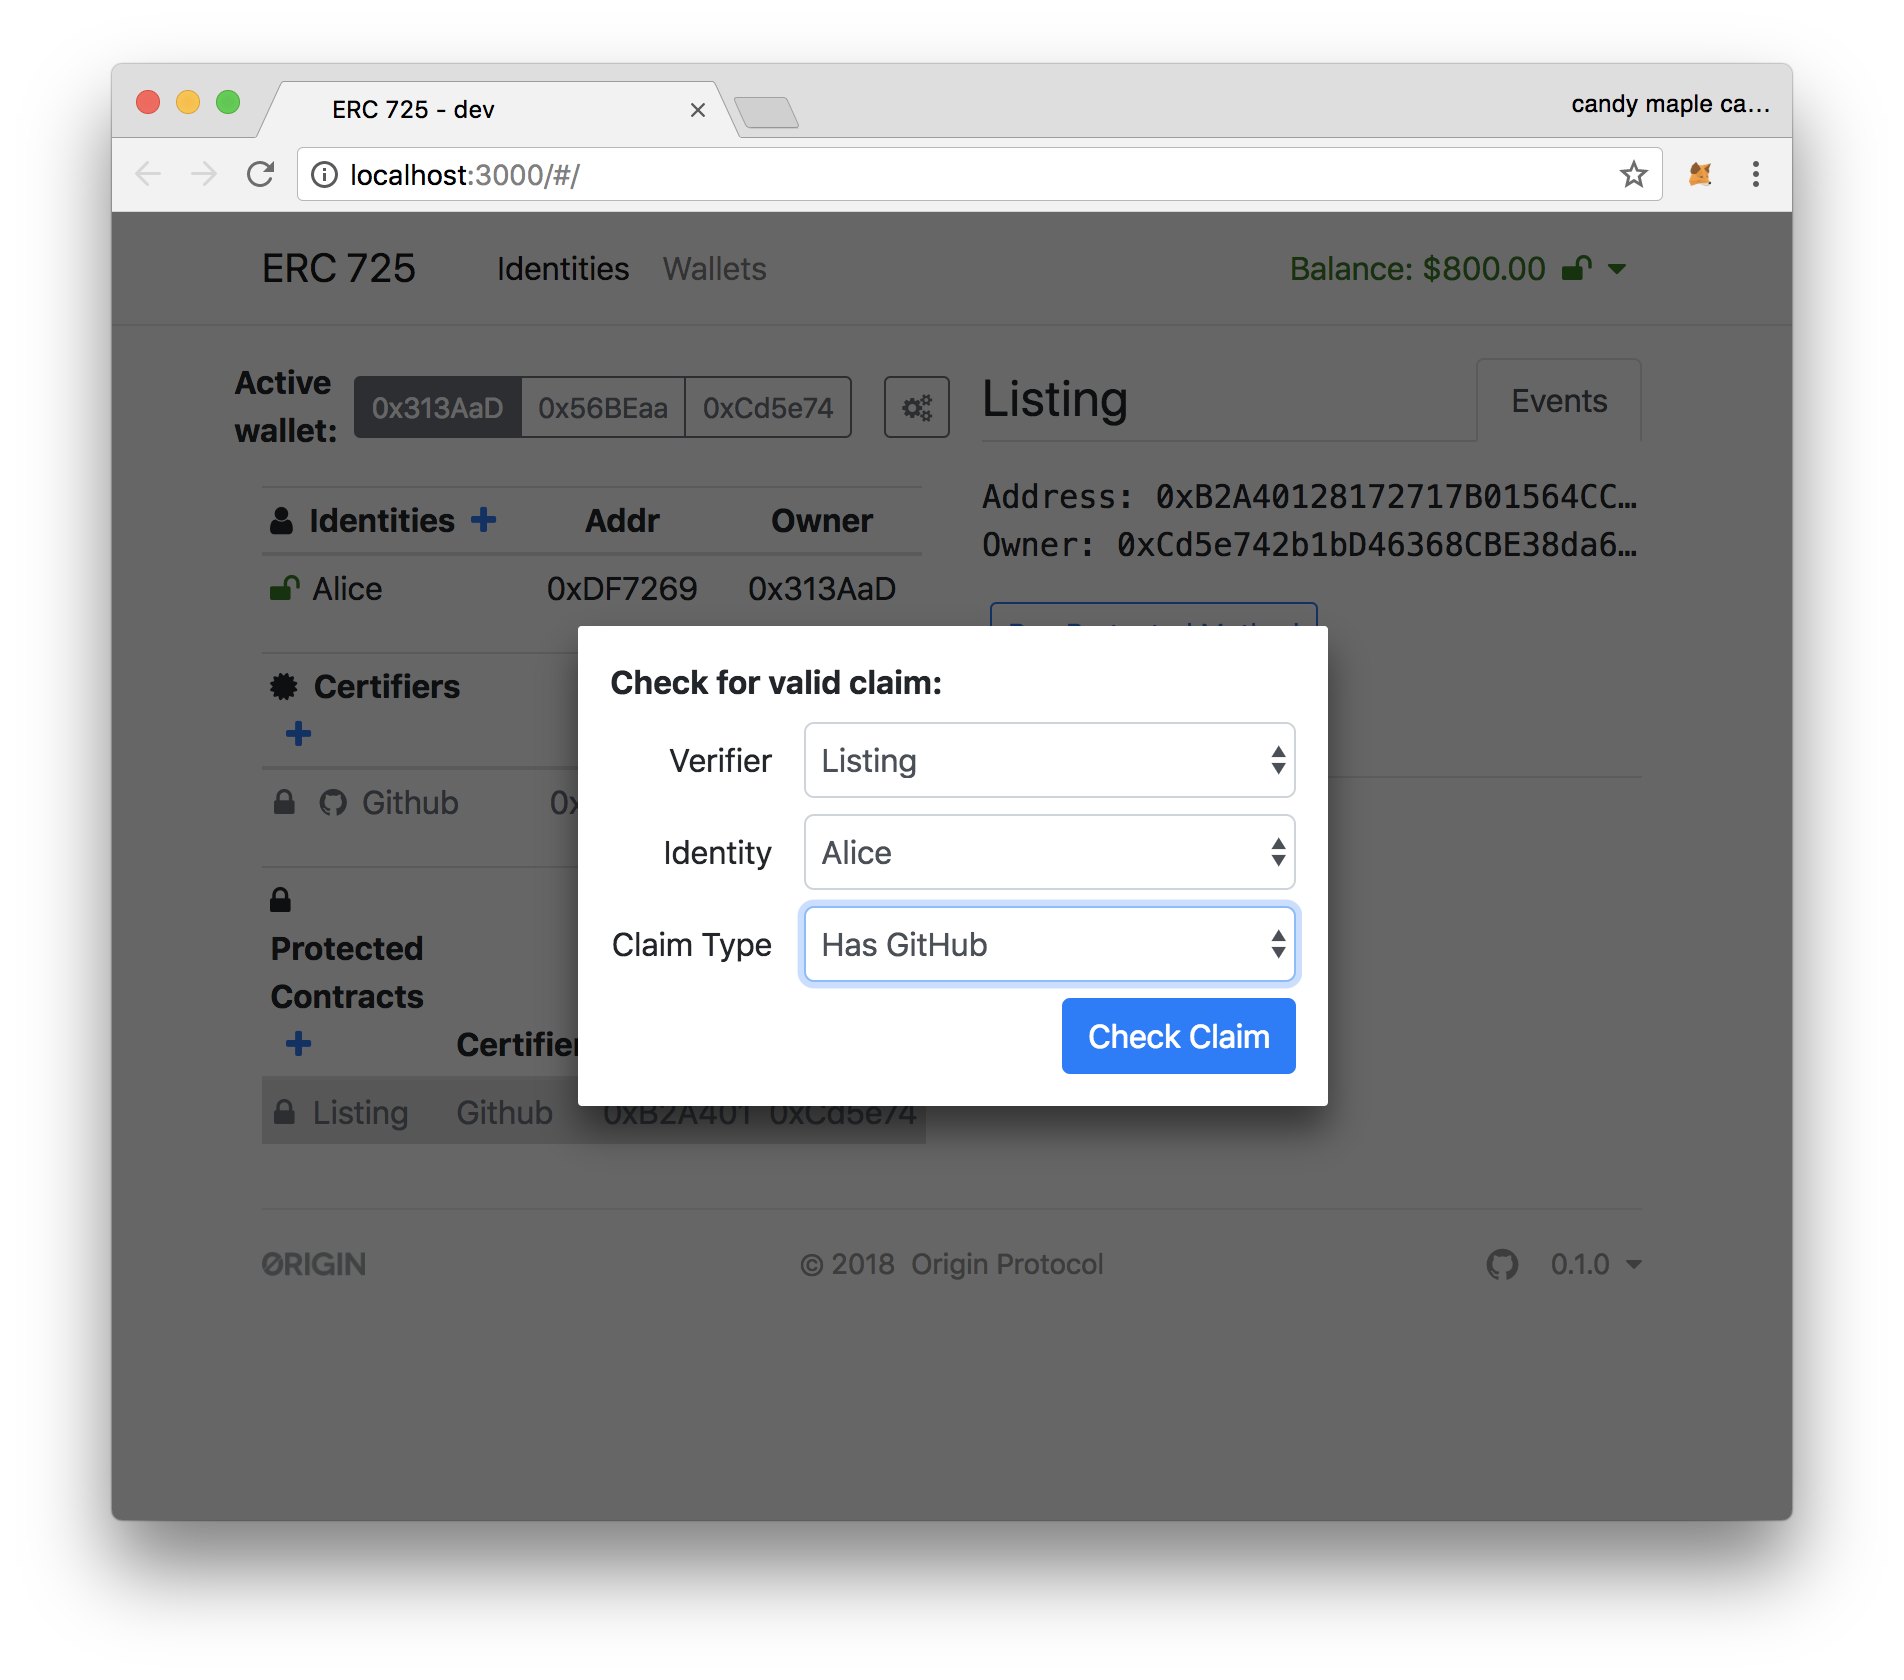
- After clicking on "Check Claim", you should see that the claim is returned as ClaimInvalid. At this point, Alice has no proof that she has a GitHub account.

-
Switch to the second wallet, and click on "GitHub" under "Certifiers".
-
On right column, click on the "+" next to "Claims" to add a claim.
-
Switch the "Claim Type" to "Has Github" and click "Add Claim".

-
Switch to the first wallet, and click on the "Alice" identity.
-
In right column, you should see the claim by our "Github" Certifier (from pervious step) that she has a GitHub account. Click "Approve" to accept this claim to Alice's identity.

- Alice now has on-chain proof of her GitHub!

-
Now click the "Listing" under "Protected Contracts", and then click on "Run Protected Method". Change the "Claim Type" to "Has Github"
-
You should see that this claim is returned as ClaimValid*.

Alice is ready to start shopping!
npm install
npm start
npm run test
- JosefJ for the original contract implementation