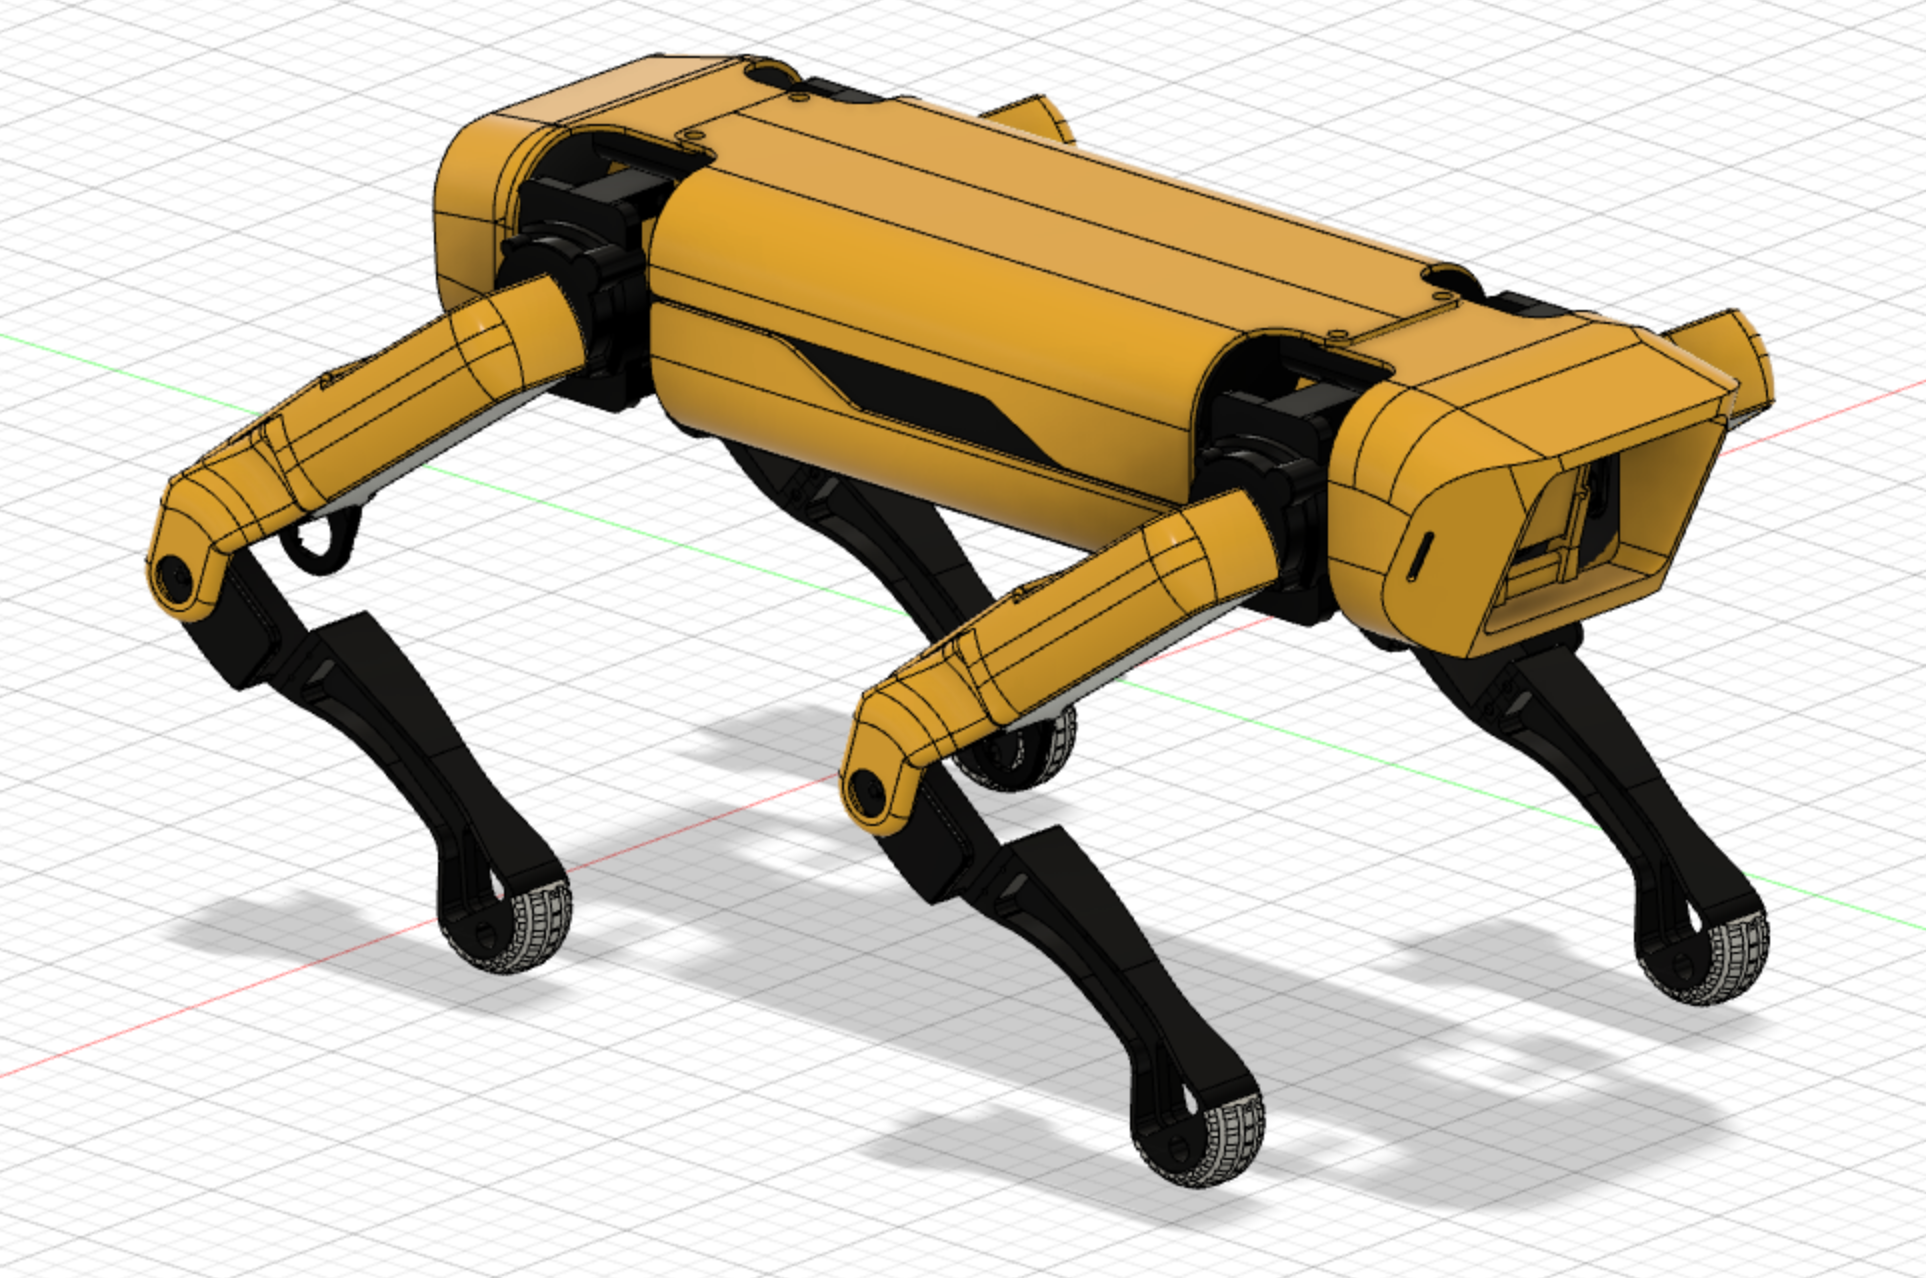
My own personal build and implementation of the Spot Micro quadruped
More info about the open source version can be found at their website.
This is a Work In Progress
I'm updating things as I go, then I'll turn it all into a nice blog post or something.
I'm using the parts from v1.02, but there is also the Thingiverse original by KDY
Parts List:
- 4x(foot, wrist, mid limb, mid limb cover, hind limb)
- Chassis, Chassis L, Chassis R
- Front Shoulder Inner, Outer
- Rear Shoulder Inner, Outer
- Cover Top, Bottom, Nose, Rear
In total there are 31 pieces. The "cover" pieces are typically printed in an accent color, like yellow.
The entire printing took about a week on my slow Ender 3
- Any Raspberry Pi - I'm using a Pi Zero W (15$)
- Make sure your Pi has the header pins for wiring
- Any model RPi will do though (15-60$)
- Also Nvidia Jetson if you're a baller (100$)
- 16GB or 32GB SD Card (Samsung and SanDisk are quality) (10$)
- (Changed) Servo Controller with i2c - PCA 9685 (< 10$)
- custom made servo controller (15$)
- Teensy 4.1 (30$)
- 3 Axis Gyro Accelerometer - MPU 6050 (10$)
- LCD Display 16x2 with i2c (15$)
- Breadboards (?)
- Wires (?)
- Soldering Iron + Solder (15$)
- (Could change) 12x Servo Motors - MG996R High Torque (60$ total)
- These might be too weak, will have to see when they get here, might need to upgrade to more torque
- Also servo horns (these can be 3D printed if really needed)
- 2x 4,000 mAh 7.4V LiPo Batteries - S2 or S3 connector, 50C or higher rating (25$ each)
- LiPo Charger - Match S2 or S3 connector, 1.5A minimum (20$)
- UBEC with 3A 5V output
- Rocker switch for battery cutoff
- Bunch of M3, M4, M5 screws and nuts
- Will update with actual numbers later
- 8x Ball Bearing - F625zz
- possibly more, maybe 16 total
All 3D Printed parts:
This is where your build may differ, Fran Ferri made a 3D model that has the rear shoulders flipped for easier servo access.
What's important here is that you know which direction the shoulders fit.
The order of the pieces goes: Shoulder on the bottom, then Nose/Rear Cover, then Body Cover on the top. Refer to the completed picture above.
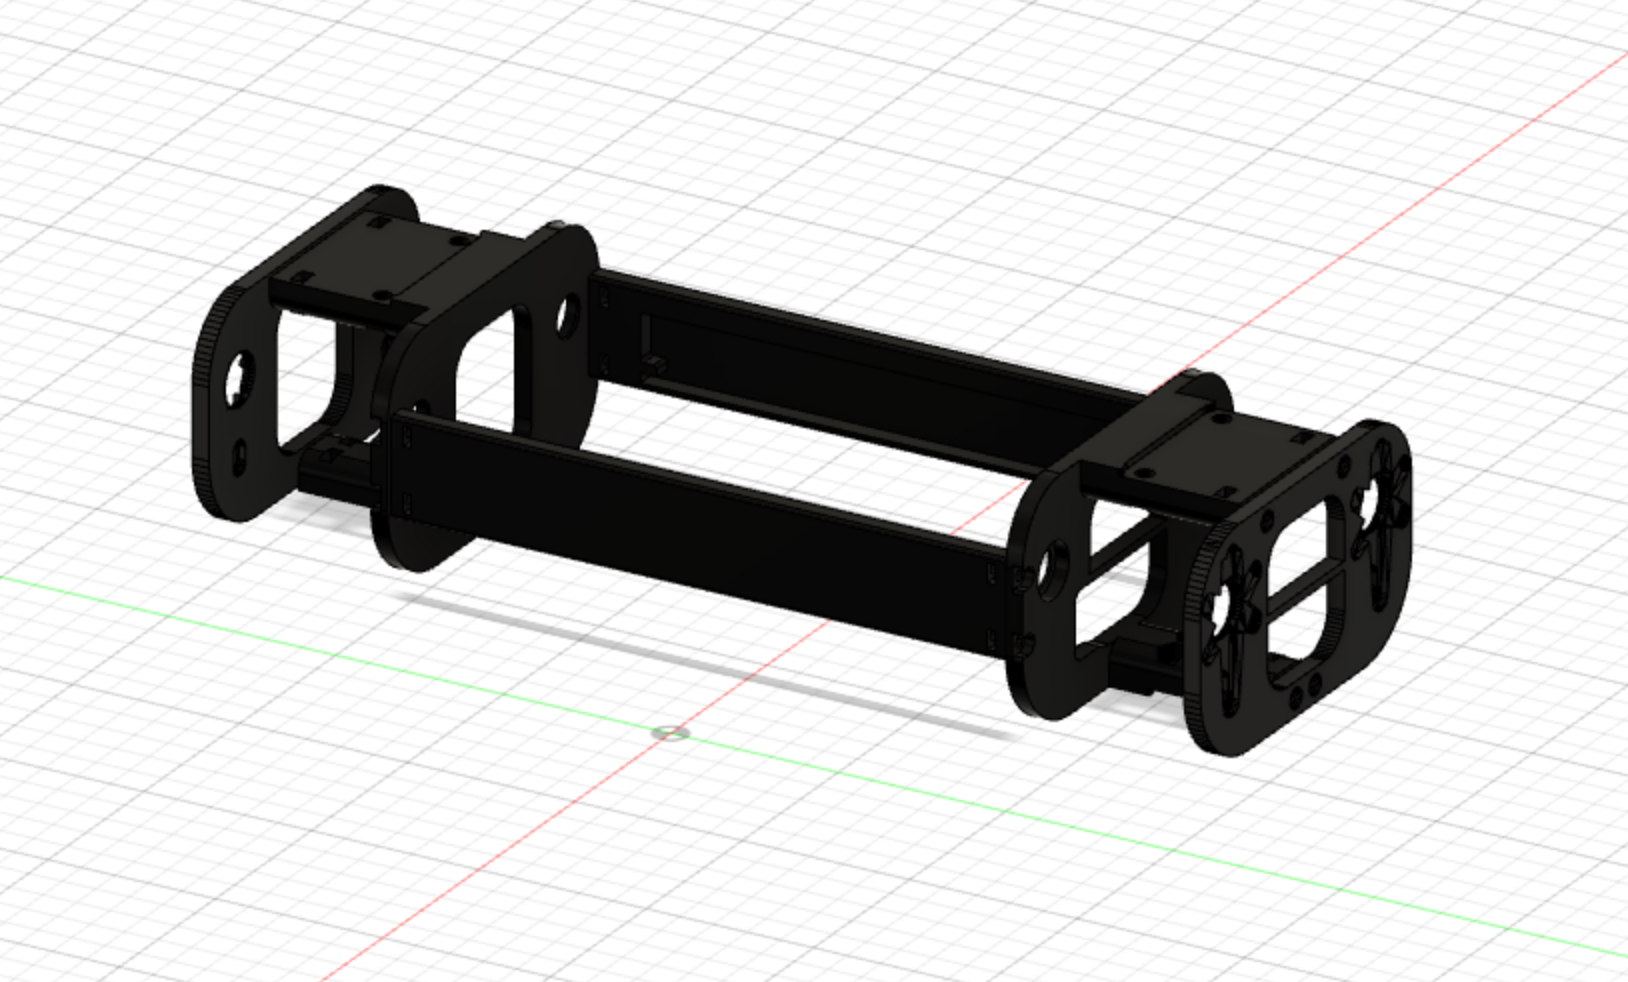

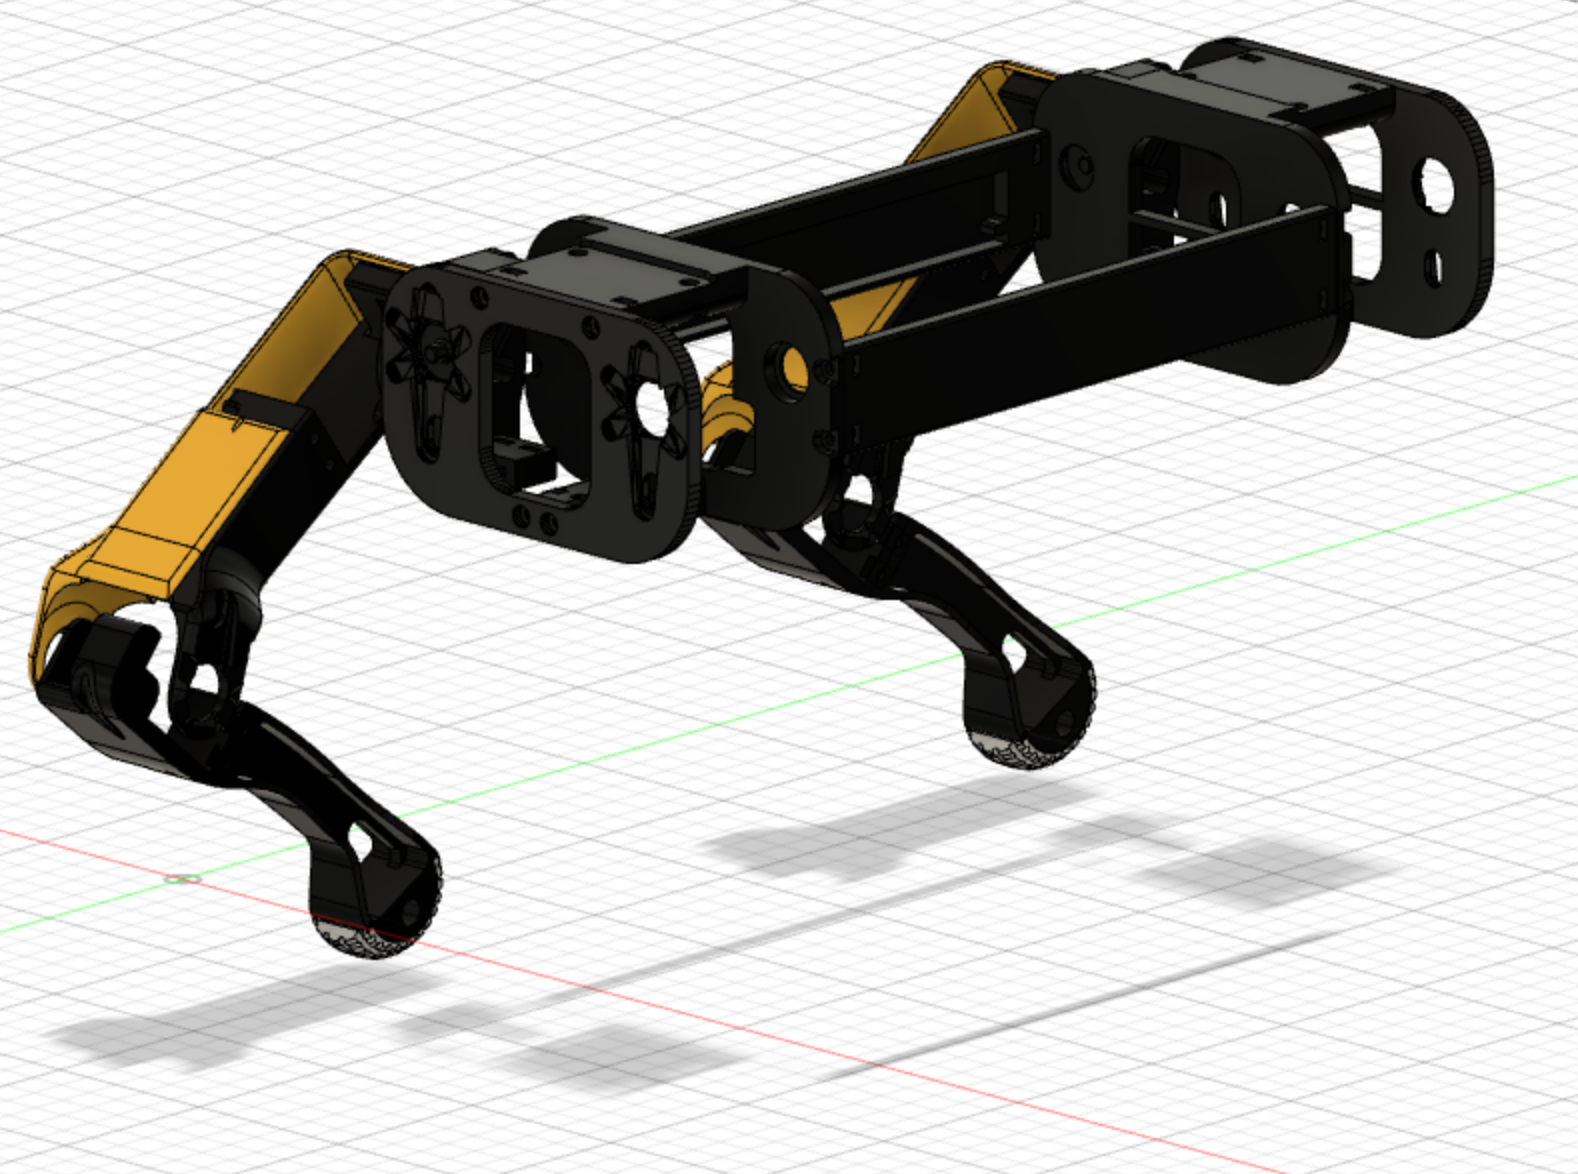
See how the shoulder servo mounts are oriented, with the peg facing toward the rear so then the servo is pointed forward.
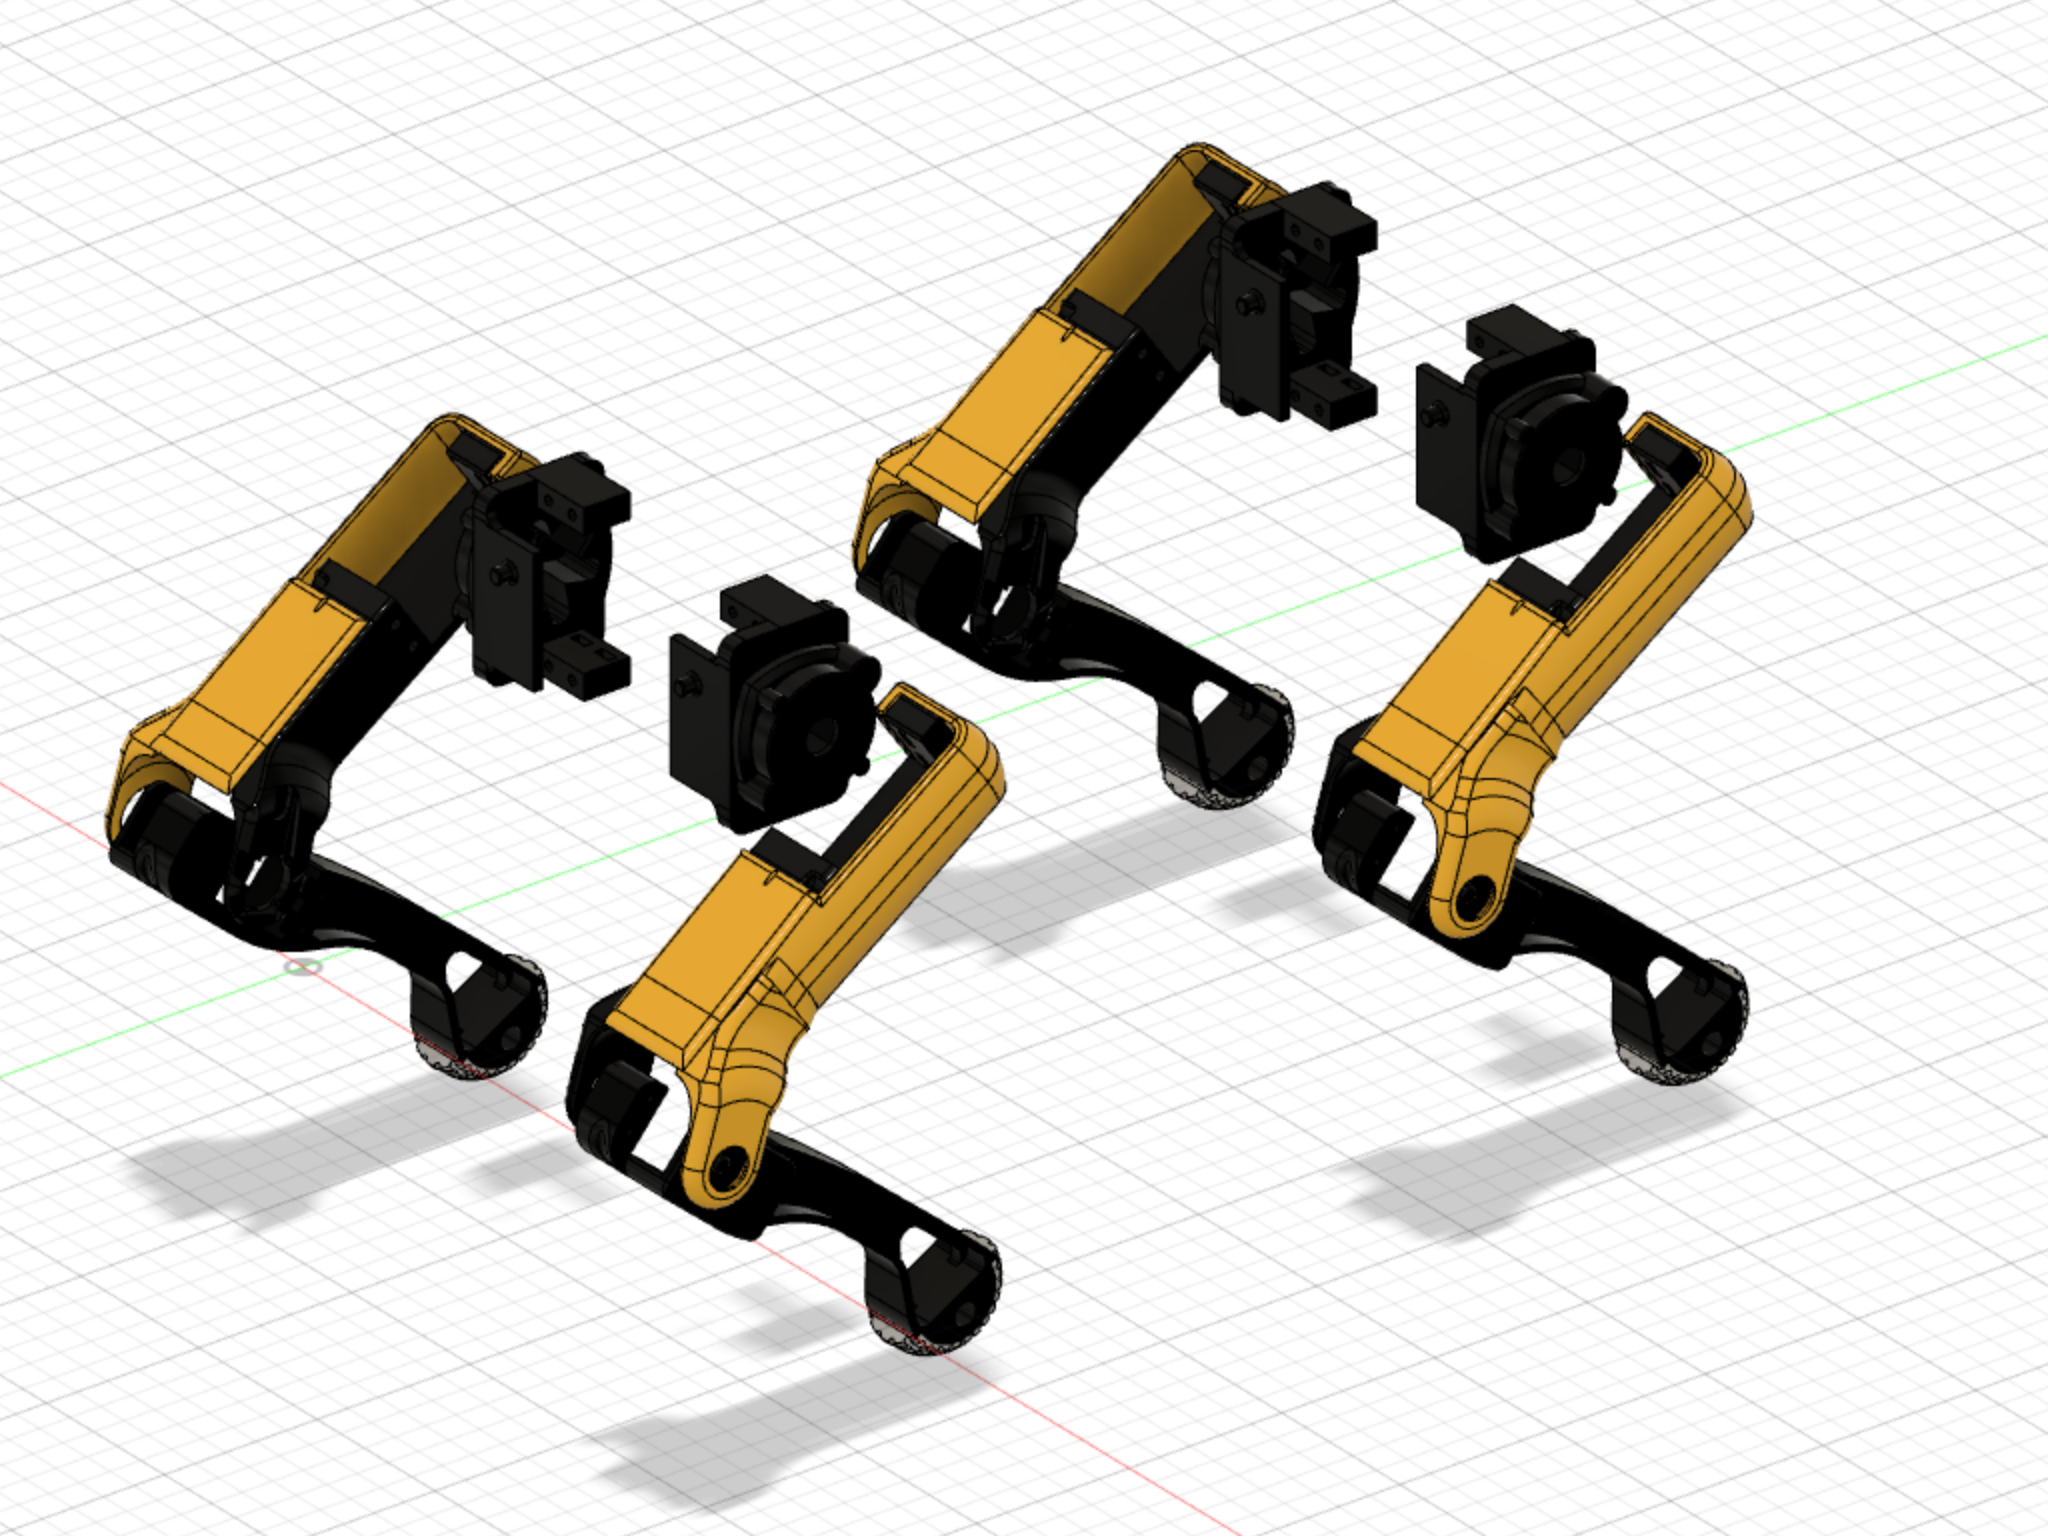
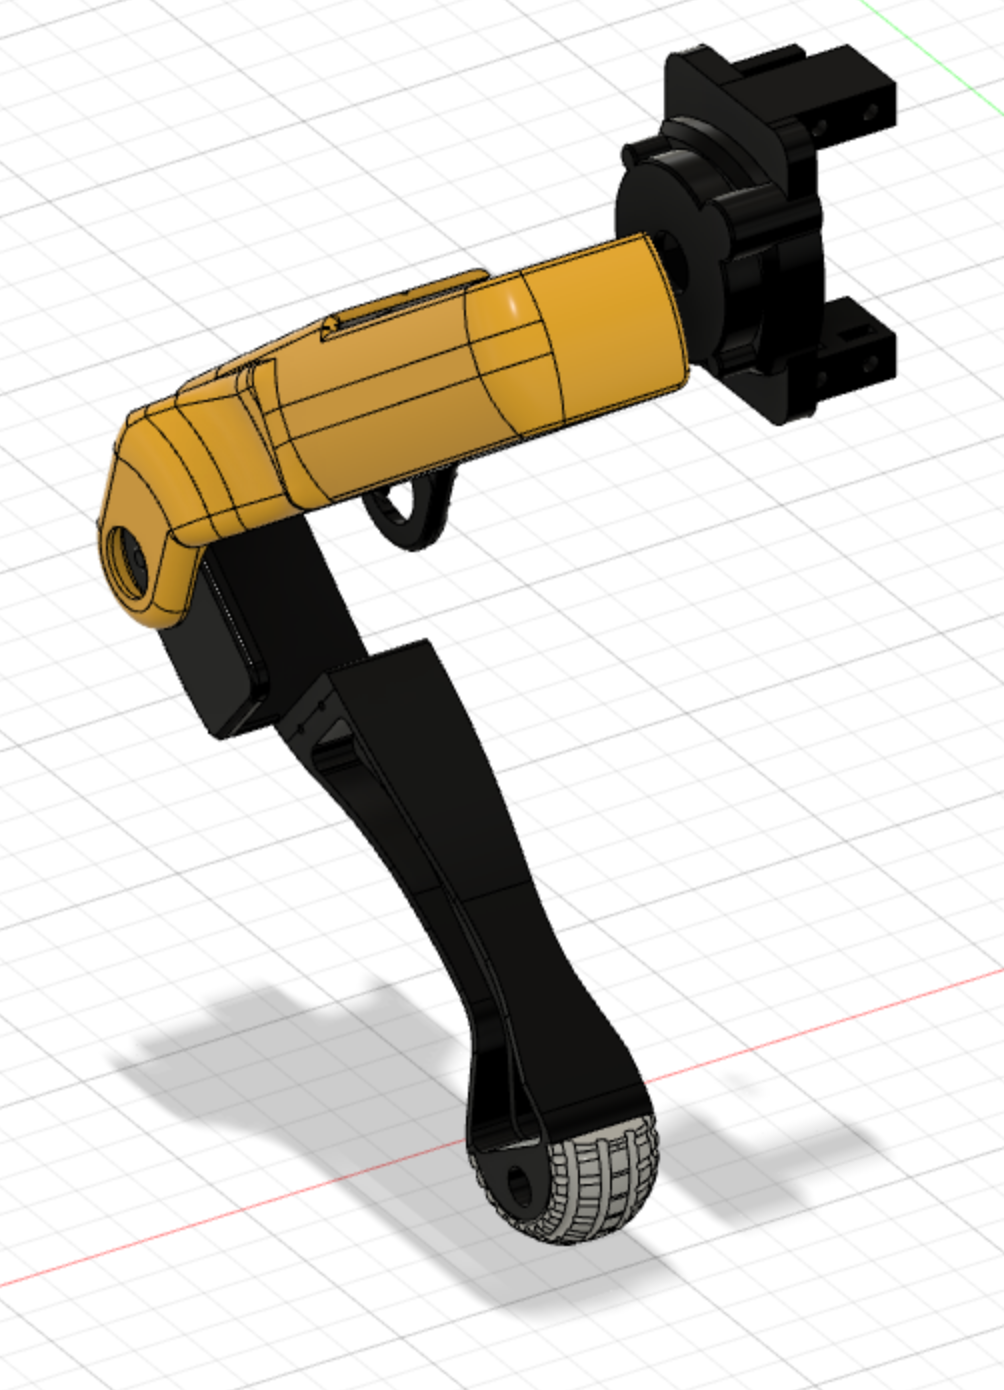
It should also be clear enough from the images how to assemble the upper part of the leg. (Wires route through it, so don't put it together just yet)
Also the end parts of the legs should be oriented like so.
WIP
Wiring the breadboards and getting the batteries to all work.
The community has generally found the PCA 9685 servo controller to be a little too jittery. So to fix this, the awesome dudes who put their freetime into this hobby project made a custom board that houses a Teensy 4.1. Super awesome work!
WIP
If you're looking to install it on your desktop, check the simulation section.
Some kinda linux should be fine. For my RPi Zero W I'm using Raspbian Buster. If you pick something different: YMMV. This is well documented enough many other places. If you're new to this, go look up the NOOBS installer, it's fantastically easy to use.
The RPi Zero has only 512 MB of ram, that kinda sucks, so we'll bump up the swap to 2 GB
First disable swap:
sudo dphys-swapfile swapoff
Then increase the amount of swap to be used by editing (with sudo) the file at /etc/dphys-swapfile to include CONF_SWAPSIZE=2048
Initialize the newly increased swap file:
sudo dphys-swapfile setup
Start swap back up again:
sudo dphys-swapfile swapon
ROS is Robot Operating System. There are a lot of steps to this and it took my slow little Pi Zero about 6 hours to run all of the compilation. Follow their instructions and come back here or follow mine below (they're the same). They warned about a few issues that could arrise, but I was lucky and did not encounter any of them. This is likely due to their patching and me using a clean install or Raspbian without putting anything else on it. YMMV.
sudo sh -c 'echo "deb http://packages.ros.org/ros/ubuntu $(lsb_release -sc) main" > /etc/apt/sources.list.d/ros-latest.list'
sudo apt-key adv --keyserver hkp://ha.pool.sks-keyservers.net:80 --recv-key C1CF6E31E6BADE8868B172B4F42ED6FBAB17C654
apt-get update/upgrade
sudo apt-get update
sudo apt-get upgrade
Install Bootstrap Deps
sudo apt-get install -y python-rosdep python-rosinstall-generator python-wstool python-rosinstall build-essential cmake
Install rosdep
sudo rosdep init
rosdep update
Make workspace for catkin
mkdir -p ~/ros_catkin_ws
cd ~/ros_catkin_ws
Build command line tools
rosinstall_generator ros_comm --rosdistro kinetic --deps --wet-only --tar > kinetic-ros_comm-wet.rosinstall
wstool init src kinetic-ros_comm-wet.rosinstall
Open Asset Import Library
This one takes a while...
mkdir -p ~/ros_catkin_ws/external_src
cd ~/ros_catkin_ws/external_src
wget http://sourceforge.net/projects/assimp/files/assimp-3.1/assimp-3.1.1_no_test_models.zip/download -O assimp-3.1.1_no_test_models.zip
unzip assimp-3.1.1_no_test_models.zip
cd assimp-3.1.1
cmake .
make
sudo make install
rosdep dependencies
cd ~/ros_catkin_ws
rosdep install -y --from-paths src --ignore-src --rosdistro kinetic -r --os=debian:buster
in the command above, replace buster with jessie or stretch if you're on one of those versions
sudo apt remove libboost1.67-dev
sudo apt autoremove
sudo apt install -y libboost1.58-dev libboost1.58-all-dev
sudo apt install -y g++-5 gcc-5
sudo update-alternatives --install /usr/bin/gcc gcc /usr/bin/gcc-5 10
sudo update-alternatives --install /usr/bin/gcc gcc /usr/bin/gcc-5 20
sudo update-alternatives --install /usr/bin/g++ g++ /usr/bin/g++-5 10
sudo update-alternatives --install /usr/bin/g++ g++ /usr/bin/g++-5 20
sudo update-alternatives --install /usr/bin/cc cc /usr/bin/gcc 30
sudo update-alternatives --set cc /usr/bin/gcc
sudo update-alternatives --install /usr/bin/c++ c++ /usr/bin/g++ 30
sudo update-alternatives --set c++ /usr/bin/g++
sudo apt install -y python-rosdep python-rosinstall-generator python-wstool python-rosinstall build-essential cmake
sudo ./src/catkin/bin/catkin_make_isolated --install -DCMAKE_BUILD_TYPE=Release --install-space /opt/ros/kinetic
source /opt/ros/kinetic/setup.bash
echo "source /opt/ros/kinetic/setup.bash" >> ~/.bashrc
The official ROS guide is easy to follow and works with apt, so its very straightforward.
Here's a copy-paste of it though:
Setup sources:
sudo sh -c 'echo "deb http://packages.ros.org/ros/ubuntu $(lsb_release -sc) main" > /etc/apt/sources.list.d/ros-latest.list'
Setup keys:
sudo apt-key adv --keyserver 'hkp://keyserver.ubuntu.com:80' --recv-key C1CF6E31E6BADE8868B172B4F42ED6FBAB17C654
curl -sSL 'http://keyserver.ubuntu.com/pks/lookup?op=get&search=0xC1CF6E31E6BADE8868B172B4F42ED6FBAB17C654' | sudo apt-key add -
Update and Install:
sudo apt update
sudo apt install ros-noetic-desktop-full
sudo apt-get install ros-noetic-catkin
Or you could install from source via the official ROS guide.