Step-by-step instructions for adding a Pi NoIR webcam to the Robo C2 printer.
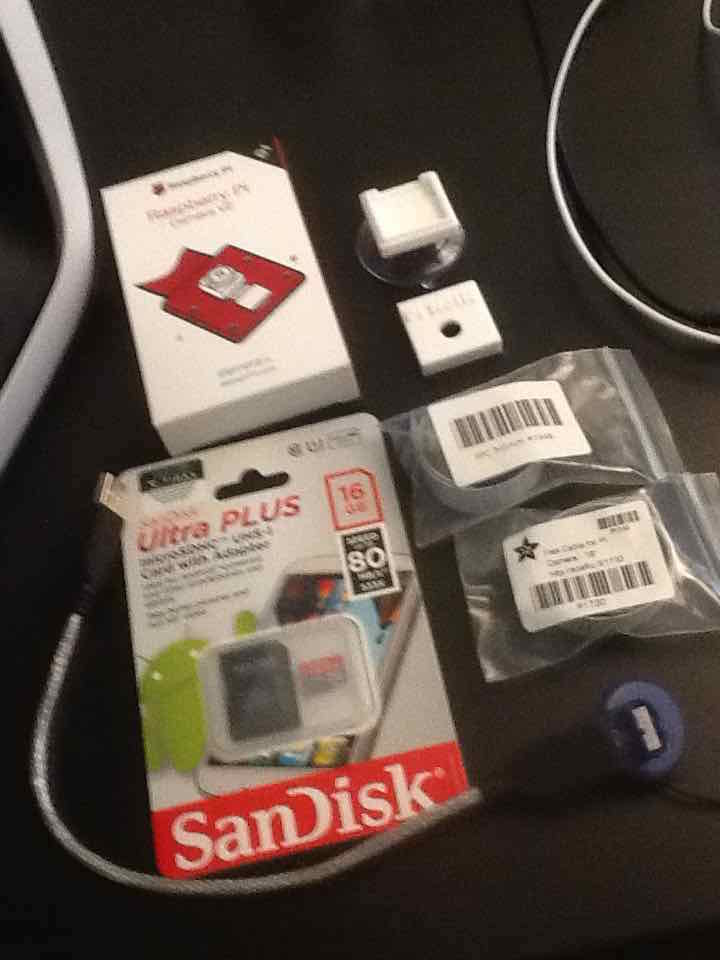
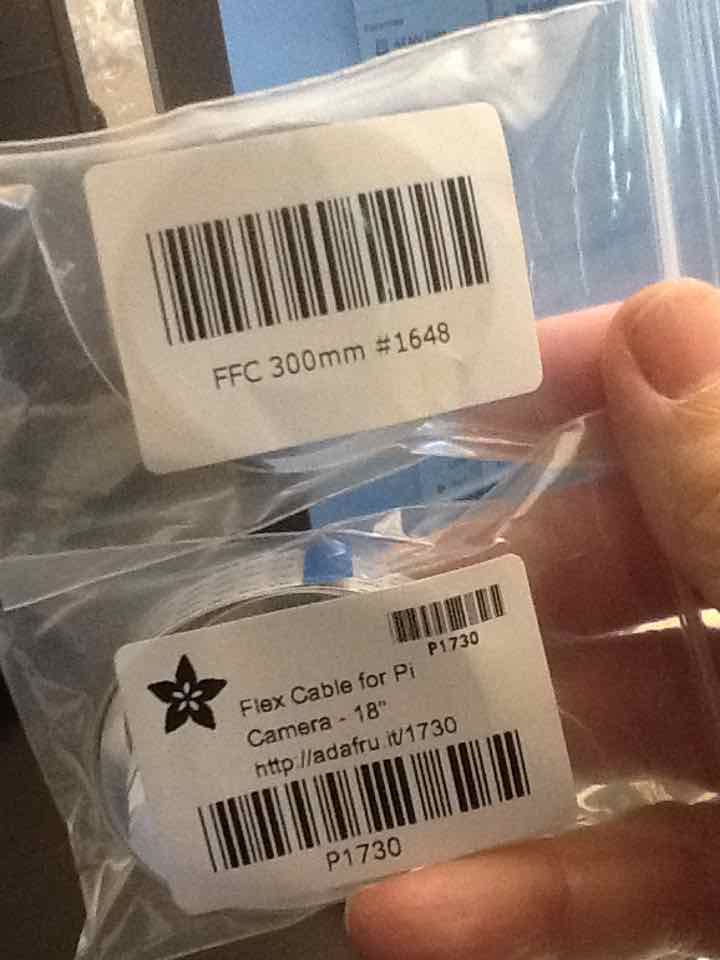
For this project, you'll need three mandatory parts and one that's optional. The mandatory parts are the Raspberry Pi NoIR Camera Board v2 - 8 Megapixels ($26.99), a longer Flex Cable for Raspberry Pi - 18" ($2.50) given the distance and lastly, a medium-sized suction cup ($0.99) from Ace Hardware, for example. I personally purchased my webcam from Fry's Electronics and the ribbon cable from Adafruit.com online.
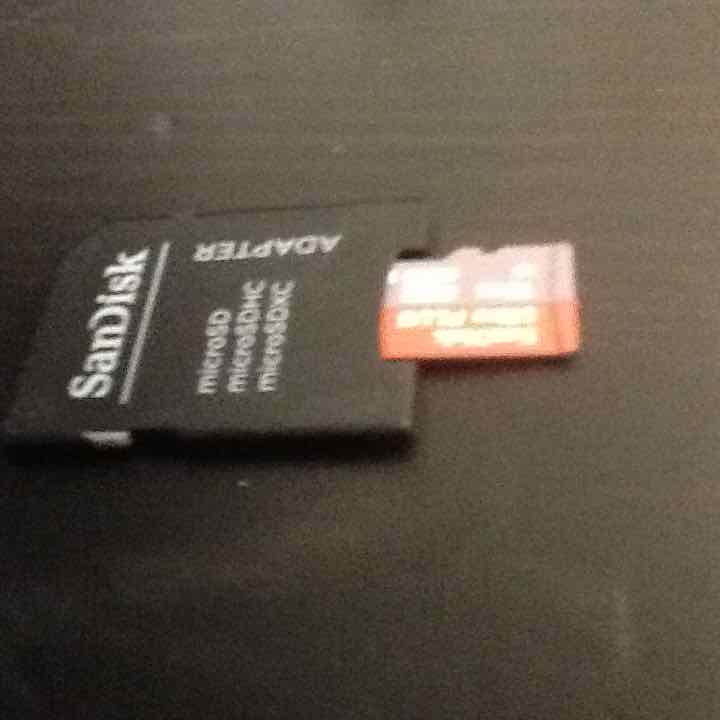
As for the optional part, I chose to upgrade the microSD on the Robo C2's internal Raspberry Pi 3 from 4GB to 16GB given that the resolution on the new v2 webcam is 8MP (which could be as much as 1GB storage per 8 minutes of video). I chose the SanDisk Ultra PLUS microSDHC UHS-1 Card with Adapter from Fry's Electronics ($9.99) for this. The total cost for the full upgrade is about $41 plus tax/shipping, as appropriate, plus any incremental cost to print the enclosure.
Additionally, if your workstation does not have an SD or a microSD slot, you will need some sort of external USB adapter for cloning the microSD card.
Since we'll be saving an image of the existing microSD and restoring that to the new card, I downloaded and installed ApplePi-Baker for OS X. If you're on Windows for your workstation then you'll need some software to clone microSD cards.
For this project, you'll need to print the enclosure in PLA. I used the Robo White PLA for this but any standard PLA filament should work for this.

I've created some custom filament profiles for Cura and have stored them in this repository should you need some. Since it's assumed that you have a Robo C2, I've included the GCODE file which should be ready to print. As a result, you shouldn't even need to go into Cura for this.
Verify that you have all the parts you'll need to begin and a few tools to include a pair of pliers.
I purchased two ribbon cables of different lengths (12" and 18") to do some test fitting. If you don't mind the cable being seen inside the black enclosure of the Robo C2 then the 12" will be fine; otherwise, go with the 18" cable as I've done.
It's necessary to do some slight cleanup of the inside of the Pi NoIR printed part but some of the remainder of the support actually is useful to hold the camera in. I didn't find it necessary to use any glue to hold the enclosure together but you'll want to do a test fit later to verify.
Once it has booted, ignore any prompts to upgrade the software at this time by choosing Cancel.
Motor Control -> using Z=100mm setting, press the Z- option once and only once! Adjust to the Z=1mm setting and continue raising it with Z- (but not so high that the bed hits the extruder).

In the LCD menu, select Utilities -> Options -> EEPROM -> Home Offsets and write down your current setting here for Z.

It's possible after upgrading your software that this value may be set back to the default. Given that this is a fussy adjustment, it's good to have this information available.
Use the power switch in the back to abrubtly power off the printer (without it homing the steppers).
Use the latch in the front to remove the base cover. Reach inside to pop loose the front cover at the top. Work around to the latches on the sides and then ease off the front panel. Leave the connections in place.


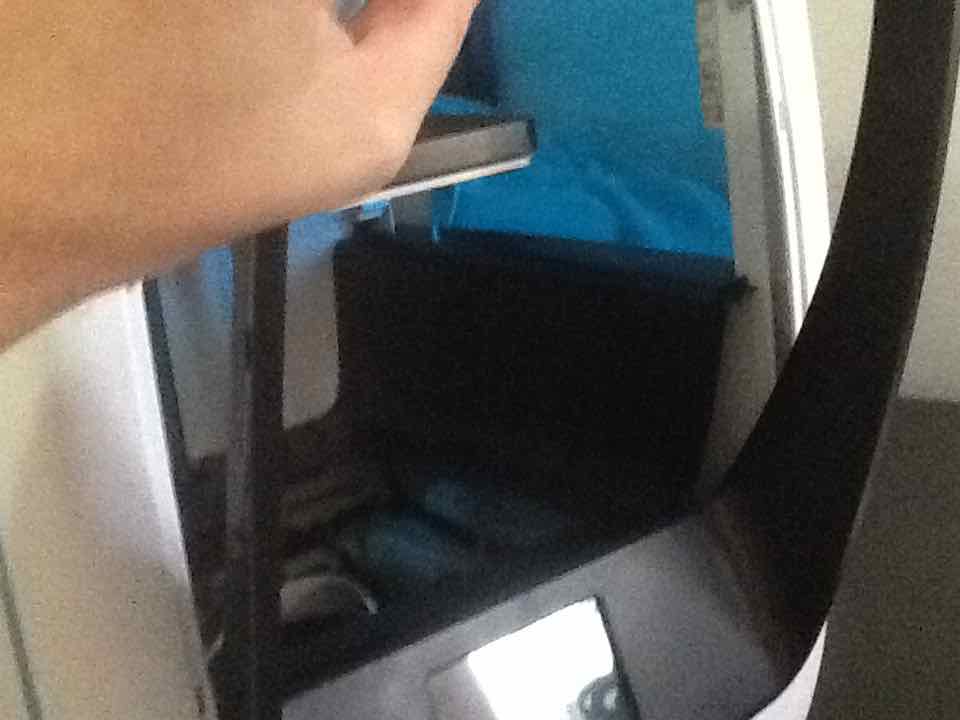
It's good to have a strong light so that you can see things inside.
Find the Raspberry Pi 3 computer on the left and locate its microSD card which is just sticking out from the bottom of the board. Slide this out with your fingers.

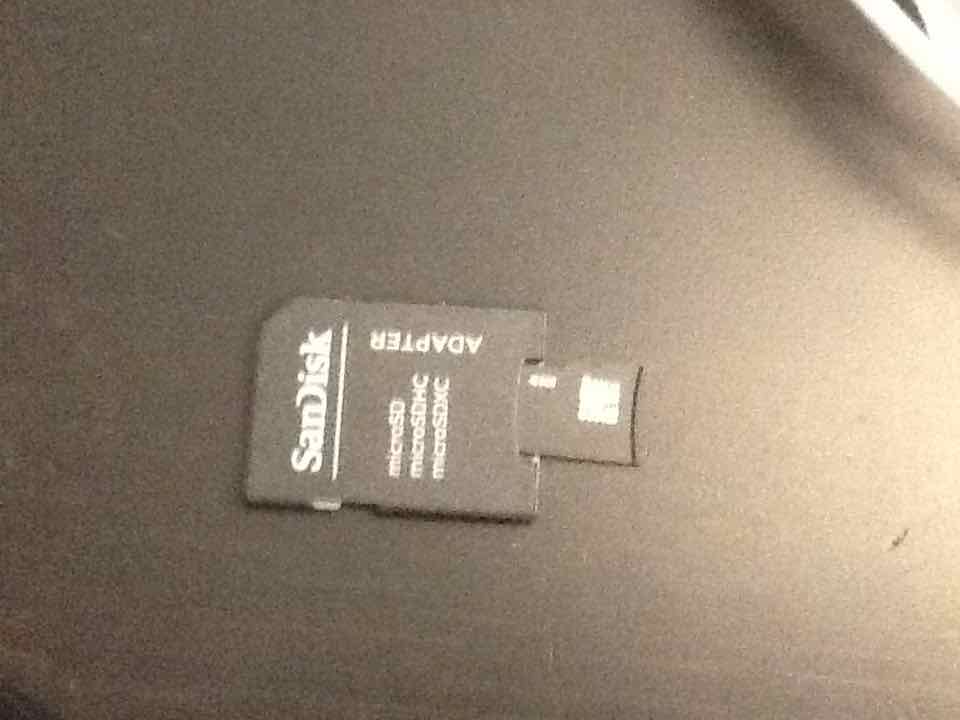
Using the SD adapter which comes with the new microSD card, insert the existing 4GB microSD card from the Robo C2 into this SD adapter and then into your workstation.
If your workstation does not have an SD adapter slot, you might need a USB adapter which accommodates a microSD card.
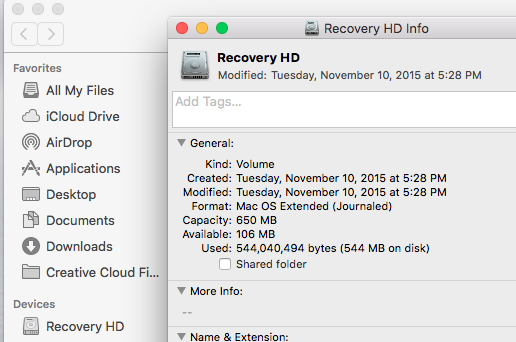
It's probably a good idea to verify that your workstation has at least 4GB of free space. If not, you'll need to clear some up to make this image. In OS X, you right-mouse click the hard drive in Finder and choose Get Info.
I use ApplePi-Baker for this step. Select the 4GB microSD card from the Robo C2 and choose the Create Backup option. Give your image a useful name and select ZIP as the Format option. Choose Save and while this is backing up, continue with the physical installation of the camera.

Unbox the Pi NoIR camera. Push the black clip near the ribbon cable so that it's moved away from the board by a couple of millimeters. Then remove the existing ribbon cable, noting the direction of the silver connectors at the end.


Insert one end of the new 18" replacement ribbon cable, making sure that the silver connectors face the same way as before. Push the black clip back down into place so that it will hold the ribbon cable snugly.


Remove the small protective film from the camera's lens and discard.

Insert the Pi NoIR camera into the base of the newly-printed enclosure. Verify that it sits evenly and that the ribbon goes through the available slot.
Align the top of the enclosure so that the hole is aligned properly with the lens. Snap the two together. If necessary, cover everything with something to protect from scratches and use some pliars to gently push both together.
Remove any hooks from the suction cup and insert it into the slot in the rear.

The backup of the microSD should be finished at some point. Remember to eject the microSD properly before removing it from your workstation.

Exit completely from the ApplePi-Baker software.
Insert the new 16GB microSD into the SD adapter and put it into your workstation. Start the ApplePi-Baker software again and select the microSD card.
In the restore section, find the image file you created earlier and restore to this new 16GB microSD card. Choose Restore and go back to the physical installation of the camera while this is taking place.

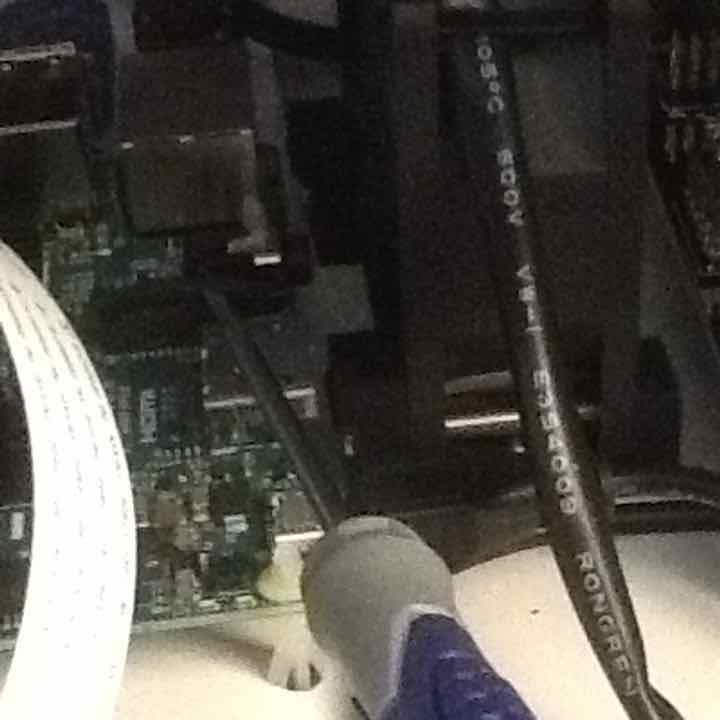
Place the Pi NoIR and enclosure on the inside left blue panel and orient it so that it faces the bed. Route the ribbon cable through the side slot and angle it toward the front bottom of the printer. Continue pushing/pulling the ribbon cable until you see its end. Grab the ribbon cable from here and route it around the corner and to where the top of the Raspberry Pi 3 computer is located.

As you did before, gently pull up the black clip from the ribbon cable connection in the center area of the Raspberry Pi computer. Connect the ribbon cable so that its silver connectors face you and push down the black clip completely.


Use a bright light to verify that you've correctly connected the ribbon cable and that the black clip is down on both sides.

Take up the ribbon cable's slack in the opposite direction, straighten the ribbon cable above the slit on the left side of the printer and afix the suction cup so that it's high enough to see the bed in its highest position. Viewing it from the outside, rotate the camera so that its top is horizontal.


Viewing the Pi NoIR from the front of the printer, verify that its front will not interfere with the left-most position of the extruder head assembly. It shouldn't, given the current design.
The restoral for the microSD image should be completed at some point. ApplePi-Baker is usually good enough to eject the volume when finished but verify this, eject when everything is done before physically removing the adapter.
Carefully install the new 16GB microSD card into the Raspberry Pi 3 inside the Robo C2 printer. The connectors should be facing up.
I found that gently grasping the card diagonally with a pair of pliers was the only way to position the card into the slot. I then used a finger to push it all the way into place.
Reinstall the front cover beginning with the bottom and working up the sides and top latches. Reinstall the base cover.
Turn on the power switch for the printer and wait for it to boot. Ignore any upgrade prompts by choosing Cancel.
Under Motor Controls, choose the Home feature to return all steppers to their home position.
Using ssh (OS X) or putty (Windows) from your workstation, connect to your printer using its name (serial number from the label on the back).
Note that my printer's name is charming-pascal but yours should be something different. The default password should be raspberry.
$ ssh pi@charming-pascal.local
$ sudo raspi-config
  # choose Expand Filesystem
  # choose Enable Camera
  # when prompted to reboot, choose No
  # choose Finish
$ cd ~
$ mkdir photos
$ cd photos
$ raspistill -o first-light.jpg
$ ls
first-light.jpg
$ sudo reboot
After the raspistill command, you should see the captured image for a moment on the Robo's LCD screen.
The Robo should reboot after that last command. Back in your workstation, bring up a browser and visit the OctoPrint interface, replacing the printer's name below with your own.
$ open http://charming-pascal.local
In Settings -> Plugins -> Robo, check the Enable Webcam checkbox and choose Save.
Under the System menu, choose Start video stream.

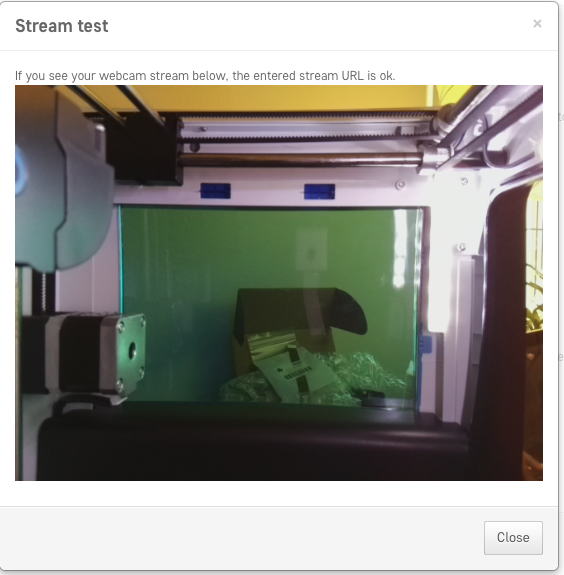
In Settings -> Webcams & Timelapse, choose the Test option. You should see an image from the webcam.
In Settings -> Software Update, choose Check for update now.
On the LCD screen of the Robo, choose Utilities, Update.
After any reboots, go back into OctoPrint. Turn on the video streaming again from the System menu option. Refresh/reload the page.
Send a job to be printed, noting the video streaming panel lower on the home page itself.

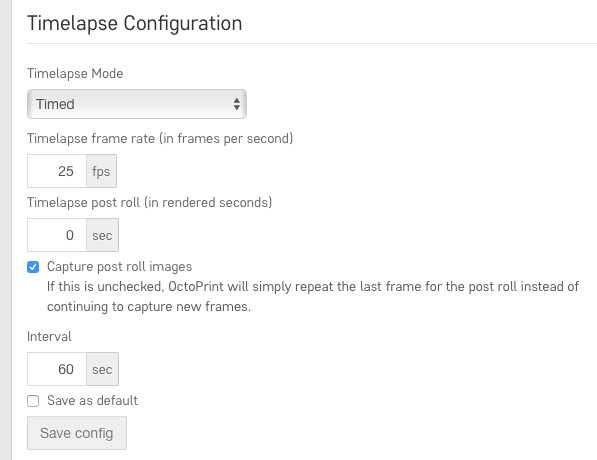
Lower on the home page, adjust any settings under Time Lapse.

...versus...
After the print job has completed, review the time-lapse video which has been created. An example video is here in this repository if you'd like to see how my botched print job finished badly one third of the way through--I quickly aborted the job, btw.
You may want to adjust the location of the suction cup a little higher/lower depending upon your first results as well as slightly rotating it (if your Pi NoIR's camera wasn't perfectly aligned during its manufacture).
There's also a bit of a hack so that you can remove the OctoPrint watermark there in the bottom/left of the videos it produces.
$ ssh pi@charming-pascal.local
$ cd ~/.octoprint
$ sudo nano config.yaml
  # locate the webcam: section near the bottom of the file and between ffmpeg: and snapshot: lines insert the line...
  watermark: false
  # save the file with Ctrl+O, Enter then Ctrl+X
$ exit
Next, you'll want to go into OctoPrint from your workstation and restart the service from the System menu.
Unfortunately, it looks like the camera included in the Robo R2 has a default tilt of 10° for whatever reason. The streaming side of the webcam doesn't adjst this, so time-lapse videos turn out fine. It is annoying, though, to see this unwanted rotation in the interface. Here's how to remove that, noting that you may have to repeat this with every upgrade from Robo.
Substitute your own printer's name below.
$ ssh pi@charming-pascal.local
$ sudo nano ~/oprint/lib/python2.7/site-packages/octoprint_robotheme/static/css/main.css
  # ---------------------------
  # Use the Ctl-W command to search for "rotate"
  # (pressing Enter)...
  # then comment out the three offending lines
  # using the style of commenting that I'm using here
  # ---------------------------
    #webcam_image {
      position: relative;
      top: -54px;
      left: -47px;
      /*-ms-transform: rotate(-10deg);*/
      /*-webkit-transform: rotate(-10deg);*/
      /*transform: rotate(-10deg);*/
    }
  # ---------------------------
  # save the file with Ctrl+O, Enter then Ctrl+X
  # ---------------------------
$ exit
It may be necessary to restart the OctoPrint interface for this change to be seen.
| Donate | Cryptocurrency | |
|---|---|---|
 |
 |
|
| Ethereum | Bitcoin |