Step-by-step instructions for adding sound events to your Robo C2 printer.
For this project, you'll need an iHome speaker (about $15) or similar USB-powered speaker with an 1/8" stereo plug plus an angled stereo plug adapter (about $5). So the total cost for the upgrade is about $20 in this case but I'm recycling my existing speaker.


Fortunately, the Raspberry Pi 3 that's inside the Robo C2 printer already has the alsa-utils collection of sound utilities installed.
For connecting to your printer's Raspberry Pi 3 computer you will either need ssh (OS X/Linux) or putty (Windows).
As for OctoPrint, you'll need to install the GCODE System Commands plugin. You'll want to substitute your printer's serial number below instead of "my-c2".
- http://my-c2.local
- Settings
- Plugin Manager
- Get More...
- GCODE System Commands -> Install
Once you've assembled the necessary parts and have verified that the necessary plugin has been installed in OctoPrint as described above, you're ready to begin.
You'll need to raise the bed of the Robo C2 in one of either two ways: under power or manually. If you're comfortable with the motor commands from the Robo's LCD screen, raise the bed out of the way so that you can gain access to the door under it; then power off the printer. Alternately, with power off already, twist the vertical rod to raise the bed manually out of the way. (See the Pi NoIR upgrade here as a separate repository with the instructions for using the motor controls.)
Remove the door at the bottom of the printer.
It's probably easiest to also remove the front panel of the printer. Reach inside to pop loose the front cover at the top. Work around to the latches on the sides and then ease off the front panel. Leave the connections in place.


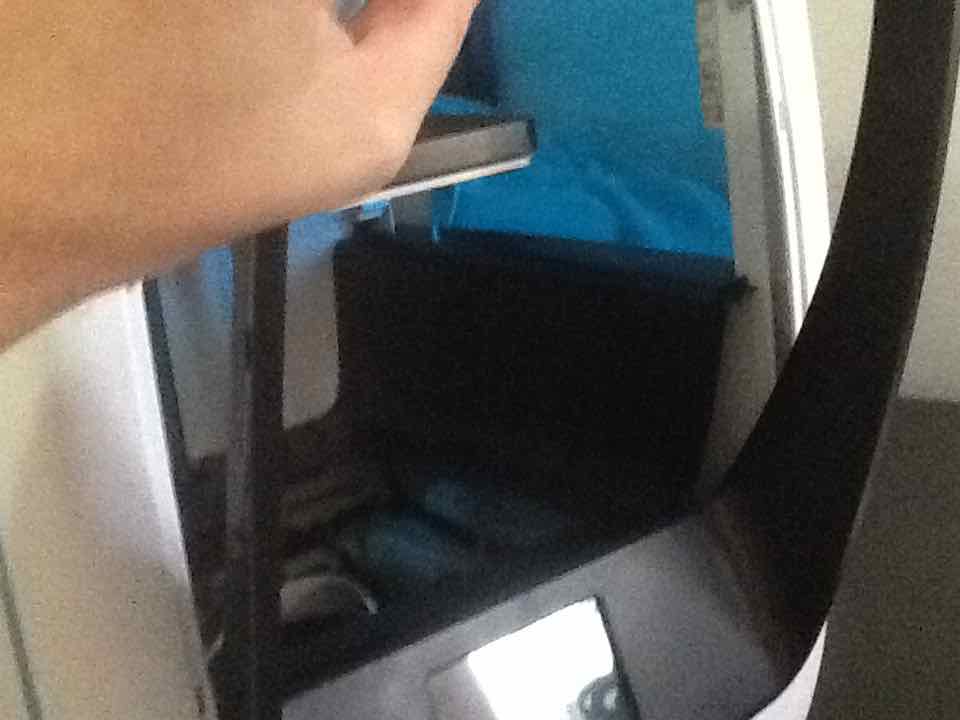
Locate the Raspberry Pi 3 computer on the left side of the bottom of the chassis. Find the only available USB port on the far end of this board in the middle. Plug in the iHome's USB plug into this receptacle.
Plug the angled stereo 1/8" adapter into the stereo jack on the right side of the Raspberry Pi 3 computer, noting that this will be a close fit with the fan assembly next to it. Plug the iHome's 1/8" stereo plug into the female side of this adapter.
Plug in the micro-USB power plug on the opposite end of this cable into the iHome itself. Switch on the iHome via its sliding power switch. Feel free to push the option button on the iHome twice to turn off the light show.
Find a suitable location inside the bottom of the chassis, noting that the iHome can be pushed together and twisted so as to lock it into a smaller profile (which reduces the bass response).
Close the bottom cover and turn on the printer.
Once the printer is on (and assuming that you've earlier either plugged in an Ethernet cable or otherwise configured its wi-fi settings) it should broadcast its name on your network. So you should be able to connect to it via its serial number (name). I'll assume "my-c2" as that serial number but substitute your own printer's S/N here.
$ ssh pi@my-c2.local # Password is "raspberry"
I'll assume that you were successful. Subsequent commands below will assume that you're doing this from your remote connection to your printer in a Terminal session. If you are using putty on a Windows-based computer, enter "my-c2.local" as the hostname, "pi" as the username and "raspberry" as the password.
Honestly, any sound event file should do as long as aplay is compatible with the format.
$ cd ~
$ mkdir sounds && cd sounds
$ mkdir r2d2 && cd r2d2
$ curl -o 1.wav https://raw.githubusercontent.com/OutsourcedGuru/roboc2-pi-sound-upgrade/master/sounds/r2d2/r2d2-1.wav
$ curl -o 2.wav https://raw.githubusercontent.com/OutsourcedGuru/roboc2-pi-sound-upgrade/master/sounds/r2d2/r2d2-2.wav
$ curl -o 3.wav https://raw.githubusercontent.com/OutsourcedGuru/roboc2-pi-sound-upgrade/master/sounds/r2d2/r2d2-3.wav
$ curl -o 4.wav https://raw.githubusercontent.com/OutsourcedGuru/roboc2-pi-sound-upgrade/master/sounds/r2d2/r2d2-4.wav
$ curl -o 5.wav https://raw.githubusercontent.com/OutsourcedGuru/roboc2-pi-sound-upgrade/master/sounds/r2d2/r2d2-5.wav
$ curl -o 6.wav https://raw.githubusercontent.com/OutsourcedGuru/roboc2-pi-sound-upgrade/master/sounds/r2d2/r2d2-6.wav
The alsamixer program within alsa-utils is how you adjust the master volume level.
$ alsamixer
Note the existing volume level in dB gain and then use your up/down cursor keys to adjust. Press the ESC key when you're done. (I've got my dB gain set to 86, for what it's worth.)
If you want to test things at this point, you should be able to run the following command to hear something.
$ aplay 6.wav
Return to your computer's browser and open up the OctoPrint session from earlier (or open it again with http://my-c2.local).
- Settings
- Plugins
- GCODE System Commands
- Plus button
- G-CODE -> OCTO 801
- System -> /usr/bin/aplay /home/pi/sounds/r2d2/1.wav
Add the remaining sounds by iteratively pressing the + button and adding OCTO 802 -> 2.wav, etc.
From the top of the main menu, you'll want to restart OctoPrint for the plugin adjustments to be seen.
Find the Printer Terminal section of the interface and enter OCTO801. You should hear the first sound event play from inside the chassis.
If the volume isn't loud enough, go back and adjust the master volume level using alsamixer again.
The most straightforward way of initiating these sound events would be to insert a line into your file where you'd like the event to take place.
For example, you might insert the following GCODE into your file to initiate a filament color change.
; Stop all steppers and extruder
M84 S0
; set to relative mode
G91
; move bed down 10mm
G1 Z10
; set back to absolute mode
G90
; R2D2 whistle to get your attention
OCTO805
; Wait ten minutes (600 seconds)
G4 S600
; R2D2 random noise to get your attention
OCTO801
At this point, the job should be safely paused. You could then use the Robo C2's LCD interface to perform the filament change wizard, clip any filament from the tip of the extruder, return to the Printer screen and press the Resume button.
Since things might change over time, note that most of the GCODE above is from my current OctoPrint's "After print job is paused" script. You might want to test all this on a small part before trusting it to a larger, more expensive part you're attempting.
Instead of manually inserting these codes, you could also create an OctoPrint plugin or a Cura (or similar) slicing program post-processing script to automatically insert GCODE for you.
I may later add some guidance on this but for now, this would be considered out-of-scope for this repository.
It would be great if there were a centralized list of already-assigned OCTO custom GCODE numbers for different things but I'm not aware of any.
These are intended to be custom codes for your own use. I would suggest that you remember the ones you issue and consistently use them throughout your projects. I'm using the 800 series which may or may not already be in use by others.
You can find the documentation for the aplay command on opensrc.org here. Note that the iHome will merge both left/right channels for the single speaker so you shouldn't have to adjust the channel selection.
You can find the documentation for the GCODE System Commands plugin on OctoPrint's website here. Note that it's probably best to give full paths for both aplay and the sound event file itself.
| Donate | Cryptocurrency | |
|---|---|---|
 |
 |
|
| Ethereum | Bitcoin |