This project is deprecated and is now replaced by Lord of Large Language Models. check it out here


This is a Flask web application that provides a chat UI for interacting with llamacpp, gpt-j, gpt-q as well as Hugging face based language models uch as GPT4all, vicuna etc...
Follow us on our Discord Server.
Watch Install Video (Outdated, please use "New UI video") Old Install Video
Watch Usage Videos Usage Video
Watch Settings Video Settings Video
Watch New UI Video New UI + Install
GPT4All is an exceptional language model, designed and developed by Nomic-AI, a proficient company dedicated to natural language processing. The app uses Nomic-AI's advanced library to communicate with the cutting-edge GPT4All model, which operates locally on the user's PC, ensuring seamless and efficient communication.
If you are interested in learning more about this groundbreaking project, visit their Github Repository, where you can find comprehensive information regarding the app's functionalities and technical details. Moreover, you can delve deeper into the training process and database by going through their detailed Technical report, available for download at Technical report.
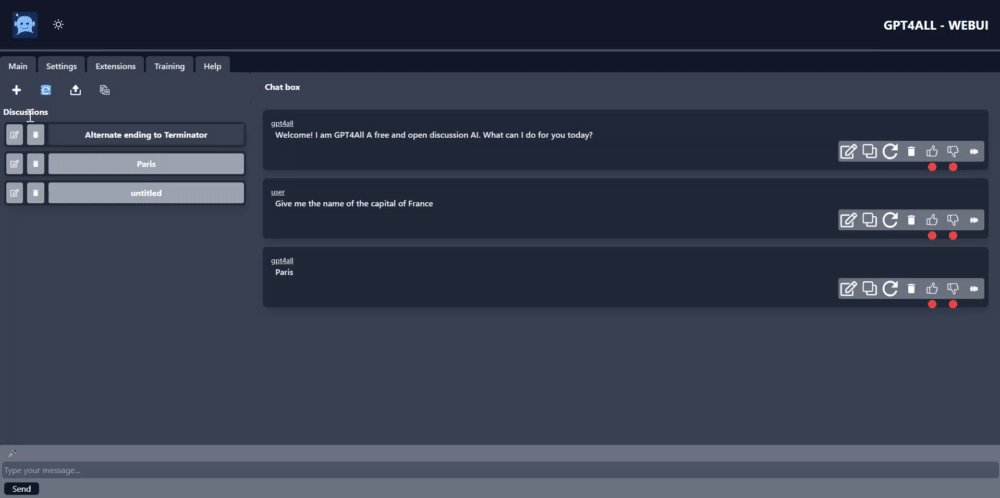
One of the app's impressive features is that it allows users to send messages to the chatbot and receive instantaneous responses in real time, ensuring a seamless user experience. Additionally, the app facilitates the exportation of the entire chat history in either text or JSON format, providing greater flexibility to the users.
It's worth noting that the model has recently been launched, and it's expected to evolve across time, enabling it to become even better in the future. This web UI is designed to provide the community with easy and fully localized access to a chatbot that will continue to improve and adapt across time.
- Chat with locally hosted AI inside a web browser
- Create, edit, and share your AI's personality
- Audio in and audio out with many options for language and voices (only Chrome web browser is supported at this time)
- History of discussion with resume functionality
- Add new discussion, rename discussion, remove discussion
- Export database to json format
- Export discussion to text format
Make sure that your CPU supports AVX2 instruction set. Without it, this application won't run out of the box (for the pyllamacpp backend). To check your CPU features, please visit the website of your CPU manufacturer for more information and look for Instruction set extension: AVX2.
Note
Default model
gpt4all-lora-quantized-ggml.binis roughly 4GB in size.
Note
It is mandatory to have python 3.10 (The official one, not the one from Microsoft Store) and git installed.
- Go to the latest release section
- Download the
webui.batif you are on windows orwebui.shif you are on linux/mac. Put this file in a folder for example/gpt4all-ui/, because when you run it, all the necessary files will be downloaded into that folder. - Run the script and wait. It should install everything and start the chatbot. Chatbot will be avaliable from web browser
http://localhost:9600.
Note During installtion, it may ask you to download a model. Feel free to accept or to download your own models depending on the backends you are using.
Once installed, you can run the app by using webui.bat or webui.sh. The script will check for any new updates
If you want to use a more advanced install procedure, please click here
Make sure to put models the inside the models directory.
After that, you can simply use docker-compose or podman-compose to build and start the application:
Build
docker compose -f docker-compose.yml buildStart
docker compose -f docker-compose.yml upStop Ctrl + C
Start detached (runs in background)
docker compose -f docker-compose.yml up -dStop detached (one that runs in background)
docker compose stopAfter that, you can open the application in your browser on http://localhost:9600
Now you're ready to work!
Two backends are now supported:
1- The llama_cpp backend by Abdeladim 2- The GPT-j backend by Abdeladim 3- The GPT-j backend by marella 4- Hugging face's Transformers (under construction)
You can also refuse to download the model during the install procedure and download it manually.
For now, we support ggml models that work "out-of-the-box" (tested on Windows 11 and Ubuntu 22.04.2), such as:
-
GPT4ALL 7B or visit repository
-
GPT4ALL 7B unfiltered or visit repository
-
Vicuna 7B rev 1 or visit repository
-
Vicuna 13B rev 1 or visit repository
We also support GPT-j models out of the box
These models don't work "out-of-the-box" and need to be converted to the right ggml type:
- Vicuna 7B or visit repository
- Vicuna 13B q4 v0 or visit repository
- Vicuna 13B q4 v1 or visit repository
- ALPACA 7B or visit repository
Just download the model into the models/<backend name> folder and start using the tool.
You can find hundreds of personalities in my personal Personalities repository. This new personalities format can be used for any third party applications, it builds a simple structure and format to define personalities. This format is evolutive and new fields and assets will be added in the future like personality voice or 3d animated character with prebaked motions that should allow AI to be more alive. The format is baked to support old versions while adding new capabilities for new versions making it ideal as a personality defintition format.
- Navigate to the root directory of your repository.
- Run either
installations/add_personality.batorinstallations/add_personality.sh, depending on your operating system. - Select the desired language, category, and personality from the provided options.
- The selected personality will be added to the list of available options.
- Choose the current personality:
- Option 1: Use the UI by going to "Settings" and selecting "Personalities".
- Option 2: Update the configuration file
configs/default_local.yamlwith the appropriate language, category, and personality name.
Note: Ensure that you have the necessary permissions and dependencies installed before performing the above steps.
Please don't forget to take time and give a Star if you like the project. This helps the visibility of the project.
# Build custom personalities and share them

To build a new personality, create a new file with the name of the personality inside the `personalities` folder. You can look at `gpt4all` personality as an example. Then you can fill the fields with the description, conditionning, etc. of your personality. Add a logo to your personality (avatar). Then save the file. I personally use stable diffusion to generate the avatars.


You can launch the application using the personality in two ways:
- Change it permanently by putting the name of the personality inside your configuration file
- Use the `--personality` or `-p` option to give the personality name to be used

If you deem your personality worthy of sharing, you can share the it by adding it to the [GPT4all personalities](https://github.com/ParisNeo/GPT4All_Personalities) repository. Just fork the repo, add your file, and do a pull request.

# Advanced Usage

If you want more control on your launch, you can activate your environment:

On Windows:
```cmd
env/Scripts/activate.bat
On Linux/MacOs:
source venv/bin/activateNow you are ready to customize your Bot.
To run the Flask server, execute the following command:
python app.py [--config CONFIG] [--personality PERSONALITY] [--port PORT] [--host HOST] [--temp TEMP] [--n_threads N_THREADS] [--n_predict N_PREDICT] [--top_k TOP_K] [--top_p TOP_P] [--repeat_penalty REPEAT_PENALTY] [--repeat_last_n REPEAT_LAST_N] [--ctx_size CTX_SIZE]On Linux/MacOS more details can be found here
--config: the configuration file to be used. It contains default configurations. The script parameters will override the configurations inside the configuration file. It must be placed in configs folder (default: default.yaml)--personality: the personality file name. It contains the definition of the pezrsonality of the chatbot and should be placed in personalities folder. The default personality isgpt4all_chatbot.yaml--model: the name of the model to be used. The model should be placed in models folder (default: gpt4all-lora-quantized.bin)--seed: the random seed for reproductibility. If fixed, it is possible to reproduce the outputs exactly (default: random)--port: the port on which to run the server (default: 9600)--host: the host address at which to run the server (default: localhost). To expose application to local network, set this to 0.0.0.0.--temp: the sampling temperature for the model (default: 0.1)--n_threads: the number of threads to be used (default:8)--n-predict: the number of tokens to predict at a time (default: 128)--top-k: the number of top-k candidates to consider for sampling (default: 40)--top-p: the cumulative probability threshold for top-p sampling (default: 0.90)--repeat-penalty: the penalty to apply for repeated n-grams (default: 1.3)--repeat-last-n: the number of tokens to use for detecting repeated n-grams (default: 64)--ctx-size: the maximum context size to use for generating responses (default: 2048)
Note: All options are optional and have default values.
Once the server is running, open your web browser and navigate to http://localhost:9600 (or http://your-host-name:your-port-number if you have selected different values for those) to access the chatbot UI. To use the app, open a web browser and navigate to this URL.
Make sure to adjust the default values and descriptions of the options to match your specific application.
This is an open-source project by the community and for the community. Our chatbot is a UI wrapper for Nomic AI's model, which enables natural language processing and machine learning capabilities.
We welcome contributions from anyone who is interested in improving our chatbot. Whether you want to report a bug, suggest a feature, or submit a pull request, we encourage you to get involved and help us make our chatbot even better.
Before contributing, please take a moment to review our code of conduct. We expect all contributors to abide by this code of conduct, which outlines our expectations for respectful communication, collaborative development, and innovative contributions.
If you find a bug or other issue with our chatbot, please report it by opening an issue. Be sure to provide as much detail as possible, including steps to reproduce the issue and any relevant error messages.
If you have an idea for a new feature or improvement to our chatbot, we encourage you to open an issue to discuss it. We welcome feedback and ideas from the community and will consider all suggestions that align with our project goals.
If you want to contribute code to our chatbot, please follow these steps:
- Fork the repository and create a new branch for your changes.
- Make your changes and ensure that they follow our coding conventions.
- Test your changes to ensure that they work as expected.
- Submit a pull request with a clear description of your changes and the problem they solve.
We will review your pull request as soon as possible and provide feedback on any necessary changes. We appreciate your contributions and look forward to working with you!
Please note that all contributions are subject to review and approval by our project maintainers. We reserve the right to reject any contribution that does not align with our project goals or standards.
Here are some of the future plans for this project:
Enhanced control of chatbot parameters: We plan to improve the UI of the chatbot to allow users to control the parameters of the chatbot such as temperature and other variables. This will give users more control over the chatbot's responses, and allow for a more customized experience.
Extension system for plugins: We are also working on an extension system that will allow developers to create plugins for the chatbot. These plugins will be able to add new features and capabilities to the chatbot, and allow for greater customization of the chatbot's behavior.
Enhanced UI with themes and skins: Additionally, we plan to enhance the UI of the chatbot to allow for themes and skins. This will allow users to personalize the appearance of the chatbot and make it more visually appealing.
We are excited about these future plans for the project and look forward to implementing them in the near future. Stay tuned for updates!
This project is licensed under the Apache 2.0 License. See the LICENSE file for details.