WARNING: THIS REPO IS STILL A WORK IN PROGRESS
Ergonomic gamepad to play Touhou Project games. Left-hand controls shoot/slow/bomb, and right hand controls movement. The bomb button is supposed to be pressed with the left thumb.
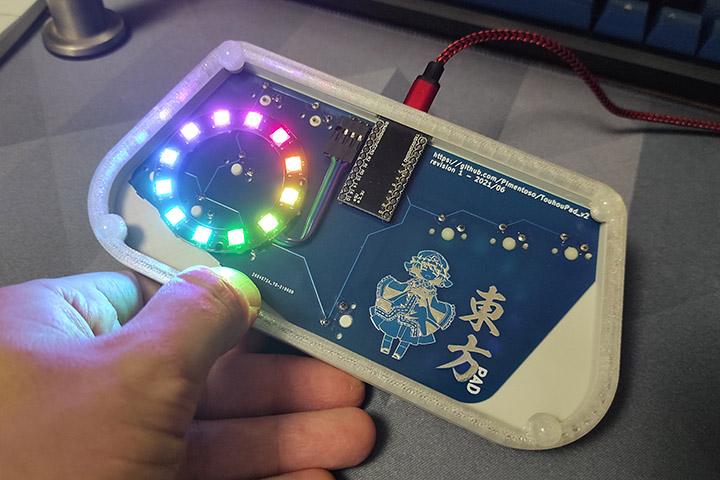
This is a newer version which uses a proper circuit board; for the old hand-wired version check here -> https://github.com/Pimentoso/TouhouPad
- Go to https://jlcpcb.com/
- Create an account if needed.
- Click "order now"
- Upload the file
Archive.zipyou can find in thekicad/gerber/directory. - Leave everything at default (you can change the pcb color if yolu want) and place the order. Note the minimum quantity you can order is 5
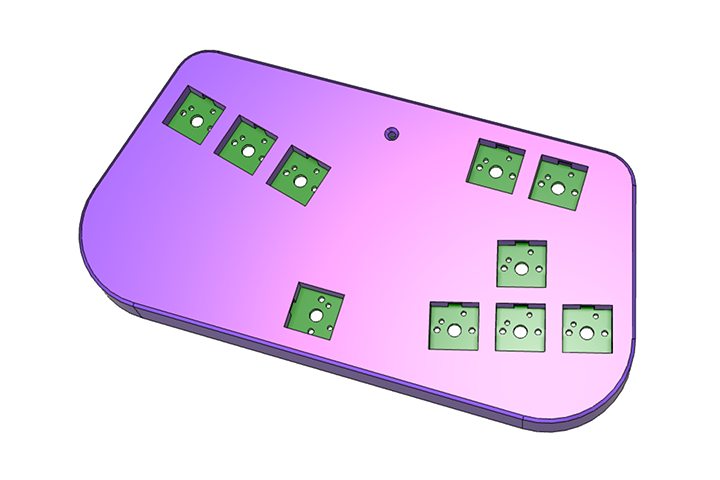
- You will need to 3d print the enclosure for the pad. You can find it in the
stl/directory - Print it face down without supports.
- In the top center of the plate there is a small hole. After you finish building the pad, you can stick a very small piece of transparent filament inside the hole to make the arduino power light shine through better.
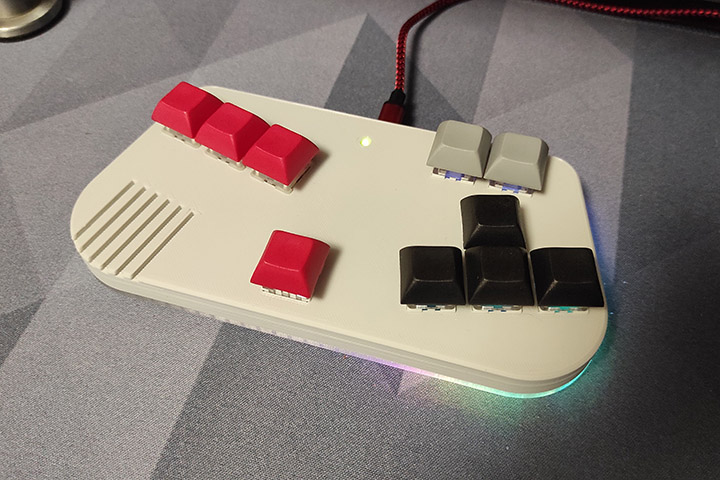
(the circuit board in the picture is the prototype version)
You will need
- Touhoupad circuit board (see above)
- 3d-printed enclosure
- Arduino pro micro board -> https://www.aliexpress.com/item/32888212119.html (the black one)
- 10x mx-style switches -> https://www.aliexpress.com/item/32899833333.html (gateron red or yellow are good for gaming)
- 10x keycaps -> https://www.aliexpress.com/item/32842379355.html (or just scavenge from an old mechanical keyboard)
- (optional) 4 silicone adhesive dots/feet
- (optional) a short RGB strip (ws2812b LEDs)
Solder the arduino to the circuit board. Place the circuit board inside the case, snap the switches in and solder them.
For RGB underglow: you can use the 3 exposed pins on the circuit board to solder a RGB strip. You can control the RGB lighting as follows
- Press esc+left arrow: toggle lighting on/off
- Press esc+right arrow: cycle lighting effects
- Press esc+up/down arrow: raise/lower brightness
Works better if you print the bottom part of the enclosure with transparent filament. Just pause the print at the 11mm mark and switch the filament to transparent.
- Method 1: flash
firmware/pimentoso_touhoupad_default.hexusing QMK Toolbox. - Method 2: flash it directly using qmk firmware:
make pimentoso/touhoupad:default:flash - To enter bootloader mode: the bottom of the pad is completely exposed so you have access to the Arduino Pro micro. Just short together the RST and GND pins using a metal object to access bootloader mode.