When Angular came out. They've suggested a pretty cool tutorial to build an app that helps a staffing agency manage its stable of heroes.
The Tour of Heroes app covers the core fundamentals of Angular. You'll build a basic app that has many of the features you'd expect to find in a full-blown, data-driven app: acquiring and displaying a list of heroes, editing a selected hero's detail, and navigating among different views of heroic data.
I've followed the same tutorial when i started working with Angular. Since React and Redux are interesting as well, i've tried to build the same app using React and Redux. That was an opportunity to learn and practice these beautiful techies.
Here are visuals of what the app should look like.
A NavigationBar that Routes to two views : Dashboard and List of Heroes.
Dashboard displaying the Best Heroes :
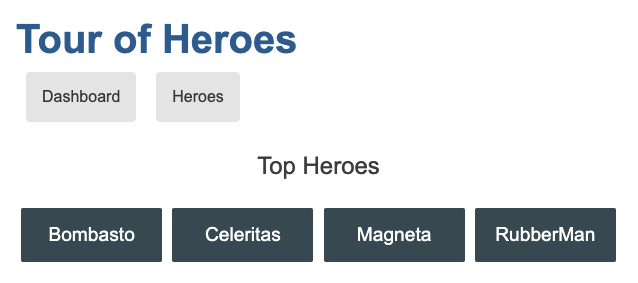
Heroes displaying the list of all Heroes with an Input to add a Hero to the current list :

- I assume that you have a Basic understanding of Javascript and Html. Other wise, take a look at this
- An interested brain
- Node.js in your machine
- You don't need to have any knowledge about Angular
React is a JavaScript library for building user interfaces. (Angular is a Framework) React can be described as next :
- Declarative : It makes it painless to create interactive UIs. Design simple views for each state in your application, and React will efficiently update and render just the right components when your data changes. Declarative views make your code more predictable and easier to debug.
- Component-Based : Build encapsulated components that manage their own state, then compose them to make complex UIs. Since component logic is written in JavaScript instead of templates, you can easily pass rich data through your app and keep state out of the DOM.
- Learn Once, Write Anywhere : We don’t make assumptions about the rest of your technology stack, so you can develop new features in React without rewriting existing code. React can also render on the server using Node and power mobile apps using React Native.
There are many way to start a React Project (clone a starter project, use create-react-app ...)
I prefer to start from scratch with the building of the project, at least once.
webpack is a module bundler for modern JavaScript applications. When webpack processes your application, it recursively builds a dependency graph that includes every module your application needs, then packages all of those modules into one or more bundles. This means that webpack is used to compile Javascript files.
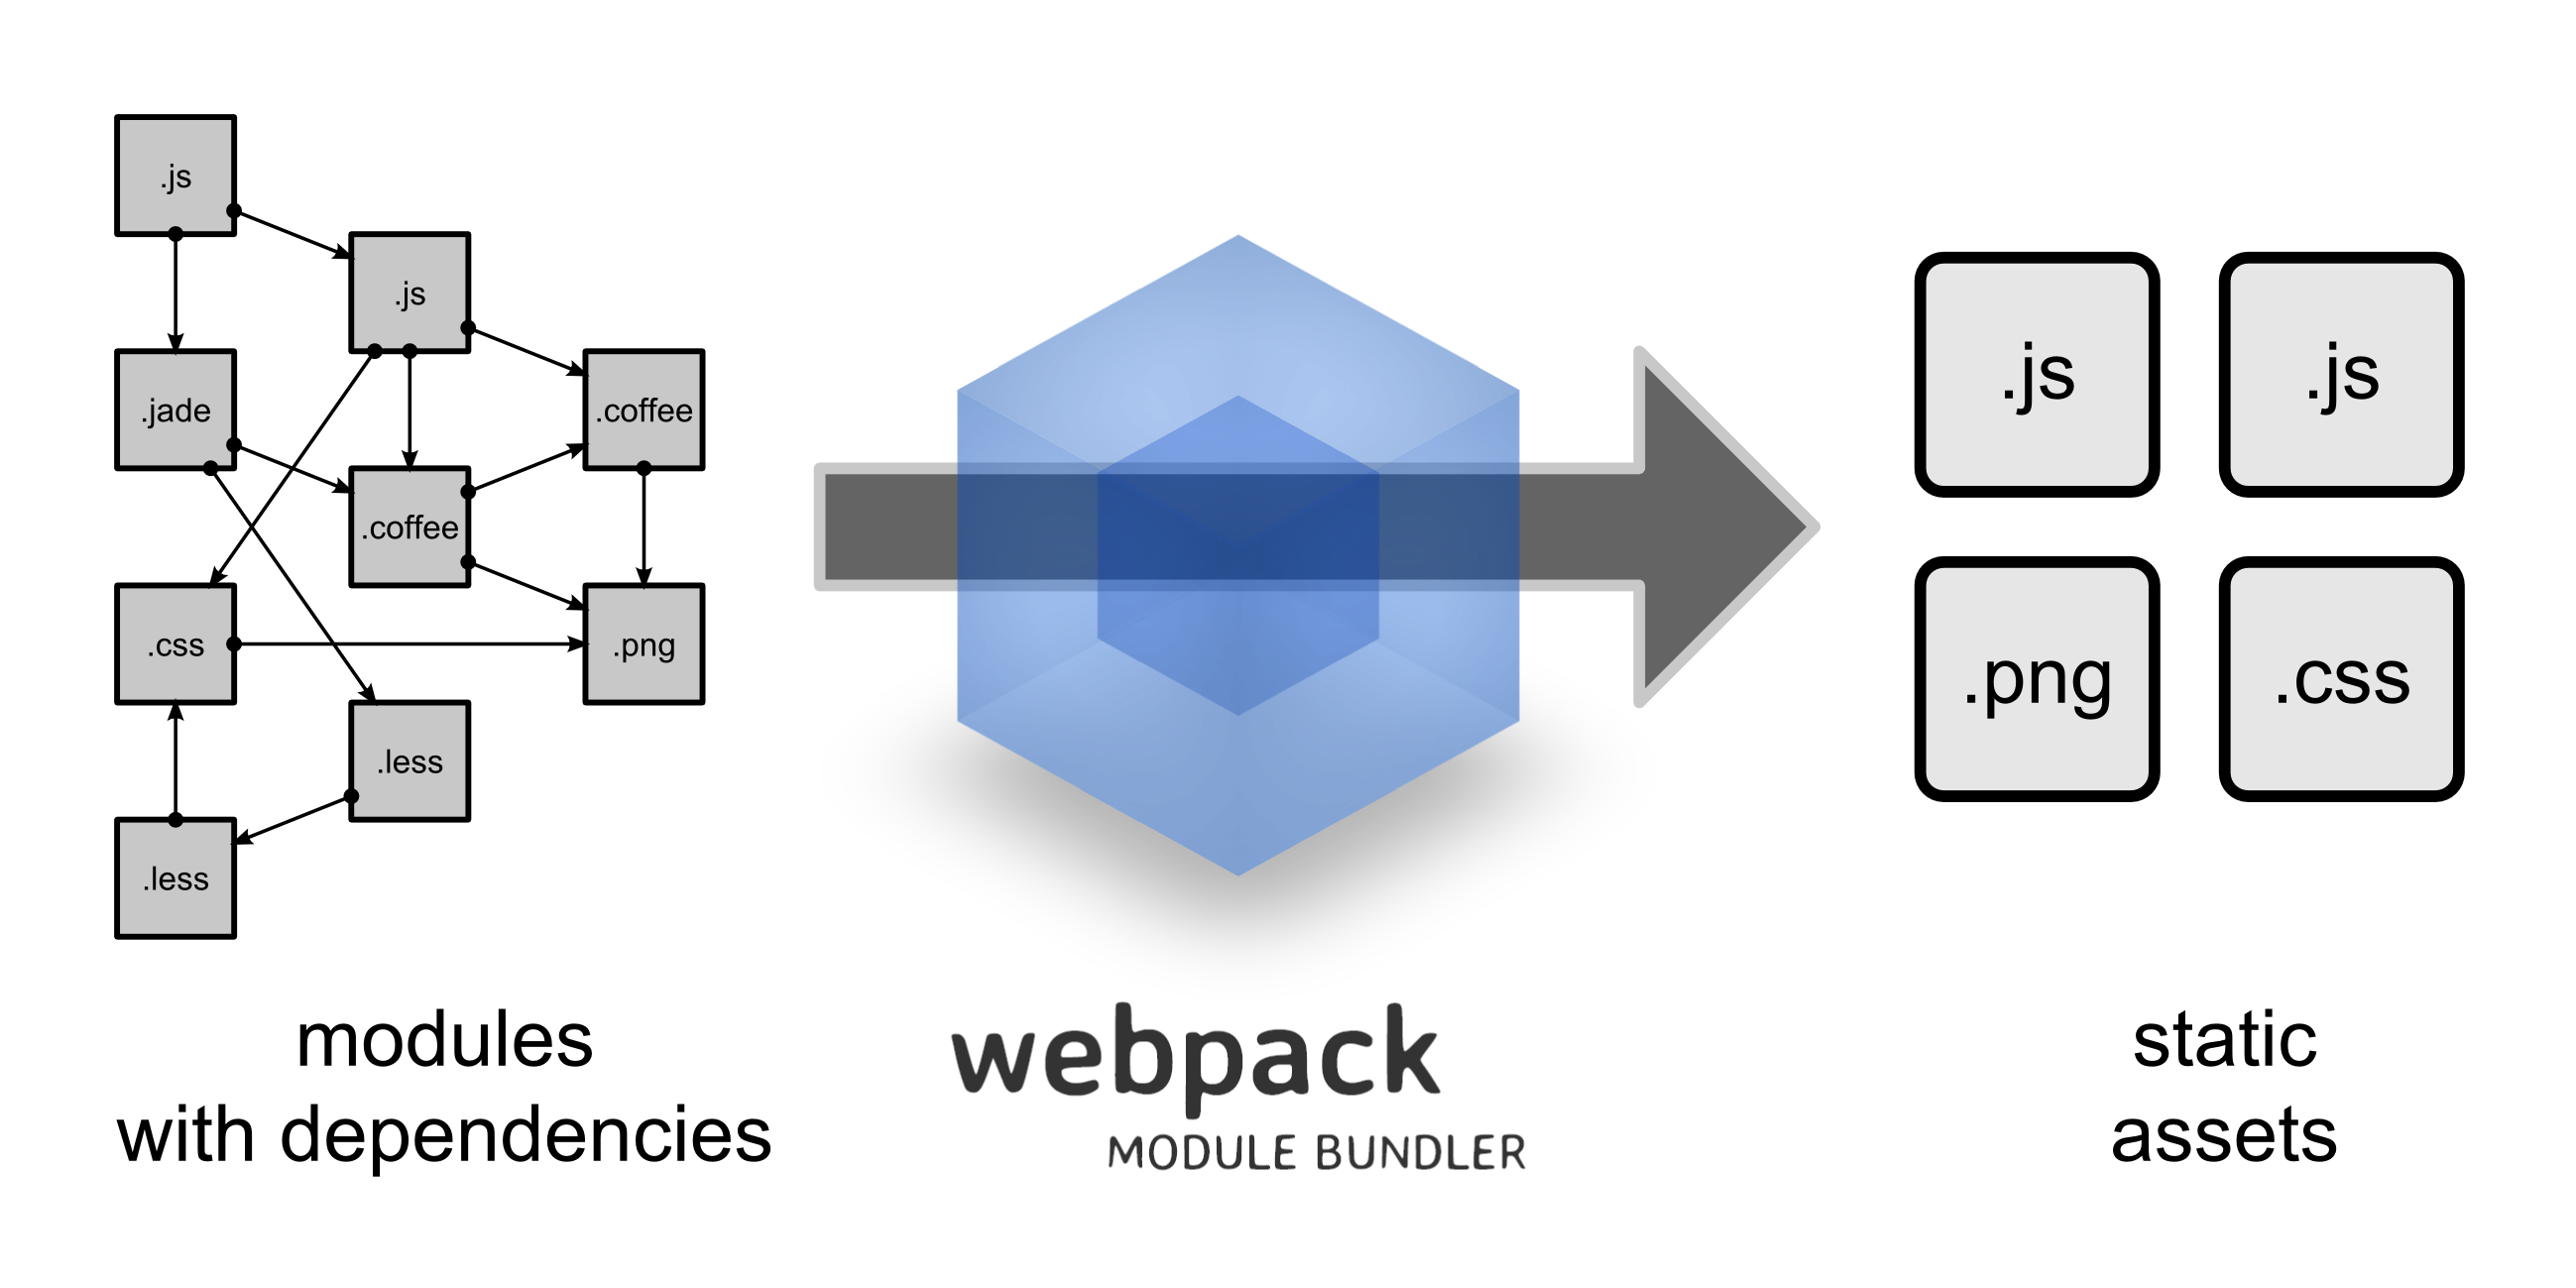
To use webpack, we should preconfigure a webpack.config.js file in which we will specify the entry point, output, loaders ...
Here's our webpack.config.js :
module.exports = {
  context: __dirname,

  entry: [
    './src/index.js',
  ],

  output: {
    filename: 'bundle.js',
    path: path.join(__dirname, 'public'),
  },

  devtool: 'source-map',

  devServer: {
    contentBase: './public',
    historyApiFallback: true,
  },

  module: {
    rules: [
      {
        test: /\.js$/,
        exclude: [/node_modules/],
        use: [{
          loader: 'babel-loader',
          options: { presets: ['es2015', 'react'] },
        }],
      },
      {
        test: /\.css$/,
        exclude: /node_modules/,
        use: ['style-loader', {
          loader: 'css-loader',
          options: {
            modules: true,
            importLoaders: 1,
            localIdentName: '[path][name]__[local]--[hash:base64:5]',
          },
        }],
      },
    ],
  },

  plugins: [
    new HtmlWebpackPlugin({
      template: './src/index.html',
    }),
  ],
};
In modules, we define loaders that enable webpack to understand other types of files than Javascript files. (Webpack itself understands only JS)
We use babel-loader because it will convert ES6 into earlier version of JS understood by all browsers.
- Make sure you have the recent version of Node.js
- in a folder, init your npm app and install webpack:
mkdir tour-of-heroes-app
npm init --yes # keep default params
npm install --save-dev webpack
You should see a package.json in our folder. This is where you will specify your dependencies. I suggest to copy my package.json it has all the dependencies we need for this project : babel to transform ES6, chai enzyme eslint mocha and sinon for tests, react and redux...
"dependencies": {
    "babel-core": "^6.25.0",
    "babel-loader": "^7.1.1",
    "babel-preset-es2015": "^6.24.1",
    "babel-preset-react": "^6.24.1",
    "babel-register": "^6.24.1",
    "chai": "^4.1.0",
    "chai-as-promised": "^7.1.1",
    "chai-enzyme": "^0.8.0",
    "css-loader": "^0.28.4",
    "enzyme": "^2.9.1",
    "eslint": "^3.19.0",
    "eslint-config-airbnb": "^15.0.2",
    "eslint-plugin-import": "^2.7.0",
    "eslint-plugin-jsx-a11y": "^5.1.1",
    "eslint-plugin-react": "^7.1.0",
    "html-webpack-plugin": "^2.29.0",
    "ignore-styles": "^5.0.1",
    "jsdom": "^11.1.0",
    "jsdom-global": "^3.0.2",
    "mocha": "^3.4.2",
    "mock-local-storage": "^1.0.3",
    "nock": "^9.0.14",
    "prop-types": "^15.5.10",
    "react": "^15.6.1",
    "react-dom": "^15.6.1",
    "react-redux": "^5.0.6",
    "react-router": "^4.1.2",
    "react-router-dom": "^4.1.2",
    "react-test-renderer": "^15.6.1",
    "redux": "^3.7.2",
    "redux-devtools-extension": "^2.13.2",
    "redux-logger": "^3.0.6",
    "redux-thunk": "^2.2.0",
    "rimraf": "^2.6.1",
    "sinon": "^2.3.8",
    "sinon-chai": "^2.12.0",
    "style-loader": "^0.18.2",
    "webpack": "^3.3.0",
    "webpack-dev-server": "^2.5.1"
  }
We will define certain scripts to make the run easy :
 "scripts": {
    "clean": "rimraf public && mkdir public",
    "build": "npm run clean && webpack -p",
    "start": "webpack-dev-server --progress --inline --hot --quiet --colors --open",
    "lint": "eslint --fix src/**/*.js",
    "mocha": "mocha --reporter spec --compilers js:babel-register -r ignore-styles -r jsdom-global/register -r mock-local-storage --recursive 'src/**/*.spec.js'",
    "test": "npm run lint & npm run mocha",
    "test-watch": "npm run mocha -- --watch"
  }
You can copy/paste these scripts in your own package.json
then install all the dependencies :
npm install
- Create your entry point
As mentioned in the webpack.config.js, the entry point is src/index.js Create this file : (You can use you IDE !)
mkdir src
In this source forlder src/, create index.js :
import React from 'react';

import App from './App/App';

render(<App />, document.getElementById('root'));

if (module.hot) {
  module.hot.accept('./App/App.js', () => {
    const UpdatedAppComponent = require('./App/App.js').default; // eslint-disable-line global-require
    render(<UpdatedAppComponent />, document.getElementById('root'));
  });
}
This is an ordinary entry point with React. But since we will use Redux, let's get started from here.
Redux is a predictable state container for JavaScript apps.
It helps you write applications that behave consistently, run in different environments (client, server, and native), and are easy to test. On top of that, it provides a great developer experience, such as live code editing combined with a time traveling debugger.
You can use Redux together with React, or with any other view library.
To install Redux :
npm install --save redux
npm install --save react-redux
npm install --save-dev redux-devtools
You don't need to install this, you already have these in your dependencies. The file remains :
import React from 'react';
import { render } from 'react-dom';
import logger from 'redux-logger';
import reduxThunk from 'redux-thunk';
import { Provider } from 'react-redux';
import { composeWithDevTools } from 'redux-devtools-extension';
import { createStore, combineReducers, applyMiddleware } from 'redux';

import App from './App/App';
import heroesReducer from './Store/HeroesReducer';

const routeReducer = combineReducers(
  {
    heroes: heroesReducer,
  });

const store = createStore(routeReducer, composeWithDevTools(applyMiddleware(logger, reduxThunk)));
render(<Provider store={store}><App /></Provider>, document.getElementById('root'));

if (module.hot) {
  module.hot.accept('./App/App.js', () => {
    const UpdatedAppComponent = require('./App/App.js').default; // eslint-disable-line global-require
    render(<UpdatedAppComponent />, document.getElementById('root'));
  });
}
Let's see what happens :
- Provider is a special React Redux component that magically makes the store available to all container components in the application without passing it explicitly. You only need to use it once when you render the root component.
- store can be seen as a shared location where the whole state of the app between all the components. To do so, component containers should subscribe (connect) to Redux store. One option would be to pass it as a prop to every container component.
- Reducers are pure functions that take the previous state and an action, and return the next state (a new state).
Now that we've created our entry point, lets create the app components and defines reducers and action creators.
- App components : This app needs : 9 components. This schema explains the connection between them.
We will define a strategy to handle components : We will create a folder for each component in which we will put our style (css) and tests (*.spec.js).
- Let's get started with root Component which is : App We want our app to contain a NavigationBar. We can define our Routes in the same component. We don't need a whole class to export since the component only renders an element. We can export a simple function :
export default function App() {
  return (
    <BrowserRouter>
      <div className={AppClass.container}>
        <NavigationBar />
        <Route exact path="/" component={Dashboard} />
        <Route exact path="/heroes" component={AllHeroes} />
      </div>
    </BrowserRouter>
  );
}
- NavigationBar: NavigationBar has two elements that should redirect to Dashboard and AllHeroes components. We will use : NavLink from 'react-router-dom'.
export default function NavigationBar() {
  return (
    <div className={NavidationBarClass.navigationBar}>
      <div className={NavidationBarClass.navigationBarInnerContainer}>
        <h1>Tour Of Heroes</h1>
        <nav className={NavidationBarClass.nav}>
          <NavLink exact to="/" activeClassName={NavidationBarClass.active}>Dashboard</NavLink>
          <NavLink exact to="/heroes" activeClassName={NavidationBarClass.active}>Heroes</NavLink>
        </nav>
      </div>
    </div>
  );
}
When you click on a NavLink, you can change this element's style using 'activeClassName'.
- Dashboard: This component should display three first heroes on the list (the best heroes).
The heroes list should be accessible to all components and if a component changes it, the others should be aware of the changes.
We say that heroes list is in the store, and the components using this list should subscribe to the store.
A part from that, a component has access to the Store via its 'props'. It's what it receives from the external world.
Since the Dashboard is the first element using the list, it should dispatch to the other components. Let's call the dispatch function 'updateHeroesAction'. It's actually an action that tells : This is the list of heroes.
Actions are payloads of information that send data from your application to your store. They are the only source of information for the store. You send them to the store using store.dispatch().
When an Action is dispatched, Redux calls the associated Reducer to take action.
//Action :
export function updateHeroesAction(heroes) {
  return {
    type: 'UPDATE_HEROES',
    payload: heroes,
  };
}

//Reducer :

export default function heroesReducer(prevState = heroes, action) {
  if (action.type === 'UPDATE_HEROES') { return action.payload.reverse(); }
  return prevState;
}
All reducers should return the previous state if the action sent is not associated to the current reducer.
- BestHeroes : This component displays the three first elements of heroes.
function displayHero(hero) {
  return <Hero hero={hero} />;
}

function BestHeroes({ heroes }) {
  const bestHeroes = [];
  bestHeroes.push(heroes[0]);
  bestHeroes.push(heroes[1]);
  bestHeroes.push(heroes[2]);
  return (
    <div>
      <h3 className={BestHeroesClass.h3}>Best Of Heroes</h3>
      <div className={BestHeroesClass.container}>
        {bestHeroes.map(displayHero)}
      </div>
    </div>
  );
}
- BestHeroesContainer : This container subscribes BestHeroes to the store using :
export default connect(mapStateToProps)(BestHeroes);

function mapStateToProps(currentState) {
  return {
    heroes: currentState.heroes,
  };
}
- Hero : This is unit of each list Element. It only displays a Hero name.
export default function Hero({ hero }) {
  return (
    <h4 className={HeroClass.module} style={{ marginRight: `${1}em` }}>{hero.name}</h4>
  );
}

Hero.propTypes = {
  hero: Proptypes.shape({
    name: Proptypes.string.isRequired,
    id: Proptypes.number.isRequired,
  }).isRequired,
};
PropTypes defines the elements of an Object and their types and link it to the Current Component.
Congrats !! You've just finished your first view using React and Redux. Actually, you have completed the circle :

We'll do the same for the other view:
-AllHeroes : This component displays all the heroes (name and id) and subscribes Heroes component to Store.
function AllHeroes() {
  return (
    <div>
      <Input />
      <HeroesContainer />
    </div>
  );
}
- Heroes This component has access to the heroes list in the store. This was done via the HeroesContainer :
Containers/HeroesContainer.js
function mapStateToProps(currentState) {
  return {
    heroes: currentState.heroes,
  };
}
export default connect(mapStateToProps)(Heroes);

//Heroes/Heroes.js
function displayHero(hero) {
  return <HeroDetails hero={hero} />;
}

export default function Heroes({ heroes }) {
  return (
    <div className={HeroesClass.container}>
      {heroes.map(displayHero)}
    </div>
  );
}
- HeroDetails :
It displays each element of the list :
export default function HeroDetails({ hero }) {
  return (
    <div className={HeroClass.heroesli}>
      <span className={HeroClass.badge}>{hero.id}</span>
      <span>{hero.name}</span>
    </div>
  );
}
- Input : The input also subscribes to the store, because it updates the heroes list. You can add a hero to the current list.
function mapStateToProps(currentState) {
  return {
    heroes: currentState.heroes,
  };
}

class Input extends React.Component {
  constructor(props) {
    super(props);

    this.actionToTaKe = this.actionToTaKe.bind(this);
  }

  actionToTaKe(event) {
    if (event.key === 'Enter') {
      this.props.dispatch(addHero({ name: event.target.value }, this.props.heroes));
      event.target.value = '';
    }
  }

  render() {
    return (
      <div className={InputClass.container} style={{ marginRight: `${3}em` }}> Hero name
        <input className={InputClass.input} type="text" onKeyPress={this.actionToTaKe} />
      </div>
    );
  }
}

export default connect(mapStateToProps)(Input);
The input dispaches an action to notify the store about the changes. In this case the action is a function 'addHero' that takes a hero and the list of heroes in parameters.
This action is :
export function addHero(hero, heroes) {
  const lastId = heroes.length;
  const newHeroes = Object.assign({}, {
    heroes: [
      ...heroes,
      {
        id: lastId + 1,
        name: hero.name,
      },
    ] });
  return (dispatch) => {
    dispatch(updateHeroesAction(newHeroes.heroes));
  };
}
You can notice that at the end, the action returns a dispatch of 'updateHeroesAction' which notifies all the components using the heroes list.
- Test your components As mentioned earlier, tests will be written in <component_name>.spec.js
Here's an example of a test :
- App.spec.js : In fact we're just making sure that out App contains on NavigationBar. Because, we are sure that all other components are testes in React (Route ...)
chai.use(chaiEnzyme());

describe('App component', () => {
  it('should have one Navigation bar', () => {
    const wrapper = shallow(<App />);
    expect(wrapper.find(NavigationBar)).to.have.length(1);
  });
});
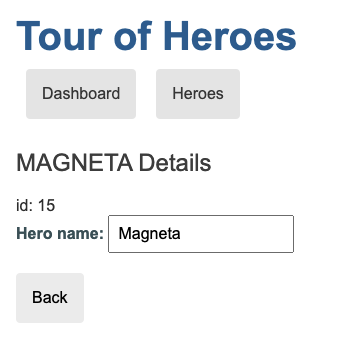
The final results til now are the next visuals.
Dashboard :

List of Heroes :

I count on you to help me complete the tutorial.
-
Display Hero's details
-
delete a hero from the list
-
TEST the rest !

Thank you for following this tutorial.
Feel free to contribute and share 😊
With 💗