Connect various Google services to your Roam graph!
To use any of the Google services included in this extension, you will first need to connect your Google account to Roam. To do so, go to the your Roam Depot settings for this extension and click on the Login with Google button. Only specify the permissions necessary for the features you plan to use with this extension - for example, if you don't plan to use Google Drive, do not enable the Google Drive related permissions. Once you've completed login, your account should appear in the Roam Depot settings.
In any page, activate the Roam Command Palette by hitting CTRL+P on windows or CMD+P on Mac, then click the Import Google Calendar command. The extension will fill the page with the events you have for that day. It will be displayed in the timezone of your browser. It will use either the page's title if it's a daily note, or the current date if it's not, as the date to import.
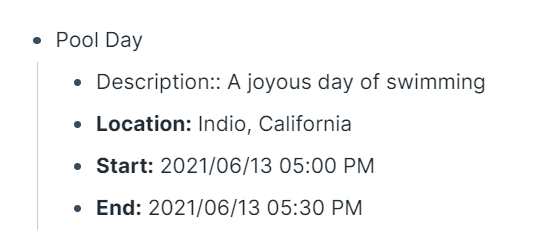
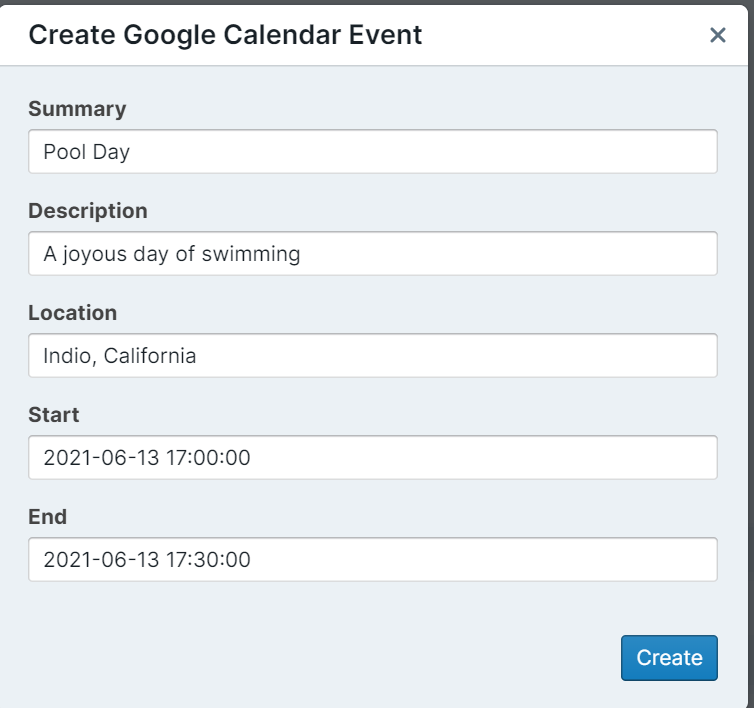
You can create google calendar event right from Roam! To create an event, focus on a block and then activate the Roam native command palette, and click Create Google Calendar Event. The dialog will prefill with the data that is in the block and its children. Use native Roam Attributes with a double colon (::) to specify a field and its value as children of the focused block.Click create to generate the event on your primary Google Calendar. Once successfully created, the link to the event will be added to the block. This is an example of a block and the values that will prefill the modal:
You can update existing events on Google Calendar from Roam.
On any block that has a Google Calendar link, an edit pencil will appear on the right end of the block. Clicking the pencil will prefill the dialog with the event's existing data from Google Calendar. Change the values from the dialog and hit update. Upon successfully updating, the block's contents with the link will update to reflect the new values of the Google Calendar event! You could also edit the event by selecting "Edit Google Calendar Event" from the command palette while focused on the block.
This extension integrates with SmartBlocks!
If you have both this extension and SmartBlocks installed, there is a <%GOOGLECALENDAR%> command available. The command will automatically run the import google calendar logic and paste the events in blocks before continuing with the rest of the workflow.
Parameters:
- Start date - Supports NLP (Defaults to DNP of target block)
- End Date - Supports NLP (Defaults to Start date if not set)
(This command also supports the SmartBlock Command <%DATEBASIS%> setting)
Example:
<%GOOGLECALENDAR:today,tomorrow%><%GOOGLECALENDAR:tomorrow%>
The RoamJS Google Calendar integration offers an API to allow other extensions and custom scripts to fetch Google Calendar events directly within Roam Research. This functionality is exposed through the global window.roamjs.extension.google object.
Description
Fetches events from the user's Google Calendar(s) for a specified date range.
Syntax
window.roamjs.extension.google.fetchGoogleCalendar({
  startDatePageTitle,
  endDatePageTitle,
});
Parameters
The function accepts a single object parameter with the following optional properties:
startDatePageTitle- A string representing the title of the page that corresponds to the start date of the desired events. The date should be in a format recognized by Roam'swindow.roamAlphaAPI.util.pageTitleToDateutility. If not provided, the current focused page title is used as the start date.endDatePageTitle- A string representing the title of the page that corresponds to the end date of the desired events. The date should be in a format recognized by Roam'swindow.roamAlphaAPI.util.pageTitleToDateutility. If not provided, the start date is used as the end date.
Returns
A Promise that resolves to an array of ExtendedInputTextNode[]. Each ExtendedInputTextNode represents an event fetched from Google Calendar, formatted according to the user's settings.
type ExtendedInputTextNode = {
  text: string;
  children?: InputTextNode[];
  event?: CalenderEvent;
};

type InputTextNode = {
  text: string;
  children?: InputTextNode[];
  uid?: string;
  heading?: number;
  textAlign?: TextAlignment;
  viewType?: ViewType;
  open?: boolean;
  props?: Record<string, unknown>;
};

type CalenderEvent = {
  id: string;
  transparency: "transparent" | "opaque";
  summary: string;
  description?: string;
  htmlLink: string;
  hangoutLink: string;
  location: string;
  attendees?: {
    displayName?: string;
    email: string;
    self: boolean;
    responseStatus: "declined" | "accepted";
  }[];
  start: { dateTime: string };
  end: { dateTime: string };
  visibility?: "private" | "public";
  calendar: string;
};
Example
window.roamjs.extension.google
  .fetchGoogleCalendar({
    startDatePageTitle: "January 1st, 2024",
    endDatePageTitle: "January 31st, 2024",
  })
  .then((events) => console.log(events))
  .catch((error) => console.error(error));
Notes
Users must configure their Google Calendar integration through the Roam Depot settings and ensure they are authenticated for this API to return events.
The function respects user settings for event filtering and formatting specified within the RoamJS Google Calendar extension settings.
All of these options are configurable from the Roam Depot page. If you used this extension when it used to hosted from RoamJS directly, there is a Migrate Settings To Roam Depot: google-calendar command available to migrate your old settings to the new version.
Specifies which calendars you would like Roam to read before importing. If you specify more than one, it will read from all of those calendars. You must use the calendar ID provided by Google which you could find in the calendar settings. This will usually be your Gmail address, such as dvargas92495@gmail.com. If you are logged in with multiple accounts on the roam/js/google page, you could specify which one each calendar is mapped to.
Specifies the text to add for each calendar event. The following placeholders are supported to be replaced with the event's data:
{summary}- the name of the event{description}- the description of the event{link}- the link for the event{hangout}- the hangout link for the event{confLink}- a conference link for the event (labeled 'Meet', 'Zoom', or 'Teams' as appropriate){location}- the location for the event{start}- the start time of the event. Add a colon and format to customize the start time format. For example,{start:hh:mm}will resolve to12:00. See the date-fns library for more details on time formats.{end}- the end time of the event. Add a colon and format to customize the end time format. For example,{end:hh:mmaaaaa}will resolve to12:00p. See the date-fns library for more details on time formats.{attendees}- the attendees of the event, comma-delimited. Could optionally include a format after a colon. For example,{attendees:[[NAME]]}will output each attendee as a page reference. The placeholderNAMEwill be replaced by the attendee's display name or the email if there's no display name.- Display names are only available for gmail.com accounts, not for Gsuite/Workspaces accounts.
{calendar}- the calendar id of the event{duration}- the duration of the event in minutes{todo}- A{{[[TODO]]}}checkbox
You can add the format directly to the field for a single block format. For a multi-block with children format, specify the format as a block tree elsewhere in your graph, then copy and paste the block reference to the format field.
An optional regular expression you could use to filter for events based on the summary or description.
Filters out the events from your calendar that you've set to 'Free'
To use this feature, ensure that the Intercept Uploads to Drive setting is enabled in your Roam Depot settings.
Anytime you upload a file to Roam, the Google extension will intercept the upload and send it to your Google Drive account instead. It will insert a new google drive component after a successful upload.
The Google Drive component is made of two parts: the preview and the open in Drive button. The preview will render the contents of the file inline within Roam. Currently, only images, videos, and pdfs are supported. The open in Drive button will be below the preview and will take you to the file in google drive on click.
By default, files are uploaded to the RoamJS folder in your drive. You could change the name of this folder using the Upload Folder field. Make sure it is a brand new folder name, as this extension does not have access to preexisting folders.