En: 05. FAQ
The key in this topic is to understand well the three levels of overrides that exists. If you change a setting and override it at the core level, but then there is an override on the same setting at the content level, the first will not be applied because the second takes precedence. This guide is valuable.
We are going to show an example of one of these cases that is most often asked. It is about activating the option to keep the aspect ratio in GB or GBC. We are going to look at GBC in particular, so in the following greps we do not have to take into account the file GB.cfg. That option is called video_dingux_ipu_keep_aspect in RA config files. This is the default situation of that setting on the different files that apply, as they are in the image just flashed:
edumoreno@HP-Folio13:/media/edumoreno/6D10-080B/RetroArch/.retroarch $ grep video_dingux_ipu_keep_aspect retroarch.cfg
video_dingux_ipu_keep_aspect = "true"
edumoreno@HP-Folio13:/media/edumoreno/6D10-080B/RetroArch/.retroarch $ grep video_dingux_ipu_keep_aspect config/Gambatte/*
config/Gambatte/GB.cfg:video_dingux_ipu_keep_aspect = "false"
config/Gambatte/GBC.cfg:video_dingux_ipu_keep_aspect = "false"
config/Gambatte/Gambatte.cfg:video_dingux_ipu_keep_aspect = "false"
In words, the Keep Aspect Ratio setting is enabled at a general level (first grep), but then disabled in overrides at the core and content level (second grep).
The logical thing would be that activating it at the content level would start to work, but RetroArch applies a system of economy of settings and when it sees that an adjustment at any level, matches the general adjustment, it simply removes the override adjustment. As a result, when setting this option to true and then creating the override at the content level, what actually happens is that the override is lost and the core level is applied, which, as can be seen, is still false.
edumoreno@HP-Folio13:/media/edumoreno/6D10-080B/RetroArch/.retroarch $ grep video_dingux_ipu_keep_aspect retroarch.cfg
video_dingux_ipu_keep_aspect = "true"
edumoreno@HP-Folio13:/media/edumoreno/6D10-080B/RetroArch/.retroarch $ grep video_dingux_ipu_keep_aspect config/Gambatte/*
config/Gambatte/GB.cfg:video_dingux_ipu_keep_aspect = "false"
config/Gambatte/Gambatte.cfg:video_dingux_ipu_keep_aspect = "false"
The solution is to make another override at the core level (which erases the adjustment at that level as well), leaving only the general adjustment.
edumoreno@HP-Folio13:/media/edumoreno/6D10-080B/RetroArch/.retroarch $ grep video_dingux_ipu_keep_aspect retroarch.cfg
video_dingux_ipu_keep_aspect = "true"
edumoreno@HP-Folio13:/media/edumoreno/6D10-080B/RetroArch/.retroarch $ grep video_dingux_ipu_keep_aspect config/Gambatte/*
config/Gambatte/GB.cfg:video_dingux_ipu_keep_aspect = "false"
In short, you have to activate the keep aspect ratio and save the overrides at the core and content level at same time. It is a mess yes.
Q2: How can I reset the RetroArch configuration so that I can mount my own overrides without being affected by the ones in Koriki?
Just delete Retroarch/.retroarch/config directory and Retroarch/.retroarch/retroarch.cfg file, being these paths relative to the root of the microSD card.
To modify the general configuration of RetroArch, there must be no content (ROM) loaded. This can be done in a number of ways:
- After launching RetroArch through a ROM, open RA menu (
Menu + X) and use theClose Contentcommand. - Open the launcher in the
Apps & Games > Appssection.
In any case, it is not usual to manipulate the general configuration of RetroArch. What most of the time is convenient is to override at the core, content (directory) or game level. Check FAQ number 1 for more details.
There are several things to keep in mind so that the ROMs are displayed:
- The format of the external card must be FAT32.
- The ROMs must be found in the appropriate directories for the system to which they belong and which are listed in the table in the ROMs section.
- The extensions of the ROMs files must be those indicated in the table in the ROMs section.
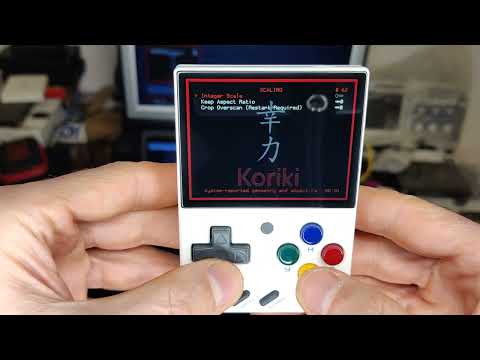
- To access the list of ROMs of the system that we are interested in, use the navigation shortcuts between systems and groups indicated in the table in the Controls section. Basically they are
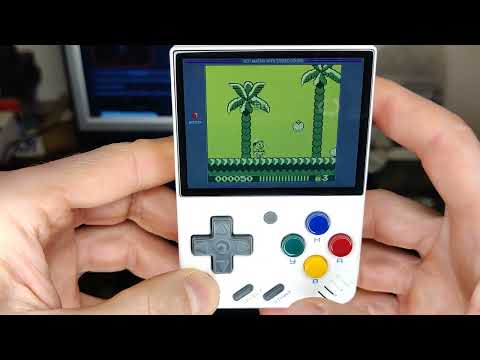
Bto go up one level,Ato go down one level andUp/Downto move between the different elements in each level. For example, the following video shows how to get to the list of Game Boy ROMs from theApplicationssection that appears by default after installing Koriki (the video is made with a different console/system, but the operation is the same).

Battery are one of the most analog elements on the console. No two are the same. To manage this reality, modern smartphones keep a lot of information about previous charges and the rate and conditions in which the discharge occurs. With all this information, they estimate a battery capacity that is as realistic as possible. In the console system, this data is not kept, so the battery capacity is estimated directly from the voltage that it offers at a certain moment. Fixed values are used for the voltage associated with the maximum and minimum charge (4.2V and 3.4V respectively), which may not be suitable for all batteries, hence some consoles misjudge the charge level.
Finally, the load indicators of the different programs (SimpleMenu, RetroArch) can be programmed differently, so there may be discrepancies between them.
SimpleMenu is prone to have problems restoring the last session if you modify the files that are addressed on the microSD card through its configuration (basically the ROMs and themes directories). When this happens, it closes and when it reopens it usually finds the same situation again and therefore enters an infinite loop of starts/crashes. During the port to Miyoo Mini, a workaround has been introduced to prevent it from entering this dead end automatically. The workaround consists of deleting the file that stores the session (.simplemenu/last_state.sav) when an uncontrolled closing happens. In this way the program starts, but in exchange the configuration is reset, reason why the default theme of SimpleMenu (0A) appears. In those situations we will see this:
In any case, the solution to these uncontrolled closings would almost always involve deleting the session file, so the loss of the settings, instead of a collateral damage of this workaround, it is inevitable in these situations.
To restore the settings, press START to enter the corresponding menu and rebuild them. Usually you will only need to modify the Theme and the settings in the Appearance section.
Starting with the RetroArch version installed in Koriki 1.1, overlays are functional. Overlays allow to overlap elements on screen, commonly used to achieve effects on the edges of the screen, especially on systems whose screen does not match the 4:3 aspect ratio of the Miyoo Mini screen.
In Koriki 1.1 the screen borders (or bezels) have been configured in four of the handheld systems, namely GB, GBC, GG and NGP. In these systems we will see a frame inspired by the design of the original system:

If you wish to deactivate them, the procedure is as follows:
-
Enter RetroArch menu (Menu + X).
-
Go to the menu path
MAIN MENU > Settings > On-Screen Display > On-Screen Overlay > Overlay Preset. -
Press
Startto blank the previous preset.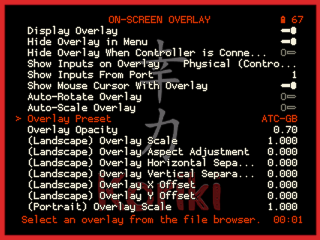
-
Go to the menu path
MAIN MENU > Settings > Video > Scaling. -
Disable the
Integer Scaleoption if you want to use more screen area.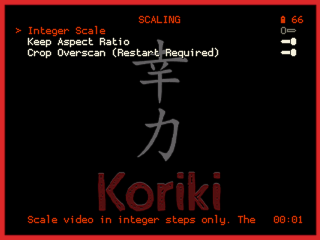
-
Optionally uncheck the
Keep Aspect Ratiooption if you want to see the system at full screen at the cost of using a different aspect ratio than the original system.
-
Go to the menu path
MAIN MENU > Quick Menu > Overrides. -
Save an override at the proper level (core, content or ROM). In the case of the Game Boy system used as example, the bezel setting was done at the content level (so that GBC could have an independent adjust), so this time it would be more correct to use the
Save Content Directory Overridesoption.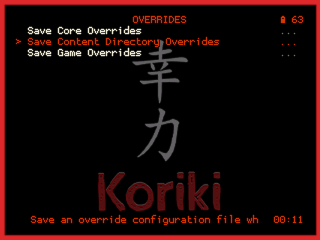
No sleep mode per se, but you can make a configuration that simulates it and even has the advantage of being safer, as you don't risk losing the game or discharging the battery. The setup is a combination of the Autostart ROM function in SimpleMenu, with the automatic savestates generation and loading function in RetroArch. Below are the steps to perform this configuration:
-
Open the RetroArch launcher in the
Apps & Games > Appssection.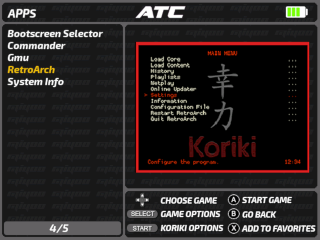
-
Go to the menu path
MAIN MENU > Settings > Saving. -
Activate the
Auto Save StateandLoad State Automaticallyoptions.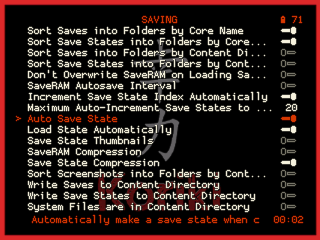
-
It is also recommended to activate the
Increment Save State Index Automaticallyoption, as savestates are going to be made a bit out of our control (every time we turn off the machine to pause the game), it is preferable to keep a larger savestates history. -
Go to the menu path
MAIN MENU > Configuration File. -
Use the
Save Current Configurationcommand.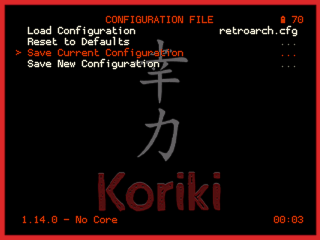
-
Exit RetroArch with the
Quit RetroArchcommand inMAIN MENU. -
Select the ROM we want to play continuously between power off/on.
-
Press the Select key.
-
In the small context menu that appears, change the value of
Autostarttoyes(left/right).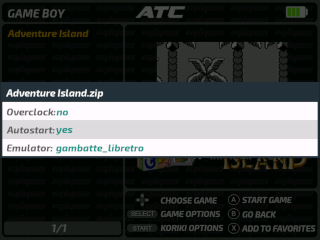
-
Press
Bto close the context menu, which will also start the game.
With this, the configuration is done. From now, closing the game will automatically generate a savestate and the console will shut down. When the console is turned on again, the game session will be restored, i.e. the game will open and the last generated savestate will be loaded automatically.
If you want to interrupt this sequence to regain control of SimpleMenu, close the game and press X during the 3 seconds that we are given the opportunity to cancel the shutdown of the console. We will return to SimpleMenu where we can continue with the normal use of the console. To return to the autostart sequence of a game, simply return to the previous series of settings in point 8.