GEE Interface
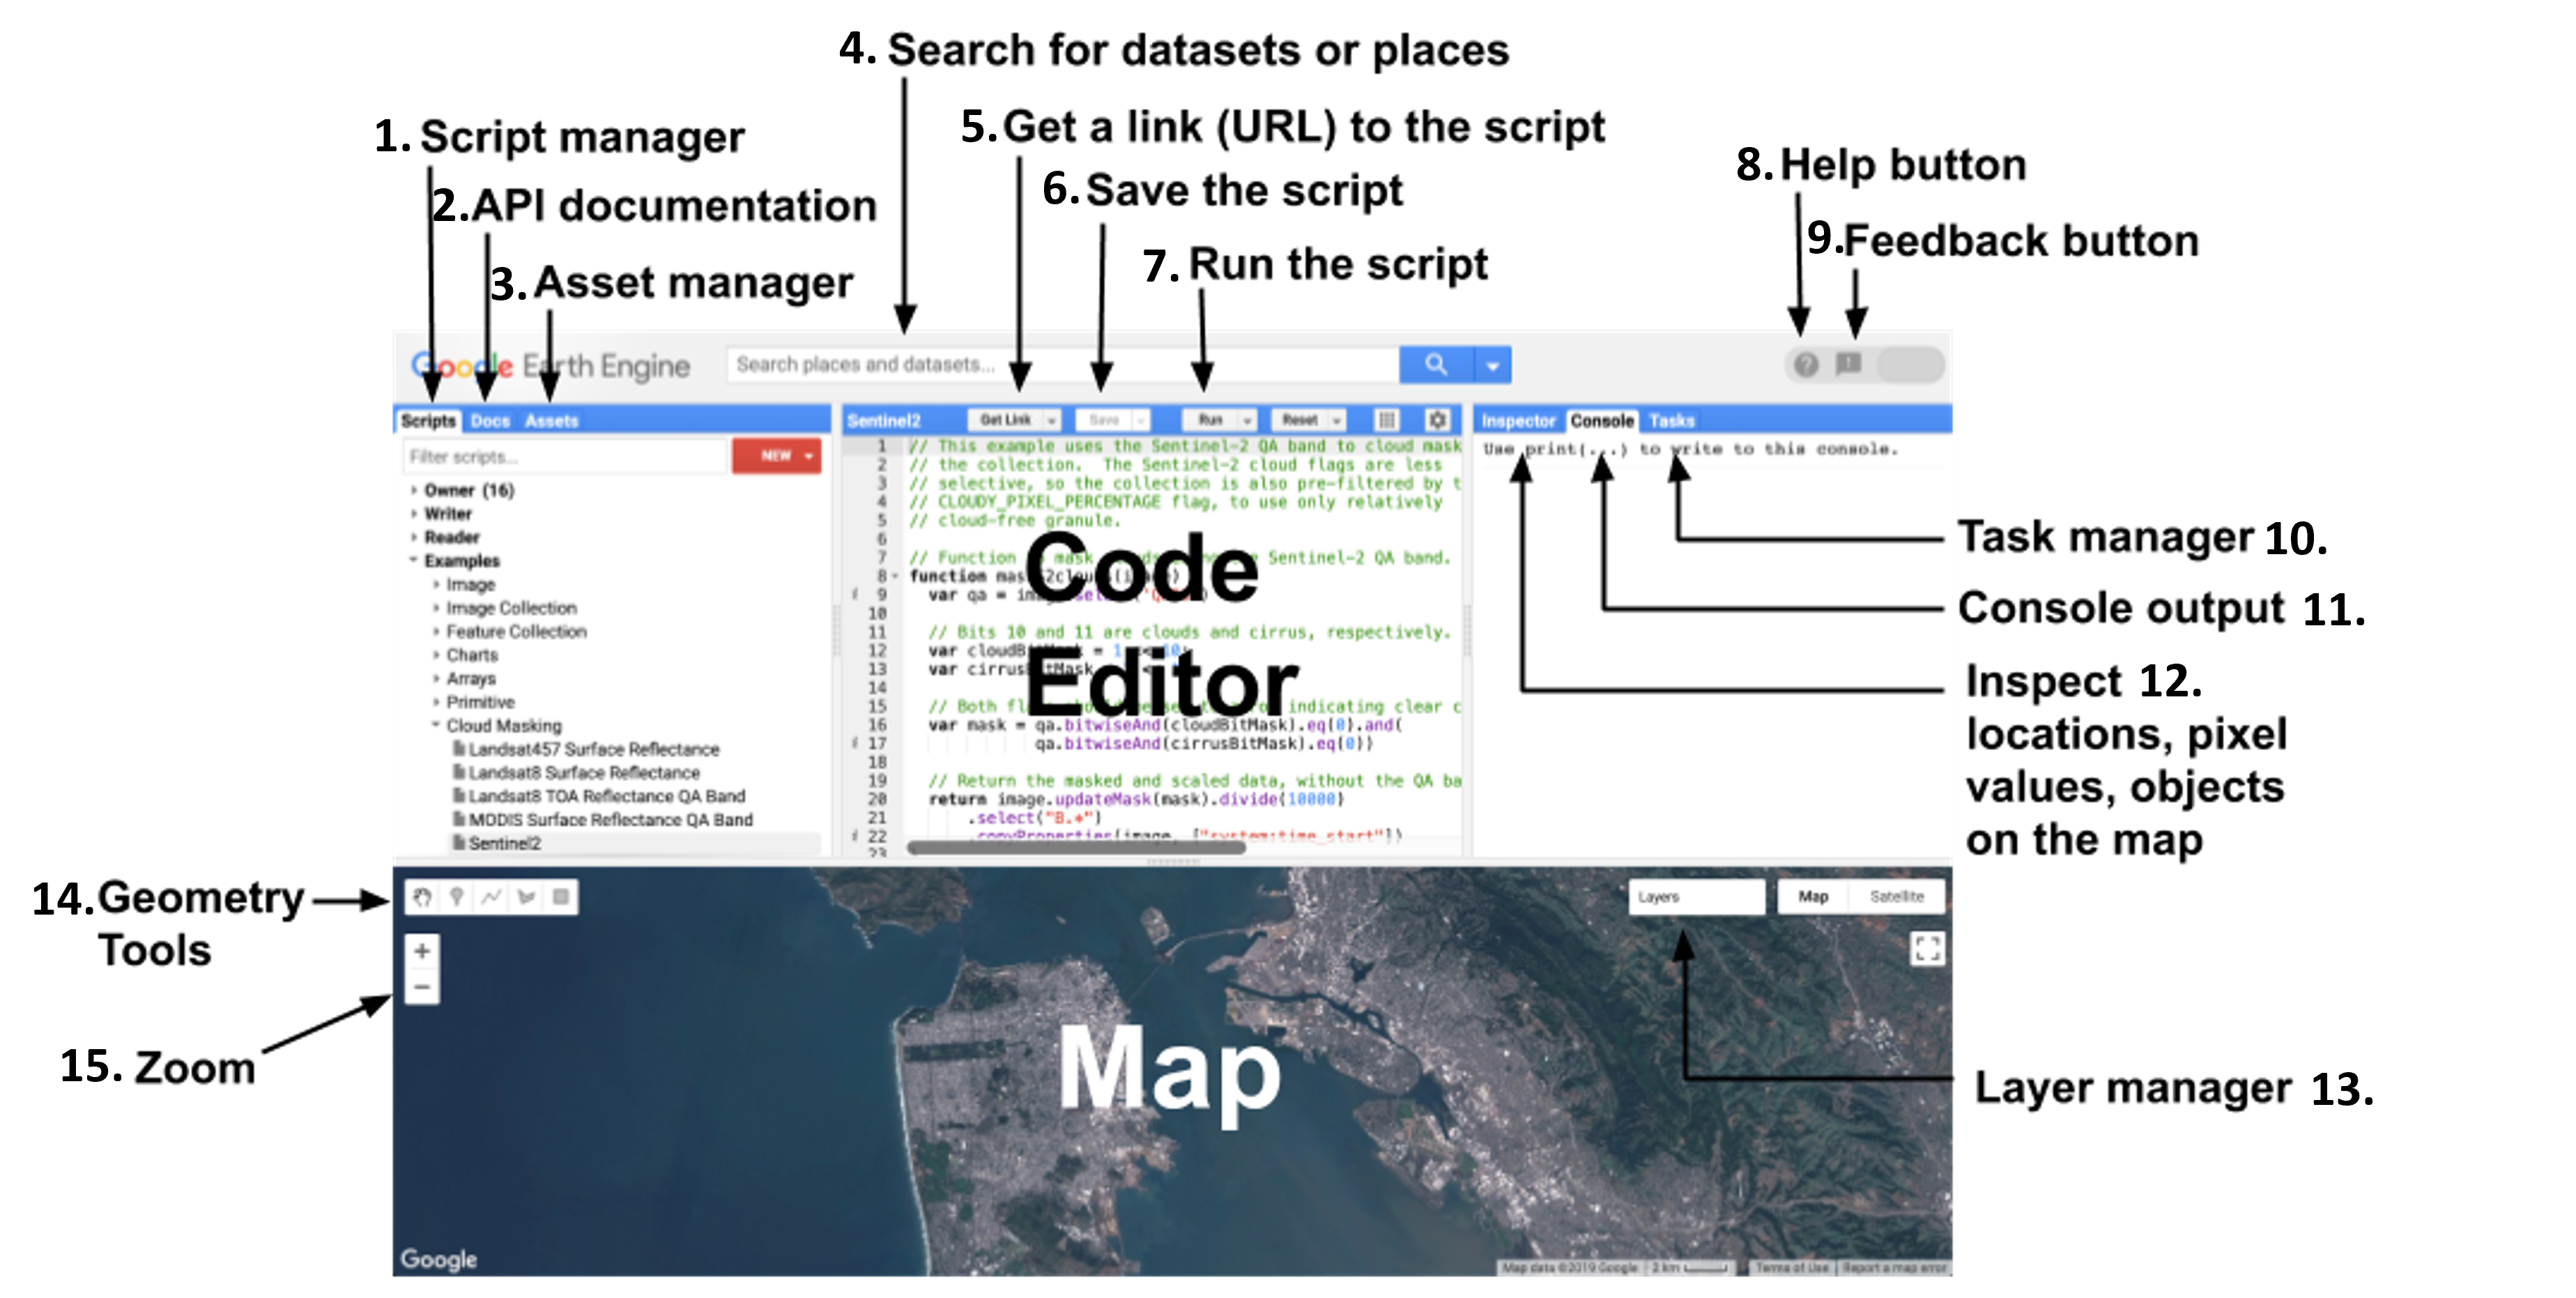
Further description of the components of the figure above:
1. Scripts
• This tab contains the code files for past saved projects. To begin a new file, click the "NEW" button and choose the intended format supply a descriptive name. You can also create a folder or repository if desired to organize projects. For the purposes of this workshop, we will create a folder titled “RS Workshop.” All files created and used during the workshop should be placed in this folder.
2. Docs
• Under the “Docs” tab, there is a comprehensive list of the various functions and algorithms available in GEE, along with explanations of their inputs and outputs.
• Map.setCenter and Map.addLayer visualize the map in the GEE map tool of an ee.Image or ee.ImageCollection.
• GEE has further explanation and examples of how to use the "Docs" at this link.
3. Assets
• The “Assets” tab allows for user to load in their own images (GeoTIFF or TFRecord) or tables (shapefiles or CSVs). These will show up under the "Tasks" (10.) tab when uploading to show progress. The “Tasks” tab is also where any exports from GEE will run.
4. Search Bar
• The search bar allows the user to find publicly available datasets to utilize for their own analysis. Use keywords such as satellite name or desired parameter to find a relevant dataset.
• Imports from the search bar or assets show up in an “imports” tab at the top of the code editor. You can change the automatically supplied name of the object (e.g. "imageCollection") to improve comprehensibility in your code (e.g. Landsat8Collection).
5. Get Link
• GEE contains a "get link" option in order to copy the code to share it with other users for collaboration.
6. Save
• To ensure that the code does not accidentally get deleted, there is a "save" option, which should be used when important changes have been made to the code.
7. Run
• Once the script has been written and completed by the user, the "run" button is pressed to execute the code.
8. Help
• For any issues or questions that may need to be resolved within GEE, there is a Help button.
9. Feedback
• A feedback option is supplied to reach out directly to Google.
10. Tasks
• Assets and exports from GEE will show up under the "Tasks" tab when uploading to show progress.
11. Console
• The “Console” contains anything that has been printed or any errors existing in the c
12. Inspector
• The “Inspector” tab gives information about the map, such as coordinates or scale. Once images or image collections have been added to the map, these will also have details that show up under this tab.
13. Layer manager
• Any layers that have been added to the map will appear listed under the "Layer Manager" (13.), where the user can turn layers on and off and adjust visualization parameters.
• Parameters can be established, typically as color palettes, by the user to visualize the data on the map.
14. Geometry tools
• Geometry tools allow the user to draw directly on the map to specify a region of interest to which analysis will be applied, which will also appear in the "imports" tab.
15. Zoom
• The user can zoom in and out on the map using the "zoom" feature.