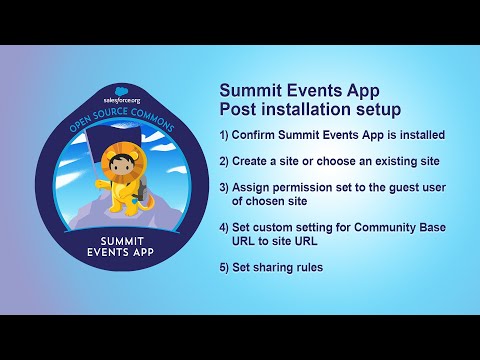
0a – Setting Up Summit Events After Installing Package
Note: Summit Event's Documentation is being transitioned to our new documentation site.
Please see the new Summit Events documentation site for the latest version of this documentation.
====
Click image to watch post install video.
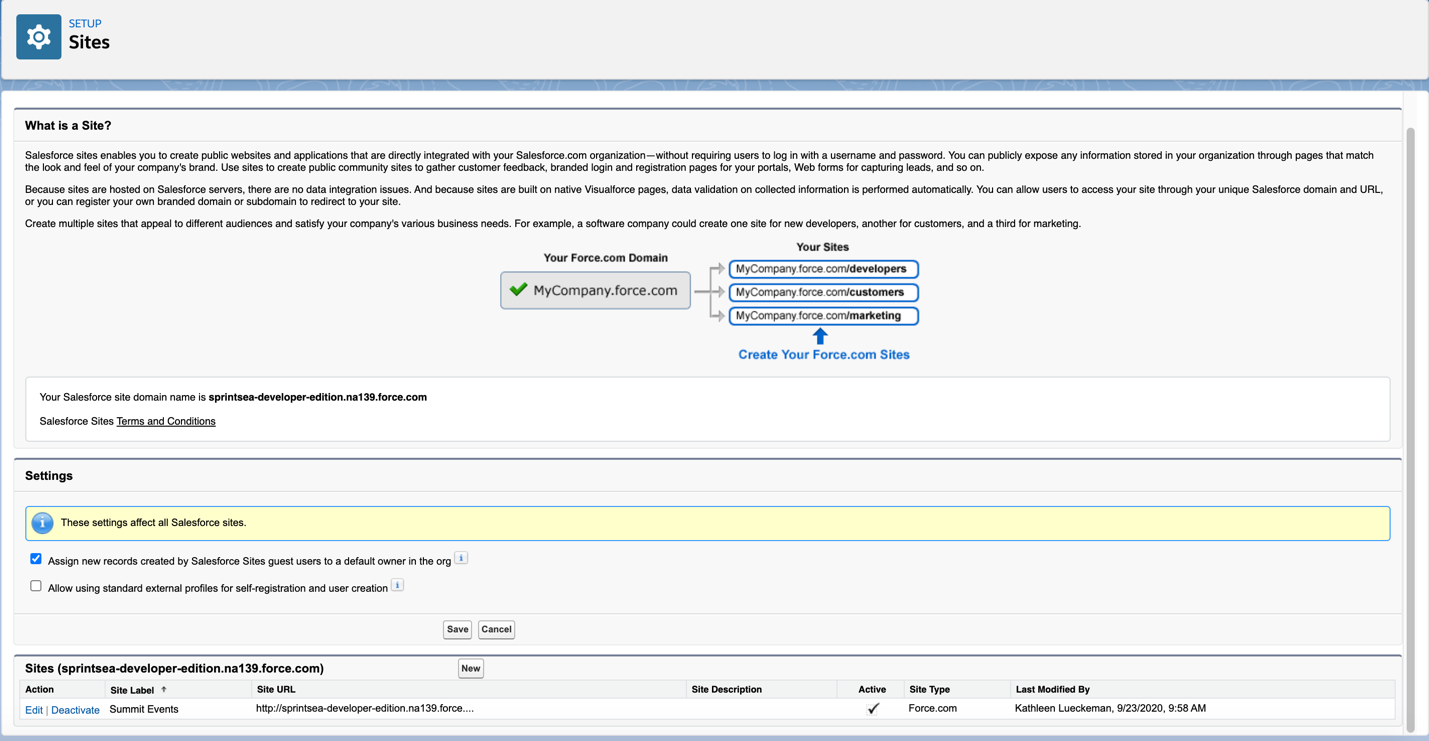
If your org does not already have a Salesforce “Site,” which is used to display public visual force pages, you will need to set up one. If your org has one set up, you may use the existing Site.
-
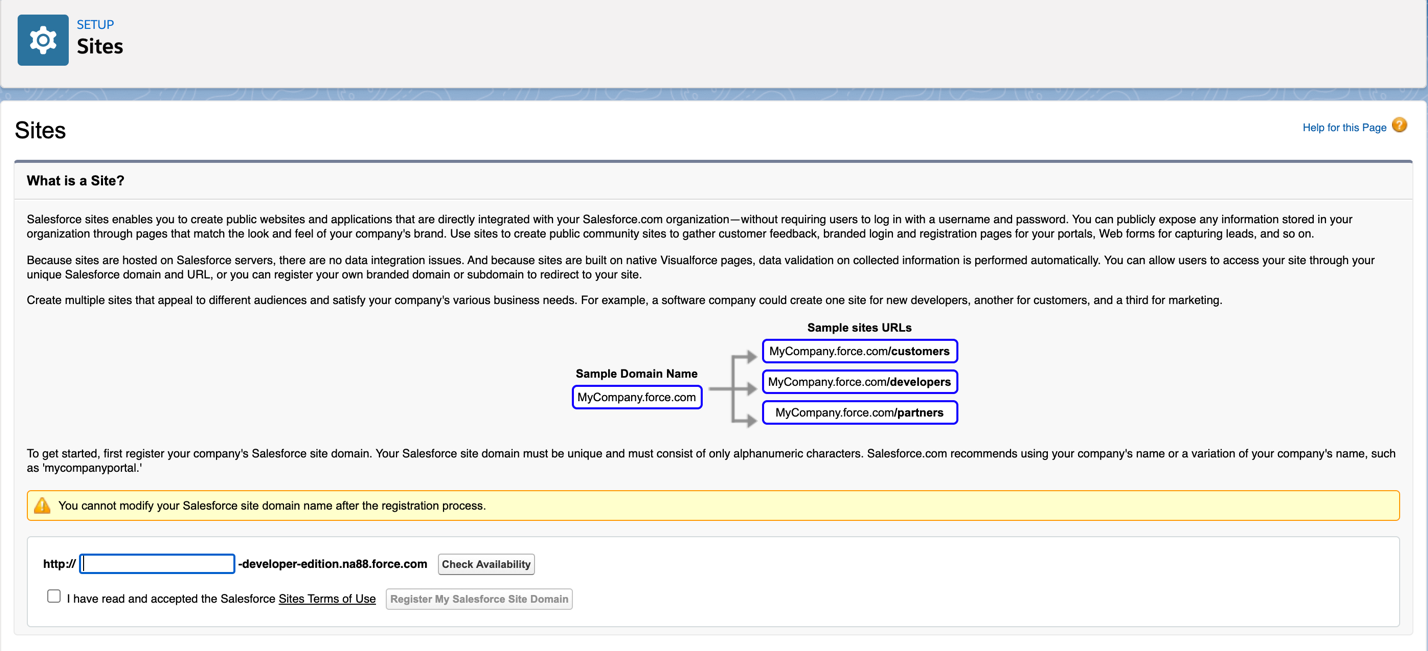
In Setup, go to User Interface -> Sites and Domains -> Sites.
-
Determine the name you want to use for the Site (it will be in the form of [site.force.com]) and click the “Check Availability” button to see whether or not it is available. Note: Each Site must be unique.
-
Click on the "Register My Salesforce Site Domain" button.
Once your domain has been registered continue:
-
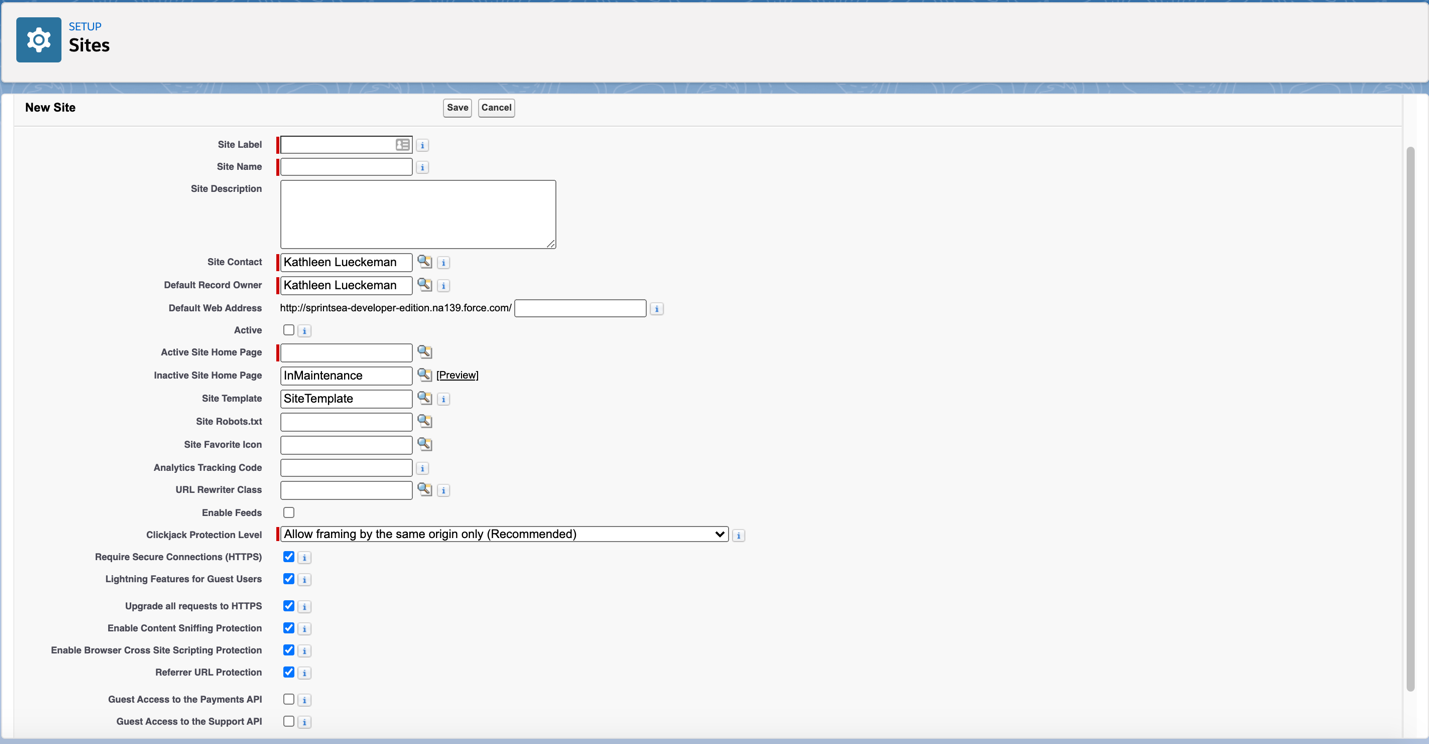
Click the "New" button next to the site header.
-
Enter the following data in the form (label, name, and homepage can be adjust to whatever makes sense for your site):
- Site Label: Summit Events
- Site Name: Summit_Events
- Active Site Home Page:
- Select the magnifying glass look-up icon and in the dialog select "SummitEvents"
- Leave all other settings at their defaults and text areas blank
-
Click "Save".
-
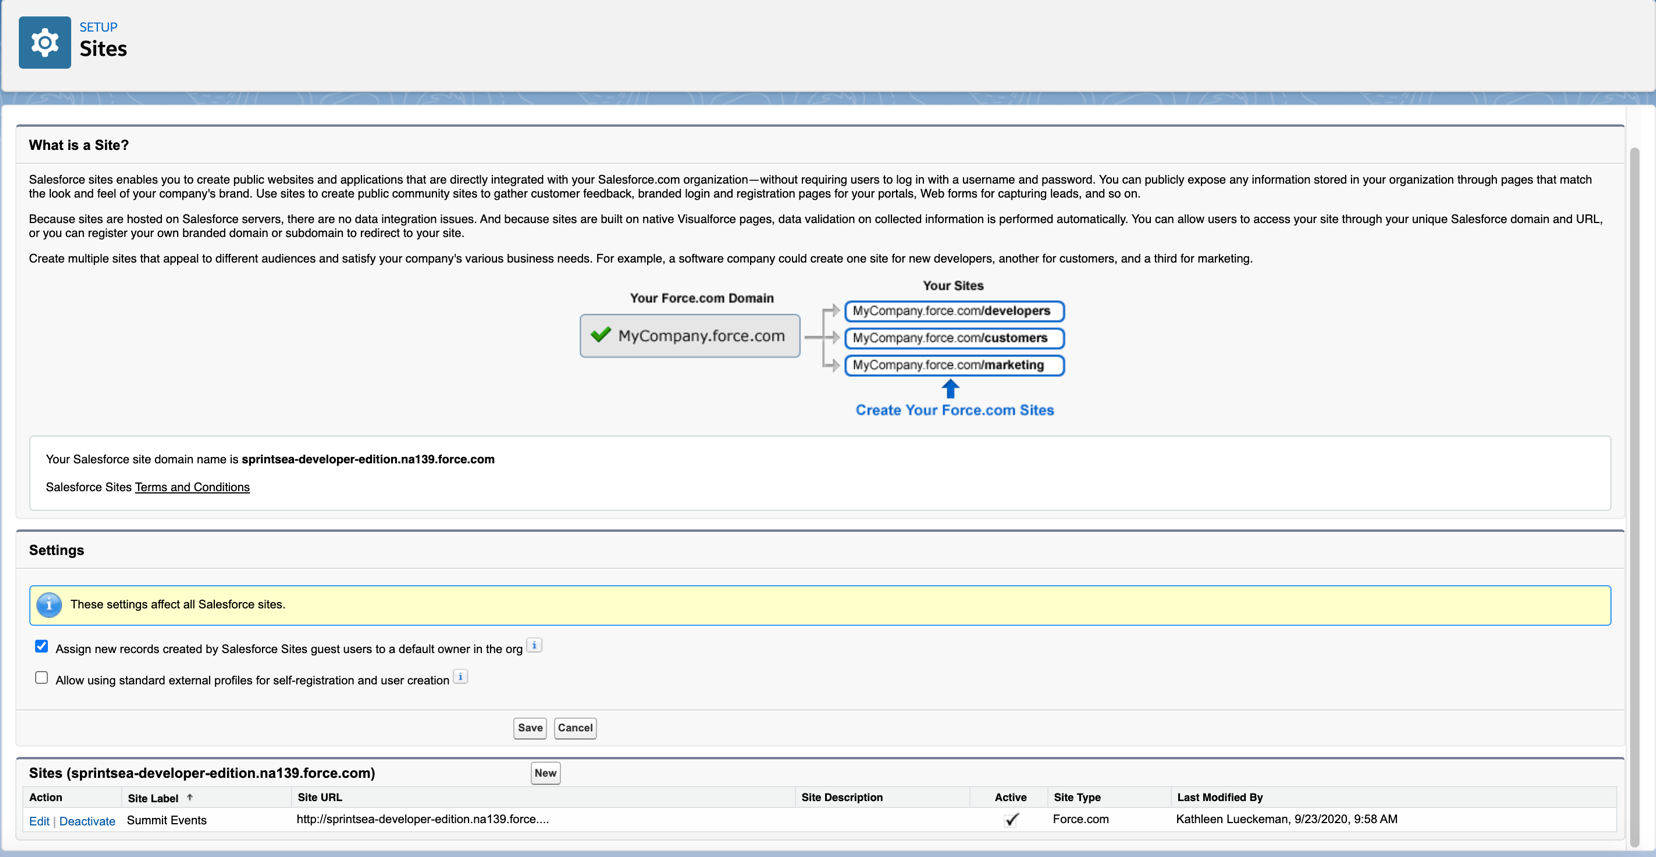
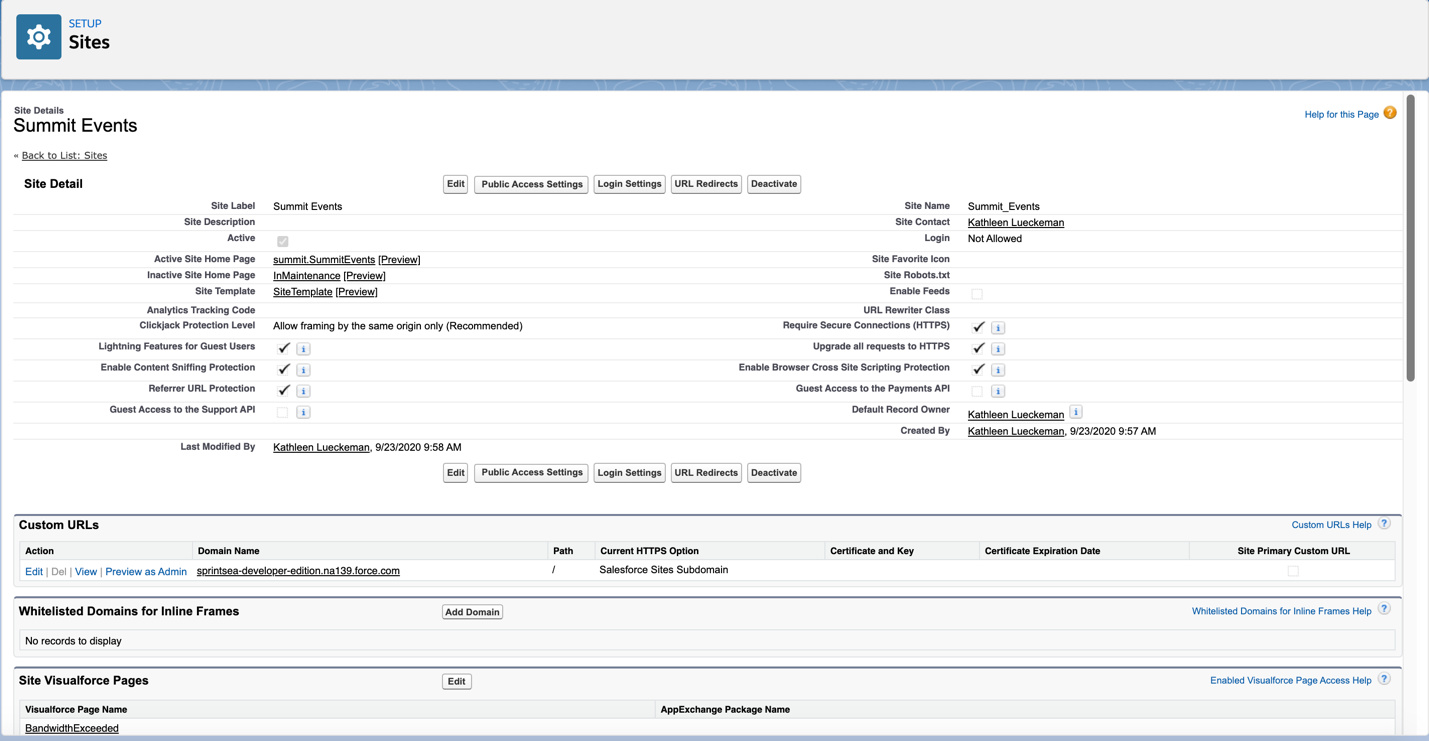
Upon save, you will see the Site under the Sites section. Under the Action column, click the "Activate" link (next to the site you just created).
-
In that same section, right-click on the Site URL link and copy the URL to your clipboard. You will need the Site URL in the next stage of post-installation set-up steps.
Since each installation can have a different site URL, we need to define that URL for the event application to use as its root web presence. This is used for feed URLs, allowing external sites to access it, among other things.
-
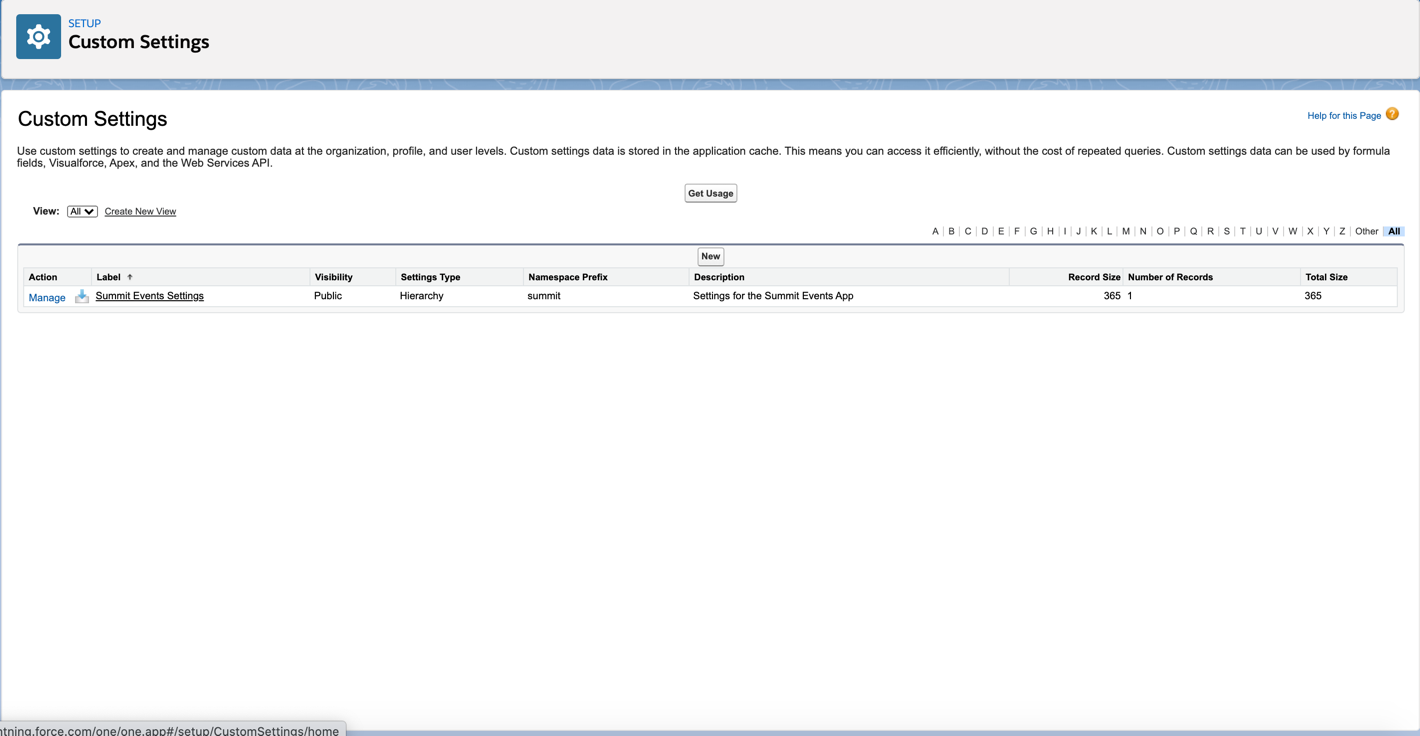
In Setup go to User Custom Code -> Custom Settings.
-
Click on the "Manage" link for the custom setting "Summit Events Settings".
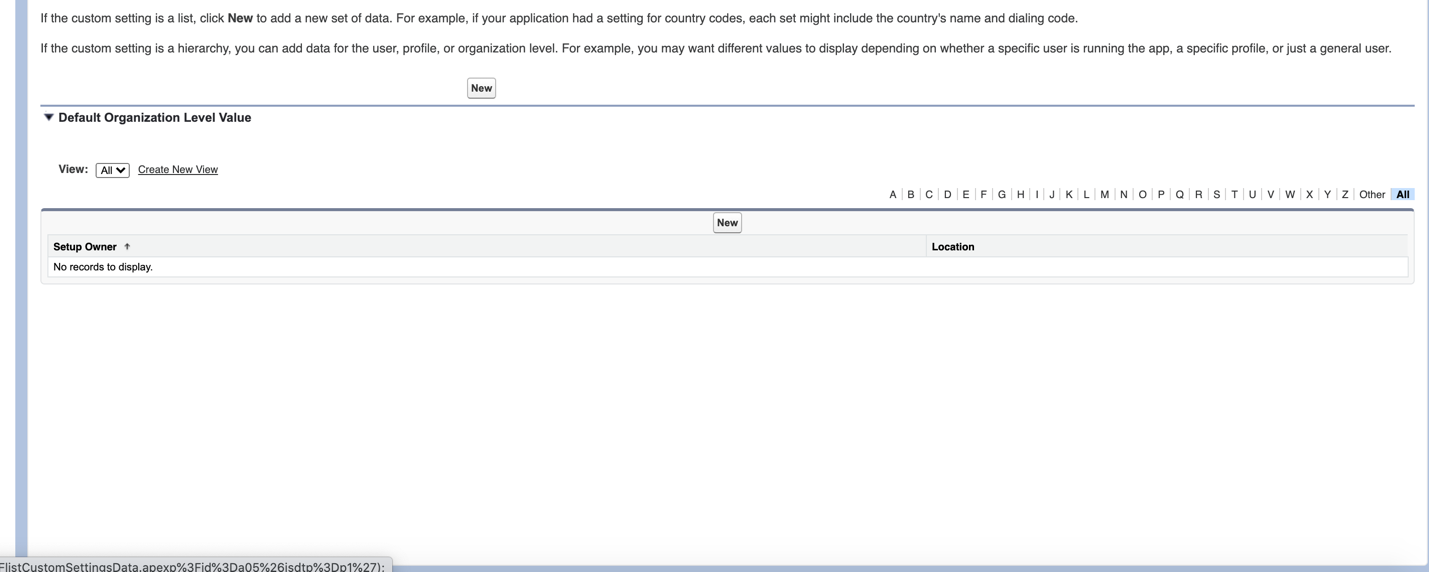
-
Click "New" button just before the "Default Organization Level Value." NOTE: There are two "New" buttons on the page, which can be confusing. You will know you are on the wrong one if you are asked to assign a user or a profile. You will know you are on the right one if you only need to enter the URL in the following step.
-
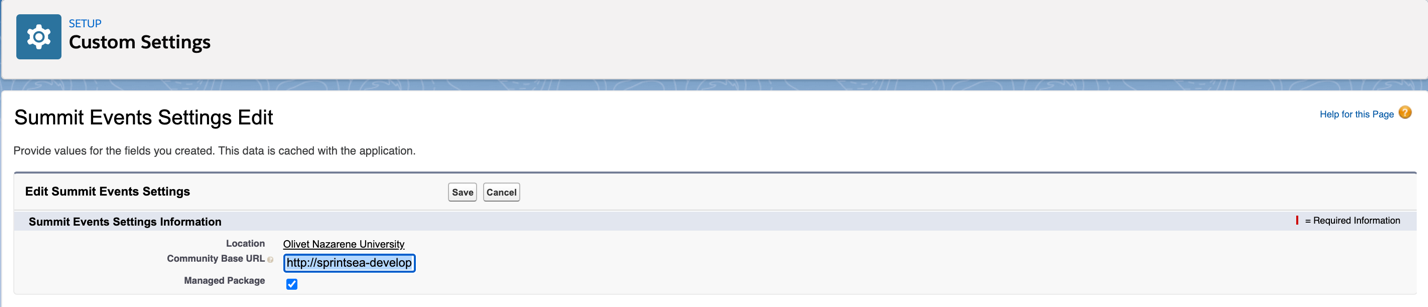
Use the URL you copied from the “Create a site record” section (step 5 above) and enter it into the Community Base URL field.
-
Click the "Save" button.
Once you hit "Save" the "New" button will be replaced with "Edit." (You will need to click the Edit button to make future adjustments to this setting.)
Salesforce Winter '20 and Spring '20 releases severely limited Guest User access to objects to ensure security. The Summit Events application requires the Guest User profile used by the event registrant to be able to read and upsert to the solution’s custom objects. To comply with these new security requirements, we need to create a sharing rule. Code has also been adjusted to allow for the required upserts. The following instructions will help you set up the required sharing rule. Unfortunately, we are not able to automate these steps yet due to limitations in SFDX.
-
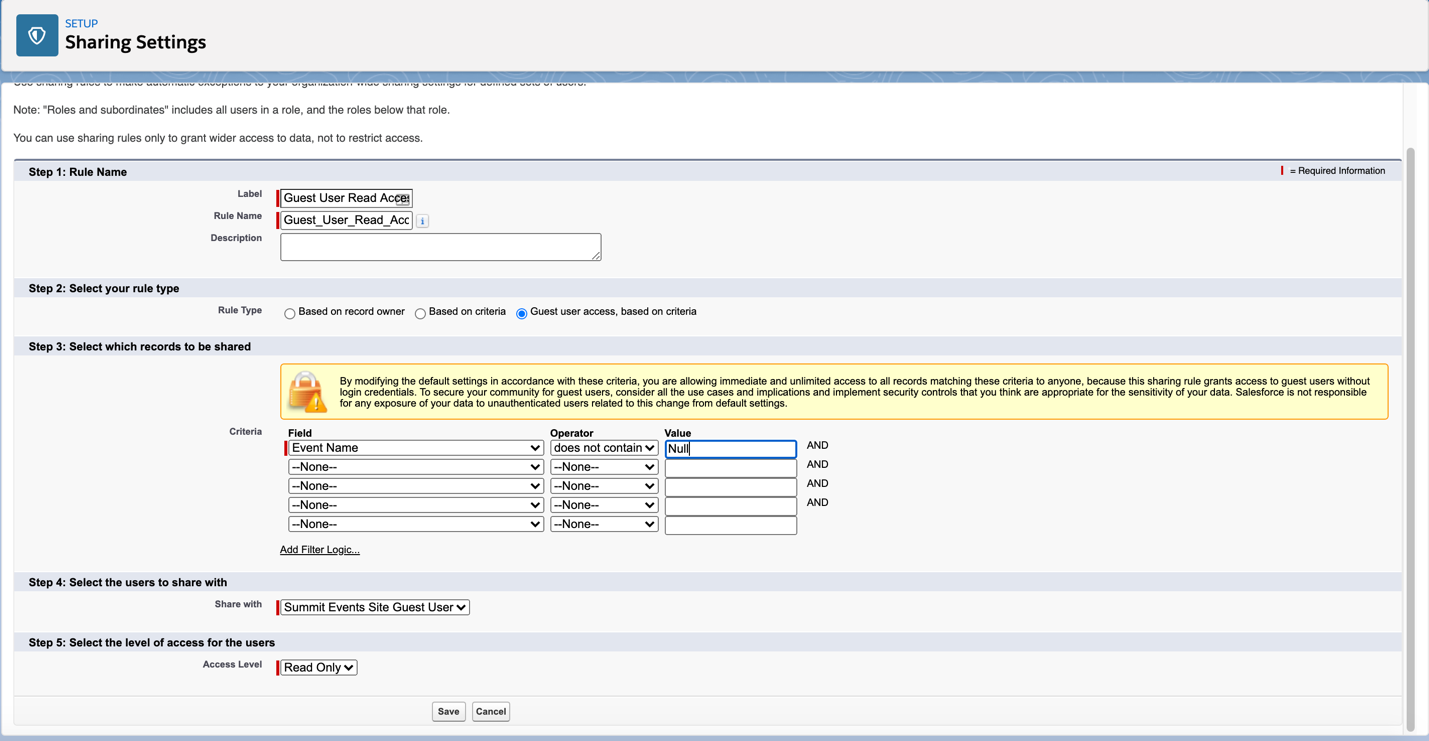
In Setup, type "Sharing" in the quick-find box in Setup and click on "Sharing Settings".
-
In the Organization-Wide Defaults section, scroll down to ensure that Summit Events is set to Public Read/Write. If it is, go to step 6.
-
If Summit Events is not set to Public Read/Write, click the "Edit" button.
-
Scroll down to "Summit Events" and select Public Read/Write in both the Default Internal Access column and the Default External Access column.
-
Click the “Save” button.
-
Under the "Sharing Rules" header (just below the Organization-Wide Default section), scroll down to the "Summit Events Sharing Rules" section and click the “New” button.
-
In the "Step 1: Rule Name" section, under Label field, enter "Guest User Read Access" and click tab. This will automatically populate the Rule Name field with "Guest_User_Read_Access."
-
In the "Step 2: Select your rule type" section, select the "Guest user access, based on criteria" radio button.
-
In the "Step 3: Select which records to be shared" section, set the following:
- "Criteria" to Field = Event Name
- Operator = "not equal to"
- Value = null (type the word 'null' for the value).
-
In the "Step 4: Select the users to share with" section, click the Share With drop-down arrow and select "Summit Events Site Guest User" (the only option).
-
Set Access Level to "Read Only".
-
Click the "Save" button.
There are two permission sets provided in this application:
Summit Events Admin: Apply to admin users that need to create and maintain events.
- Note: Users who are not system administrators but who will administer Summit Events will need this permission set. You do not need to add the Permission Set at this time, but follow the steps bulleted below if/when you need a user to administer Summit Events.
- In Setup under Users, click on Permission Sets.
- Click on Summit Events Admin.
- Click on the “Manage Assignments” button.
- Click the checkbox next to the user who will administer Summit Events and click the “Add Assignments” button.
Summit Events Registrant: This permission set needs to be applied to the Guest User profile of your site for the public to be able to access to registration forms (see below).
- In Setup, go to User Interface -> Sites and Domains -> Sites.
- Under the Sites section, click on the words Summit Events in the "Site Label" field.
- Click on the "Public Access Settings" button at the top of the site definition page.
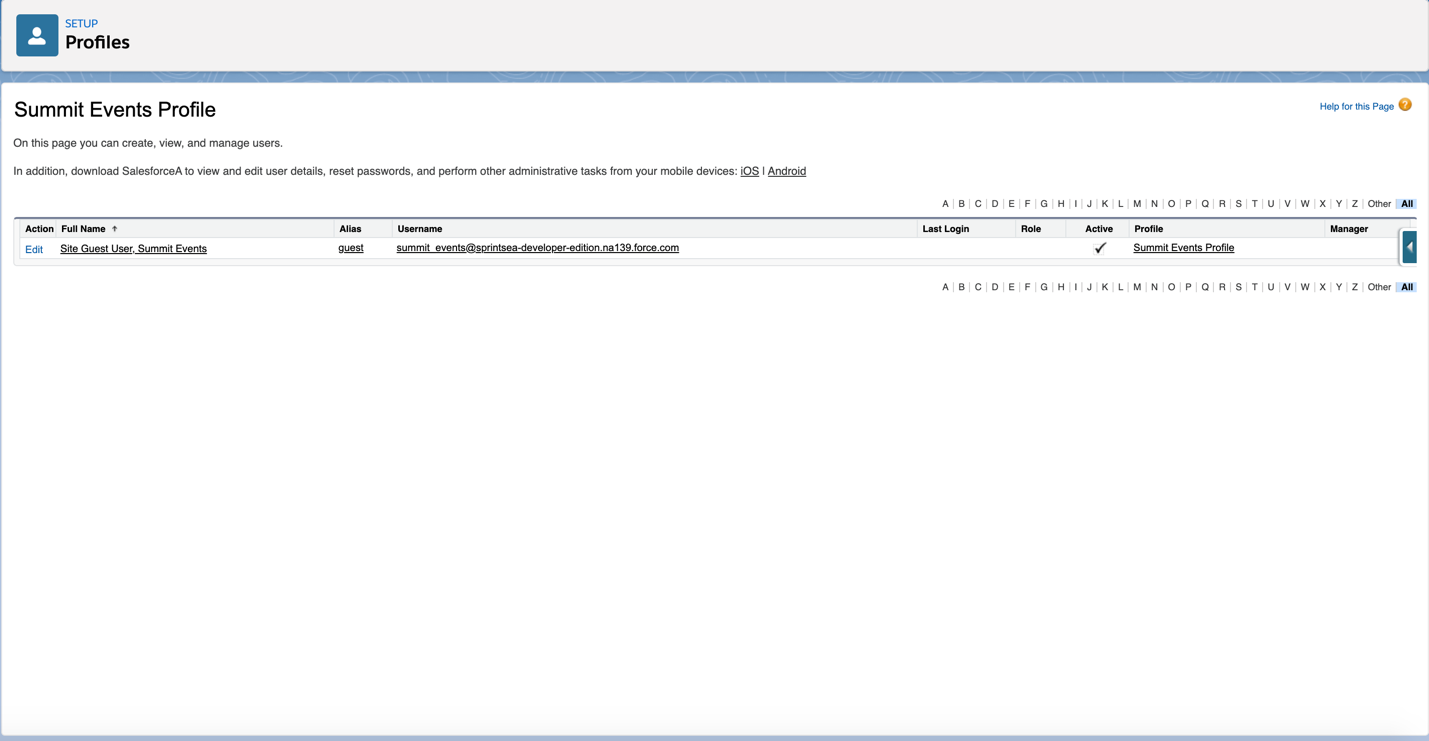
- On the Summit Events Profile page, click on the "View Users" button.
- Under the Full Name column, click on the Site Guest User name (which is a link).
- On the Summit Events Site Guest User page, scroll down to Permission Set Assignment and click the “Edit Assignments” button.
- In the Available Permission Sets section, click on Summit Events Registrant and click the “Add” button. This will move it into the Enabled Permission Sets section.
- Click the “Save” button.

Congrats! At this point you should have a functioning Summit Events Package.
- Setting Up Summit Events After Installing Package
- Steps To Do Before You Start Using Summit Events
- Setup Contact Matching
- Setup Lead Matching
- Create an Event
- Create an Event Instance
- View and Edit Event Registration
- Create Event Appointment Types and Manage Event Appointments
- Create an Event Host
- Create an Event Email