Getting Started: Opening a Window
In this tutorial, we'll learn how to open a window and prepare it for use with TrippyGL.
We're gonna start by creating a simple C# Console App. I'll be using Visual Studio 2019. Install into this project the latest version of the following NuGet packages:
- TrippyGL (1.X)
- Silk.NET.OpenGL (2.X)
- Silk.NET.Windowing (2.X)
TrippyGL itself doesn't provide windowing, but instead is built atop the Silk.NET library, which provides the bindings to the OpenGL API and things like windowing and input.
To create a window, we can use Window.Create(), which returns an IWindow. This method takes as parameter a WindowOptions struct. It is in this struct that you can specify many parameters for your window, such as title, size, depth buffer bits, or most importantly, which graphics API to use. For TrippyGL, you must set this to an OpenGL context, preferrably with version 3.3 or newer.
Once we have our IWindow instance, we can subscribe to events such as Load, Update, Render, FramebufferResize, Closing, etc.
To start (and show) the window, we can use the extension method window.Run(). This starts a game loop, and does not return until the window is closed.
Within our Window_Load() method, we must create a Silk.NET GL object, which lets our program make OpenGL calls, and then use it to create a TrippyGL GraphicsDevice. We can then use this GraphicsDevice in our Window_Render() method. Our code should look something like this:
using Silk.NET.Maths;
using Silk.NET.OpenGL;
using Silk.NET.Windowing;
using TrippyGL;

namespace TrippyExample
{
    class Program
    {
        static IWindow window;
        static GL gl;
        static GraphicsDevice graphicsDevice;

        static void Main(string[] args)
        {
            WindowOptions windowOpts = WindowOptions.Default;
            windowOpts.Title = "My TrippyGL Window!";
            windowOpts.API = new GraphicsAPI(ContextAPI.OpenGL, ContextProfile.Core, ContextFlags.Debug, new APIVersion(3, 3));

            using IWindow myWindow = Window.Create(windowOpts);
            window = myWindow;

            window.Load += Window_Load;
            window.Render += Window_Render;
            window.FramebufferResize += Window_FramebufferResize;
            window.Closing += Window_Closing;

            window.Run();
        }

        private static void Window_Load()
        {
            gl = window.CreateOpenGL();
            graphicsDevice = new GraphicsDevice(gl);

            // Loading code here

            Window_FramebufferResize(window.FramebufferSize);
        }

        private static void Window_Render(double dt)
        {
            graphicsDevice.ClearColor = Color4b.CornflowerBlue;
            graphicsDevice.Clear(ClearBuffers.Color);

            // Rendering code here
        }

        private static void Window_FramebufferResize(Vector2D<int> size)
        {
            graphicsDevice.SetViewport(0, 0, (uint)size.X, (uint)size.Y);

            // Resize code here
        }

        private static void Window_Closing()
        {
            // Dispose all resources here

            graphicsDevice.Dispose();
            gl.Dispose();
        }
    }
}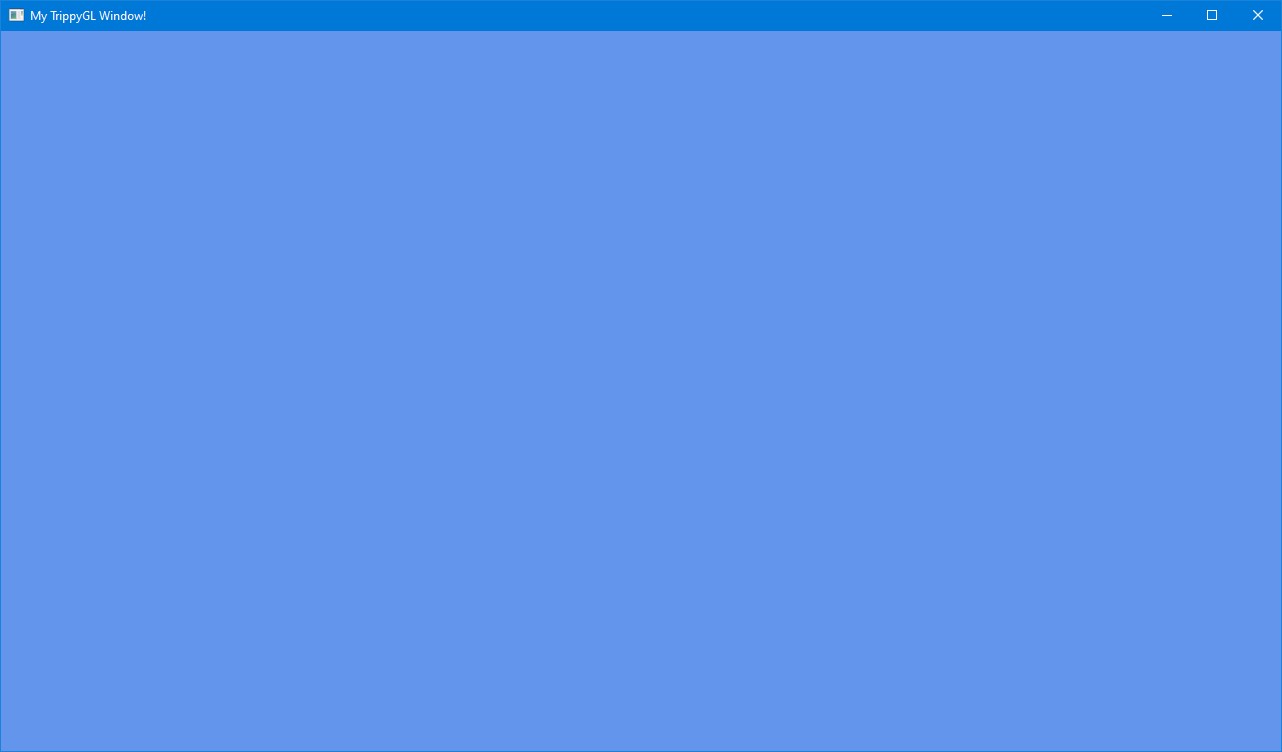
Our Window_Render() method will just clear the whole screen to a constant color. Try changing this to a different color, and then try making this color change over time using window.Time! You can make your window spew rainbows by instead using:
graphicsDevice.ClearColor = Color4b.FromHSV((float)window.Time * 0.5f % 1, 1, 1);Our Window_FramebufferResize() method will tell us whenever the window framebuffer's size has changed. We use this to update the viewport, which is the area (in pixels) of the framebuffer to which we're drawing. Note that there is a difference between the IWindow.Resize and IWindow.FramebufferResize events!
Finally, don't forget about disposing. On our Window_Closing() method, we dispose the GraphicsDevice (this also disposes all TrippyGL GraphicsResource-s) and we dispose the GL object used in it (the order is important). The window gets disposed in Main() after window.Run() returns.
- Getting an exception from Silk.NET? Make sure all your Silk.NET packages are the exact same version! Also check the implicit packages; TrippyGL references Silk.NET.OpenGL but you should also install it explicitly to take control over the version.
- Window not showing up? Try adding
windowOpts.IsVisible = true;before creating the window. Silk.NET.Windowing can use many different windowing backends, typically SDL and GLFW. This means there can be differences in how they behave in different scenarios.