You might know a customer pager from restaurants or similar places where several customers have to be packed into a mixed queue. With the customer pager this queue is virtualized.
The customer receives a pager with a number. This number is given out by the staff. With this pager the customer can already sit down at his place. As soon as it is his turn, the staff can "call" the pager with a specific number.
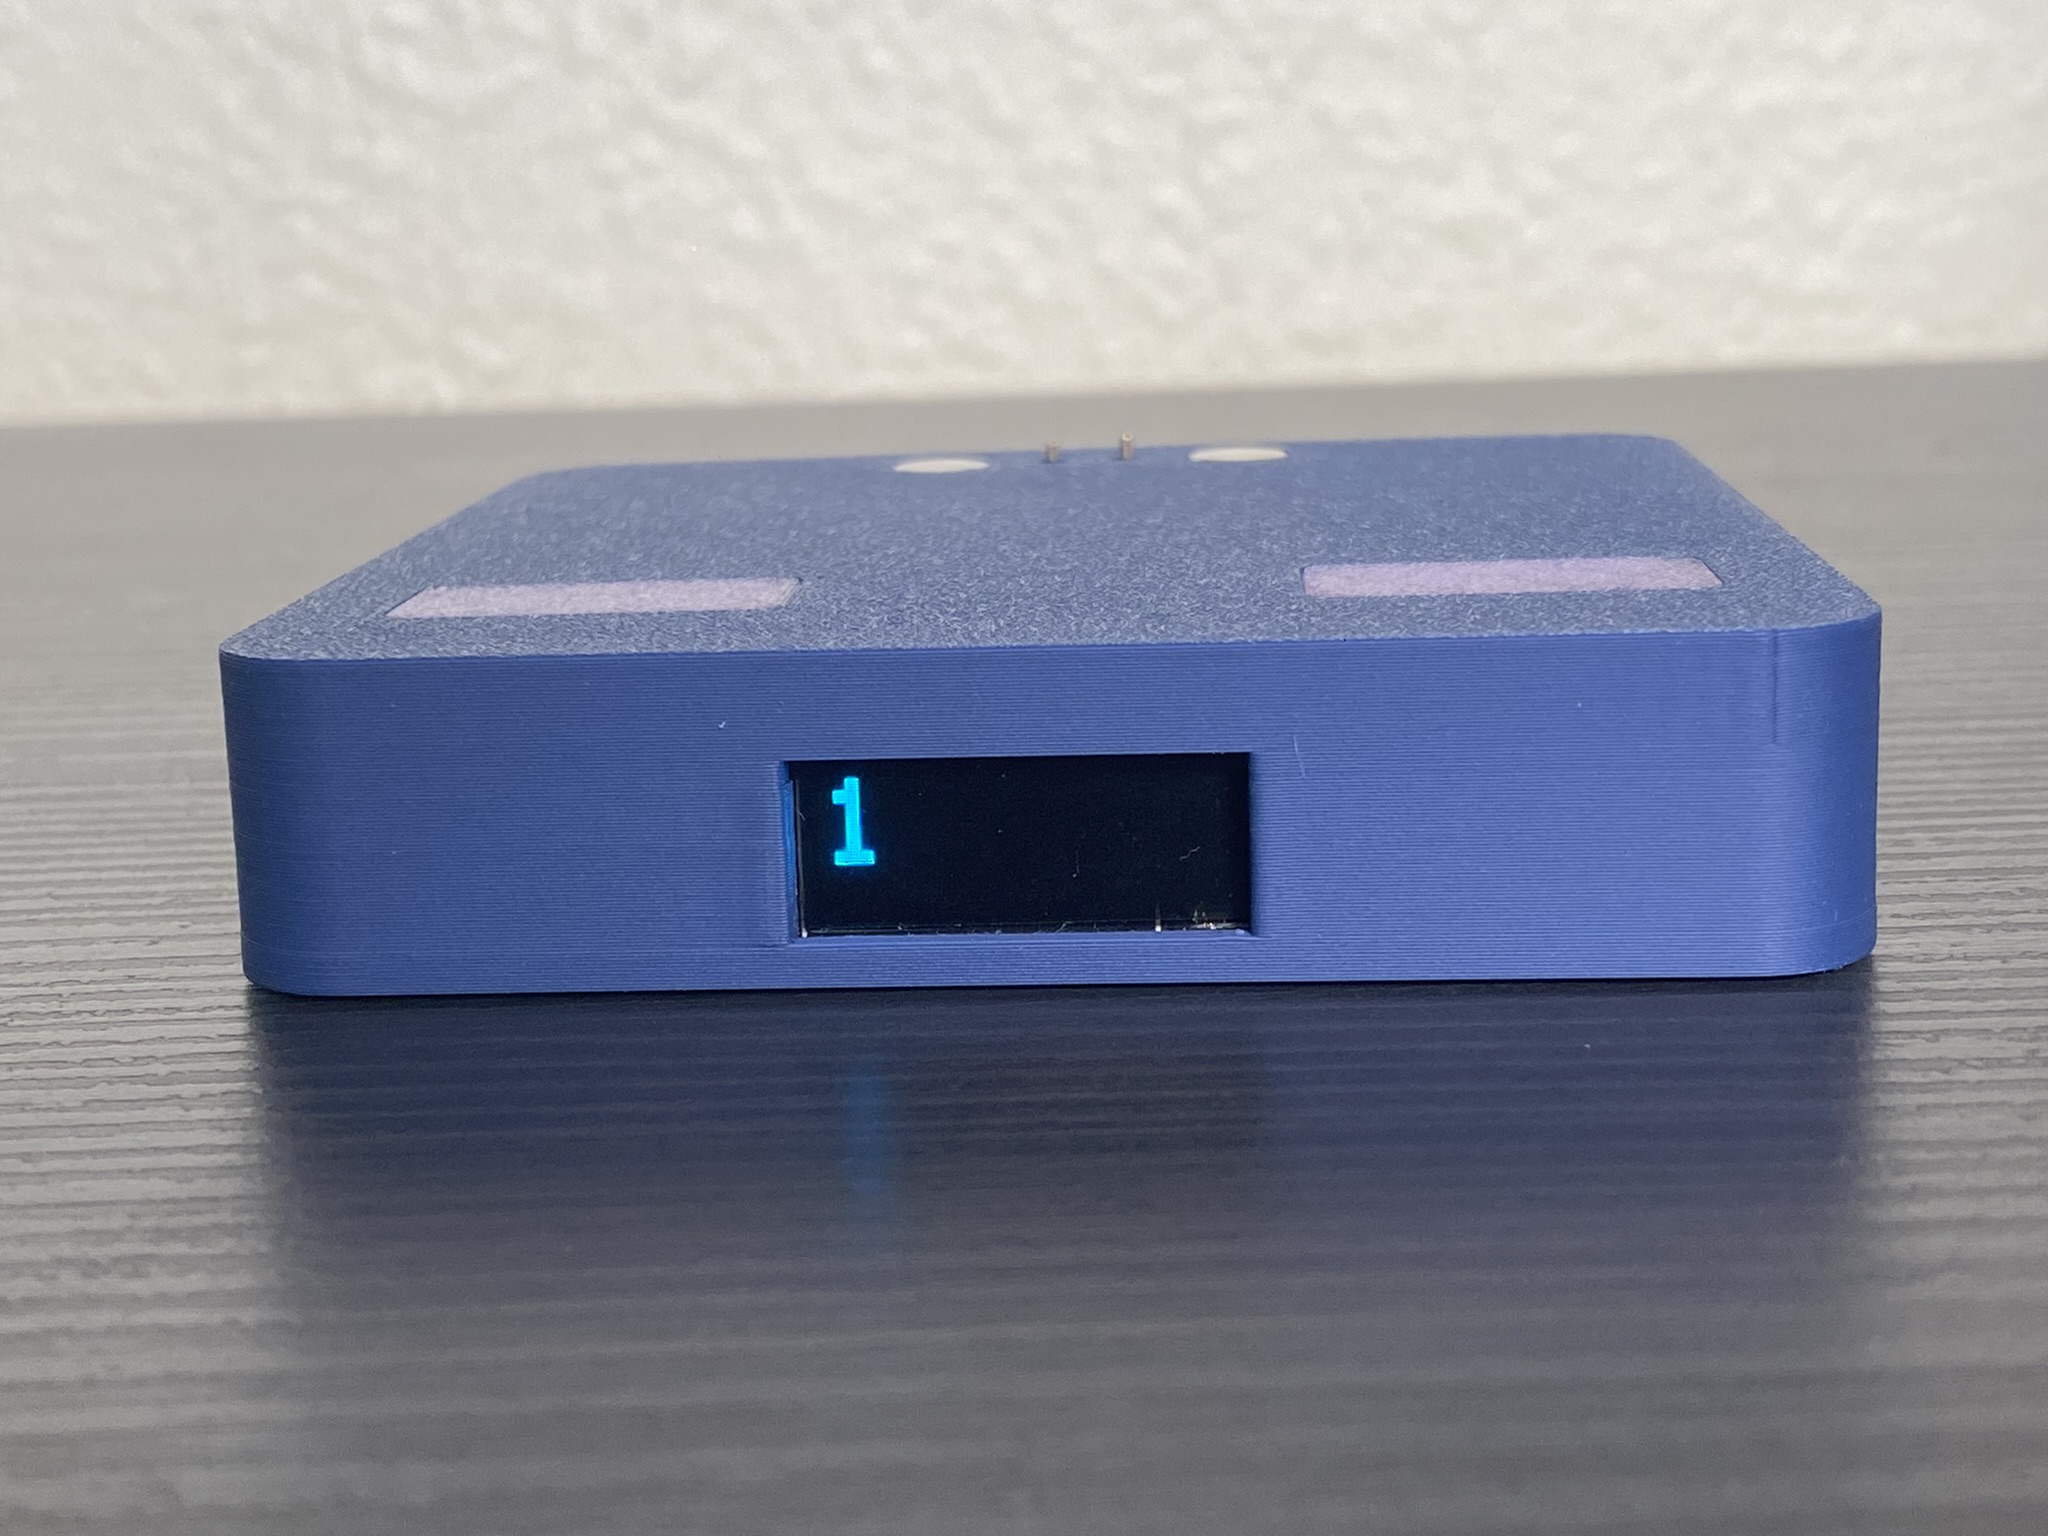
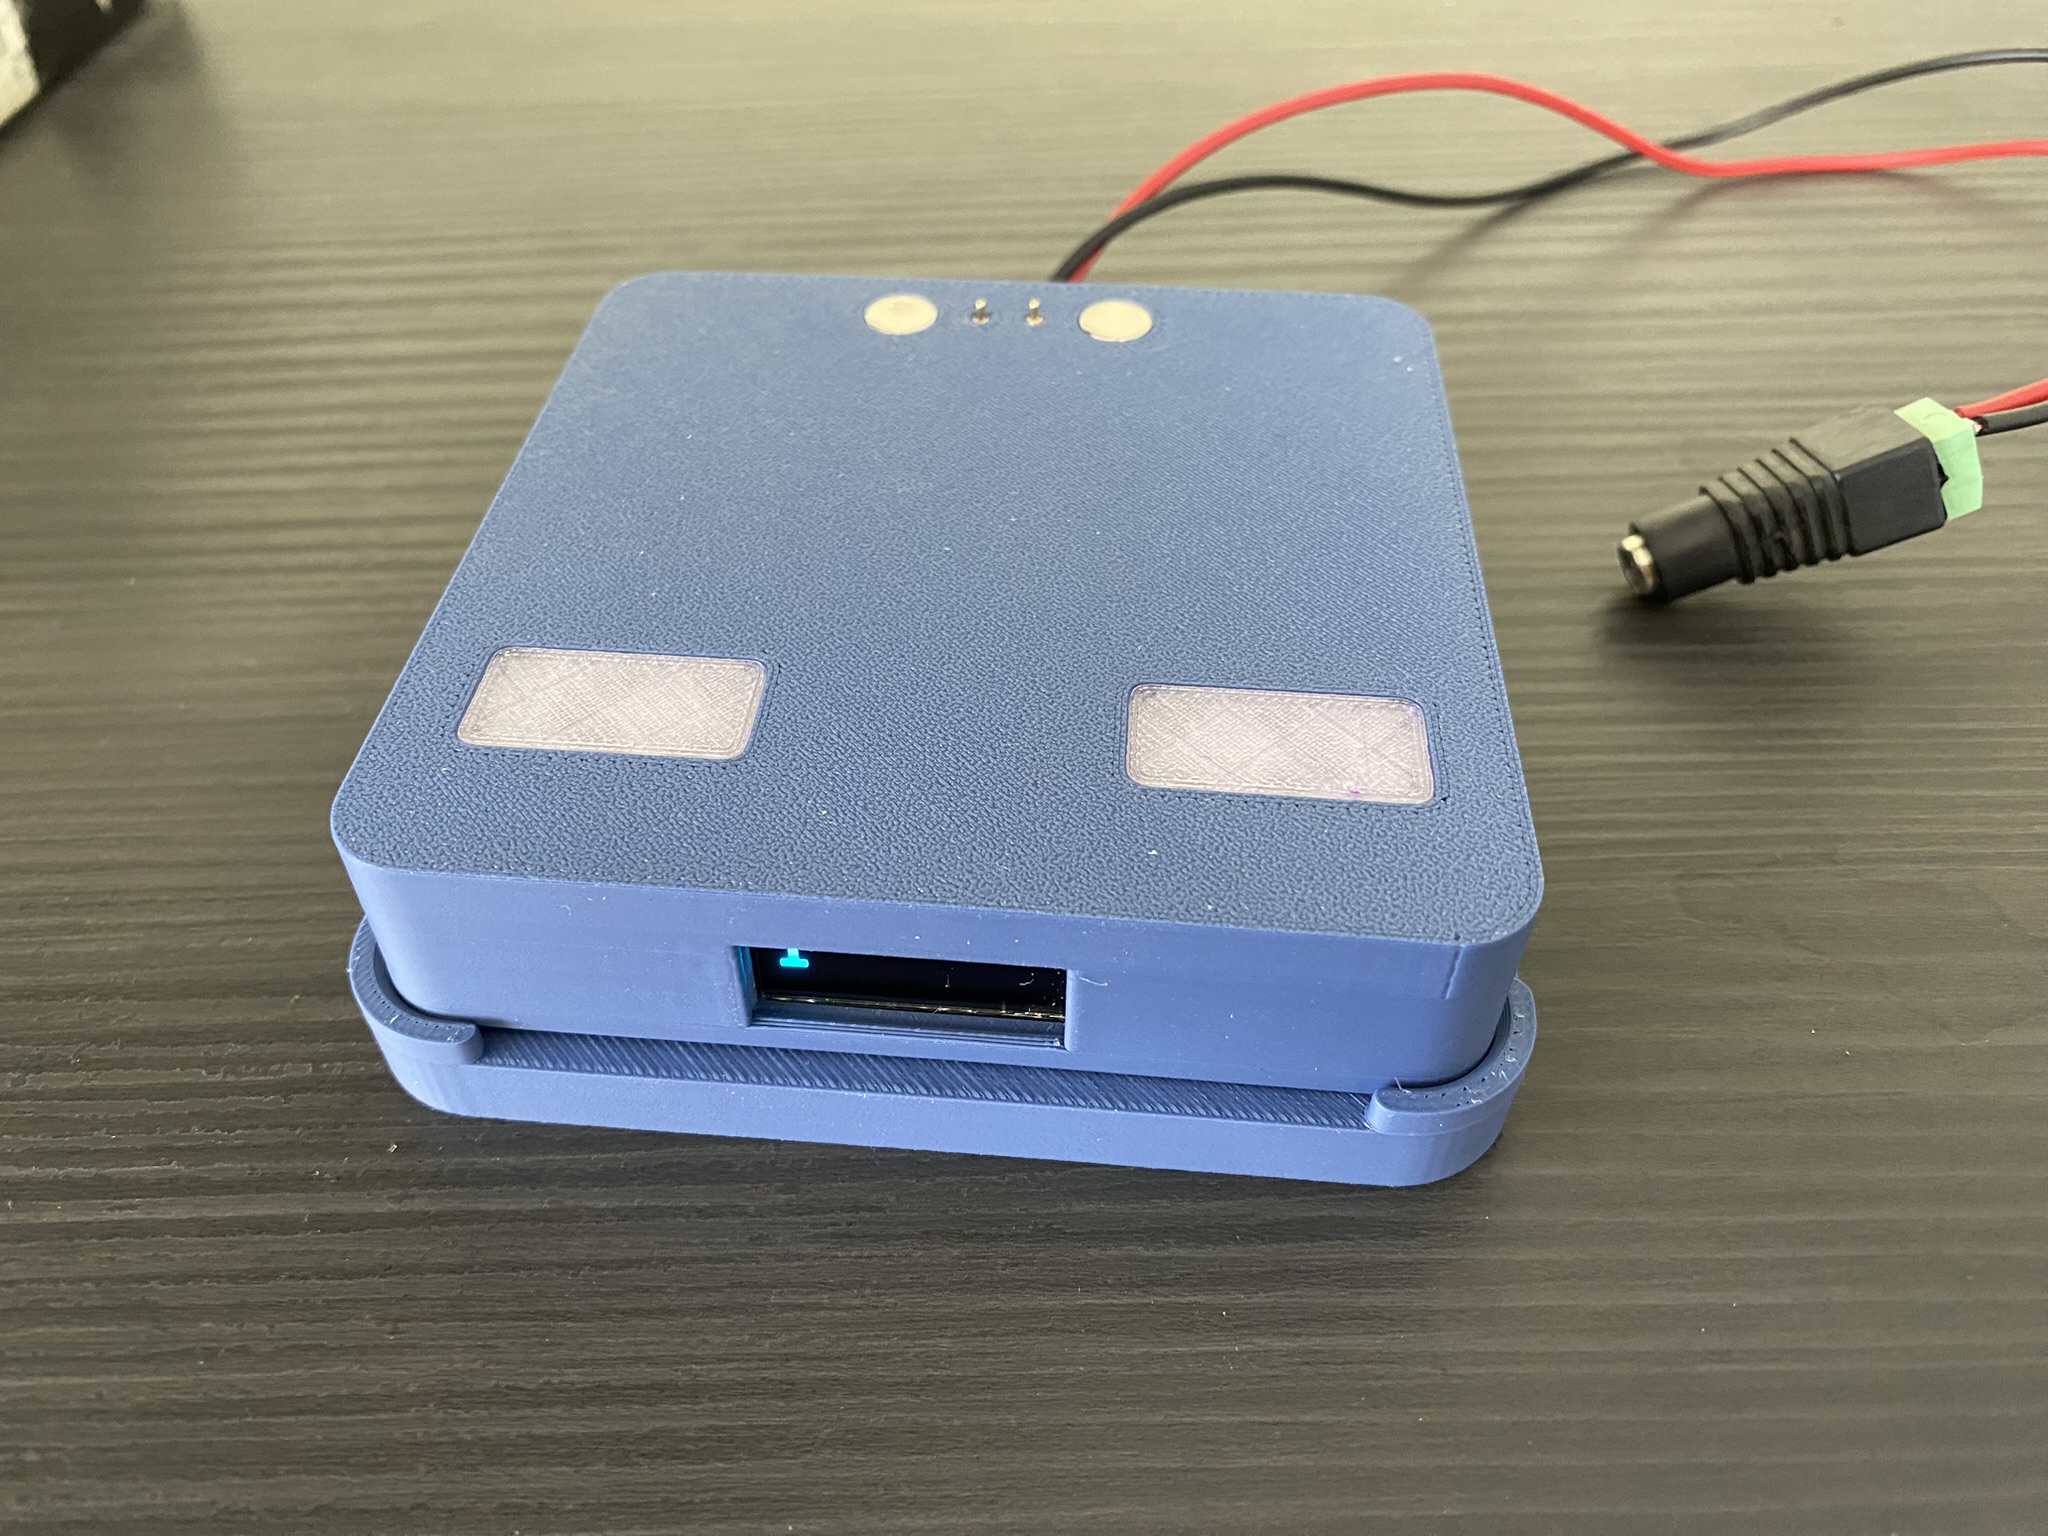
The customer is alerted via the pager by vibration, display on the OLED and LEDs that it is his turn.
He brings the device back to the staff. The staff exchanges the device with the goods, deactivates the alarm and can use the pager for the next customer.
This system consists of a administration station(station for the employees) and several clients/pagers for the customers.
- 📟 Based on an ESP32
- 📶 Communication via the existing Wifi
- 🔆 OLED display with 128x32 pixels
- 🔋 Integrated battery incl. charging function via base
- 🔦 Attention through flashing LEDs and vibration
- ✏️ Easy configuration via WifiManager
- 📡 REST API for easy integration into your own system
The client and also the administration station are based on the LOLIN32 Lite and need the right package for the Arduino IDE.
Install (if not already done) via the Arduino Board Manager the "esp32" package from "Espressif Systems".
After the package has been installed, you will find the appropriate board under "WEMOS LOLIN32 Lite".
You can find all the necessary 3D printing files on the following page for free download: https://www.printables.com/model/467464-customer-pager
Here you will find all print data for the client, administration station and the charging station including Fusion360 original file for any adjustments.
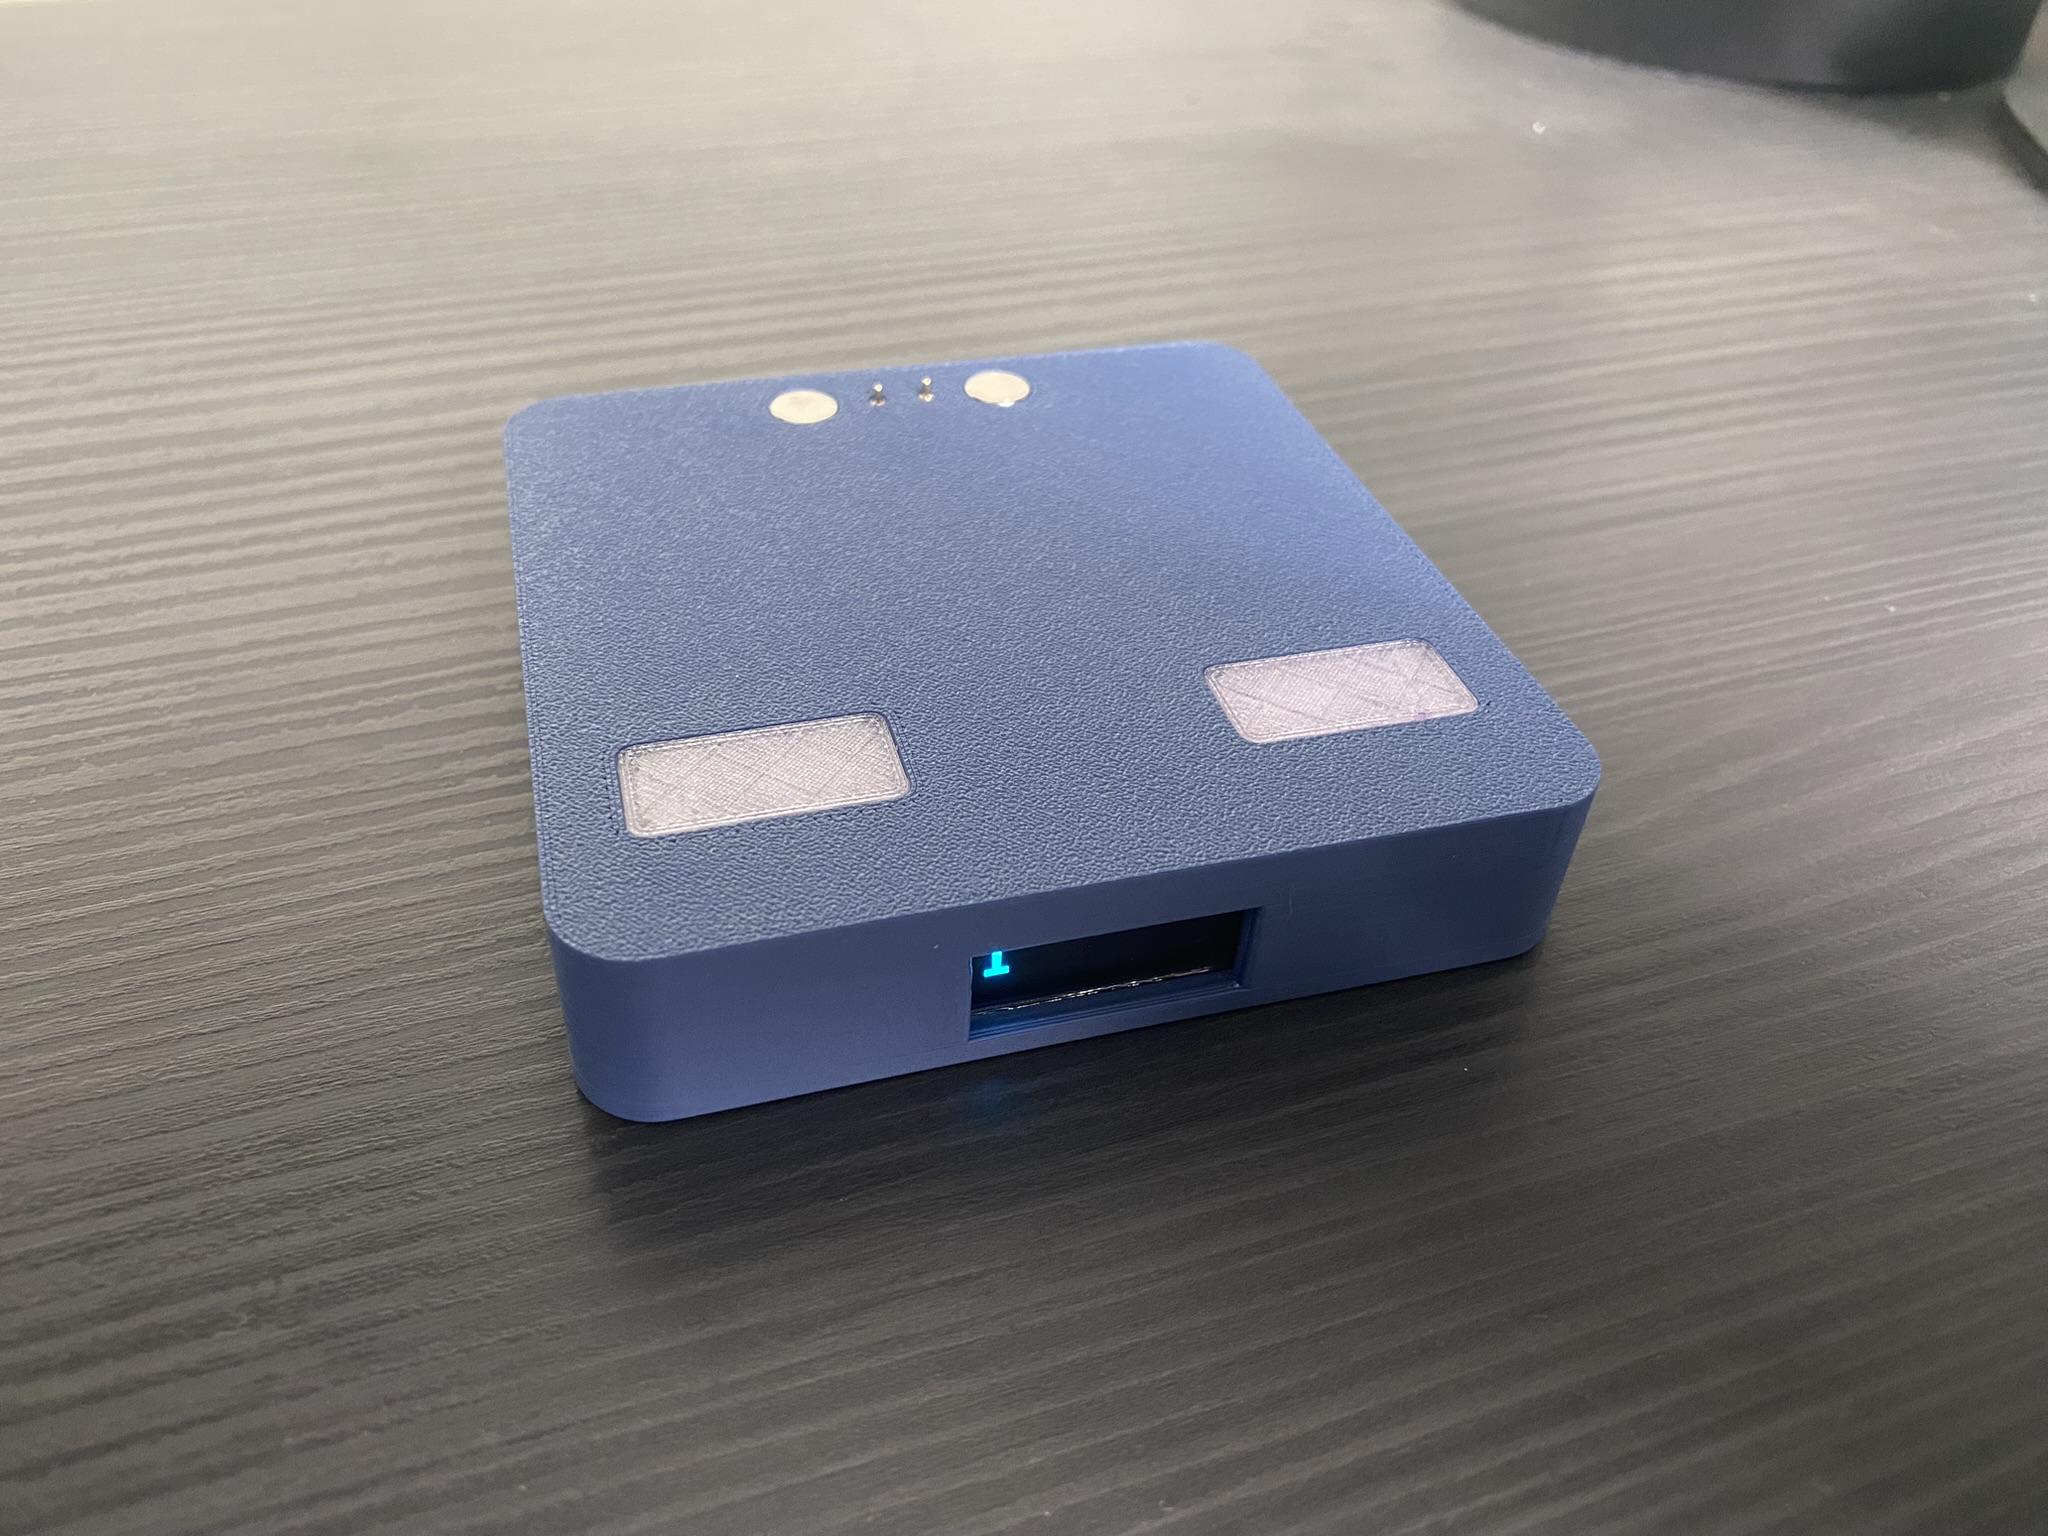
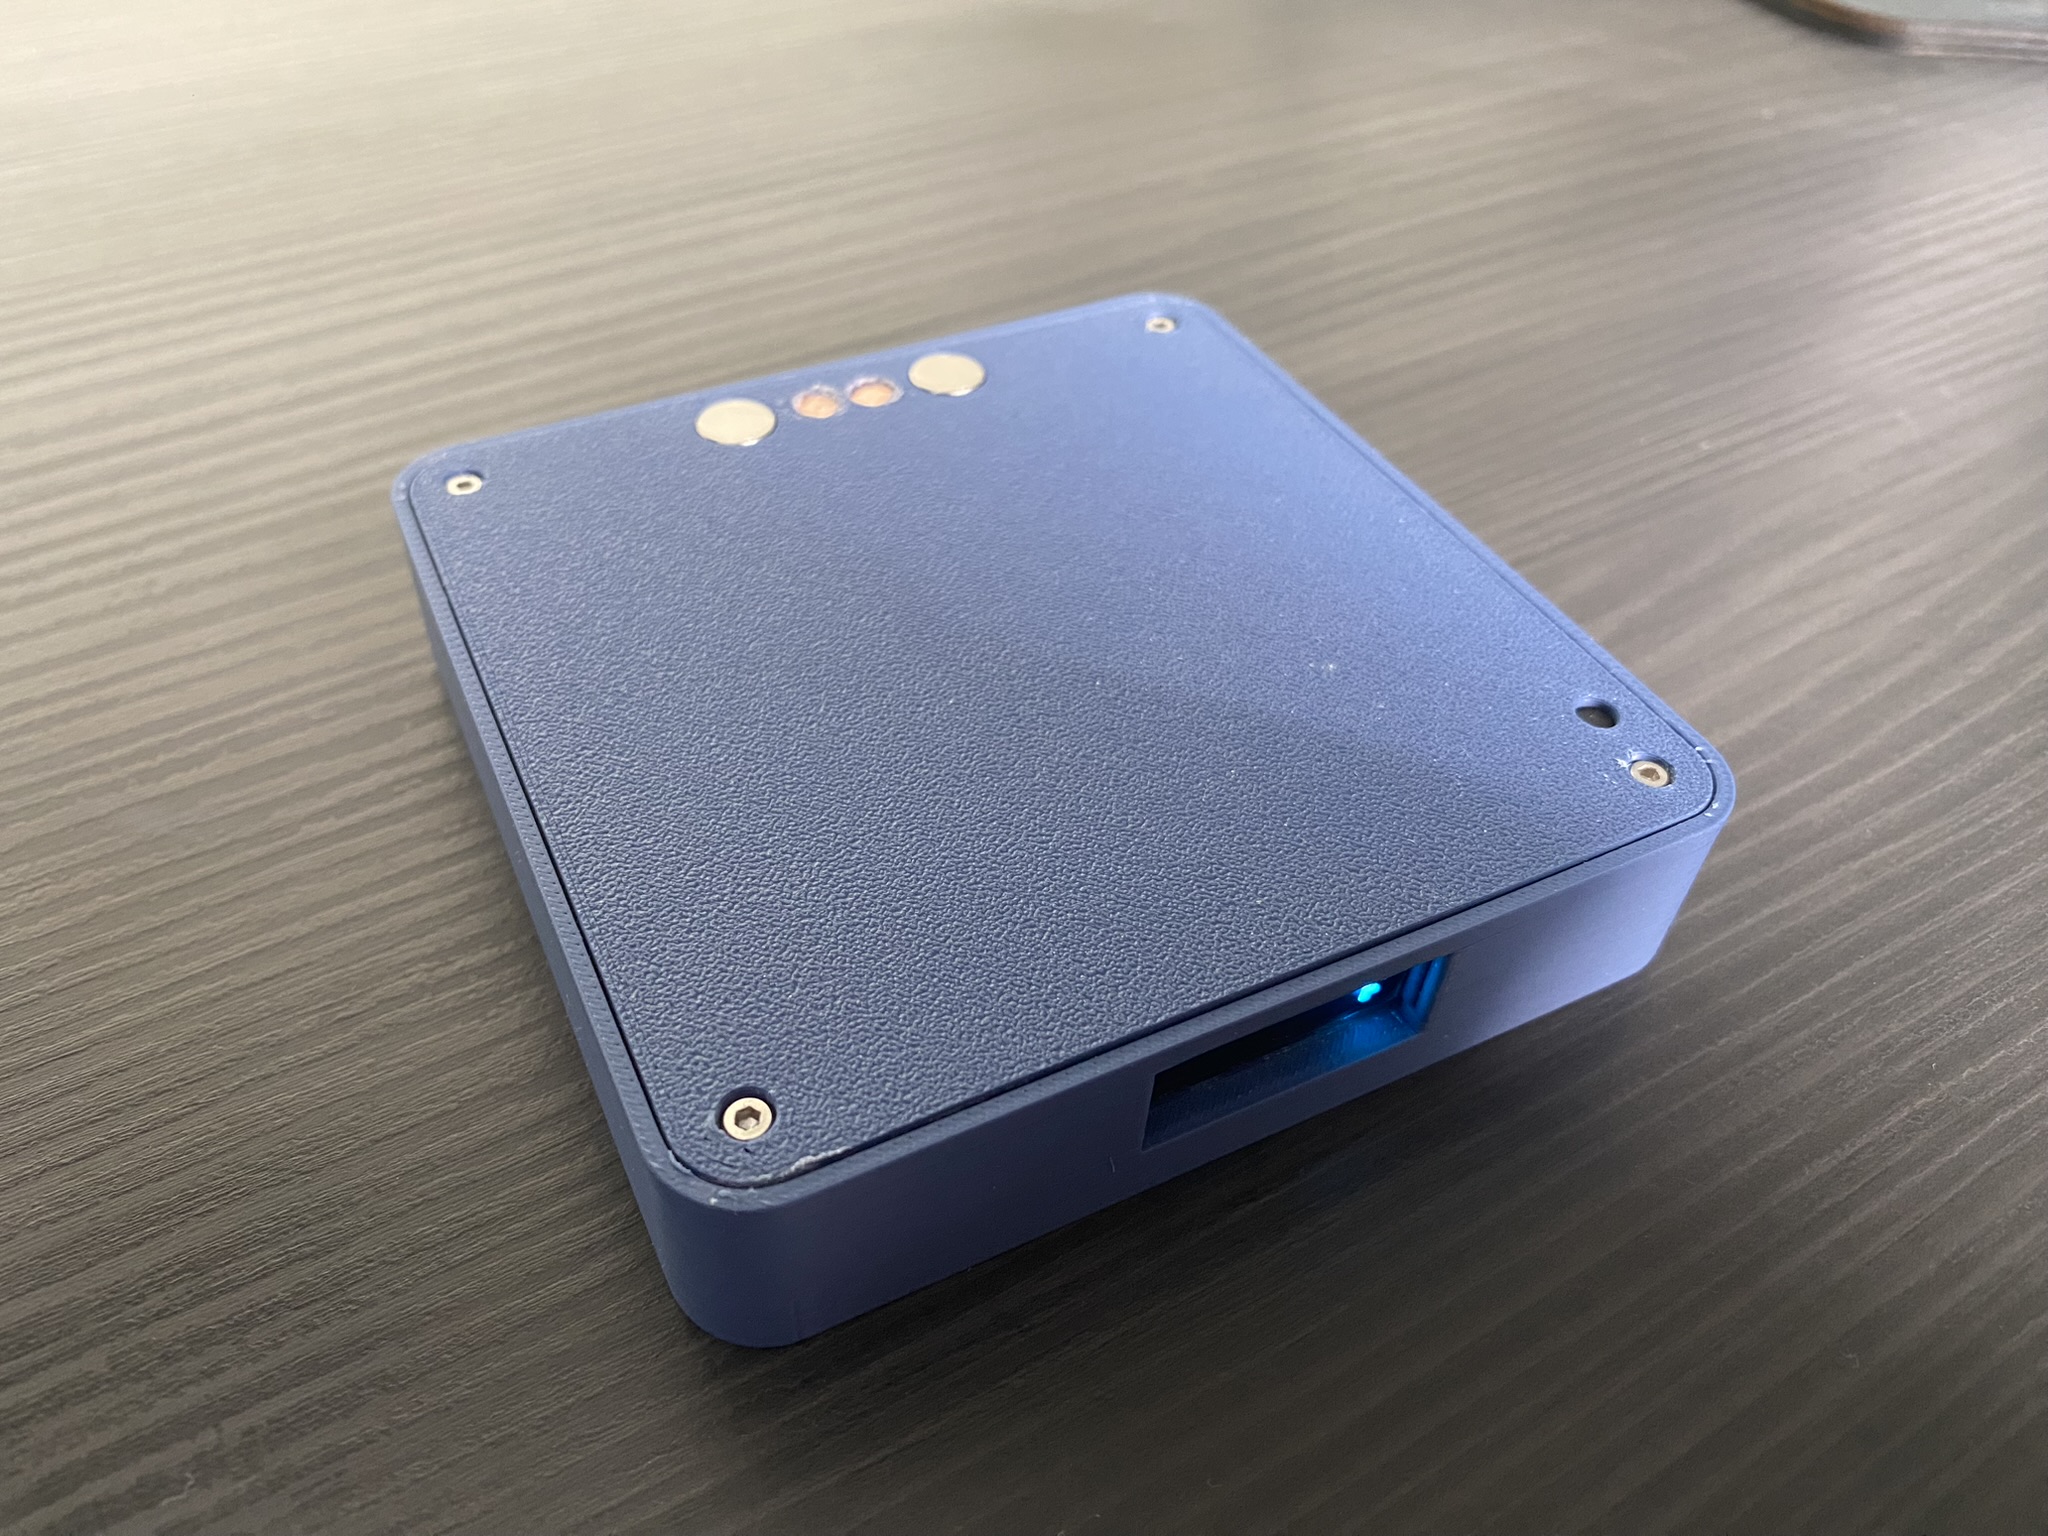
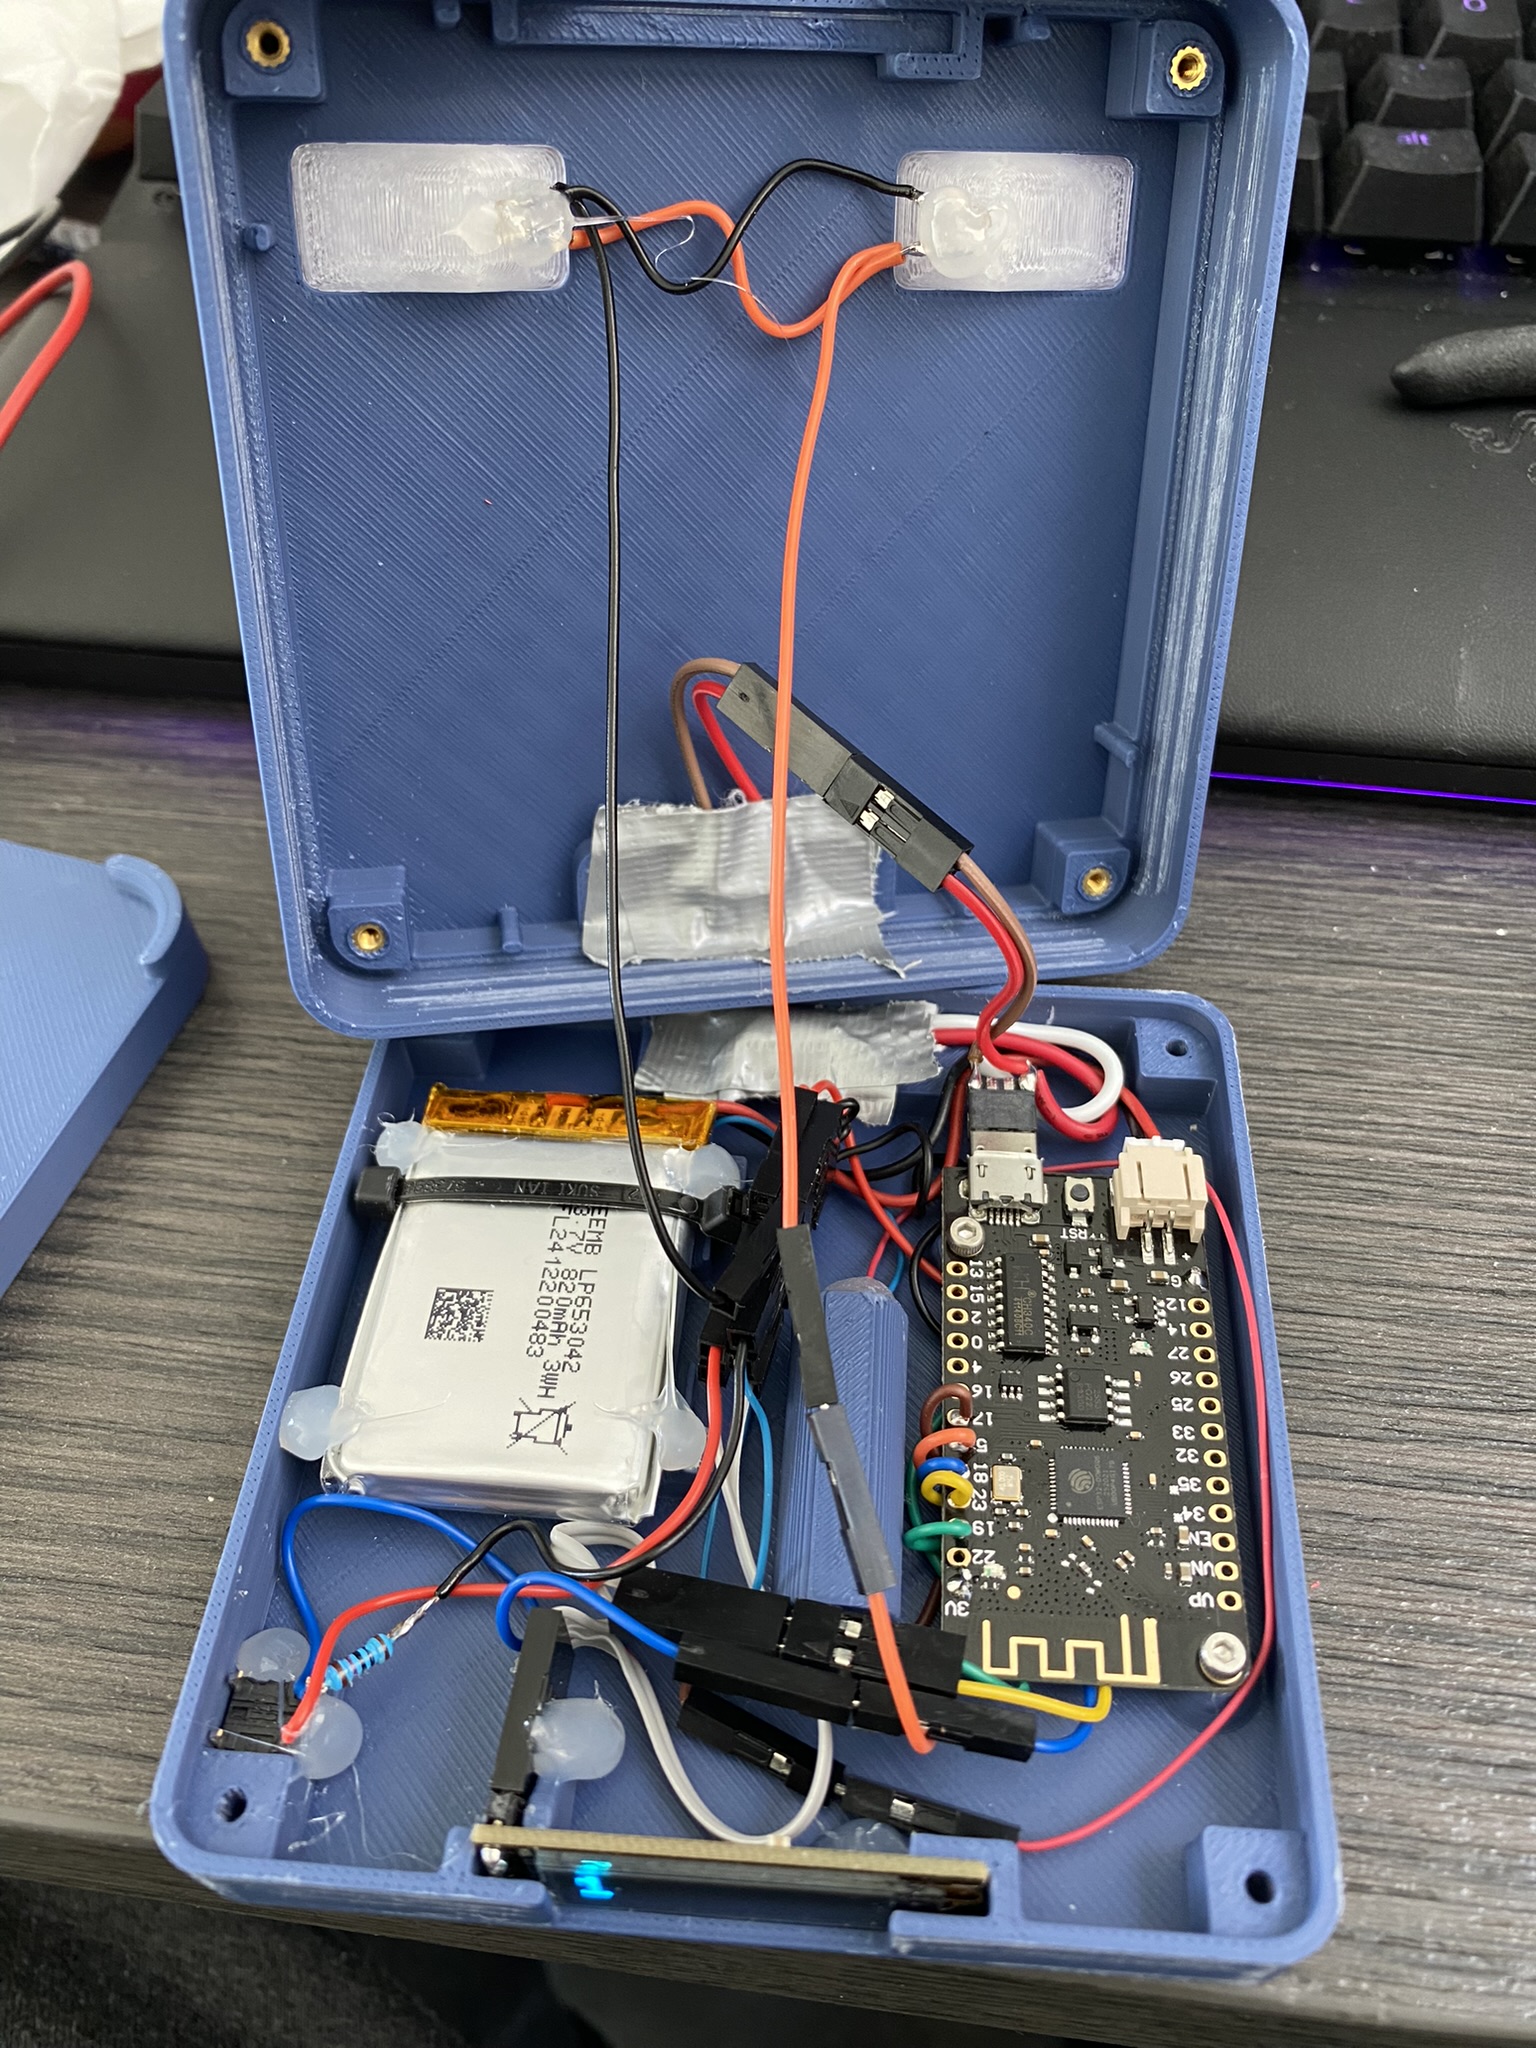
The client is the hardware that the customer gets.
As soon as it is his turn, the client vibrates and flashes its LEDs. Once the customer brings the client back to the issuance, this can stop the alarm and give him in exchange, for example, the goods.
 |
 |
 |
|---|
Below I list all the components I needed to build the client. The store links are only for reference. All goods can also be bought at any other dealer:
| Name | Menge | Shop-Link |
|---|---|---|
| LOLIN32 Lite Development Board | 1 | https://www.amazon.de/dp/B07MC4Y73P |
| I2C OLED Display 0,91" 128X32 Pixel | 1 | https://www.amazon.de/dp/B09BFK48GJ |
| 3.7V 820mAh Lipo Battery | 1 | https://www.amazon.de/dp/B082152887 |
| Vibration motor 3.7V | 1 | https://www.amazon.de/dp/B083Y1BFYQ |
| LED white 3mm | 2 | https://www.amazon.de/dp/B01AUI4VR4 |
| USB Micro Port Plug | 1 | https://www.amazon.de/dp/B09ZRHXRNR |
| Push button 6x6 | 1 | https://www.amazon.de/dp/B08VDFW4VG |
| Pogo Pin Connector | 2 | https://www.amazon.de/dp/B07FPCPX8X |
| Copper rivets | 2 | https://www.amazon.de/dp/B018HMGM54 |
| 10k resistor | 1 | https://www.amazon.de/dp/B08QRJZ82J |
| Ruthex M2 thread insert | 4 | https://www.amazon.de/dp/B088QJG676 |
| Magnets 8 x 2 mm | 4 | https://www.amazon.de/dp/B0BLCFSZKZ |
In addition to these components, cables, soldering accessories, cable ties, etc. are needed, which I have not listed here.
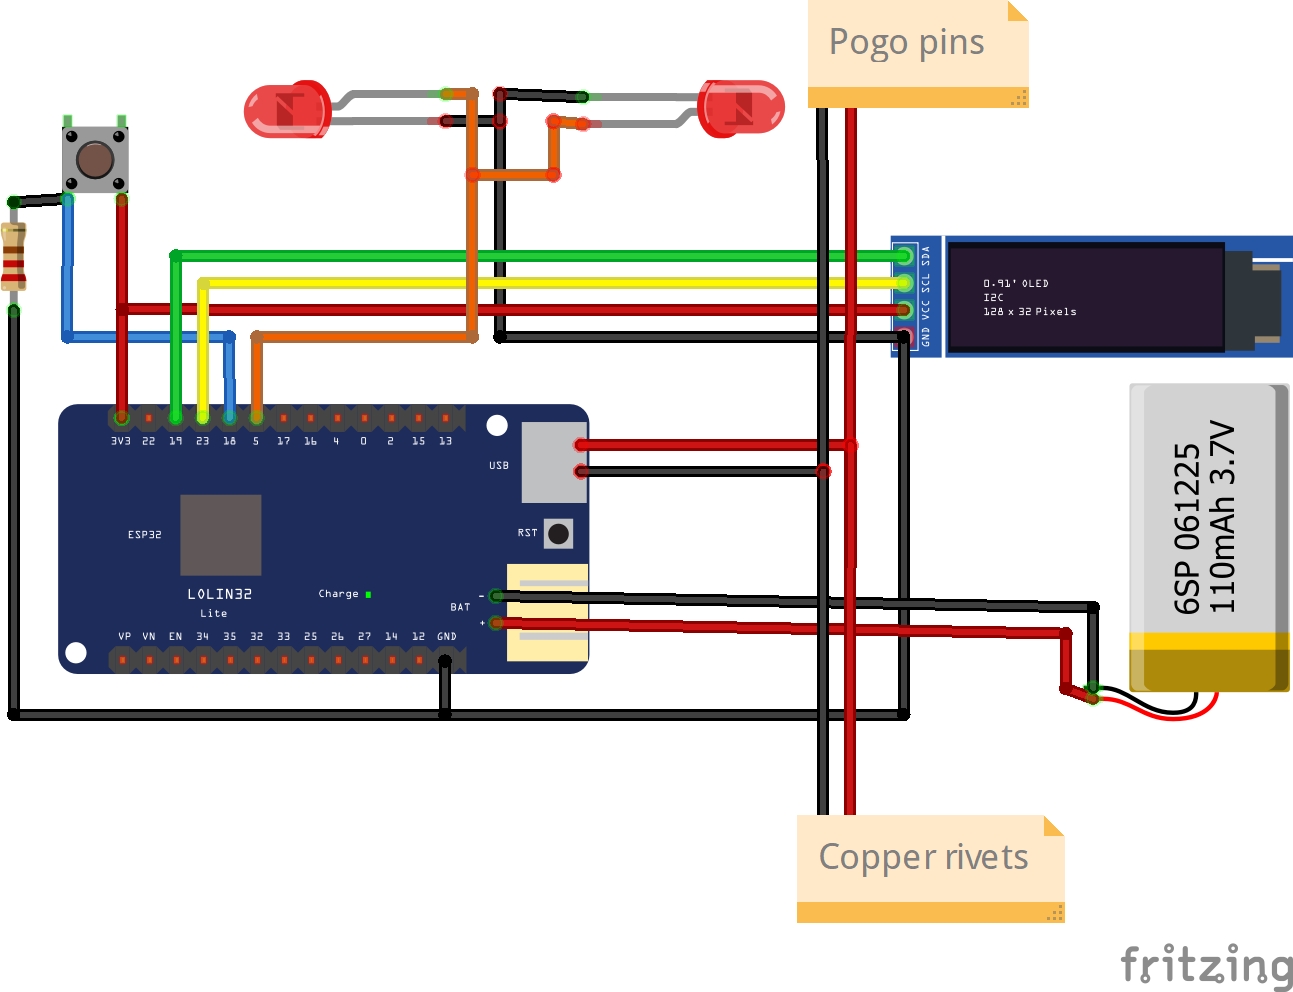
The wiring of the components is done as shown in this diagram:
 |
 |
|---|
Here the pinout again in detail:
| Pin | Name |
|---|---|
| 5 | LEDs |
| 17 | Vibration |
| 18 | Button |
| 19 | OLED SDA |
| 23 | OLED SCL |
Important: Please only pay attention to the correct polarity of the magnets and the current!
Download the folder under "client/arduino-code/" locally and open it in your Arduino IDE.
The following libraries must additionally be installed. They can all be installed via the Arduino Library or manually from GitHub:
| Name | Autor | GitHub | Webseite |
|---|---|---|---|
| EasyButton | Evert Arias | https://github.com/evert-arias/EasyButton | https://easybtn.earias.me/ |
| Adafruit_GFX | Adafruit | https://github.com/adafruit/Adafruit-GFX-Library | |
| Adafruit_SSD1306 | Adafruit | https://github.com/adafruit/Adafruit_SSD1306 | |
| WiFiManager | tzspu | https://github.com/tzapu/WiFiManager |
Please note that you need the package for the LOLIN32 board first. The procedure is described under "General > Configure Arduino IDE".
Connect the LOLIN32 Lite via USB to your computer and select the correct COM port and as device "WEMOS LOLIN32 Lite". Then upload the source code directly via your Arduino Librabry using "Sketch > Upload".
After starting the WifiManager automatically opens a WLAN network with the name "CustomerPager". Connect to this and set up the WLAN via the configuration menu that appears and finally the pager number under "Setup".
After the Wifi is set up, the client provides a REST API for the required functions. The port of the REST interface is 8080.
The following endpoints are provided:
| Endpunkt | Beschreibung | Beispiel |
|---|---|---|
| GET /alarm-start | Starts the alarm for this pager | http://192.168.0.2:8080/alarm-start |
| GET /alarm-stop | Stops the alarm for this pager | http://192.168.0.2:8080/alarm-stop |
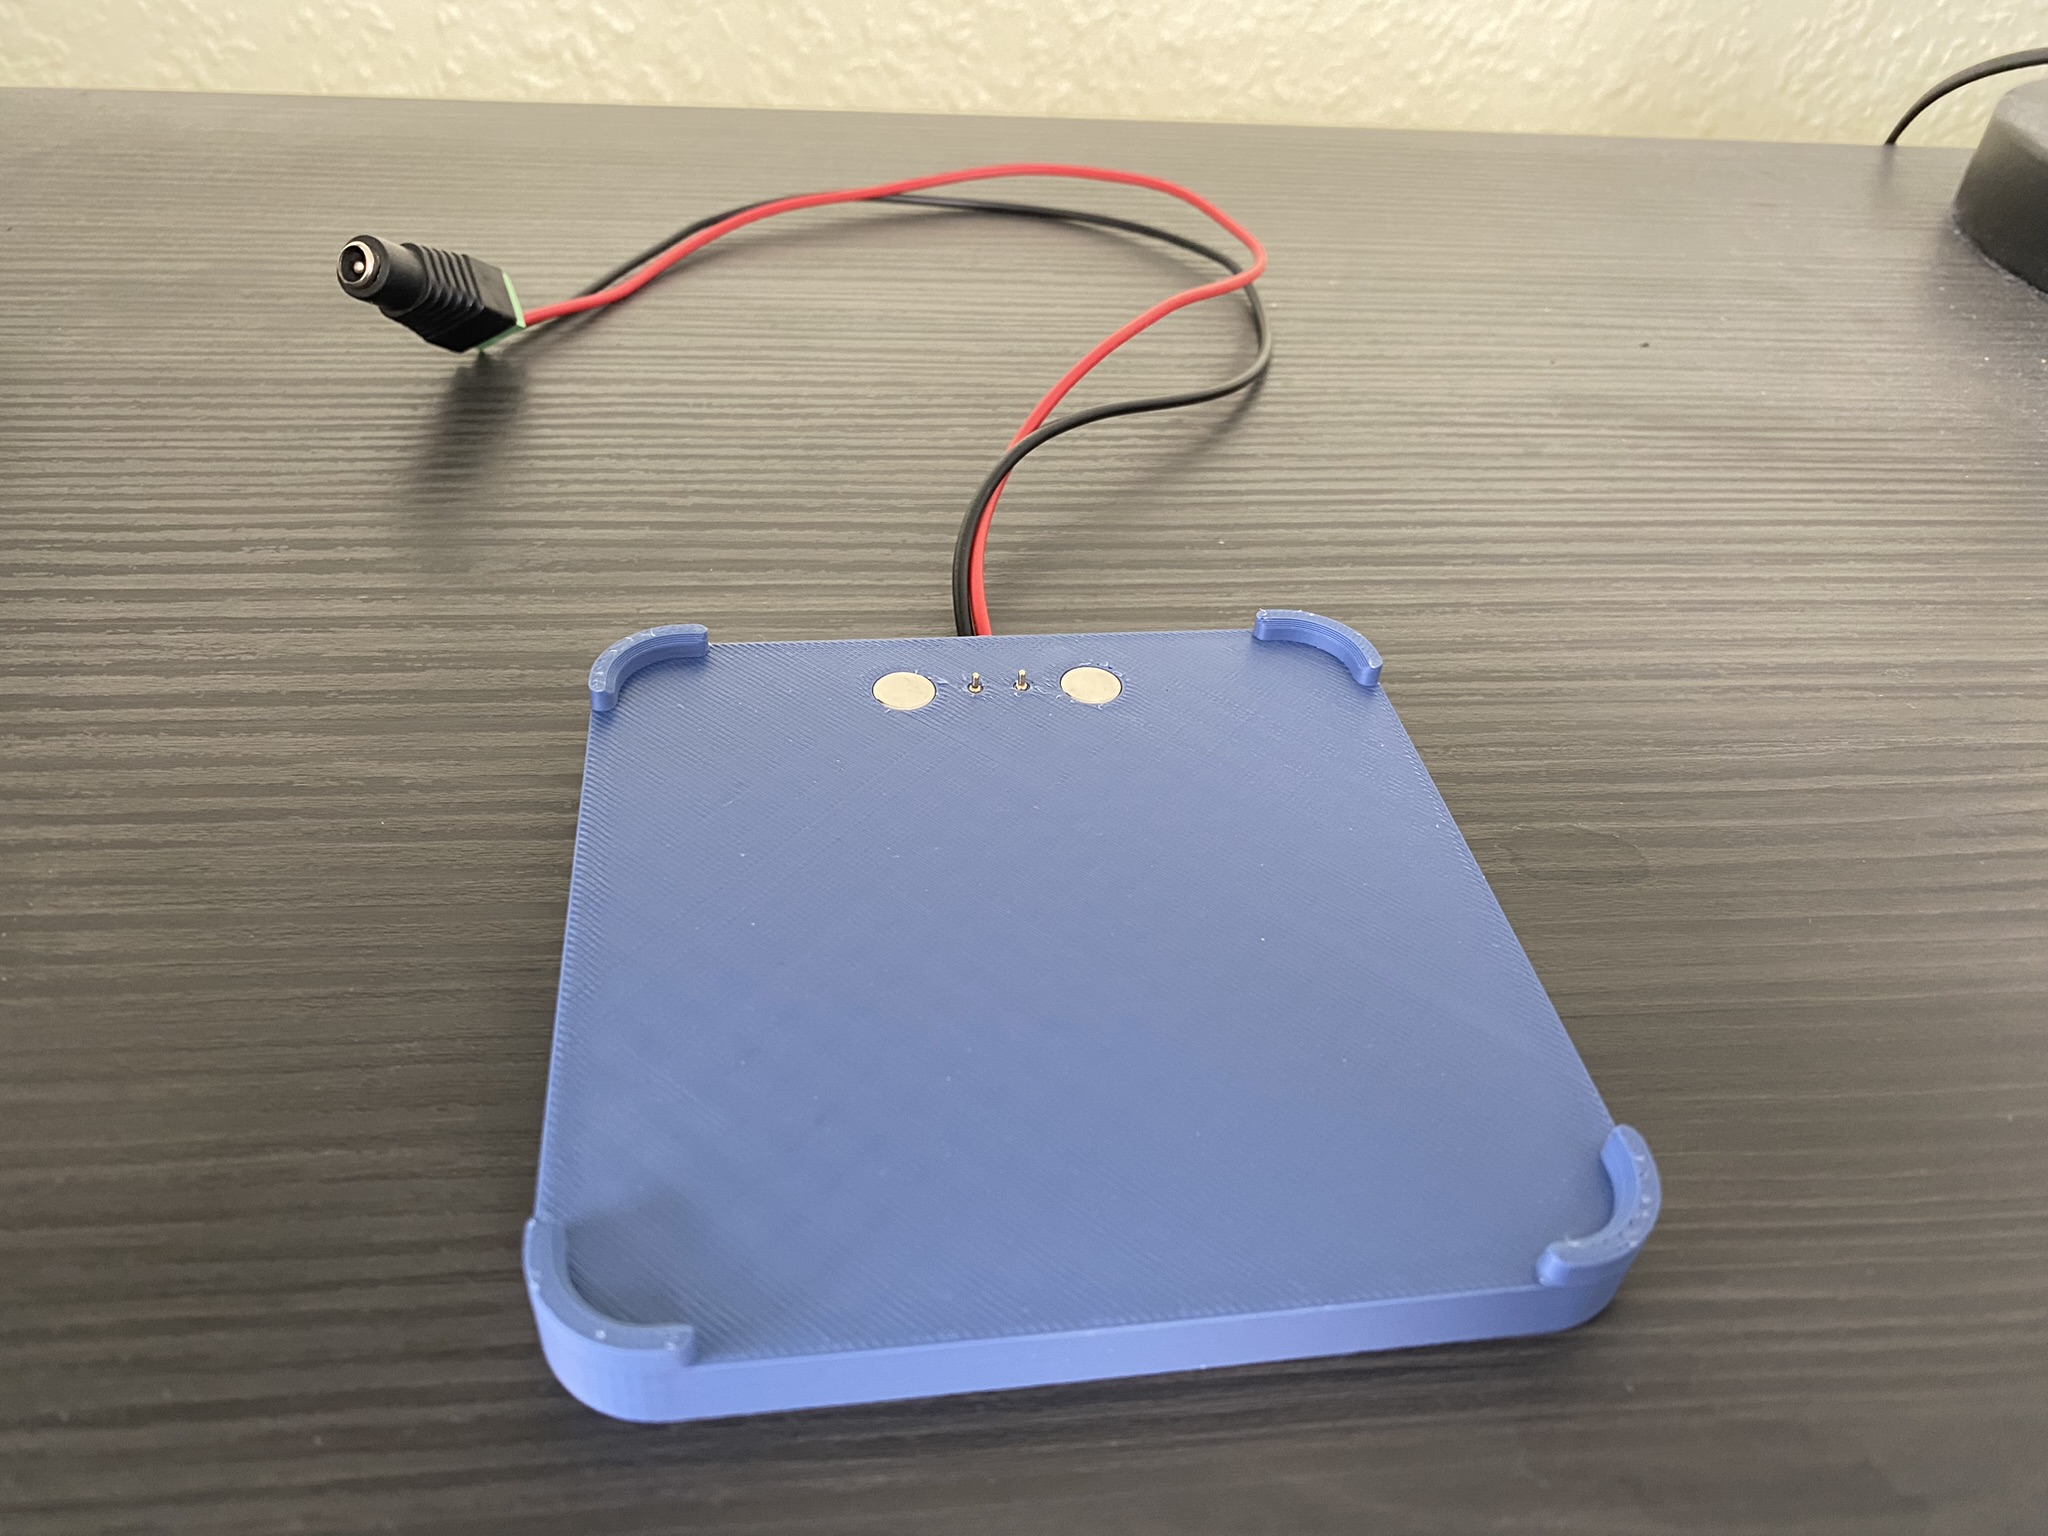
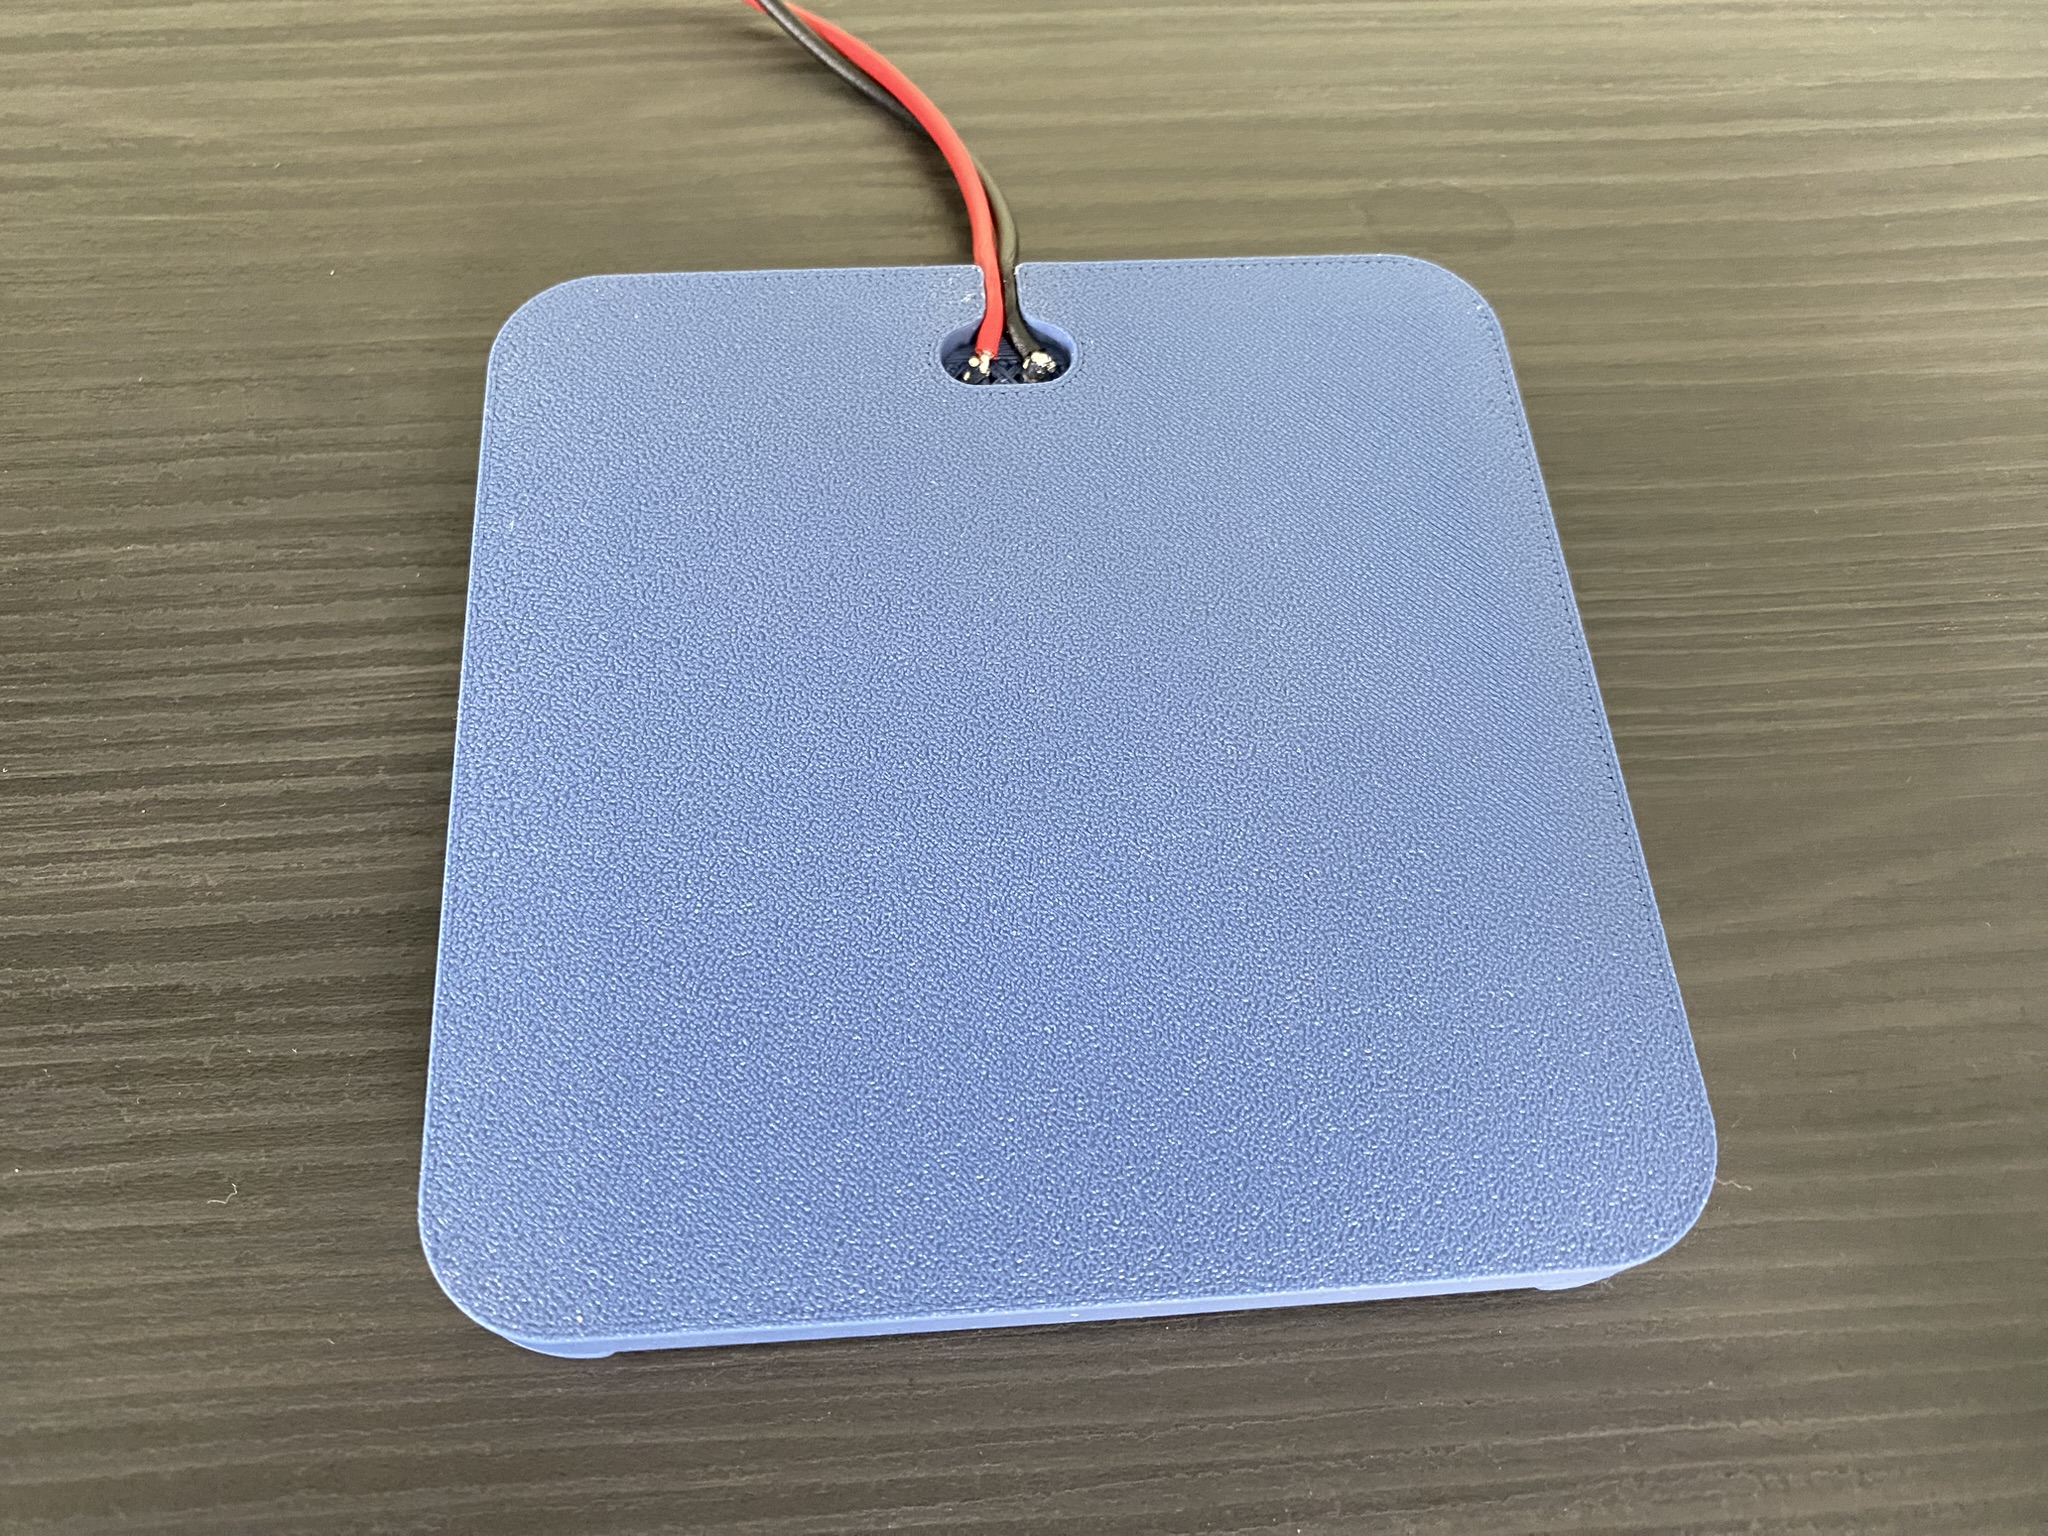
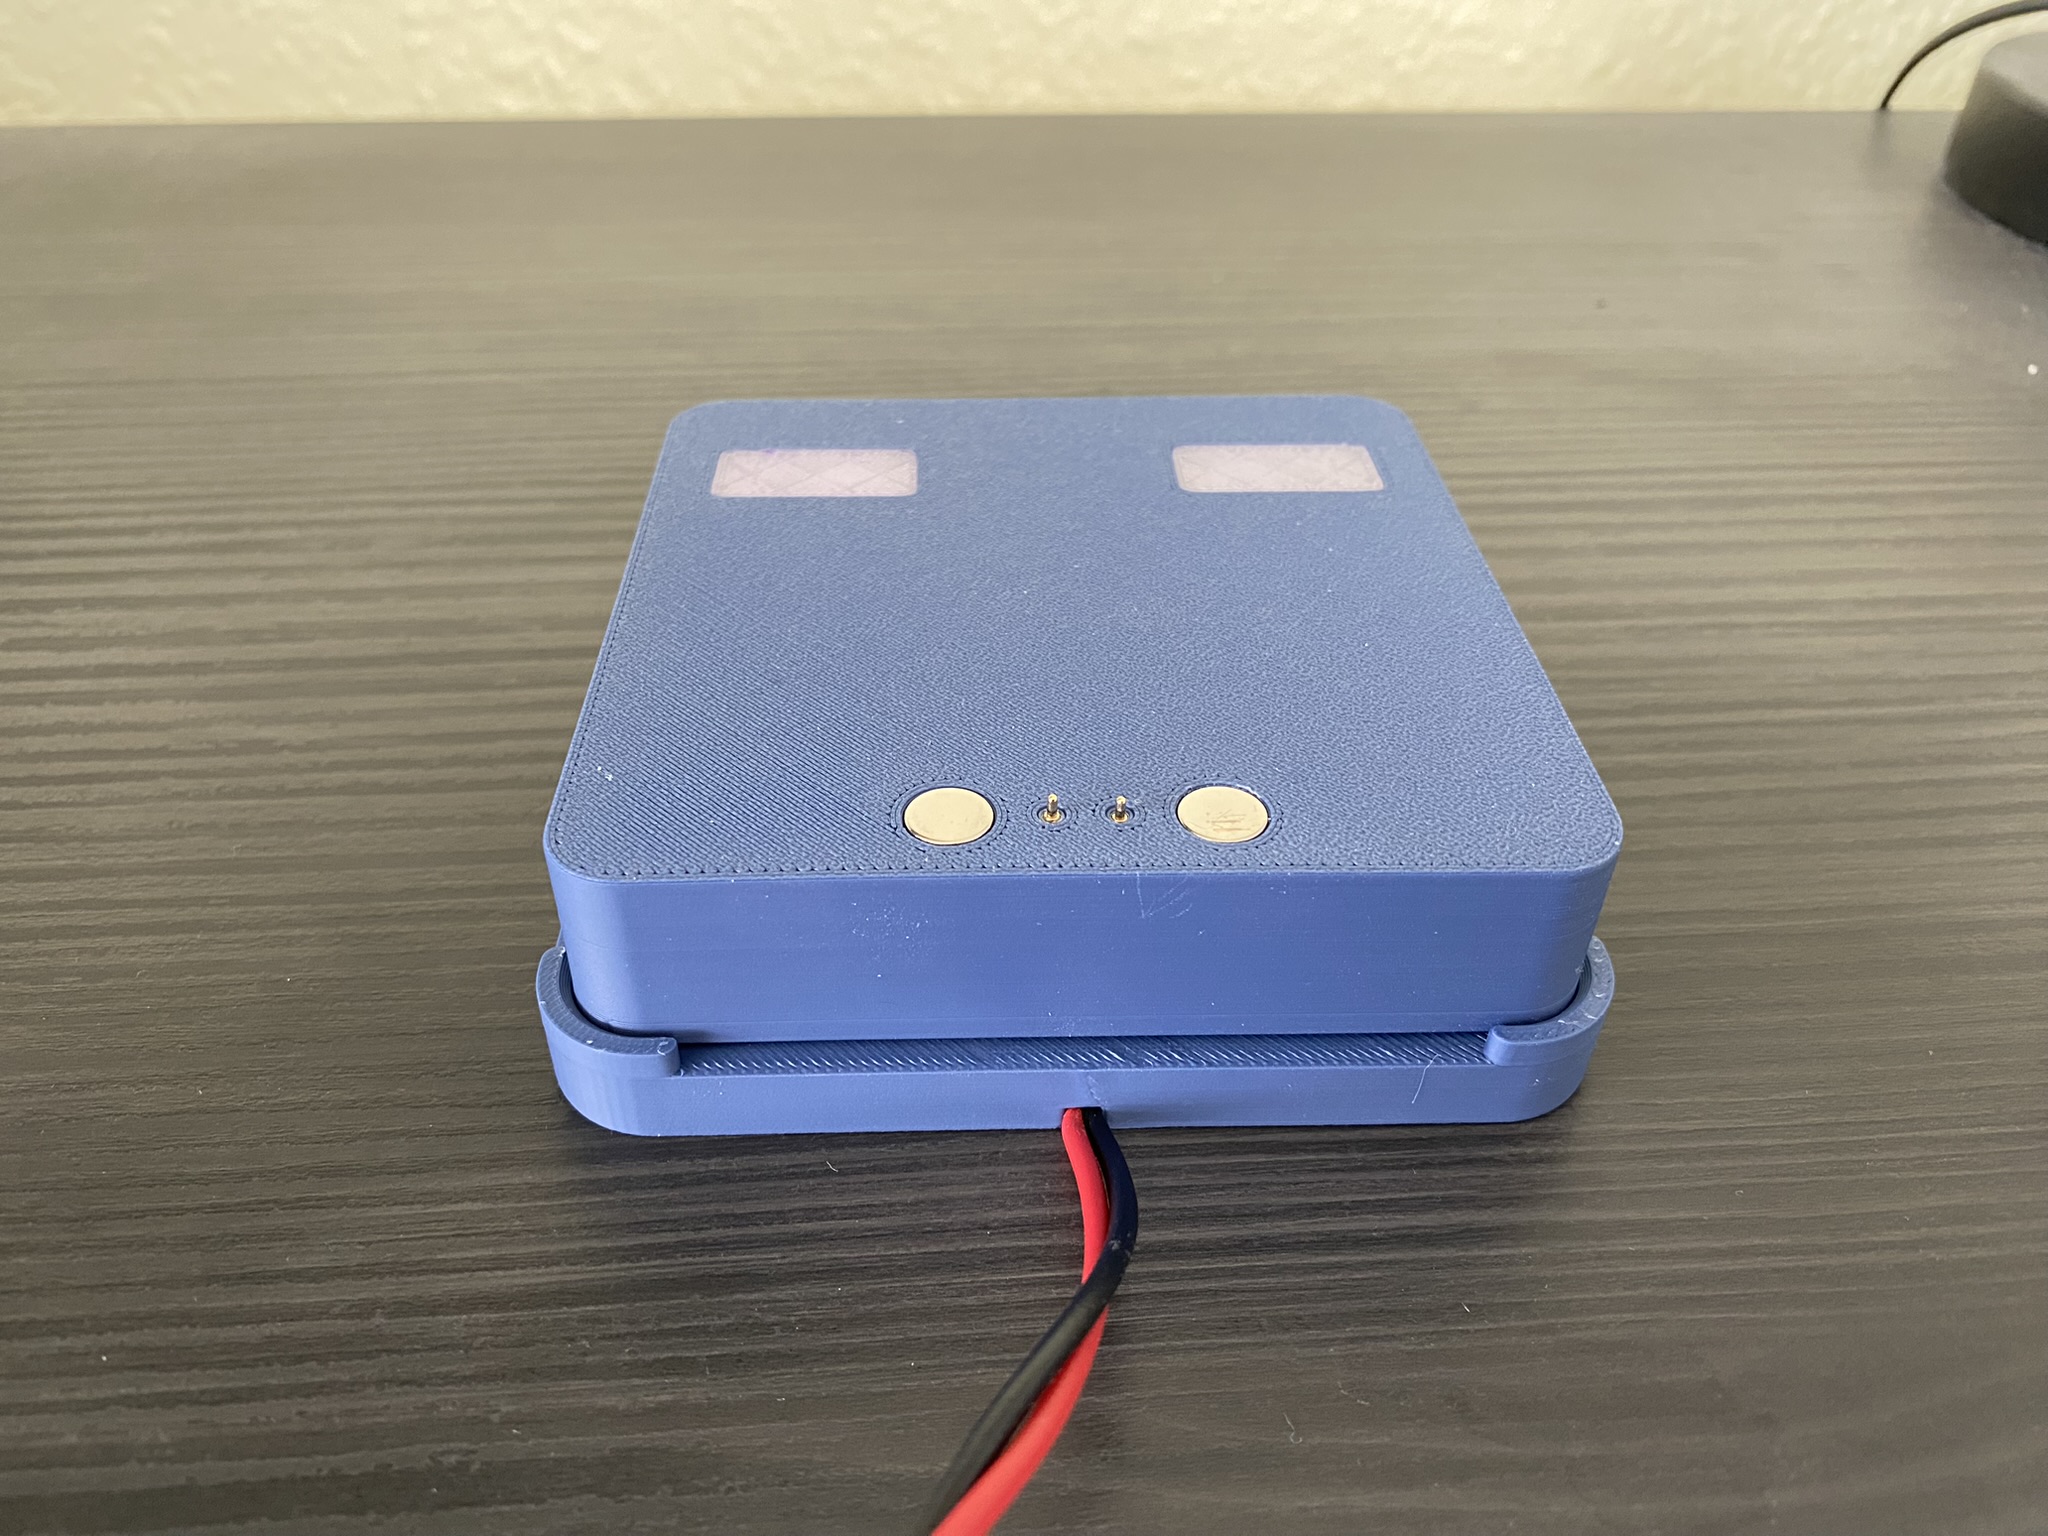
The charging station focuses on exactly one feature - charging the pagers. No other gimmicks - pure focus on charging.
 |
 |
 |
 |
|---|
Below I list all the components I needed to build the charging station. The store links are only for reference. All goods can also be bought at any other dealer:
| Name | Menge | Shop-Link |
|---|---|---|
| Pogo Pin Connector | 2 | https://www.amazon.de/dp/B07FPCPX8X |
| Magnets 8 x 2 mm | 2 | https://www.amazon.de/dp/B0BLCFSZKZ |
The charging station is quite simple. Here you only have to solder the cables of the power supply to one pogo pin each.
Important: Please only pay attention to the correct polarity of the magnets and the current!
coming soon
Currently, all to-dos for this project are collected here: Customer pager ToDo's