- 掌握多线程编程
- 理解互斥和同步的实现原理
- 能够应用 Windows 系统中的互斥和同步机制实现互斥和同步的控制
原始参考的案例代码均由 ![]()
C# 编写,这里本人使用 ![]()
Python 实现,力求达到同样的效果。
开发环境:![]()
Windows 11 Pro 23H2
![]()
Python 3.12
![]()
PyCharm 2023.2.5
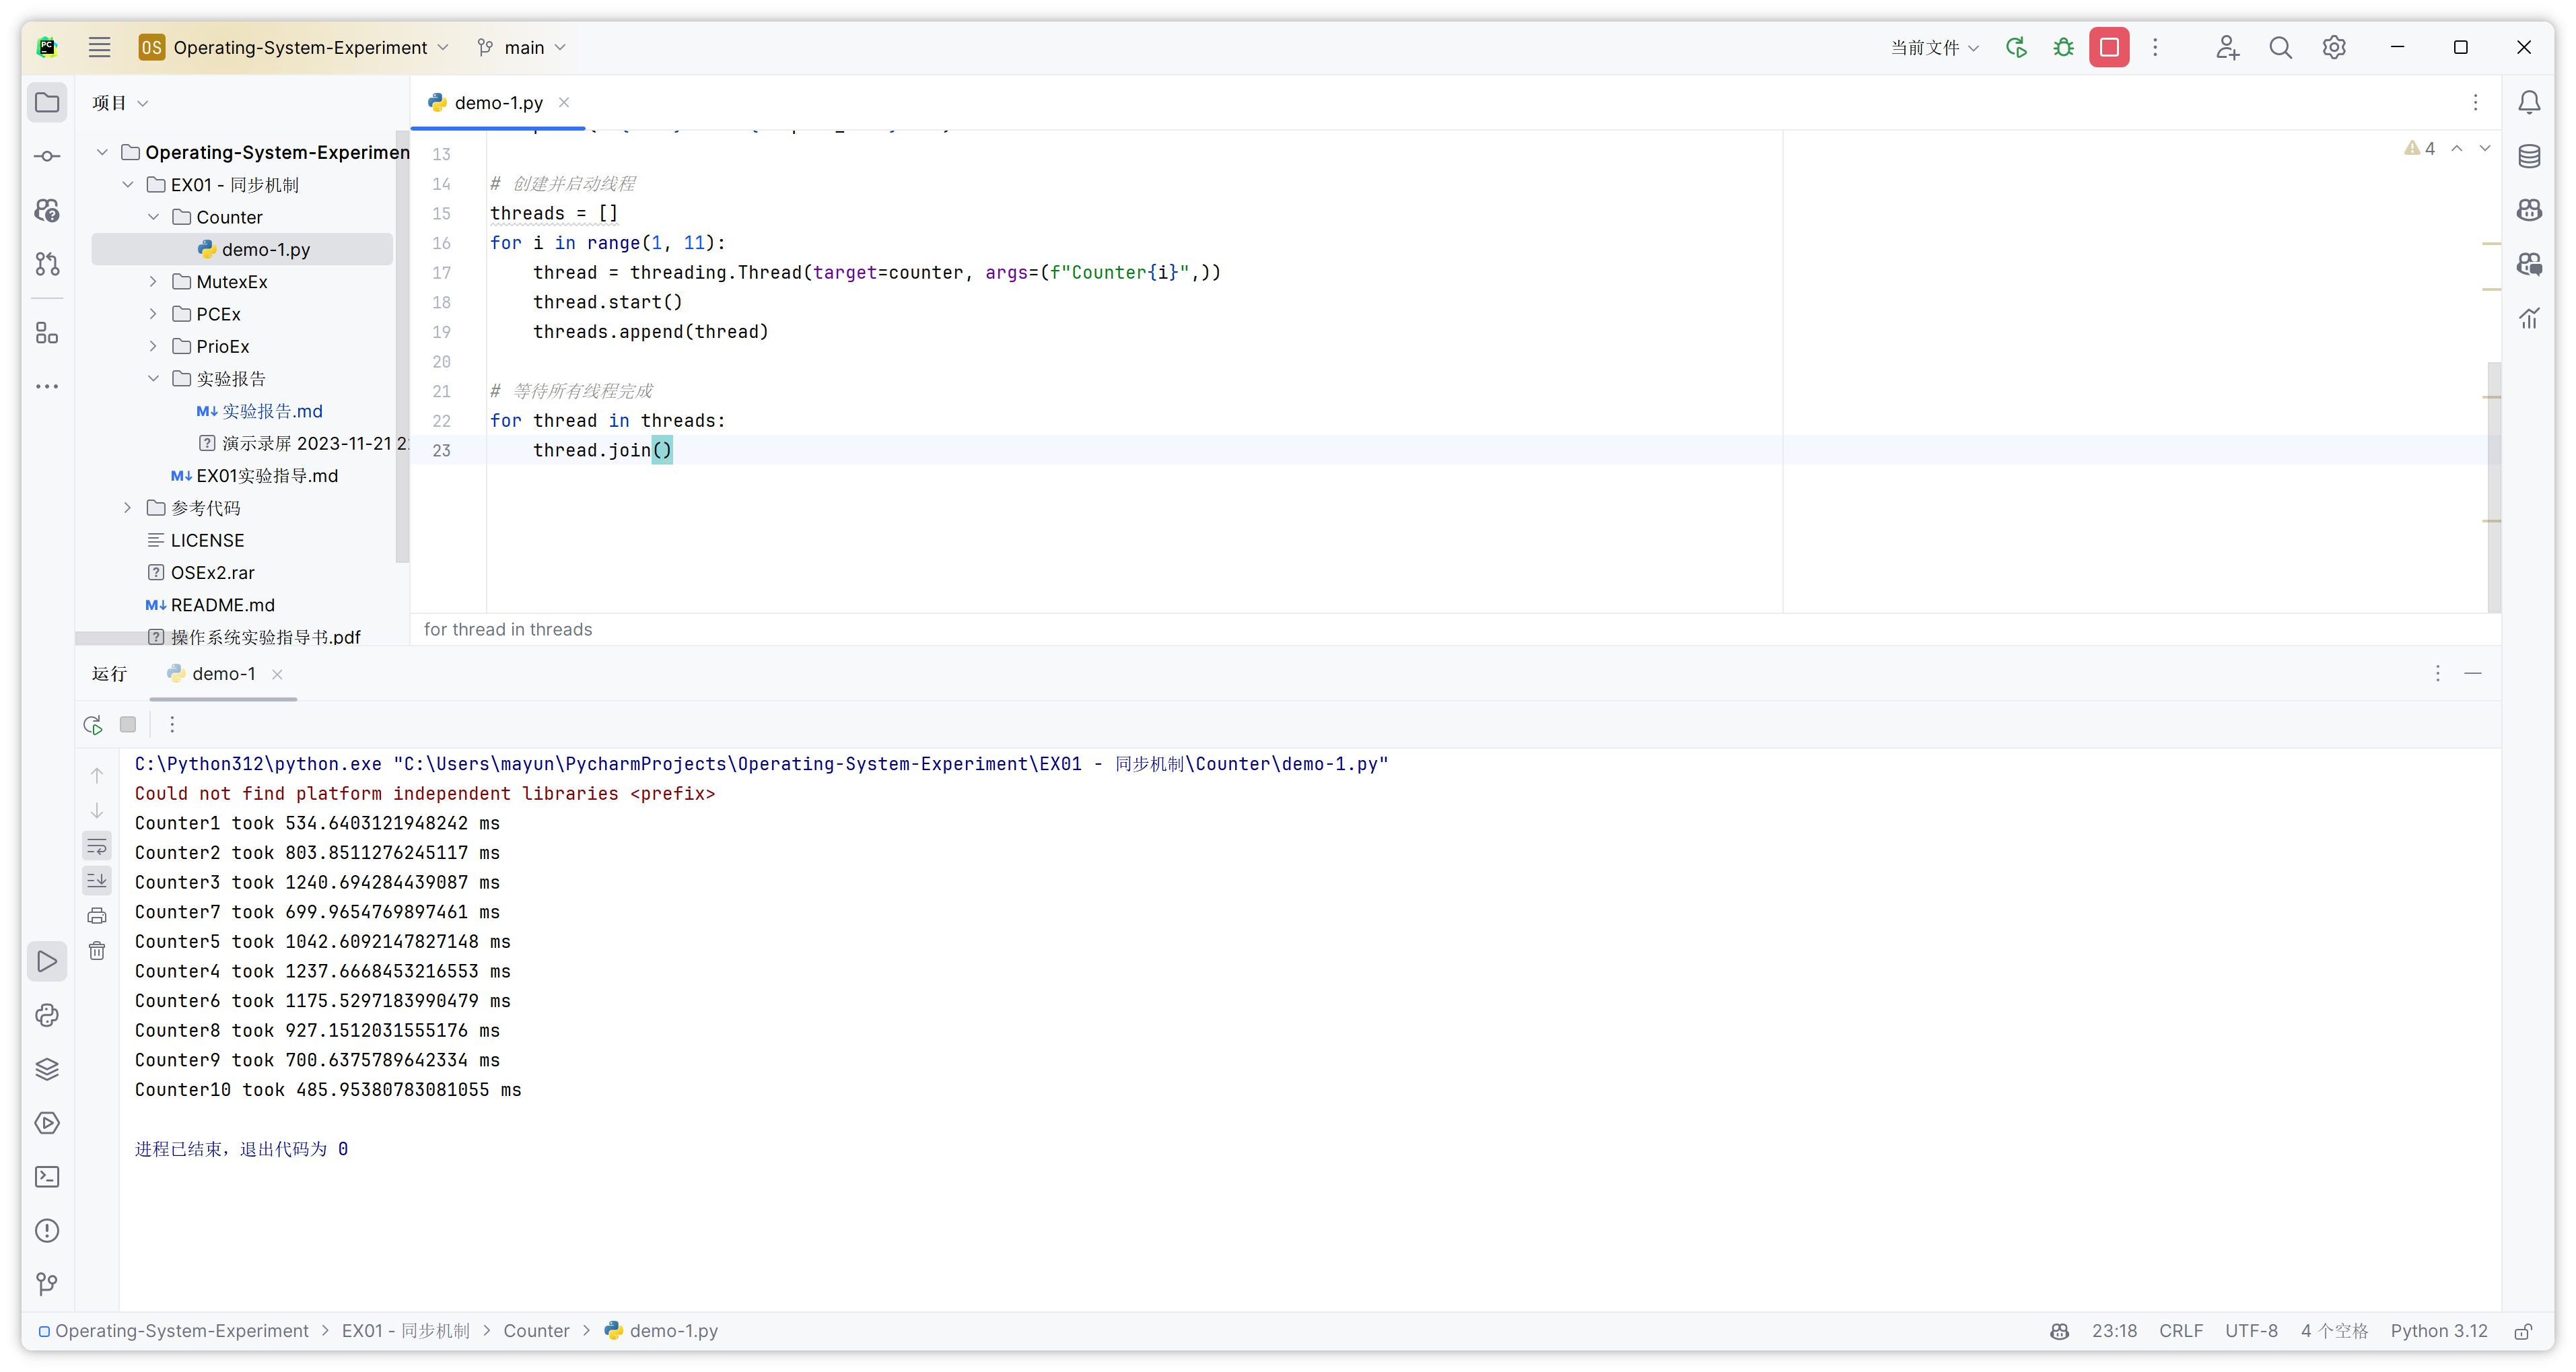
目标:了解多线程编程,思考为何多个线程执行相同代码时所需要时间不同。
代码如下:
import threading
import time

# 定义一个计数器函数
def counter(name):
    start_time = time.time()
    x = 1
    for i in range(90000):
        y = x + 1
        x = y + x
    elapsed_time = (time.time() - start_time) * 1000  # 毫秒
    print(f"{name} took {elapsed_time} ms")

# 创建并启动线程
threads = []
for i in range(1, 11):
    thread = threading.Thread(target=counter, args=(f"Counter{i}",))
    thread.start()
    threads.append(thread)

# 等待所有线程完成
for thread in threads:
    thread.join()
这段代码使用 Python 的 threading 模块来创建和运行多个线程。下面是对代码的详细解释:
-
导入必要的模块:
import threading: 导入 Python 中用于线程处理的threading模块。import time: 导入time模块,用于测量时间。
-
定义计数器函数
counter:- 这个函数接受一个参数
name,用于标识线程。 - 在函数内部,首先记录开始时间。
- 然后,进行一个计算密集型的操作,即循环 90000 次执行加法运算。(原案例代码为计算 900000000 次,由于 Python 的性能问题,这里减轻了计算负载)
- 在循环结束后,计算经过的时间(毫秒)并打印该线程的名称和耗费时间。
- 这个函数接受一个参数
-
创建和启动线程:
- 创建一个空列表
threads用于存储线程对象。 - 通过一个循环创建 10 个线程。每个线程都执行
counter函数,并传入一个唯一的名称(Counter1,Counter2, ...,Counter10)。 threading.Thread(target=counter, args=(f"Counter{i}",))创建一个线程对象,目标函数是counter,参数是一个格式化的字符串f"Counter{i}"。- 使用
thread.start()启动每个线程。 - 将启动的线程添加到
threads列表中。
- 创建一个空列表
-
等待所有线程完成:
- 使用一个循环来遍历
threads列表。 - 对于列表中的每个线程,调用
thread.join()。这个方法会阻塞当前线程(即主线程),直到被调用join()的线程完成。这确保了主线程会等待所有创建的线程完成后才继续执行。
- 使用一个循环来遍历
综上所述,这段代码创建了 10 个线程,每个线程执行相同的计算任务,并且主线程会等待所有这些线程完成后才结束程序。这是一个多线程并发执行的示例。
多个线程执行相同代码时所需要时间不同的原因主要是线程的调度和并发执行。创建了10个线程,每个线程都执行相同的计算任务。由于线程是并发执行的,操作系统会根据各种因素来调度这些线程的执行顺序。这包括处理器的可用性、线程的优先级、系统负载等。因此,每次运行程序时,不同的线程可能会以不同的顺序执行,这会导致它们花费的时间不同。
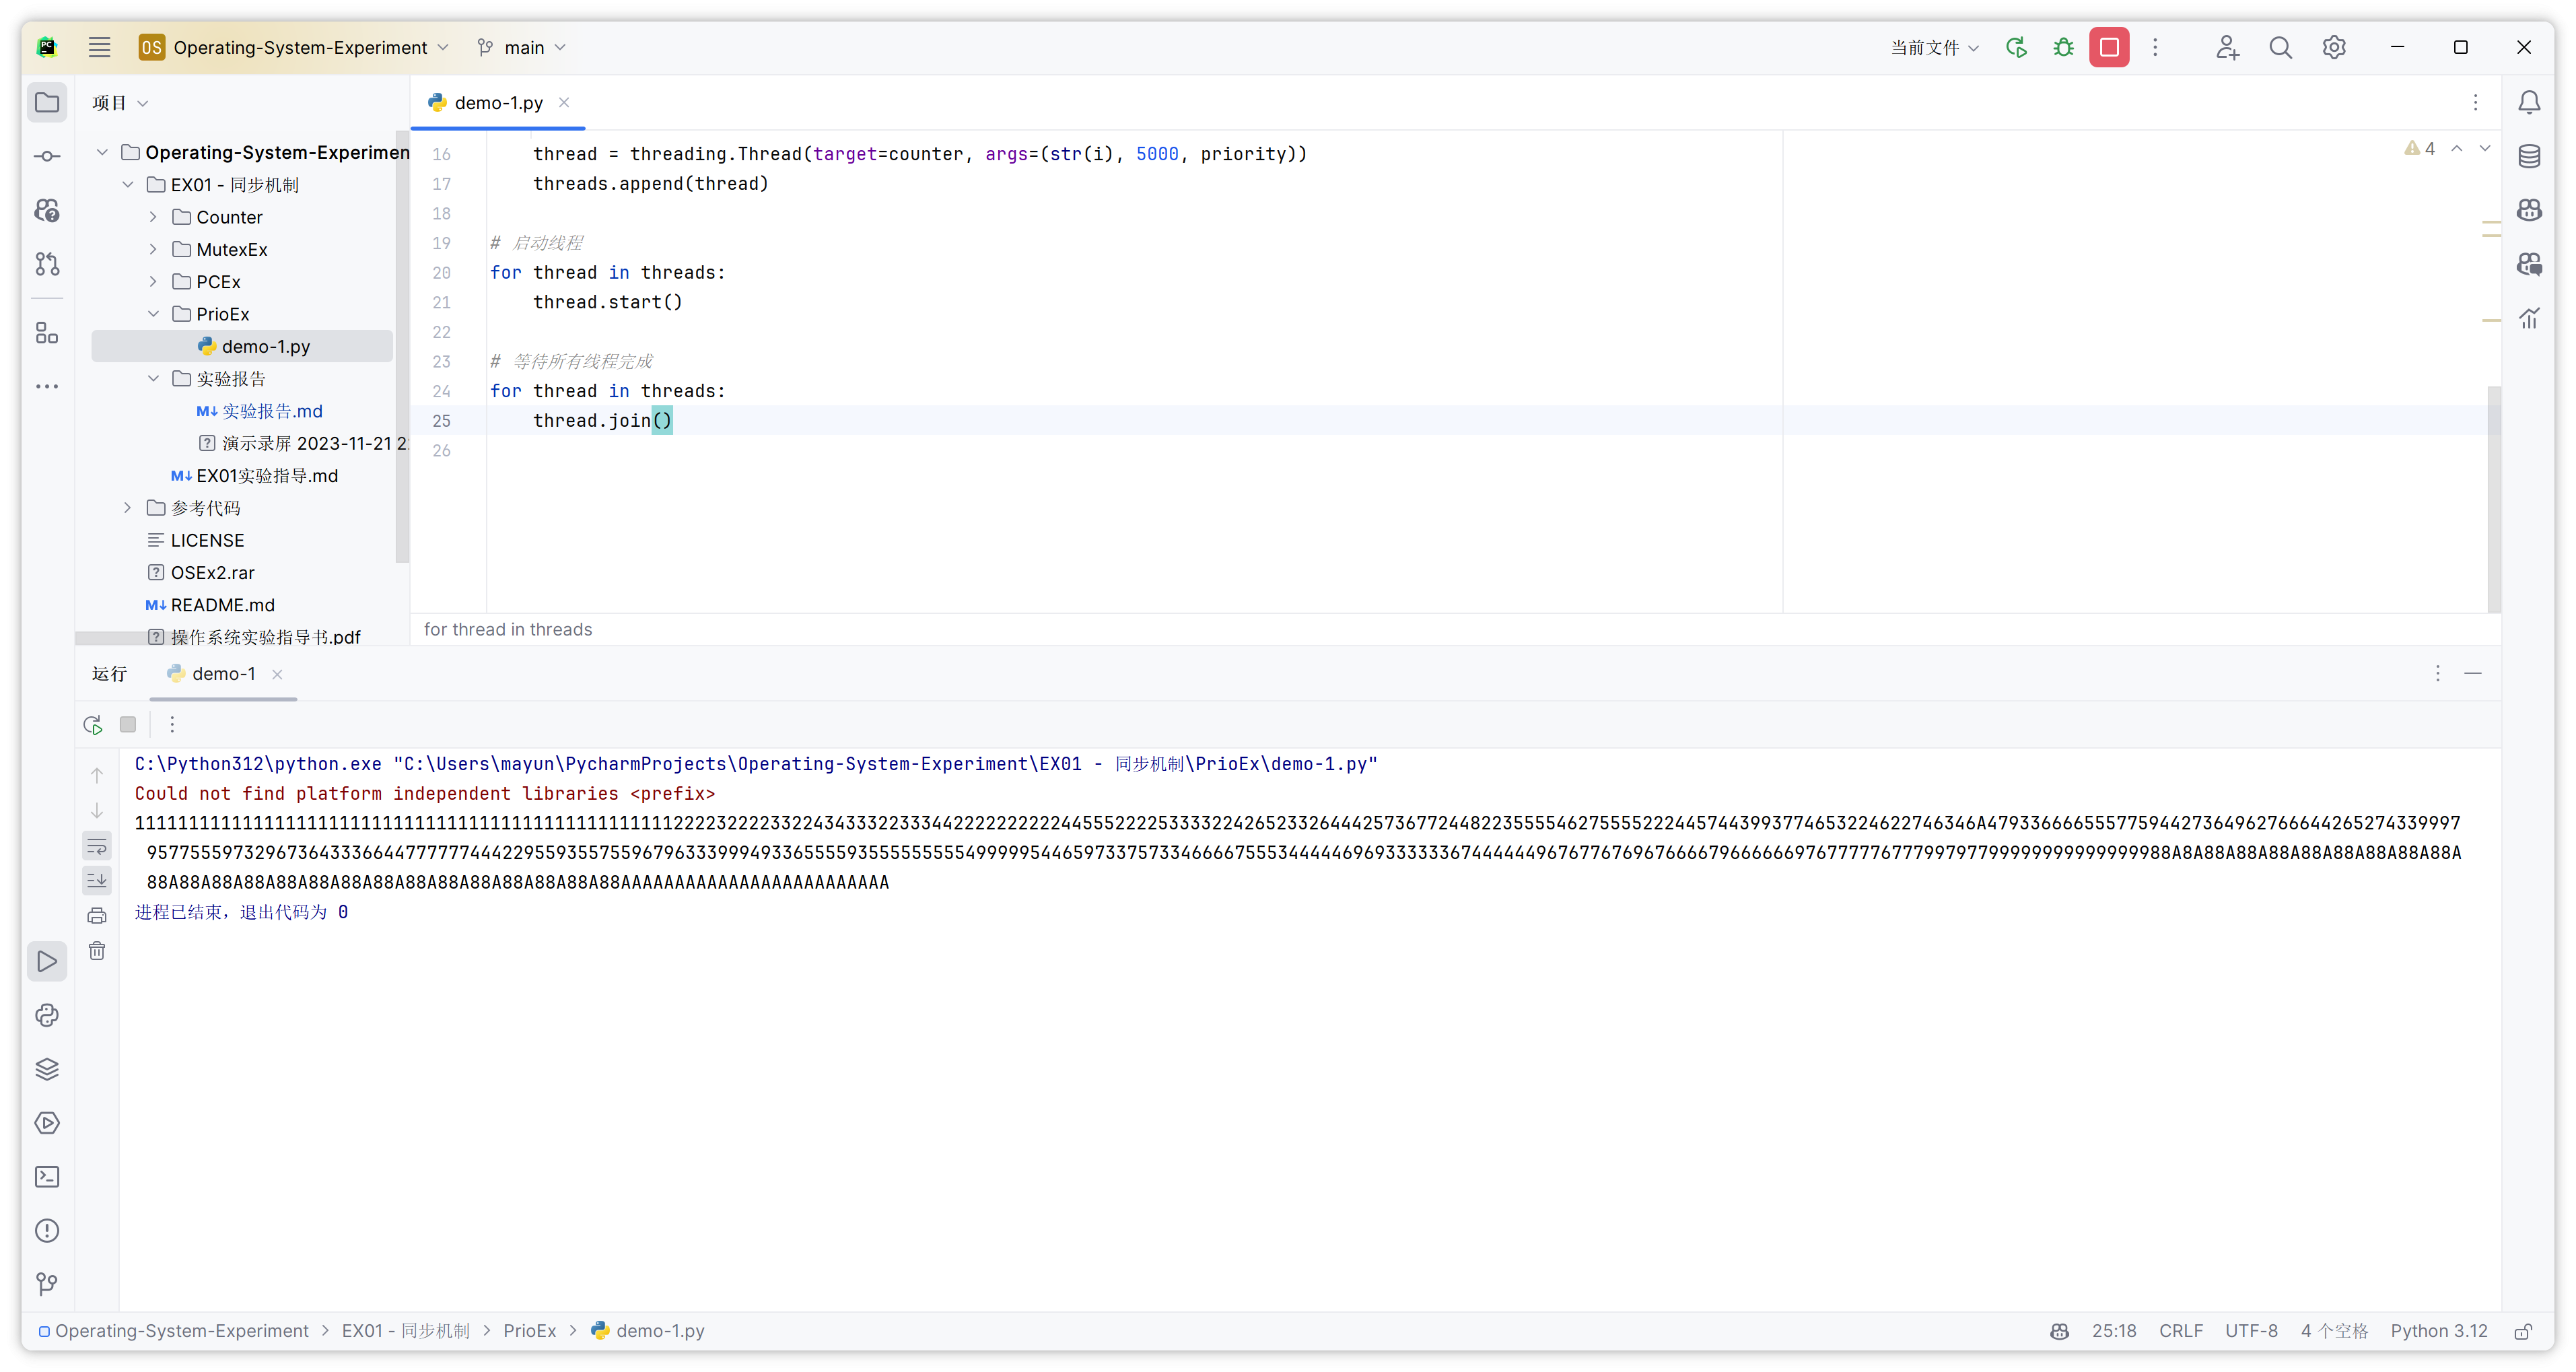
目标:掌握多线程编程,熟悉如何调整的线程的优先级,并尝试改变实例中不同线程的优先级,观察其中运行时间的变化。
代码如下:
import threading
import time

def counter(name, count_to, priority):
    for i in range(count_to):
        if i % 100 == 0:
            print(name, end='', flush=True)
            time.sleep(0.01 * (5 - priority))  # 模拟优先级差异

# 创建线程
threads = []
for i in range(1, 11):
    priority = 5 if i <= 7 or i == 9 else 3 if i == 8 else 1
    if i == 10:
        i = 'A'
    thread = threading.Thread(target=counter, args=(str(i), 5000, priority))
    threads.append(thread)

# 启动线程
for thread in threads:
    thread.start()

# 等待所有线程完成
for thread in threads:
    thread.join()
这段代码使用 Python 的 threading 模块来创建和运行多个线程,并通过自定义的方式模拟线程优先级。以下是代码的详细解释:
-
导入必要的模块:
import threading: 导入 Python 中用于线程处理的threading模块。import time: 导入time模块,用于线程休眠。
-
定义计数器函数
counter:- 这个函数接收三个参数:
name(线程名称),count_to(计数上限),和priority(模拟的优先级)。 - 函数中有一个循环,循环次数由
count_to决定。 - 在循环中,每当
i是 100 的倍数时,打印线程的名称,然后根据优先级休眠一段时间。优先级越高,休眠时间越短,模拟线程优先级的影响。
- 这个函数接收三个参数:
-
创建线程:
- 创建一个空列表
threads用于存储线程对象。 - 通过循环创建 10 个线程。每个线程的优先级根据其序号决定:前 7 个和第 9 个线程优先级为 5(最高优先级),第 8 个为 3(普通优先级),第 10 个为 1(最低优先级)。
- 特别地,当
i等于 10 时,将其转换为字符 'A',便于观察输出结果。 - 使用
threading.Thread(target=counter, args=(str(i), 5000, priority))创建线程,其中counter是目标函数,str(i)、5000和priority是传递给函数的参数。 - 将每个创建的线程添加到
threads列表中。
- 创建一个空列表
-
启动线程:
- 遍历
threads列表并启动每个线程。
- 遍历
-
等待所有线程完成:
- 再次遍历
threads列表。 - 对每个线程调用
thread.join(),确保主线程在所有子线程完成之前不会继续执行。
- 再次遍历
通过这种方式,代码创建了 10 个具有不同“优先级”的线程,每个线程执行相同的计数任务,但根据其“优先级”休眠不同的时间,模拟了线程优先级的影响。这个例子展示了如何在 Python 中通过控制线程的休眠时间来模拟线程优先级的概念。
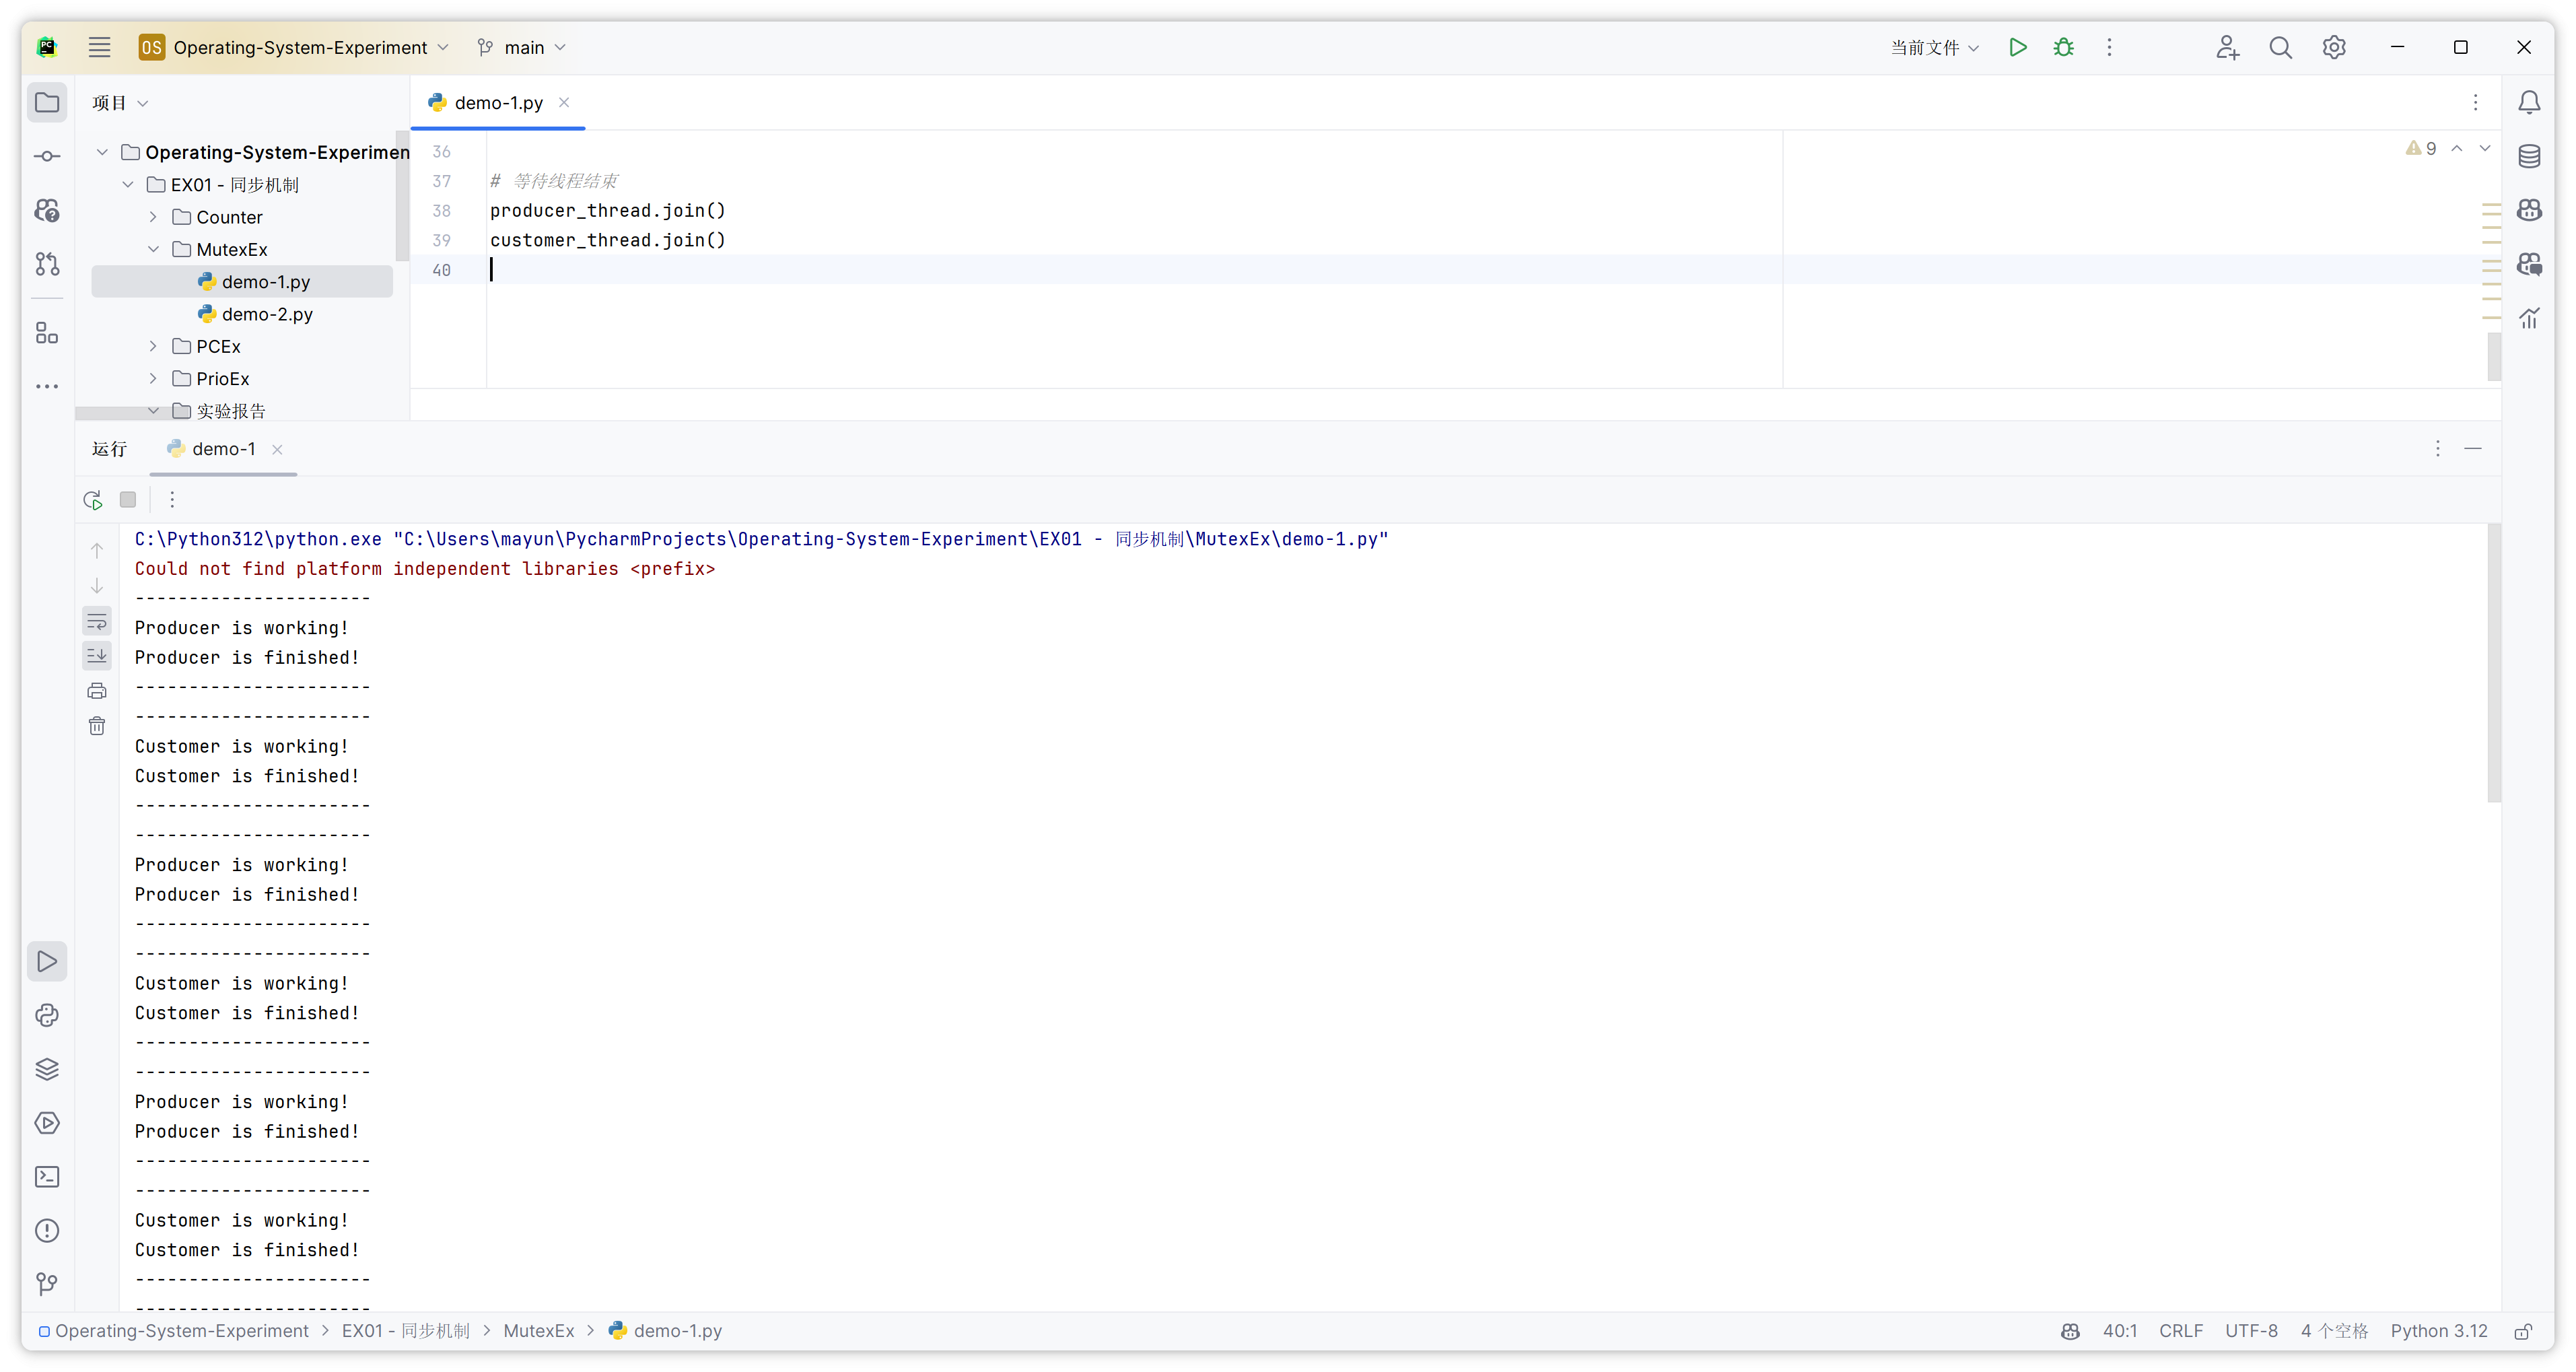
目标:熟悉 Windows 系统中的互斥控制方法,在此基础上实现 4 个线程的互斥控制(原实例中为 2 个线程)。
代码如下:
import threading
import time
import random

# 创建一个锁对象
lock = threading.Lock()

def producer():
    while True:
        lock.acquire() # 请求锁
        try:
            print("----------------------\nProducer is working!")
            time.sleep(0.5) # 模拟工作
            print("Producer is finished!\n----------------------")
        finally:
            lock.release() # 释放锁
        time.sleep(random.uniform(0.2, 0.4))

def customer():
    while True:
        lock.acquire() # 请求锁
        try:
            print("----------------------\nCustomer is working!")
            time.sleep(0.5) # 模拟工作
            print("Customer is finished!\n----------------------")
        finally:
            lock.release() # 释放锁
        time.sleep(random.uniform(0.2, 0.4))

# 创建并启动线程
producer_thread = threading.Thread(target=producer)
customer_thread = threading.Thread(target=customer)

producer_thread.start()
customer_thread.start()

# 等待线程结束
producer_thread.join()
customer_thread.join()
这段代码展示了一个生产者-消费者模式的基本示例,其中使用了线程同步机制(通过互斥锁)来控制线程间的交互。下面是对代码的详细解释:
-
导入必要的模块:
import threading: 导入 Python 中用于线程处理的threading模块。import time: 导入time模块,用于线程休眠。import random: 导入random模块,用于生成随机数。
-
创建互斥锁:
lock = threading.Lock(): 创建一个互斥锁对象,用于在生产者和消费者之间同步资源访问。
-
定义生产者函数
producer:- 这个函数在一个无限循环中运行。
- 使用
lock.acquire()请求锁,确保同一时间内只有一个线程(生产者或消费者)可以执行其代码块。 - 在锁的保护下,打印信息表示生产者正在工作,然后休眠 0.5 秒来模拟工作过程。
- 使用
finally块确保在退出代码块前释放锁(lock.release()),无论是正常退出还是因为异常。
-
定义消费者函数
customer:- 这个函数的结构与生产者函数类似,在一个无限循环中运行。
- 同样使用锁来确保资源的同步访问,并模拟消费者的工作过程。
-
创建并启动线程:
- 使用
threading.Thread分别创建生产者和消费者线程。 - 使用
start()方法启动这两个线程。
- 使用
-
等待线程结束:
- 使用
join()方法等待两个线程结束。不过,由于线程函数中使用了无限循环,这意味着这两个线程实际上不会自行结束,除非程序被外部中断,比如手动停止程序。
- 使用
在这个示例中,生产者和消费者通过一个互斥锁来协调它们的操作。由于两个线程不能同时持有锁,这就保证了当一个线程(比如生产者)正在工作时,另一个线程(比如消费者)将等待直到锁被释放。这样可以防止同时访问共享资源所可能引发的问题,如数据不一致或竞争条件。
由于并未指定生产者和消费者的个数,这里假定为 2 个生产者和 2 个消费者。
代码如下:
import threading
import time
import random

# 创建一个锁对象
lock = threading.Lock()

def producer(id):
    while True:
        lock.acquire() # 请求锁
        try:
            print(f"----------------------\nProducer {id} is working!")
            time.sleep(0.5) # 模拟工作
            print(f"Producer {id} is finished!\n----------------------")
        finally:
            lock.release() # 释放锁
        time.sleep(random.uniform(0.2, 0.4))

def customer(id):
    while True:
        lock.acquire() # 请求锁
        try:
            print(f"----------------------\nCustomer {id} is working!")
            time.sleep(0.5) # 模拟工作
            print(f"Customer {id} is finished!\n----------------------")
        finally:
            lock.release() # 释放锁
        time.sleep(random.uniform(0.2, 0.4))

# 创建并启动线程
threads = []
for i in range(2):
    threads.append(threading.Thread(target=producer, args=(i+1,)))
    threads.append(threading.Thread(target=customer, args=(i+1,)))

for thread in threads:
    thread.start()

# 等待所有线程结束
for thread in threads:
    thread.join()
这段代码与之前的代码相比有以下主要区别:
-
多个生产者和消费者:
- 在这个版本中,我创建了多个生产者(producer)和消费者(customer)线程。每个生产者和消费者都有一个唯一的标识符(
id),这在函数调用时作为参数传入。 - 在先前的代码中,只有一个生产者和一个消费者线程。
- 在这个版本中,我创建了多个生产者(producer)和消费者(customer)线程。每个生产者和消费者都有一个唯一的标识符(
-
线程创建方式的变化:
- 在这个版本中,通过循环创建了多个生产者和消费者线程,并将它们添加到一个线程列表
threads中。这提供了更灵活的方式来管理和启动多个线程。 - 在先前的代码中,生产者和消费者线程是单独创建和启动的。
- 在这个版本中,通过循环创建了多个生产者和消费者线程,并将它们添加到一个线程列表
-
打印信息的个性化:
- 在这个版本中,打印的信息包含了线程的
id,这使得输出更容易区分哪个生产者或消费者在工作。例如,print(f"Producer {id} is working!")。 - 在先前的代码中,打印的信息是静态的,没有区分不同线程的标识。
- 在这个版本中,打印的信息包含了线程的
这些更改使代码能够支持多个生产者和消费者线程的并发执行,同时还能通过线程的唯一标识来追踪每个线程的活动。
目标:熟悉 Windows 系统中的同步控制方法,实现如下图所示的多线程的同步控制。

代码如下:
import threading
import queue
import random
import time
# 定义两个缓冲区
buffer1 = queue.Queue(maxsize=10)
buffer2 = queue.Queue(maxsize=5)
# 定义全局指针
ppointer = 0
pcpointer1 = 0
pcpointer2 = 0
cpointer = 0
# 为了线程安全,定义锁
ppointer_lock = threading.Lock()
pcpointer1_lock = threading.Lock()
pcpointer2_lock = threading.Lock()
cpointer_lock = threading.Lock()
def producer(name, buffer, maxsize):
global ppointer
while True:
item = random.randint(1, 100)
with ppointer_lock:
buffer.put((item, ppointer))
print(f"{name} produced {item} at position {ppointer}")
ppointer = (ppointer + 1) % maxsize
time.sleep(random.uniform(0.2, 0.4))
def pc(maxsize1, maxsize2):
global pcpointer1, pcpointer2
while True:
with pcpointer1_lock:
item, pcpointer1 = buffer1.get()
with pcpointer2_lock:
buffer2.put((item, pcpointer2))
print(f"PC processed item {item} from position {pcpointer1} of buffer1 to position {pcpointer2} of buffer2")
pcpointer2 = (pcpointer2 + 1) % maxsize2
time.sleep(random.uniform(0.1, 0.2))
def customer(name, buffer, maxsize):
global cpointer
while True:
item, cpointer = buffer.get()
with cpointer_lock:
print(f"{name} consumed {item} from position {cpointer}")
cpointer = (cpointer + 1) % maxsize
time.sleep(random.uniform(0.2, 0.4))
# 创建并启动线程
producer_threads = [threading.Thread(target=producer, args=(f"Producer{i}", buffer1, 10)) for i in range(1, 4)]
pc_thread = threading.Thread(target=pc, args=(10, 5))
customer_threads = [threading.Thread(target=customer, args=(f"Customer{i}", buffer2, 5)) for i in range(1, 3)]
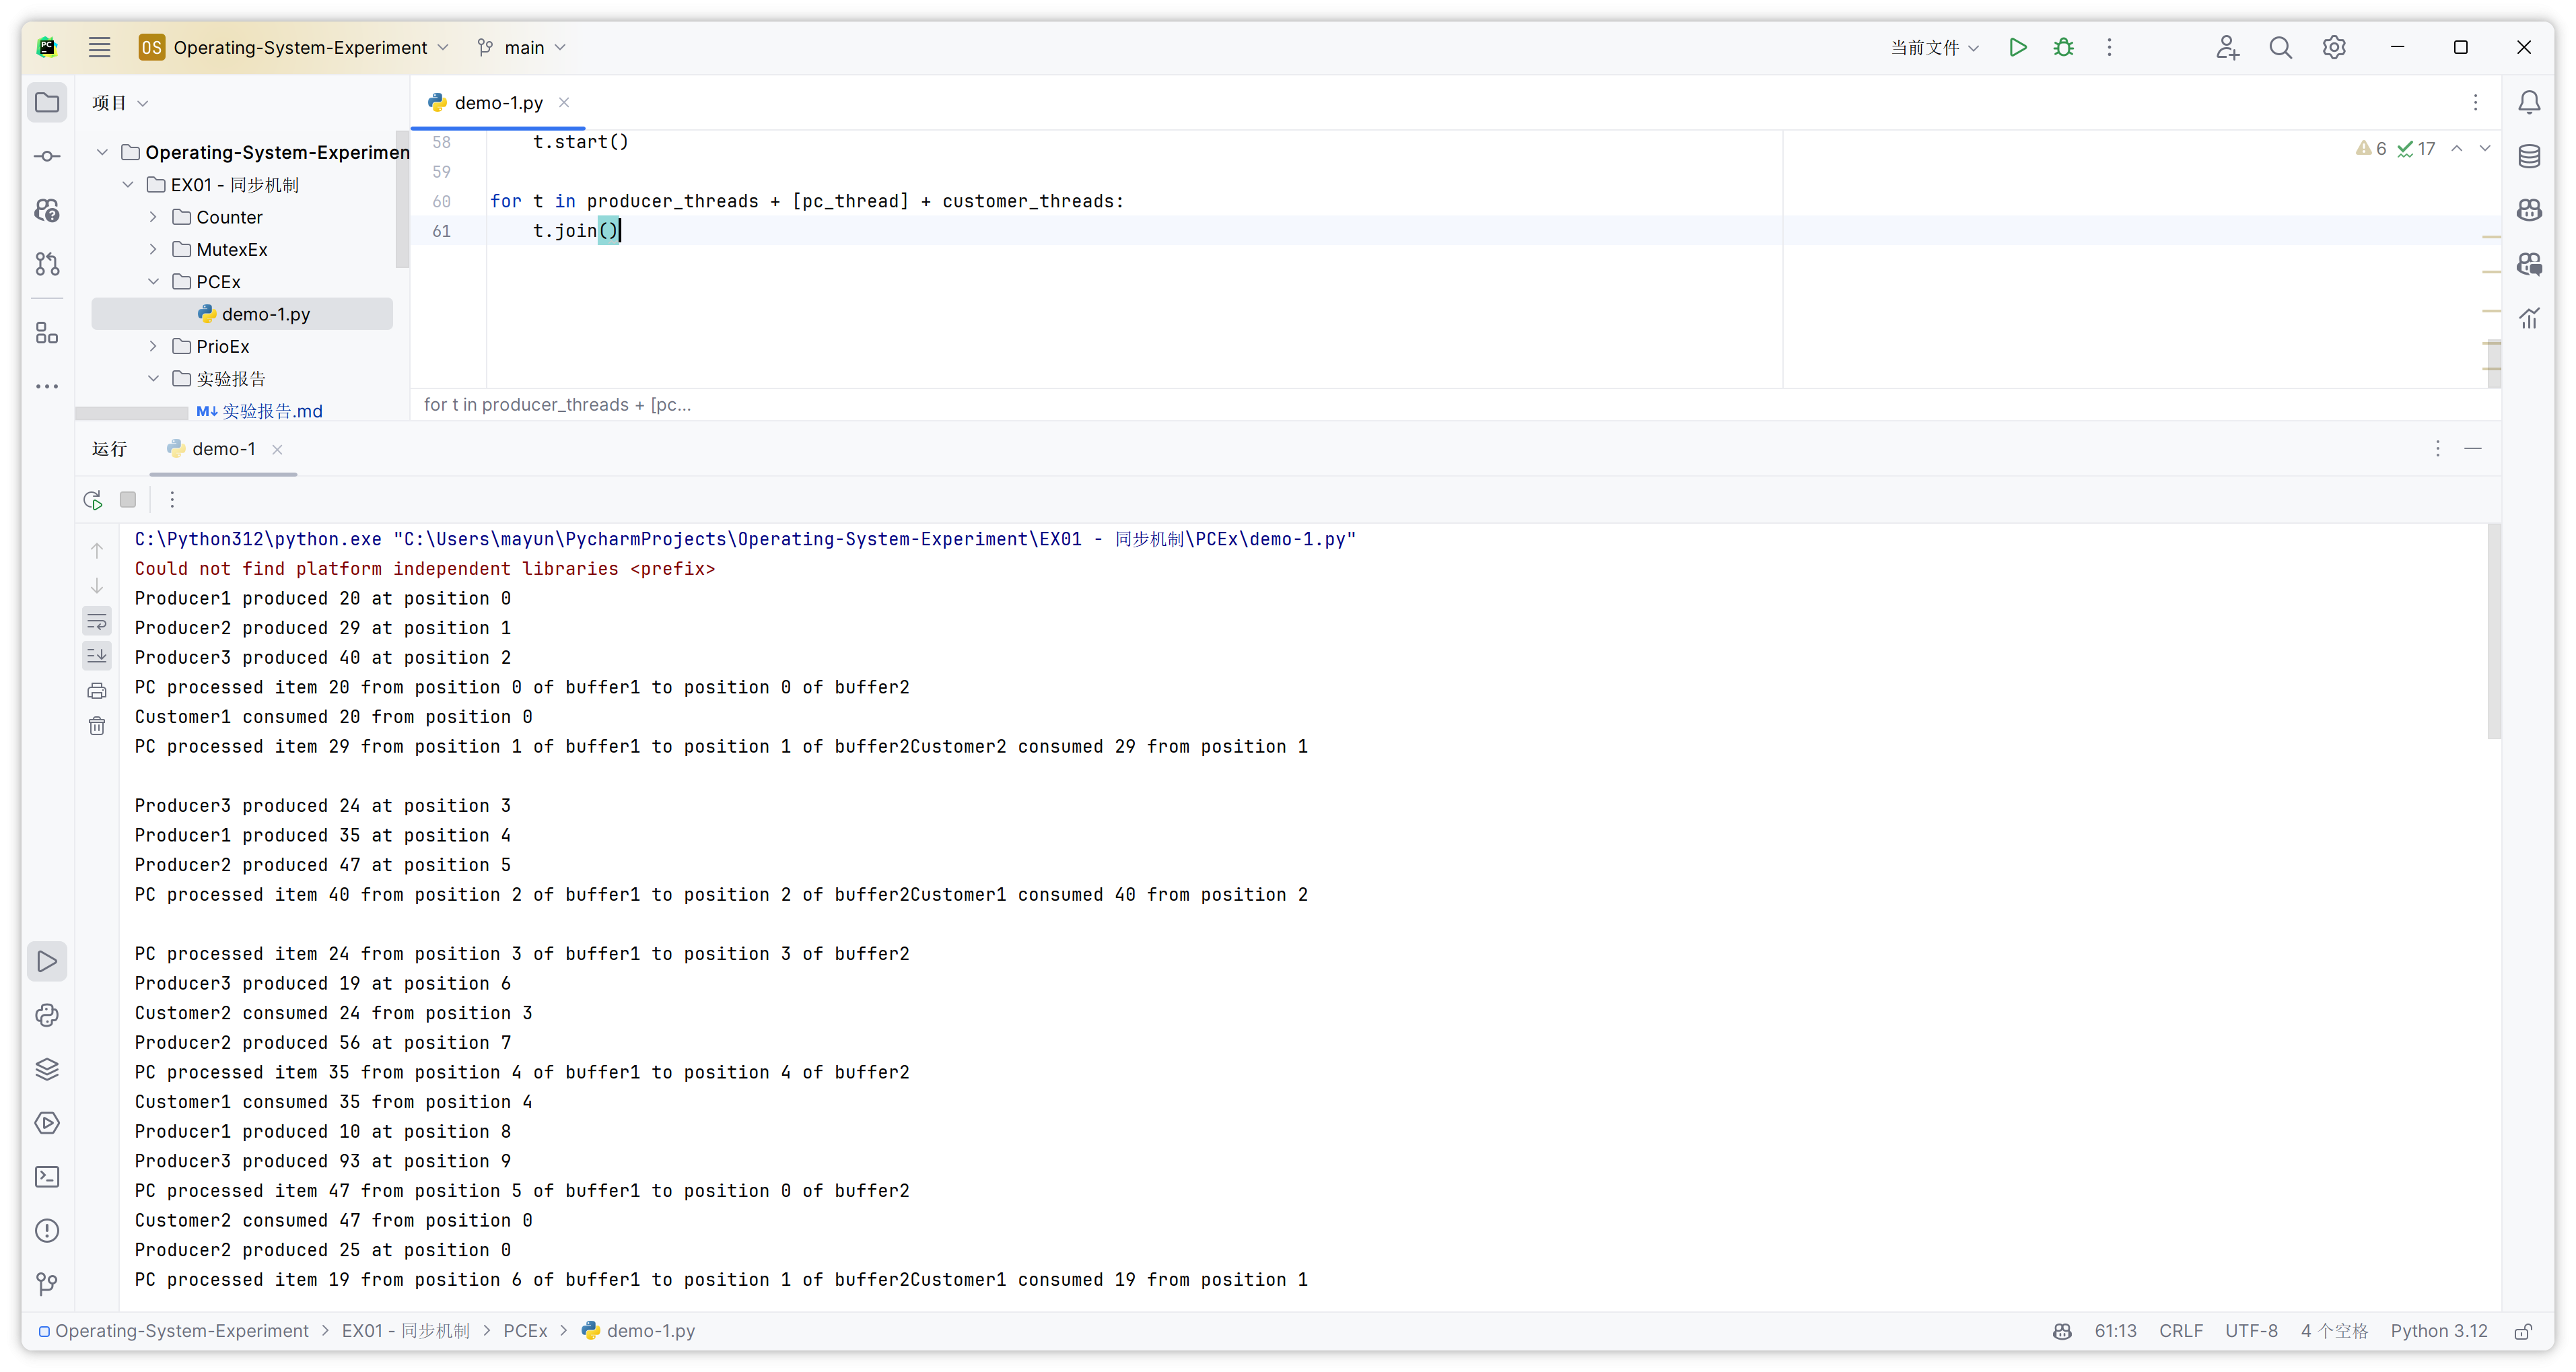
for t in producer_threads + [pc_thread] + customer_threads:
t.start()
for t in producer_threads + [pc_thread] + customer_threads:
t.join() 这段代码展示了一个生产者-处理器-消费者模型,使用线程、队列和锁来处理并发和同步。这是一个复杂的多线程示例,涉及到多个生产者、一个处理器(producer-consumer,缩写为 pc)、以及多个消费者。下面是对代码的详细解释:
-
导入必要的模块:
import threading: 用于处理多线程。import queue: 用于创建线程安全的队列。import random: 生成随机数。import time: 用于线程休眠。
-
创建队列和全局指针:
buffer1和buffer2是两个队列,分别作为生产者的输出缓冲区和消费者的输入缓冲区。它们的最大容量分别是 10 和 5。ppointer,pcpointer1,pcpointer2,cpointer是全局指针,用于跟踪在每个缓冲区中的操作位置。由于queue.Queue在 Python 中是一个抽象的 FIFO 先进先出队列,它不允许直接访问特定索引的元素。因此,我们需要通过在每个生产者和消费者中维护一个单独的指针计数器来模拟这个行为。
-
定义锁:
ppointer_lock,pcpointer1_lock,pcpointer2_lock,cpointer_lock是锁对象,用于同步对应指针的访问以保证线程安全。
-
定义
producer函数:- 生产者线程函数,向
buffer1生产数据。 - 随机生成一个整数作为生产项,并将其及其位置放入
buffer1。 - 使用
ppointer_lock来同步对ppointer的访问。
- 生产者线程函数,向
-
定义
pc函数:- 处理器线程函数,从
buffer1取数据并加工后放入buffer2。 - 使用
pcpointer1_lock和pcpointer2_lock分别同步从buffer1取数据和向buffer2放数据的操作。
- 处理器线程函数,从
-
定义
customer函数:- 消费者线程函数,从
buffer2取数据消费。 - 使用
cpointer_lock同步对cpointer的访问。
- 消费者线程函数,从
-
创建并启动线程:
- 创建并启动三个生产者线程,一个处理器线程,和两个消费者线程。
- 生产者线程和消费者线程分别传入其名称、操作的缓冲区和缓冲区大小作为参数。
-
等待所有线程结束:
- 使用
join()方法等待所有线程结束。但由于线程函数中使用了无限循环,这些线程实际上不会自行结束,除非程序被外部中断,比如手动停止程序。
- 使用
这段代码演示了如何在一个复杂的生产者-处理器-消费者模型中使用队列来管理数据流,并通过锁来确保线程之间在访问共享资源时的同步。这是一种常见的并发编程模式,适用于多种数据处理和流处理场景。
通过本次实验,我深入理解了多线程编程的核心概念及其在现代计算机系统中的重要性。本次实验不仅加深了我对多线程编程的理解,还提升了我的实际编程技能,特别是在涉及线程同步和互斥的复杂场景中。通过实验,我更加确信,良好的同步机制设计对于构建高效、稳定且可靠的多线程应用至关重要。