Project that details the creation of a Spark Cluster using Raspberry Pi 4 and Ubuntu Server LTS 20.04
This project was last updated 9/10/20!
This project is my own documentation of building a Spark Cluster Computer. I explain from start to finish how to setup a physical Raspberry Pi 4 Cluster Computer and install Apache Hadoop and Apache Spark on the cluster.
In this tutorial, we cover:
- Physical Cluster Setup
- Individual Pi Setup - Ubuntu Server LTS 20.04 Installation
- Cluster Setup - Public Key SSH Authentication, Static IP, Host/Hostnames Configuration
- Hadoop Installation - Single Node and Multi-Node; Hadoop 3.2.1
- Spark Installation - Spark Jobs via YARN and the Spark Shell; Spark 3.0.1
This tutorial would not have been possible without knowledge from the following articles:
- A Data Science/Big Data Laboratory by Pier Taranti
- Build Raspberry Pi Hadoop/Spark Cluster from Scratch by Henry Liang
- How to Install and Set Up a 3-Node Hadoop Cluster by Linode (Contributitons from Florent Houbart)
- Install, Configure, and Run Spark on Top of a Hadoop YARN Cluster
- Apache Hadoop Documentation
- Apache Spark Documentation
Without further ado, let's get on to it!
To start the setup, install your Raspberry Pis on the server rack casing. You can find these cases for cheap on Amazon.


For my setup, I used a wired ethernet connection from my router which was then routed to my Netgear 4-port 100 Mbps Switch. Then, I connected each Raspberry Pi to the switch via a 1-foot ethernet cable.


I used a RAVPower 4-Port USB Power Supply to power my Raspberry Pi. As they are Raspberry Pi 4s, they all use USB-C as a power supply.


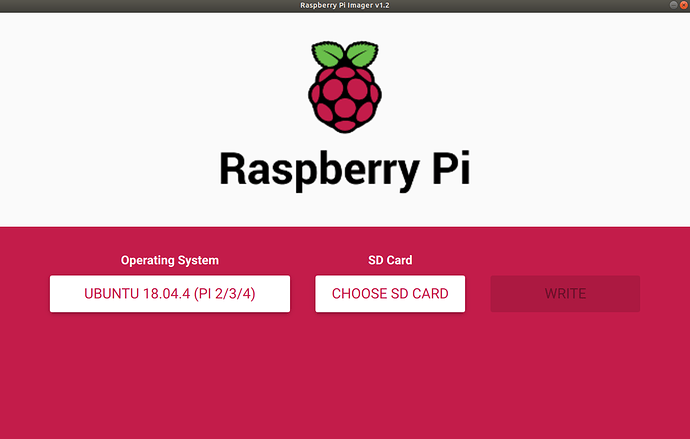
Use the Raspberry Pi Imager to write the Ubuntu Server LTS 20.04 64 Bit to each pi.
In this stage, we'll SSH into each Pi and setup some basic configuration.
Repeat the following steps for each Pi.
Plug in one Pi at a time; finish the setup configuration completely before moving on to the next Pi.
Use this net-tools command to find the IP address of the Pi.
$ arp -na | grep -i "dc:a6:32"If that doesn't return anything, you can also use your router admin interface to see a list of connected devices.
The name of the device should be ubuntu
After you're connected you'll be prompted to change the password. Make the password the same on each Pi; something secure but easy to remember.
Ensure that the Pi has the time synchronized using the following command:
$ timedatectl statusYou should be returned this prompt:
               Local time: Mon 2020-08-10 12:24:54 EDT
           Universal time: Mon 2020-08-10 16:24:54 UTC
                 RTC time: Mon 2020-08-10 16:24:54
                Time zone: America/New_York (EDT, -0400)
System clock synchronized: yes
              NTP service: active
          RTC in local TZ: no
If the system clock is synchronized and NTP service is active, you're good to go.
Lastly, run the following commands to finish individual configuration:
$ sudo apt update
$ sudo apt upgrade
$ sudo reboot
If you get a cache lock error after the update command, reboot the Pi try again.
In this stage, we'll setup static IPs, hosts/hostname, public-key SSH authentication, and ease-of-use functions.
The following steps will need to be done on each Pi.
Ubuntu Server LTS 20.04 requires Netplan for network configuration. Specifically, editing a few yaml files.
First, SSH into the Pi and find the name of your network interface by running:
$ ip aThe returned information should look like so:
1: lo:  mtu 65536 qdisc noqueue state UNKNOWN group default qlen 1000
    link/loopback 00:00:00:00:00:00 brd 00:00:00:00:00:00
    inet 127.0.0.1/8 scope host lo
       valid_lft forever preferred_lft forever
    inet6 ::1/128 scope host
       valid_lft forever preferred_lft forever
2: eth0:  mtu 1500 qdisc fq_codel state UP group default qlen 1000
    link/ether 7c:97:0d:a6:27:53 brd ff:ff:ff:ff:ff:ff
    inet 192.168.1.1/24 brd 192.168.0.255 scope global dynamic noprefixroute en
...
The network interface name is the bolded eth0 tag (It will not be bolded on your system, but this is the location you should look).
Keep this in mind, we'll need this for the network configuration file.
Next, you'll need to use nano or vim to edit the configuration files. In this tutorial, I'll be using nano. Use the following commands to edit the configuration file to disable automatic network configuration.
$ sudo nano /etc/cloud/cloud.cfg.d/99-disable-config.cfgAll you need to add is the following code:
network: {config: disabled}Then, you'll setup the static IP by editing the 50-cloud-init.yaml file. Use the following command:
$ sudo nano /etc/netplan/50-cloud-init.yamlThe basic template to set a static IP is:
network:
    ethernets:
        {Network Interface Name}:
            dhcp4: false
            addresses: [{Specifc IP Adress}/24]
            gateway4: {Gateway Address}
            nameservers:
                addresses: [{Gateway Address}, 8.8.8.8]
    version: 2
My configuration file looked like so: (X being the last digit of the specific IP address for each Pi; 10.1.2.121, 10.1.2.122, 10.1.2.123, etc.)
network:
    ethernets:
        eth0:
            dhcp4: false
            addresses: [10.1.2.X/24]
            gateway4: 10.1.2.1
            nameservers:
                addresses: [10.1.2.1, 8.8.8.8]
    version: 2
After editing the file, apply the settings by using the following commands:
$ sudo netplan applysudo netplan apply will make your SSH session hang because the ip address changes.
Kill the terminal session and SSH into the Pi using the new ip address.
Then reboot the Pi and confirm the static IP address is set correctly.
The following steps will need to be done on each Pi.
Now it's time to configure the hosts and hostnames files to the specific Pi information.
First we'll SSH into the Pi and update the hostname file using the following command:
$ sudo nano /etc/hostnameThe hostname file should like so (X being the last digit of the specific IP address for each Pi):
pi0X
For example, the hostname file for pi01 will look like:
pi01
Next, we'll have to update the hosts file using the following command:
$ sudo nano /etc/hostsThe hosts file should look like so after editing:
# The following lines are desirable for IPv6 capable hosts
::1 ip6-localhost ip6-loopback
fe00::0 ip6-localnet
ff00::0 ip6-mcastprefix
ff02::1 ip6-allnodes
ff02::2 ip6-allrouters
ff02::3 ip6-allhosts

10.1.2.121 pi01
10.1.2.122 pi02
10.1.2.123 pi03
While editing the hosts file, make sure to delete the localhost 127.0.0.1 line from the file.
The template for adding additional nodes to the hosts file is:
{IP Address} {hostname}
Note, the hostname file will be different for each node, but the hosts file should be exactly the same.
Now reboot the Pi and move on to the next Pi until all are configured.
Perform these steps on the master Pi until only until directed to do otherwise.
First, edit the ssh config file on the Pi using the following command:
$ nano ~/.ssh/configAdd all of the nodes to the config file, including the Host, User, and Hostname for each Pi.
The template for adding nodes to the config file is:
Host piXX
User ubuntu
Hostname {IP Address}
My config file looked like this after adding all of my nodes to the file:
Host pi01
User ubuntu
Hostname 10.1.2.121

Host pi02
User ubuntu
Hostname 10.1.2.122

Host pi03
User ubuntu
Hostname 10.1.2.123
Next, create an SSH key pair on the Pi using:
$ ssh-keygen -t rsa -b 4096You'll be prompted to select a directory to save and for a passphrase.
Press enter through the prompts because the key pair needs to be saved in the .ssh directory and the key pair should be passwordless.
The output should look similar to this:
Your identification has been saved in /your_home/.ssh/id_rsa
Your public key has been saved in /your_home/.ssh/id_rsa.pub
The key fingerprint is:
SHA256:/hk7MJ5n5aiqdfTVUZr+2Qt+qCiS7BIm5Iv0dxrc3ks user@host
The key's randomart image is:
+---[RSA 4096]----+
|                .|
|               + |
|              +  |
| .           o . |
|o       S   . o  |
| + o. .oo. ..  .o|
|o = oooooEo+ ...o|
|.. o *o+=.*+o....|
|    =+=ooB=o.... |
+----[SHA256]-----+
Repeat the SSH keygen on Pi 2 and 3.
Then use the following command on all Pis (including Pi 1) to copy the public keys into Pi 1's authorized key list:
$ ssh-copy-id pi01Finally, you can copy Pi 1's configuration files to the rest of the Pi's using the following commands:
$ scp ~/.ssh/authorized_keys piXX:~/.ssh/authorized_keys$ scp ~/.ssh/config piXX:~/.ssh/configNote, XX stands for the specific digit identifier for the Pi (pi02, pi03).
Now you should be able to ssh into any Pi from any of the Pis without providing a password.
Make sure to test it out from all Pis to ensure everything is working properly.
This step entails editing the .bashrc file in order to create some custom functions for ease of use.
On the master Pi, we'll first edit the ~/.bashrc file:
$ nano ~/.bashrcWithin this file, add the following code to the bottom of the file:
# cluster management functions

#   list what other nodes are in the cluster
function cluster-other-nodes {
    grep "pi" /etc/hosts | awk '{print $2}' | grep -v $(hostname)
}

#   execute a command on all nodes in the cluster
function cluster-cmd {
    for node in $(cluster-other-nodes);
    do
        echo $node;
        ssh $node "$@";
    done
    cat /etc/hostname; $@
}

#   reboot all nodes in the cluster
function cluster-reboot {
    cluster-cmd sudo reboot now
}

#   shutdown all nodes in the cluster
function cluster-shutdown {
    cluster-cmd sudo shutdown now
}

function cluster-scp {
    for node in $(cluster-other-nodes);
    do
        echo "${node} copying...";
        cat $1 | ssh $node "sudo tee $1" > /dev/null 2>&1;
    done
    echo 'all files copied successfully'
}

#   start yarn and dfs on cluster
function cluster-start-hadoop {
    start-dfs.sh; start-yarn.sh
}

#   stop yarn and dfs on cluster
function cluster-stop-hadoop {
    stop-dfs.sh; stop-yarn.sh
}
Source the .bashrc file on the master Pi:
source ~/.bashrcNow use the following command to copy the .bashrc to all the worker nodes:
cluster-scp ~/.bashrcLastly, run the following command to source the .bashrc file on all nodes:
cluster-cmd source ~/.bashrcYou now have a functioning cluster computer.
In order to start running parallel processing tasks, we'll install Hadoop first and then Spark.
To install Java 8 on each node, use the following command:
$ cluster-cmd sudo apt install openjdk-8-jdkThen, because we haven't done it in a while, use the following command to reboot the Pis:
$ cluster-rebootAfter everything is rebooted, SSH into the master Pi and run the following command to verify Java was installed correctly:
$ cluster-cmd java -versionPerform the following steps only on the master Pi until directed to do otherwise.
Next, download the Hadoop 3.2.1 binary onto your machine. You can get the binary from the Apache Hadoop website and use wget to download it on to the Pi.
$ wget https://downloads.apache.org/hadoop/common/hadoop-3.2.1/hadoop-3.2.1.tar.gzNote, the link in the bash command might not work if Hadoop has been updated.
Next, extract the tar and move the binary to the /opt directory using the following command:
$ sudo tar -xvf hadoop-3.2.1.tar.gz -C /opt/ && cd /optChange the name of the directory from hadoop-3.2.1 to hadoop:
$ sudo mv hadoop-3.2.1 hadoopChange the permissions on the directory.
$ sudo chown ubuntu:ubuntu -R /opt/hadoopEdit .profile to add Hadoop binaries to PATH:
$ nano /opt/hadoop/.profileAdd the following line:
PATH=/opt/hadoop/hadoop/bin:/opt/hadoop/hadoop/sbin:$PATH
Edit the .bashrc file to include the following environmental variables at the bottom of the file.
# path and options for java
export JAVA_HOME=/usr/lib/jvm/java-8-openjdk-arm64

# path and options for Hadoop
export HADOOP_HOME=/opt/hadoop
export PATH=$PATH:$HADOOP_HOME/bin:$HADOOP_HOME/sbin

export HADOOP_INSTALL=$HADOOP_HOME
export HADOOP_MAPRED_HOME=$HADOOP_HOME
export HADOOP_COMMON_HOME=$HADOOP_HOME
export HADOOP_HDFS_HOME=$HADOOP_HOME
export HADOOP_INSTALL=$HADOOP_HOME
export YARN_HOME=$HADOOP_HOME
export HADOOP_COMMON_LIB_NATIVE_DIR=$HADOOP_HOME/lib/native
export HADOOP_CONF_DIR=$HADOOP_HOME/etc/hadoop
export HADOOP_OPTS="-Djava.library.path=$HADOOP_HOME/lib/native"
Then source the .bashrc file to ensure it updates.
source ~/.bashrcNext, set the value of JAVA_HOME in /opt/hadoop/etc/hadoop/hadoop-env.sh. You'll have to scroll down to find the correct line.
The line will be commented out. Uncomment the line and add the correct path to the variable.
It should look like this:
...
# The java implementation to use. By default, this environment
# variable is REQUIRED on ALL platforms except OS X!
export JAVA_HOME=/usr/lib/jvm/java-8-openjdk-arm64
...Use the following command to edit the core-site.xml file.
$ nano /opt/hadoop/etc/hadoop/core-site.xmlIt should look like so after editing:
<configuration>
    <property>
        <name>fs.defaultFS</name>
        <value>hdfs://pi01:9000</value>
    </property>
</configuration>
Then edit the hdfs-site.xml file:
$ nano /opt/hadoop/etc/hadoop/hdfs-site.xmlAfter editing:
<configuration>
    <property>
        <name>dfs.replication</name>
        <value>1</value>
    </property>
</configuration>Format the NameNode THIS WILL DELETE ALL DATA IN THE HDFS!:
$ hdfs namenode -formatStart the NameNode and DataNode:
$ start-dfs.shMake the required directories to run MapReduce jobs:
$ hdfs dfs -mkdir /user
$ hdfs dfs -mkdir /user/ubuntu
Copy input files into the distributed filesystem:
$ hdfs dfs -mkdir input
$ hdfs dfs -put /opt/hadoop/etc/hadoop/*.xml input
Run the test example:
$ hadoop jar /opt/hadoop/share/hadoop/mapreduce/hadoop-mapreduce-examples-3.2.1.jar grep input output 'dfs[a-z.]+'View the ouput on the distributed file system:
$ hdfs dfs -cat output/*When done, stop the NameNode and DataNode:
$ stop-dfs.shConfigure the following parameters in the configuration files:
/opt/hadoop/etc/hadoop/mapred-site.xml:
<configuration>
    <property>
        <name>mapreduce.framework.name</name>
        <value>yarn</value>
    </property>
    <property>
        <name>mapreduce.application.classpath</name>
        <value>$HADOOP_MAPRED_HOME/share/hadoop/mapreduce/*:$HADOOP_MAPRED_HOME/share/hadoop/mapreduce/lib/*</value>
    </property>
</configuration>
/opt/hadoop/etc/hadoop/yarn-site.xml:
<configuration>
    <property>
        <name>yarn.nodemanager.aux-services</name>
        <value>mapreduce_shuffle</value>
    </property>
    <property>
        <name>yarn.nodemanager.env-whitelist</name>
        <value>JAVA_HOME,HADOOP_COMMON_HOME,HADOOP_HDFS_HOME,HADOOP_CONF_DIR,CLASSPATH_PREPEND_DISTCACHE,HADOOP_YARN_HOME,HADOOP_MAPRED_HOME</value>
    </property>
</configuration>
Start ResourceManager and NodeManager:
$ start-yarn.shStart NameNode and DataNode:
$ start-dfs.shTest if all daemons are running:
$ jpsYou should see this output after running the jps command:
5616 SecondaryNameNode
5760 Jps
5233 NameNode
4674 NodeManager
5387 DataNode
4524 ResourceManager
If you see all six daemons, then it's time to move on the Multi-Node Installation of Hadoop.
Stop all daemons:
$ stop-yarn.sh
$ stop-dfs.shUpdate the following configuration files:
/opt/hadoop/etc/hadoop/core-site.xml:
    <configuration>
        <property>
            <name>fs.default.name</name>
            <value>hdfs://pi01:9000</value>
        </property>
    </configuration>
/opt/hadoop/etc/hadoop/hdfs-site.xml:
<configuration>
    <property>
            <name>dfs.namenode.name.dir</name>
            <value>/opt/hadoop/data/nameNode</value>
    </property>

    <property>
            <name>dfs.datanode.data.dir</name>
            <value>/opt/hadoop/data/dataNode</value>
    </property>
    <property>
        <name>dfs.namenode.checkpoint.dir</name>
        <value>/opt/hadoop/hdfs/namenodesecondary</value>
    </property>
    <property>
            <name>dfs.replication</name>
            <value>1</value>
    </property>
</configuration>
/opt/hadoop/etc/hadoop/mapred-site.xml:
<configuration>
    <property>
        <name>mapreduce.framework.name</name>
        <value>yarn</value>
    </property>
    <property>
        <name>yarn.app.mapreduce.am.env</name>
        <value>HADOOP_MAPRED_HOME=$HADOOP_HOME</value>
    </property>
    <property>
        <name>mapreduce.map.env</name>
        <value>HADOOP_MAPRED_HOME=$HADOOP_HOME</value>
    </property>
    <property>
        <name>mapreduce.reduce.env</name>
        <value>HADOOP_MAPRED_HOME=$HADOOP_HOME</value>
    </property>
    <property>
        <name>yarn.app.mapreduce.am.resource.memory-mb</name>
        <value>512</value>
    </property>
    <property>
        <name>mapreduce.map.resource.memory-mb</name>
        <value>256</value>
    </property>
    <property>
        <name>mapreduce.reduce.resource.memory-mb</name>
        <value>256</value>
    </property>
</configuration>
/opt/hadoop/etc/hadoop/yarn-site.xml:
<configuration>
    <property>
        <name>yarn.acl.enable</name>
        <value>0</value>
    </property>
    <property>
        <name>yarn.resourcemanager.hostname</name>
        <value>pi01</value>
    </property>
    <property>
        <name>yarn.nodemanager.aux-services</name>
        <value>mapreduce_shuffle</value>
    </property>
    <property>
        <name>yarn.nodemanager.resource.memory-mb</name>
        <value>1536</value>
    </property>
    <property>
        <name>yarn.scheduler.maximum-allocation-mb</name>
        <value>1536</value>
    </property>
    <property>
        <name>yarn.scheduler.minimum-allocation-mb</name>
        <value>128</value>
    </property>
    <property>
        <name>yarn.nodemanager.vmem-check-enabled</name>
        <value>false</value>
    </property>
</configuration>For the Master:
$ nano /opt/hadoop/etc/hadoop/masterIt should look like this:
pi01
For the Workers:
$ nano /opt/hadoop/etc/hadoop/workersIt should look like this:
pi02
pi03
SSH into Pi 2 and then Pi 3 and run the following commands:
sudo mkdir /opt/hadoop
sudo chown ubuntu:ubuntu -R /opt/hadoop
After creating the /opt/hadoop directory in Pi 2 and Pi 3 and changing the owner of the directory, SSH back into Pi 1.
Use the following command to copy all files from the master node to the worker nodes:
$ for pi in $(cluster-other-nodes); do rsync -avxP /opt/hadoop $pi:/opt; doneThen copy the .bashrc file from the master node to the worker nodes and source it on all nodes:
$ cluster-scp ~/.bashrc
$ cluster-cmd source ~/.bashrc
After everything is copied, you can verify that Hadoop was installed correctly using the following command on each node:
$ hadoop version | grep HadoopRun the following commands only on the master node unless directed otherwise.
To run for the first time, the HDFS needs to be formatted:
$ hdfs namenode -formatTo start the HDFS, run the following command on the master node:
$ start-dfs.shTo start YARN, run the following command:
$ start-yarn.shEnsure that everything is working by running the following command on all nodes:
$ jpsOn the master node, jps should return a similar output:
7202 SecondaryNameNode
6954 NameNode
7498 Jps
7389 ResourceManager
On the worker nodes, jps should return a similar output:
3889 Jps
3684 NodeManager
3514 DataNode
First create the user home directory in the HDFS:
$ hdfs dfs -mkdir -p /user/ubuntuCreate a directory called books in the HDFS:
$ hdfs dfs -mkdir booksGrab a few books from the Gutenberg Project:
$ cd ~
$ wget -O alice.txt https://www.gutenberg.org/files/11/11-0.txt
$ wget -O holmes.txt https://www.gutenberg.org/files/1661/1661-0.txt
$ wget -O frankenstein.txt https://www.gutenberg.org/files/84/84-0.txt
Put the books on the HDFS in the books directory:
$ hdfs dfs -put alice.txt holmes.txt frankenstein.txt booksList the contents of the books directory:
hdfs dfs -ls booksMove one of the books back into the local filesystem:
hdfs dfs -get books/holmes.txtList the current directory to ensure that you successfully retrieved the file:
lsLet's test that everything is working through the "Hello, world!" to MapReduce; the WordCount.
First, submit a job with the sample WordCount jar to YARN:
yarn jar /opt/hadoop/share/hadoop/mapreduce/hadoop-mapreduce-examples-3.2.1.jar wordcount "books/*" outputAfter the job is finished (it could take a few minutes), get the results with the following command:
hdfs dfs -ls outputYou should be returned the following information:
Found 2 items
-rw-r--r--   1 ubuntu supergroup          0 2020-09-10 18:09 output/_SUCCESS
-rw-r--r--   1 ubuntu supergroup     272490 2020-09-10 18:09 output/part-r-00000
Then, print the result with the following command (use Ctrl-Z to exit):
hdfs dfs -cat output/part-r-00000 | lessCongragulations, you now have a working YARN cluster!
The following steps only need to be performed on the master Pi.
First, download the Spark 3.0.1 (pre-built for Hadoop 3.2 and later) binary onto the master Pi. You can get the binary from the Apache Spark website and use wget to download it.
$ wget https://downloads.apache.org/spark/spark-3.0.1/spark-3.0.1-bin-hadoop3.2.tgzNote, the link in the bash command might not work if Spark has been updated.
Next, extract the tar and move the binary to the /opt/hadoop/ directory using the following command:
$ sudo tar -xvf spark-3.0.1-bin-hadoop3.2.tgz -C /opt/hadoop && cd /opt/hadoopChange the name of the directory in /opt/hadoop/ to spark:
$ sudo mv spark-3.0.1-bin-hadoop3.2 sparkChange the permissions on the directory.
$ sudo chown ubuntu:ubuntu -R /opt/hadoop/sparkAdd the following code to the end of the .bashrc file:
# path and options for Spark
export SPARK_HOME=/opt/hadoop/spark
export PATH=$PATH:$SPARK_HOME/bin
export LD_LIBRARY_PATH=/opt/hadoop/lib/native:$LD_LIBRARY_PATH
Source the .bashrc file:
source ~/.bashrcAdd the Spark directory to the PATH by editing the Hadoop user profile:
$ nano /opt/hadoop/.profileAdd the following lines:
PATH=/opt/hadoop/spark/bin:$PATH
export HADOOP_CONF_DIR=/opt/hadoop/etc/hadoop
export SPARK_HOME=/opt/hadoop/spark
export LD_LIBRARY_PATH=/opt/hadoop/lib/native:$LD_LIBRARY_PATH
Exit the terminal session and SSH back again to restart the session.
Rename the spark default template config file:
mv /opt/hadoop/spark/conf/spark-defaults.conf.template /opt/hadoop/spark/conf/spark-defaults.conf
Edit $SPARK_HOME/conf/spark-defaults.conf and set spark.master to yarn:
sudo nano /opt/hadoop/spark/conf/spark-defaults.confSet the following configurations:
spark.master yarn

spark.driver.memory 512m

spark.yarn.am.memory 512m

spark.executor.memory 512m
Run the following command using the spark-submit command to test the parallel processing calculation of Pi:
spark-submit --deploy-mode client --class org.apache.spark.examples.SparkPi /opt/hadoop/spark/examples/jars/spark-examples_2.12-3.0.1.jar 10You should see the following line in the output after submiting the job:
...
Pi is roughly 3.1401351401351403
...
Enable the Web UI of Spark to track your submitted jobs by editing spark-defaults.conf file:
sudo nano /opt/hadoop/spark/conf/spark-defaults.confAdd the following lines to the configuration file:
spark.eventLog.enabled            true
spark.eventLog.dir                hdfs://pi01:9000/spark-logs
spark.history.provider            org.apache.spark.deploy.history.FsHistoryProvider
spark.history.fs.logDirectory     hdfs://pi01:9000/spark-logs
spark.history.fs.update.interval  10s
spark.history.ui.port             18080
Create the log directory in the HDFS:
hdfs dfs -mkdir /spark-logsRun the history server:
/opt/hadoop/spark/sbin/start-history-server.shRun the Pi parallel processing job again to generate logs in the HDFS.
spark-submit --deploy-mode client --class org.apache.spark.examples.SparkPi /opt/hadoop/spark/examples/jars/spark-examples_2.12-3.0.1.jar 10Access the Spark History Server throught the Web UI at http://{Master Node IP}:18080 in a web browser.
Let's take a look at some the existing data on our cluster in an interactive manner; via the Spark Shell:
To start the Spark Shell:
spark-shellThen let's do a small Scala example to show the power of the Spark Shell.
First, let's create a string variable named input from the alice.txt file.
var input = spark.read.textFile("books/alice.txt")Then, let's count the number of non-blank lines using the filter function:
input.filter(line => line.length()>0).count()The returned output should be so:
res0: Long = 2813
Congratulations, you now have a working Spark Cluster Computer.
Go forth and do great things!