The Miditech Midiplus 4x4 hack and STM32Duino
The MCU of the Miditech / Midiplus 4x4 midi interface is a high density STM32F103RC, a common uC ARM STM32F1 chip family used on most musical gears like the Arturia Minilab, the Novation Launchkey and Launchpad for example. It is a very powerful chip, especially when you compare it to the Arduino Uno (ATMEGA328P).
As a former AVR platform developper, I choose to use STM32DUINO to preserve a part of my knowledge and to reuse my existing software libraries. STMDUINO is a port of the famous Arduino platform for the Maple Mini and other STM32 F1 and F4 boards, continuing by Roger Clark where Leaflabs left off.
To hack the Miditech interface, I had to remove some resistors on the motherboard because they were disabling the low level bootloader thought the UART1. After an upload of a STM32DUINO generic bootloader, I was able to compile and load from the USB a "blink" hello world sketch with the Arduino standard IDE.
UPDATE : Not tested, but it is probably faster to solder a connector at CN11 and to use an STLINKV2 stick to flash the firmware. If you don't have a STLINK usb stick, the procedure stays the same.
You need to modify the board to enable the internal bootloader of the STM32F103.
- Start by unscrewing the front plate , and remove the board from the case.
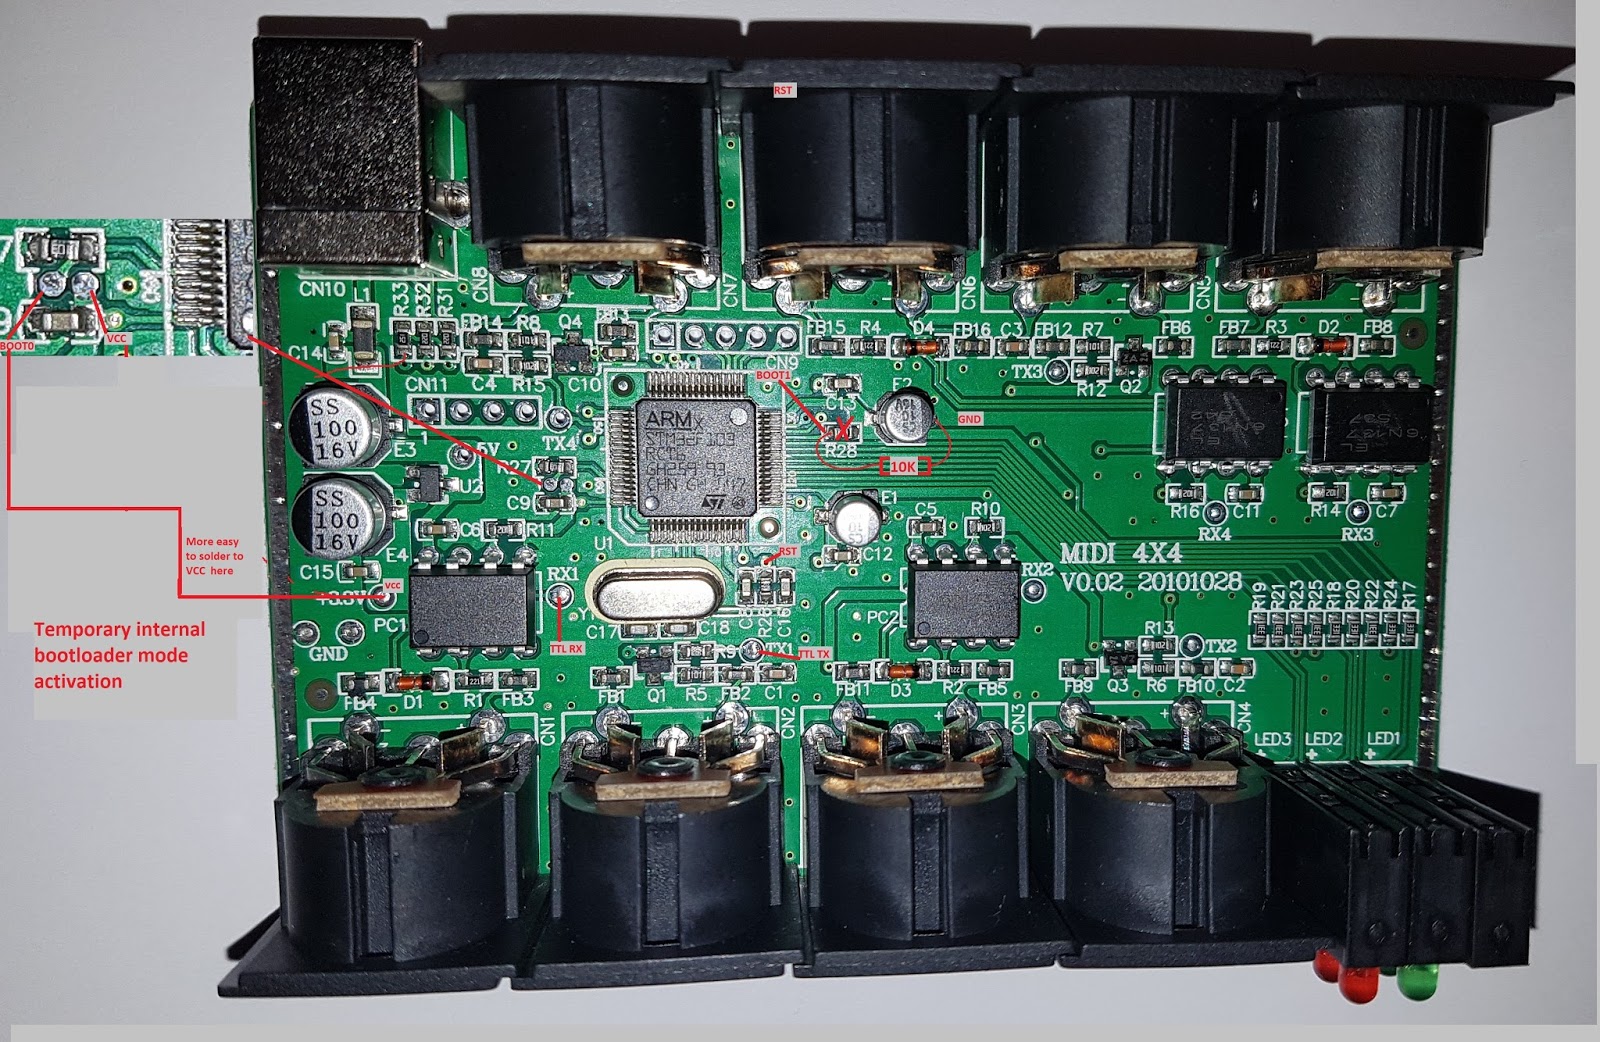
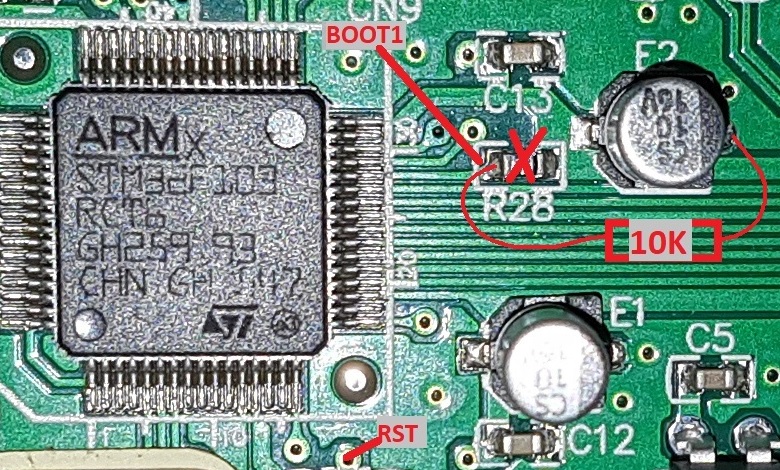
- Remove the R28 resistor because it's disabling the bootloader standard mode and connect a 10K resistor between the boot1 pin and the ground as shown.
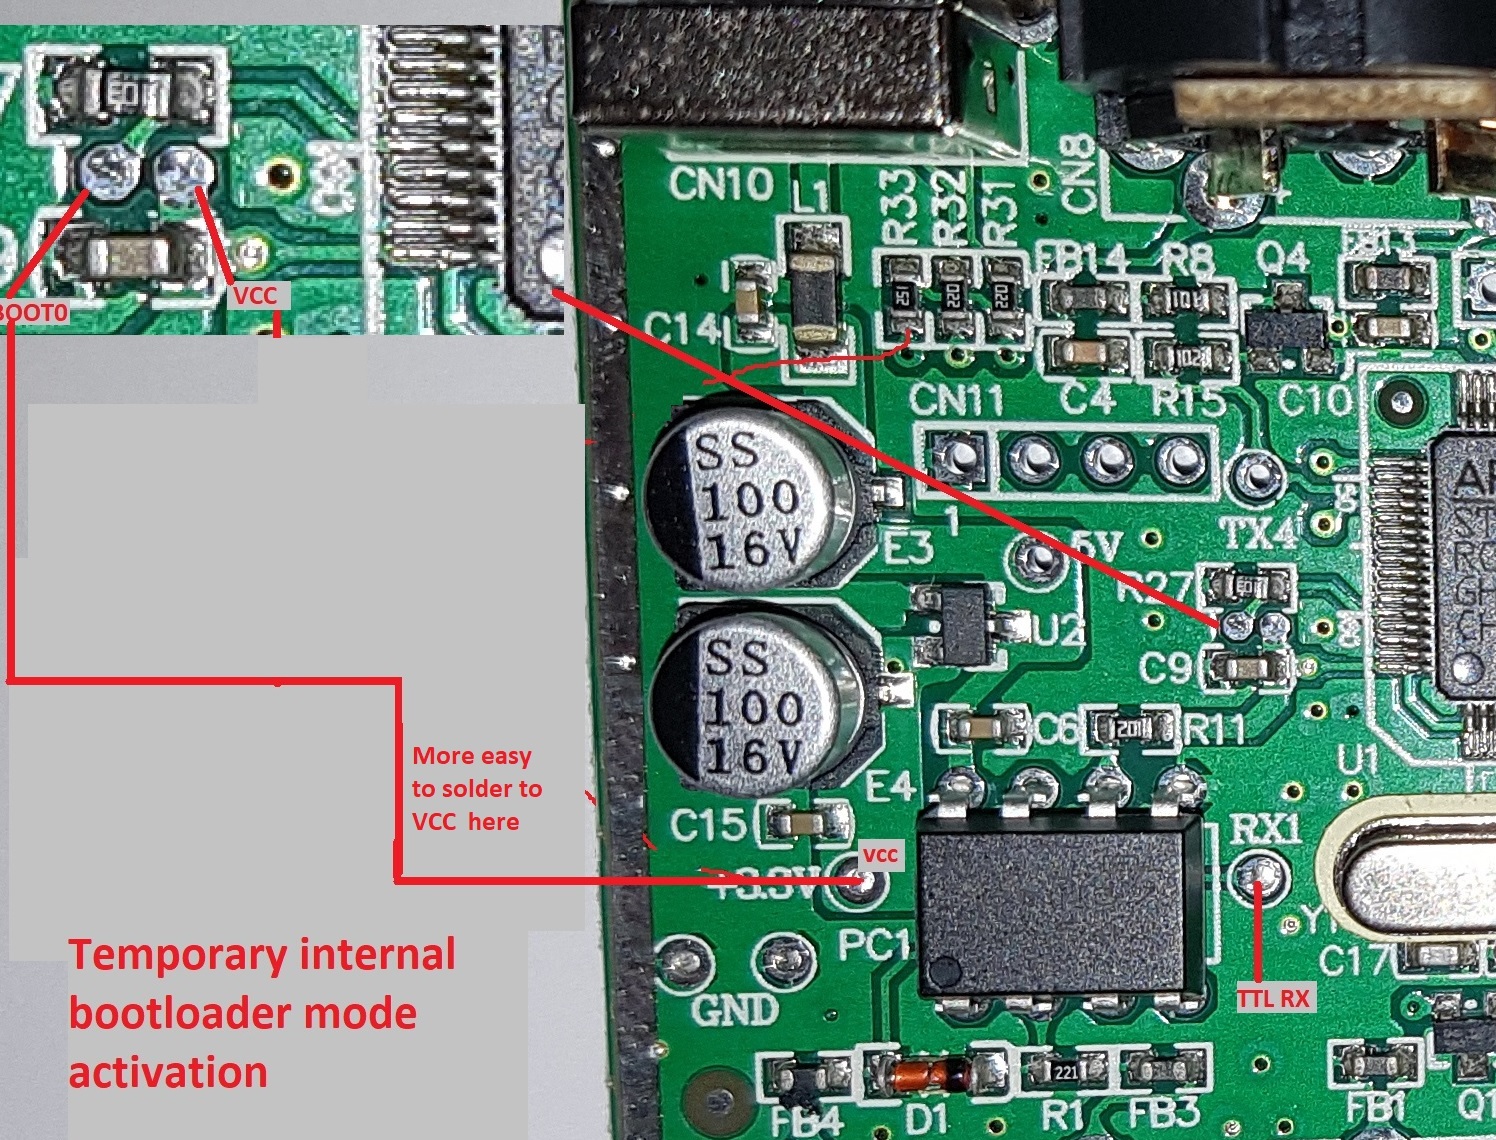
- Solder a wire to the Boot0 pin, and another to the VCC 3,3V pin. Connect the wires together. This can be removed after the STMDuino bootloader download

- Plug your TTL to Serial USB stick
- Plug the Miditech/Midipplus board into the USB
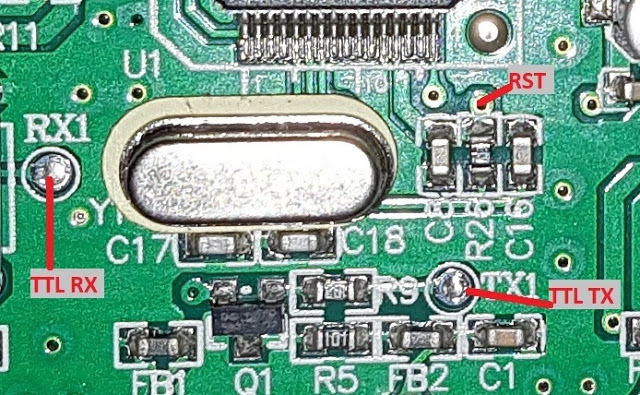
- Launch STM Flash loader demonstrator (if you don't have it , check the ST Micro. web site) and reset the Miditech/Midiplus board by by touching the RST tap point and the ground (for example the USB plug shield). As the chip is in bootloader mode, you will see, or hear nothing...
- Connect TTL RX 1/TTL TX1 from the Miditech/Midiplus board to the TTL RX/ TTL TX of your serial USB converter. You can solder 2 wires to the pads clearly labelled on the board it self, or just hold the wires with the left hand and do the rest with the right one !
At this point, it is still time to stop. After that step, not return possible !!!!!
- Choose the serial port corresponding to your Serial to TTL interface in the list than click on "Next" in STMFlash
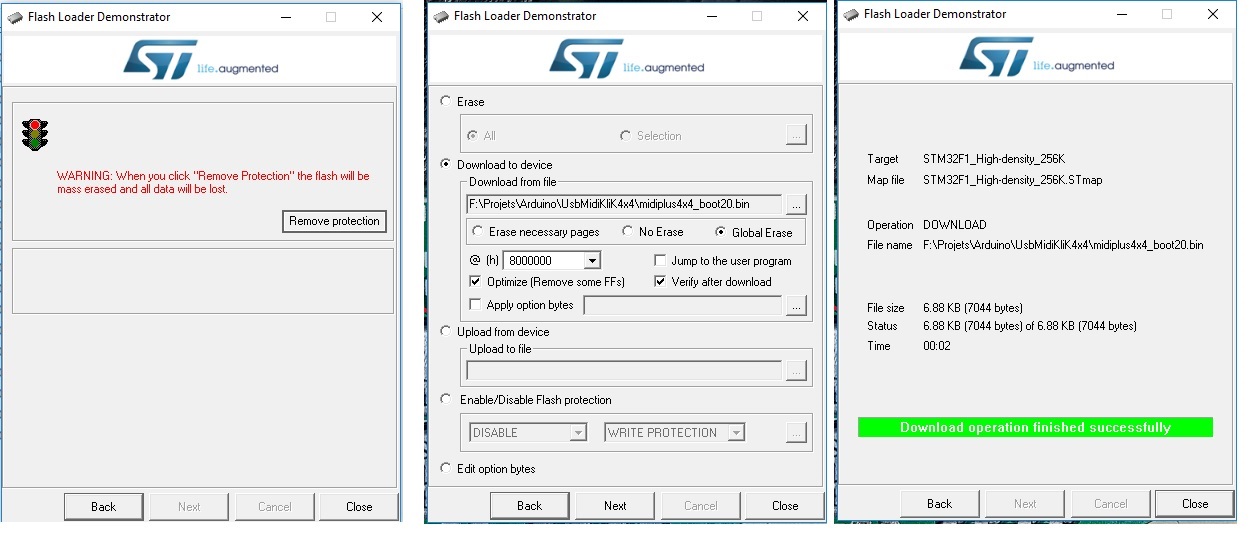
- You will see a red warning indicating that the firmware is protected, and going further will erase it. So, if you are really sure, click on "Remove protection". The existing Miditech/Midiplus firmware will be entirely erased.
- Click next, and choose the "midiplus4x4_boot20.bin" file (see in the root dir of the Git repository). This is the STMDUINO bootloader especially modified for the Miditech/Midiplus board to activate the USB DISC command (on PA8).
- Check "Optimize", "Global Erase", and "Verify after download", then "Next". The download will start, and if everything is ok, you will have a message confirming that the the update was done correctly.
- Unplug the Miditech/Midiplus board, and plug it again. The blue led will flash, meaning that the board is in DFU perpetual mode. You are ready to download the USB MidiKliK 4x4 firmware firmware with the Arduino IDE.
