If you need to manually reflash your device, download this zip file. It contains scripts, firmware and instructions for version 4 and 6 of the WIFI modem (version 5 never saw the light of day if you're wondering about the gap). Do not use the files in this repo to flash, they are outdated but people tend to end up here so that's why I'm updating the readme.
I created this binaries repo because the end to end solution for modem and ethernet over serial comes from many different sources.
This package is designed to make it easy on the end user to grab one zip file and be able to do it all.
I have created accomapnying documentation and videos to help the user along.
The sources in this package from:
microweb mtcp ethersl(get package name) wifi-modem git-repo esp_slip_router git repo
Get the ZIP File: https://theoldnet.com/downloads/serial-wifi-adapter-binaries.zip
Get your RS232 Serial to WIFI Adapter Here: https://theoldnet.com/store
- TheOldNet WIFI Modem Emulator Firmware: https://github.com/ssshake/vintage-computer-wifi-modem/
- MicroWeb Browser for DOS: https://github.com/jhhoward/MicroWeb
- ESP_SLIP_Router Github: https://github.com/martin-ger/esp_slip_router
- ESP_SLIP_Router DNS Issue: martin-ger/esp_slip_router#17
- mTCP Library: https://www.brutman.com/mTCP/
- EtherSL via the Crynwr DOS Software Packet Drivers: http://www.ibiblio.org/pub/micro/pc-stuff/freedos/files/distributions/1.2/repos/pkg-html/crynwr.html
- Dave's World article on SLIP in DOS: https://mcmackins.org/stories/dos-slip.html
- Download this repository buy checking it out with Git of by downloading this ZIP
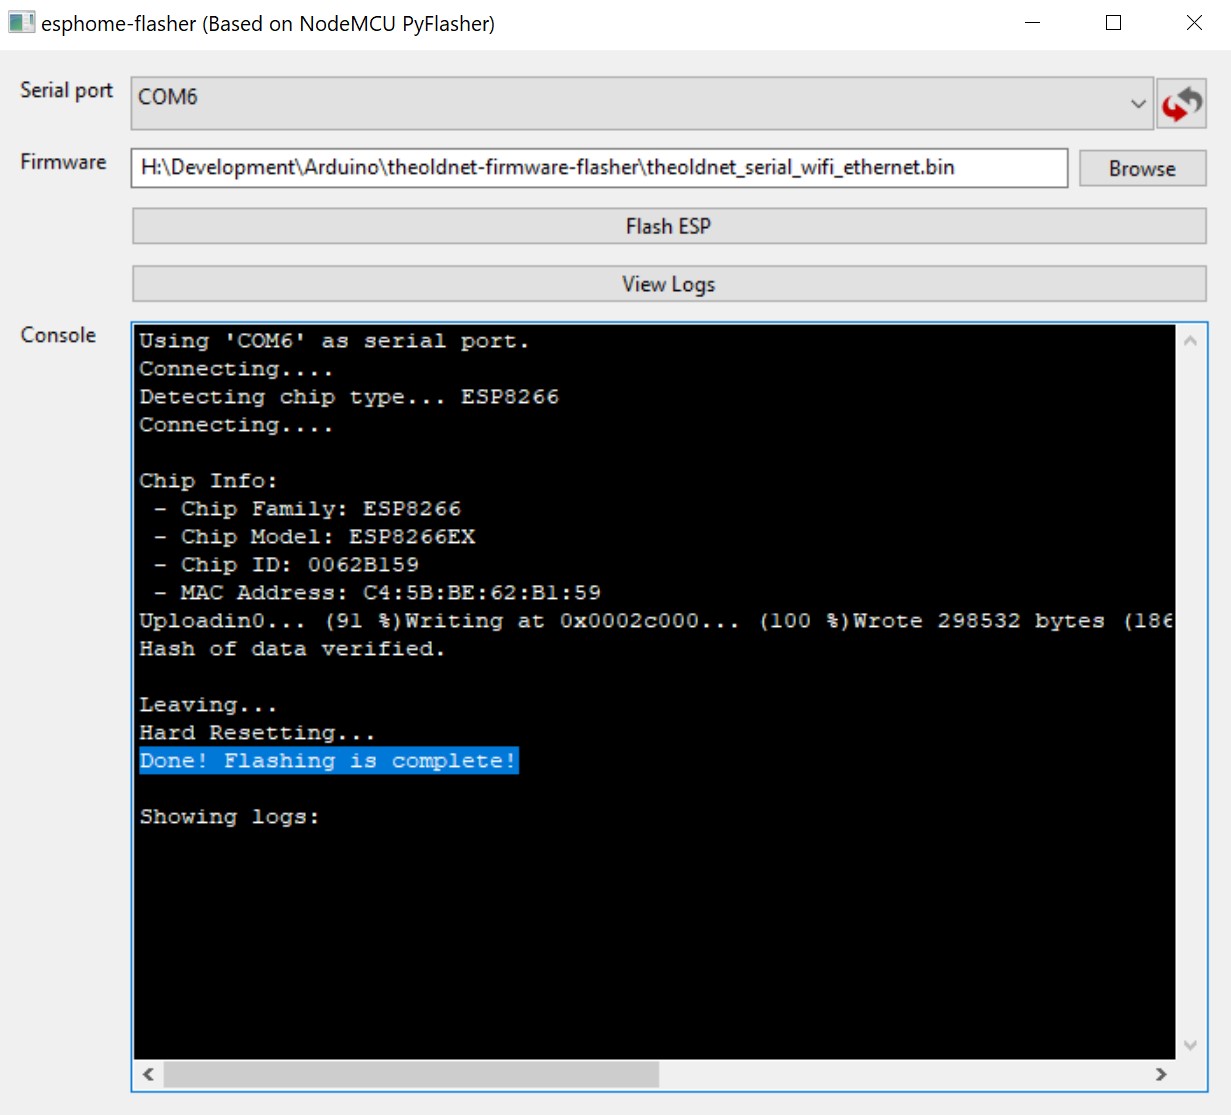
- Run ESPHome-Flasher-1.3.0-Windows-x64.exe
- Plug your device into your computer over USB
- In ESPHome Flasher choose your devices COM port
- Choose the firmware file of choice.
- for SLIP firmware choose theoldnet_serial_wifi_ethernet.bin
- for Hayes Modem & PPP firmware choose theoldnet_serial_wifi_ppp.bin
- Then click Flash ESP
Hayes Modem PPP
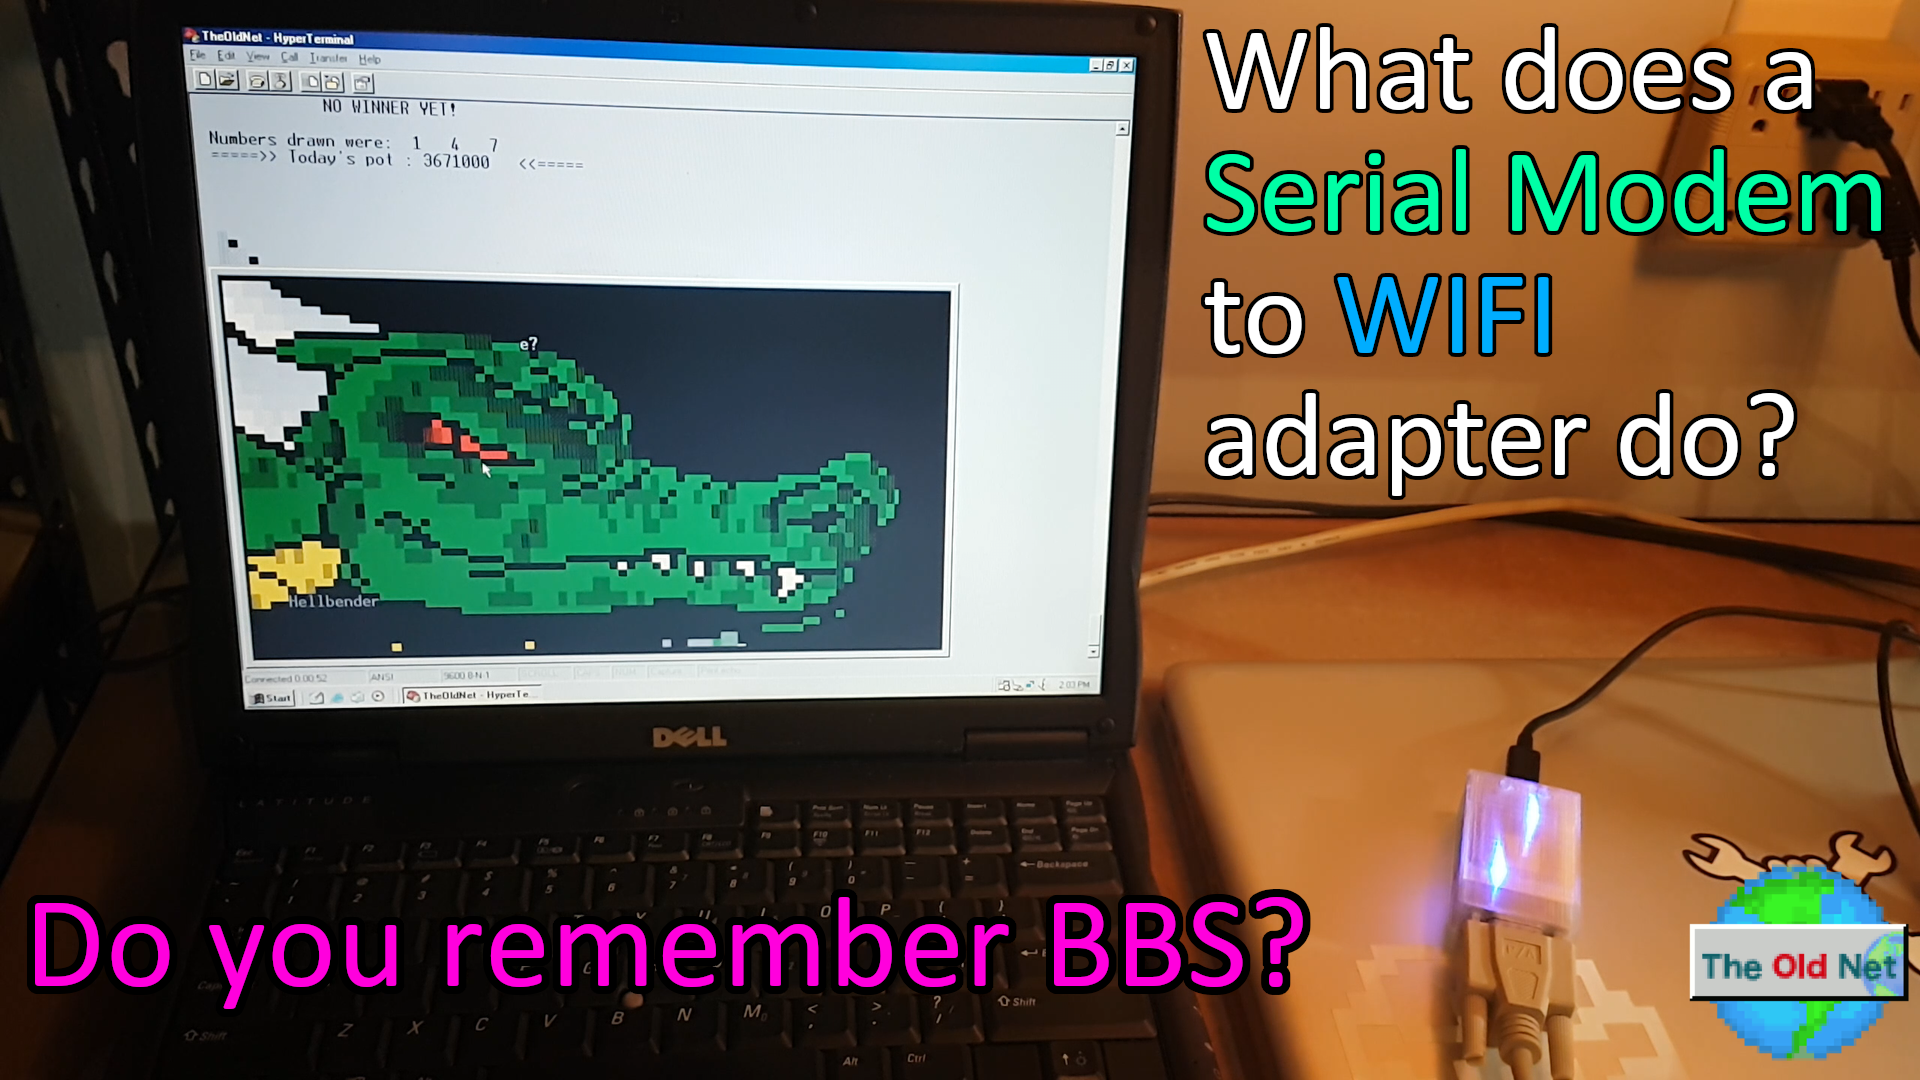
This is the defaul firmware that ships with The Old Net Serial to WIFI Adapter. It emulates a Hayes modem which is capable of connecting to BBS's hosted on the internet. It is also capable of acting as an ISP so that you can use Windows or Macintosh Dial Up Networking to get a full fledge internet connection on your vintage computer.
SLIP
The SLIP firmware acts as an ethernet adapter over serial. It behaves like a network card, not a modem. Both firmwares are capable giving your vintage computer a TCP/IP network connection. However because this firmware behaves like an ethernet adapter, it will not work with software that expects to be talking to a modem (terminal programs, dialup networking).
There are different reasons to use SLIP over PPP which was depend on your situation. I would recommend starting with the Hayes PPP firmware and then using SLIP where PPP is not available for your situation.
Soon, sorry.
Soon, sorry.
Once connected to telnet press ALT + E and then ALT + N
- You will loose all configuration settings such as your wifi SSID and PASSWORD as well as your preferred bit rate
- The bit rate will be reset to the default for the firmware. For the modem firmware it's 300 bps. For the ethernet firmware it's 115200 bps
- You must configure the ethernet firmware using TELNET on port 7777
- You must configure the modem firmware using a terminal program such as Telix and by issuing AT commands
Documentation from the SLIP and Modem repositories are below. This is a snapshot and may be out of date.
A SLIP to WiFi router
This is an implementation of a SLIP (Serial Line IP - RFC1055) router on the ESP8266. It can be used as simple (and slow) network interface to get WiFi connectivity. The ESP can act as STA or as AP. It transparently forwards any IP traffic through it. As it uses NAT no routing entries are required on the other side.
In this mode the ESP connects to the internet via an AP with ssid, password and offers at UART0 a SLIP interface with IP address 192.168.240.1. This default can be changed in the file user_config.h.
To connect a Linux-based host, start the firmware on the ESP, connect it via serial to USB, and use the following commands on the host:
sudo slattach -L -p slip -s 115200 /dev/ttyUSB0&
sudo ifconfig sl0 192.168.240.2 pointopoint 192.168.240.1 up mtu 1500
now
telnet 192.168.240.1 7777
gives you terminal access to the esp as router. On the ESP you then enter:
CMD>set ssid <your_ssid>
CMD>set password <your_pw>
CMD>set use_ap 0
CMD>save
CMD>reset
To get full internet access you will need aditionally a route:
sudo route add default gw 192.168.240.1
and a DNS server - add an appropriate entry (e.g. public DNS server) in /etc/resolv.conf, eg. by (as root):
echo "nameserver 9.9.9.9" > /etc/resolv.conf
A script may help to automize this process.
The status LED (default: GPIO2) indicates:
- permanently on: not connected (initial state after boot)
- permanently off: connected (or SoftAP active), no traffic
- rapidly blinking: in- or outgoing traffic
The default config of the router can be overwritten and persistenly saved to flash by using a console interface. This console is available via tcp port 7777 (e.g. from the host attached to the serial line - see above).
The console understands the following command:
- help: prints a short help message
- show [stats]: prints the current config and status
- set ssid|pasword [value]: changes the named config parameter
- set addr [ip-addr]: sets the IP address of the SLIP interface (default: 192.168.240.1)
- set speed [80|160]: sets the CPU clock frequency (default: 160)
- set bitrate [bitrate]: sets the serial bitrate to a new value
- portmap add [TCP|UDP] external_port internal_ip internal_port: adds a port forwarding (works in STA mode)
- portmap remove [TCP|UDP] external_port: deletes a port forwarding
- save: saves the current parameters to flash
- quit: terminates a remote session
- reset [factory]: resets the esp and applies the config, optionally resets WiFi params to default values
- lock: locks the current config, changes are not allowed
- unlock [password]: unlocks the config, requires password of the network AP
- scan: does a scan for APs
If you want to enter non-ASCII or special characters you can use HTTP-style hex encoding (e.g. "My%20AccessPoint") or, only on the CLI, as shortcut C-style quotes with backslash (e.g. "My\ AccessPoint"). Both methods will result in a string "My AccessPoint".
You can also turn the sides and make the ESP to work as AP - useful e.g. if you want to connect other devices to a RasPi that has no WiFi interface:
With a Linux-based host start the firmware on the esp, connect it via serial to USB, and use the following commands on the host:
sudo slattach -L -p slip -s 115200 /dev/ttyUSB0&
sudo ifconfig sl0 192.168.240.2 pointopoint 192.168.240.1 up mtu 1500
sudo route add -net 192.168.4.0/24 gw 192.168.240.1
again
telnet 192.168.240.1 7777
gives you terminal access to the ESP as router. On the ESP you then enter:
CMD>set ap_ssid <your_ssid>
CMD>set ap_password <your_pw>
CMD>set use_ap 1
CMD>save
CMD>reset
Now STAs of this AP get IP adresses in the 192.168.4.0/24 network and can reach the Linux machine as "192.168.240.2". The AP interface is NATed, i.e. you cannot set up connections from the Linux machine to the STAs, but from STAs to Linux works. Useful e.g. if you want to reach an MQTT server on the Linux.
The console understands the following command for the AP mode:
- set use_ap [0|1]: selects, whether the esp_slip_router uses an STA interface (use_ap = 0, default) or an AP interface (use_ap = 1)
- set [ap_ssid|ap_password] value: changes the settings for the soft-AP of the ESP (for your stations)
- set ap_channel [1-13]: sets the channel of the SoftAP (default 1)
- set ap_open [0|1]: selects, whether the soft-AP uses WPA2-PSK security (ap_open=0, automatic, if an ap_password is set) or open (ap_open=1)
- set ssid_hidden [0|1]: selects, whether the SSID of the soft-AP is hidden (ssid_hidden=1) or visible (ssid_hidden=0, default)
- set max_clients [1-8]: sets the number of STAs that can connct to the SoftAP (limit of the ESP's SoftAP implementation is 8, default)
- set addr_peer [ip-addr]: sets the IP address of the peer of the SLIP interface that is also the default gateway (default: 192.168.240.2)
- set dns [ip-addr]: sets the IP address of the DNS server that is distributed via DHCP (default: 192.168.240.2)
- Speed: 115200 is the max baudrate on many USB ports and the current standard speed. This is SLOW compared to the typical WiFi speeds. This means connectivity via the serial line works, even basic web browsing, but the speed is what you can expect from about 100kB/s... But IoT applications typically use much less bandwidth, also terminal access is fine.
- A configuration to enable hardware flow control (RTS/CTS) is available in include/driver/uart.h. Sassa0 recompiled with UART_HW_RTS 1 and UART_HW_CTS 1. In that case slattach does not work anymore with it, even with removing the -L argument, however it does work in the Amiga with hardware flow control enabled (known to work with up to 57600 bauds). See issue #16.
- If you are just interested in the SLIP interface as a basis for you own projects, you might have a look into the user_simple directory. It contains a minimal version of the router with no config console.
Copyright (C) 2020 Richard Bettridge under GPLv3 license.
based on https://github.com/RolandJuno/esp8266_modem Copyright (C) 2016 Paul Rickards rickards@gmail.com under GPLv3 license.
based on https://github.com/jsalin/esp8266_modem Copyright (C) 2015 Jussi Salin salinjus@gmail.com under GPLv3 license.
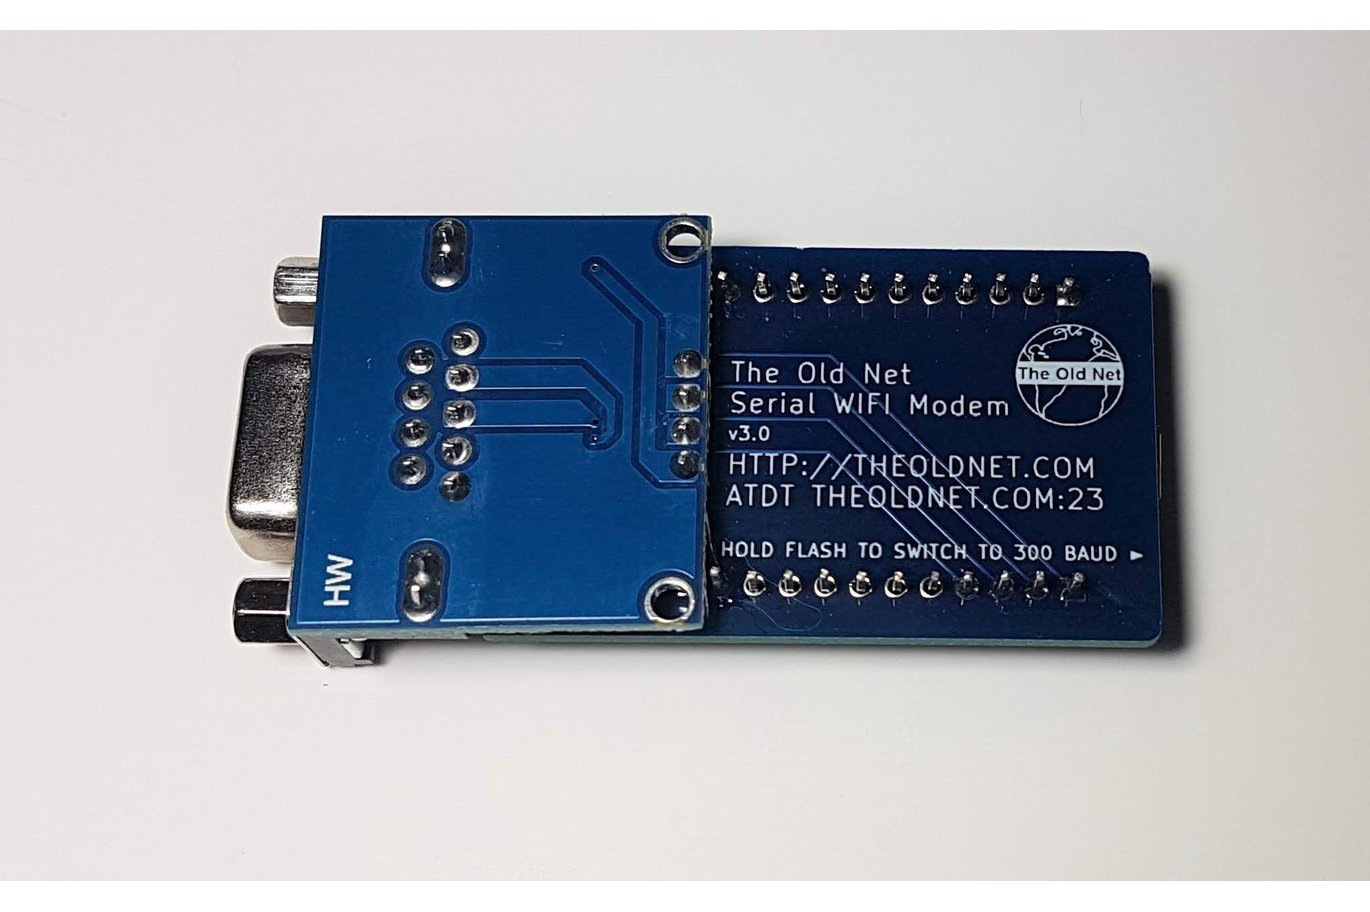
I make these modems on a custom PCB for a reasonable price. I try to keep the shipping low and the modem always in stock. You can get one at TheOldNet Store
Read the docs that ship with the modem here https://github.com/ssshake/vintage-computer-wifi-modem/blob/master/docs/Wifi%20Modem%20Welcome%20Guide.pdf
I created this document showing the pin mappings for various systems which do not have a DE/DB9 port. Thanks to members of the community for verifying these pinouts!
You can reference this to make your own custom cables https://github.com/ssshake/vintage-computer-wifi-modem/blob/master/docs/pin-mapping.md
To flash the firmware you need three things:
-
This firmware file: https://github.com/ssshake/vintage-computer-wifi-modem/raw/master/firmware/theoldnet_serial_wifi_modem/theoldnet_serial_wifi_modem.ino.nodemcu.bin
-
This program: https://github.com/esphome/esphome-flasher/releases/tag/v1.3.0
-
If on windows, this driver: https://www.silabs.com/documents/public/software/CP210x_Universal_Windows_Driver.zip
TheOldNet.com is a set of services which aim to revitalize vintage computers by way of providing network access.
The Serial WIFI Modem Emulator is a RS232 DB9 connection which provides a bridge to the internet over WIFI. This device does not show up like a wifi network card on the old device. Rather it shows up as a Hayes compatible dial up modem. Instead of dialing phone numbers to connect to remote computers, it connects to remote computers via telnet.
This means that you do not need any special software. Any old terminal program works. Instead of dialing a phone number, you "dial" an IP. It's that simple and easy.
- Change baud rate: AT$SB=N (N=300,1200,2400,4800,9600,19200,38400,57600,115200)
- Set WiFi SSID: AT$SSID=YourWiFiSSID
- Set WiFi Password: AT$PASS=YourWiFiPassword
- Connect to WiFi: ATC1
- Save current settigns to NVRAM: AT&W
- Connect by TCP: ATDTsome.bbs.com:23
- Disable telnet command handling: ATNET0
- Get my IP: ATIP
- Make a HTTP GET request: ATGEThttp://host:80/path
- Answer a RING: ATA
- Disconnect: +++ (following a delay of a second)
- Speed Dial: ATDSN (N=0-9)
- Set Speed Dial: AT&ZN=HOST:PORT (N=0-9)
- Complete commands can be found with AT? or ATHELP
Note that the key and port are optional parameters. Port defaults to 23. All parameters are case sensitive, the command itself not. You must always connect to an access point before dialing, otherwise you get an error. When you connect to WIFI you get either OK or ERROR after a while, depending on if it succeeded. If you get ERROR the connection might still occur by itself some time later, in case you had a slow AP or slow DHCP server in the network. When dialing, you get either CONNECT when successfully connected or ERROR if the connection couldn't be made. Reasons can be that the remote service is down or the host name is mistyped.
Default Baud rate is defined in the code as 300. 2400 is safe for C64 and 19200 for any PC and Amiga. 115200 for PC's with "new" 16550 UART. You must always have that default rate on the terminal when powering on. After giving a command for a higher rate nothing is replied, just switch to the new baud rate in your terminal as well. Then you can give next command in the new baud rate. Note that the first command after switching baud rate might fail because the serial port hardware is not fully synchronized yet, so it might be good idea to simply give "AT" command and wait for "ERROR" or "OK" before giving an actual command.
You can always default the baud rate back to 300 baud by pressing and holding the button (GPIO 0 to ground) for 5 seconds until the LED (GPIO 5) flashes fast.
OK
at$ssid=MyWiFiNetwork

OK
at$pass=MyPassword

OK
atc1

CONNECTING TO SSID MyWiFiNetwork......
CONNECTED TO MyWiFiNetwork
IP ADDRESS: 192.168.2.3

OK
atdtbat.org:23
DIALING bat.org:23

CONNECT 2400


           ^_                                   _^
          /  \__________   /\___/\   __________/  \
         /              \  \     /  /              \
        /      \   \     \_/ ` ' \_/     /   /      \
       /   _/\  \   \        ---        /   /  /\_   \      Logo by:
      /  _/   \  \   \                 /   /  /   \_  \        Saruman
     / _/      \          _       _          /      \_ \
    /_/         \/\/\/\/\/ \_____/ \/\/\/\/\/         \_\
   //                                                   \\
.       Welcome to BatMUD, Online since 14th April 1990!
.     EMail: batry@bat.org about problems concerning BatMUD

     This machine is owned by B.A.T. ry, a non-profit organization,
                    and is hosted at Nebula, Finland.