![]()
First steps with TTGO T-Wristband. Product page.
Developed with PlatformIO
Includes a paged interface framework.
Disclaimer: Still work in progress. Currently I'm facing issues regarding battery duration (You can follow the issue in the manufacturer's repo). PRs are welcome.
- Single touch: change page
- Long touch: page action
- Led: Charging status
- CET/CEST time, action: connect to wifi and update via NTP
- UTC time, action: connect to wifi and update via NTP
- Battery status. Action: OTA mode.
- Compass, action: calibrate magnetometer.
- Temperature: from the MPU9250 temp register.
- OTA: long touch to enter OTA mode, to load firmware from PlatformIO.
First of all, install PlatformIO with your favourite IDE (i.e. VSCode). Follow this instructions.
Clone the repo
git clone https://github.com/TioRuben/TTGO-T-Wristband.gitOpen cloned folder with your PlatformIO IDE (in the example, with VSCode)
cd TTGO-T-Wristband
code .
In the first flash, edit platformio.ini and comment all upload config (upload_protocol, upload_port, upload_flags):
Connect wristband via USB with the supplied daughter board. In Windows 10, drivers are installed automatically. I guess with other OS will be automatically installed too.
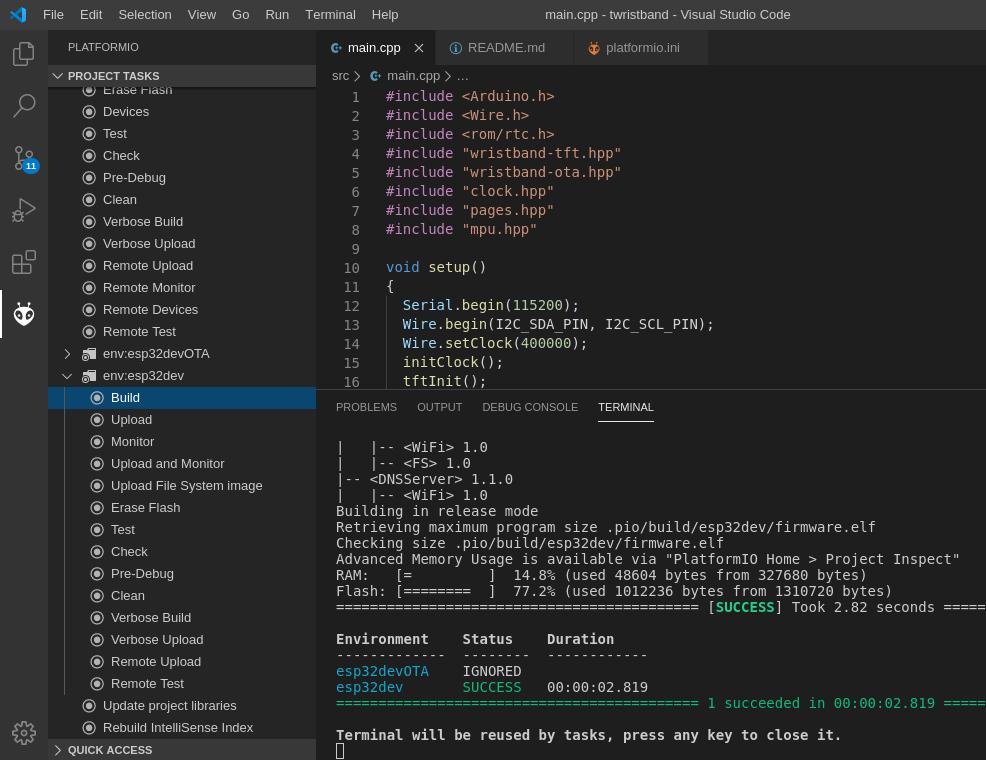
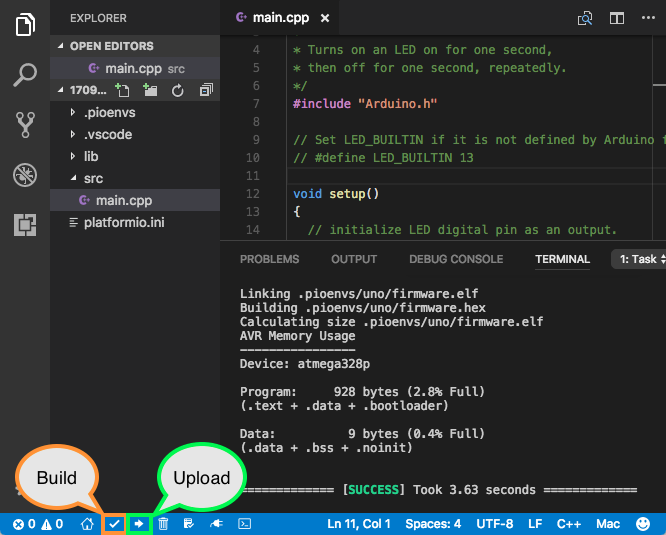
After plugging wristband, please select env variant esp32dev on VisualCode and build it, PlatformIO icon->env:esp32dev->Build:
then, in the same menu, plase select upload.
or build and upload it with the pio command line:
pio run -e esp32dev --target uploadPlatformIO will build and upload the binaries to the TTGO T-Wristband via USB.
After first flashing, you can use OTA upload. First of all, go to battery or OTA page in the wristband. Then maintain the wristband button pressed. If your Wifi is still not configured, you will see an screen asking you to connect to the wristband AP. Connect to It and follow the instructions in the captive portal to configure wifi (more info: WifiManager).
Once configured, you will see the "waiting for ota" message in the screen. Find your wristband IP Address, in your platformio.ini please enter the IP address in the upload_port config:
[...]
[env:esp32devOTA]
platform = espressif32
board = esp32dev
framework = ${common_env_data.framework}
monitor_speed = ${common_env_data.monitor_speed}
upload_protocol = espota
upload_port = [YOUR_IP_ADDRESS]
[...]
It's supposed to work with hostnames, but sometimes fails.
Press the upload button in PlatformIO
or build and upload it with the pio command line:
pio run --target uploadThe project will compile and upload to the wristband via WiFi (OTA).
- UTC Time
- Port ADC calibration from Lilygo example
- Finish compass
- Add magnetometer calibration action
- Add MPU temperature measurement page
- Wake on motion interrupt. Wakes the wristband if big movements (ie when moving the arm to watch the time).
- Refactor page framework to work with RTOS tasks
- Charging animation
- Prevent deep sleep when charging to feedback the charging status (via LED)
- Bluetooth
- "Next appointment" page
- Change lcd brightness depending on day/night time