
![]()
In order to run this application, you need to install Oracle's JDK (Tested with JDK7)
The application uses PostgreSQL as a database engine. In order to get the application up and running you should configure:
- Set environment variable
DATABASE_URLas it's shown in the .env.example file - If your Postgres installation doesn't have SSL support enabled, you must set
TWILIO_DISABLE_DB_SSL=true
$ cp .env.example .envRunning the application will also run the database migrations.
If you already have Gradle installed, you should be able to run the application using gradle bootRun. This will
install all dependencies and build the application. If no other port is specified the app will run in port 8080.
If you don't have gradle installed, you can use the Gradle Wrapper included in this project. Just go to the root directory
of the project and prepend any gradle task with the executable ./gradlew. You can run the application by running
the following command in the root directory of the project:
./gradlew bootRun
If you would like to see request and response content in the console use --debug as follows:
./gradlew bootRun --debugIf you open you browser on http://localhost:8080 you should see the list of questions that were specified in the
survey.json file. Once you have completed totally or partially a survey, you will be able to see the answers here
as well. This is only possible after you have set up your Twilio number to make a request to /survey on your server.
If you want to run the app within IntelliJ, you can follow these steps:
-
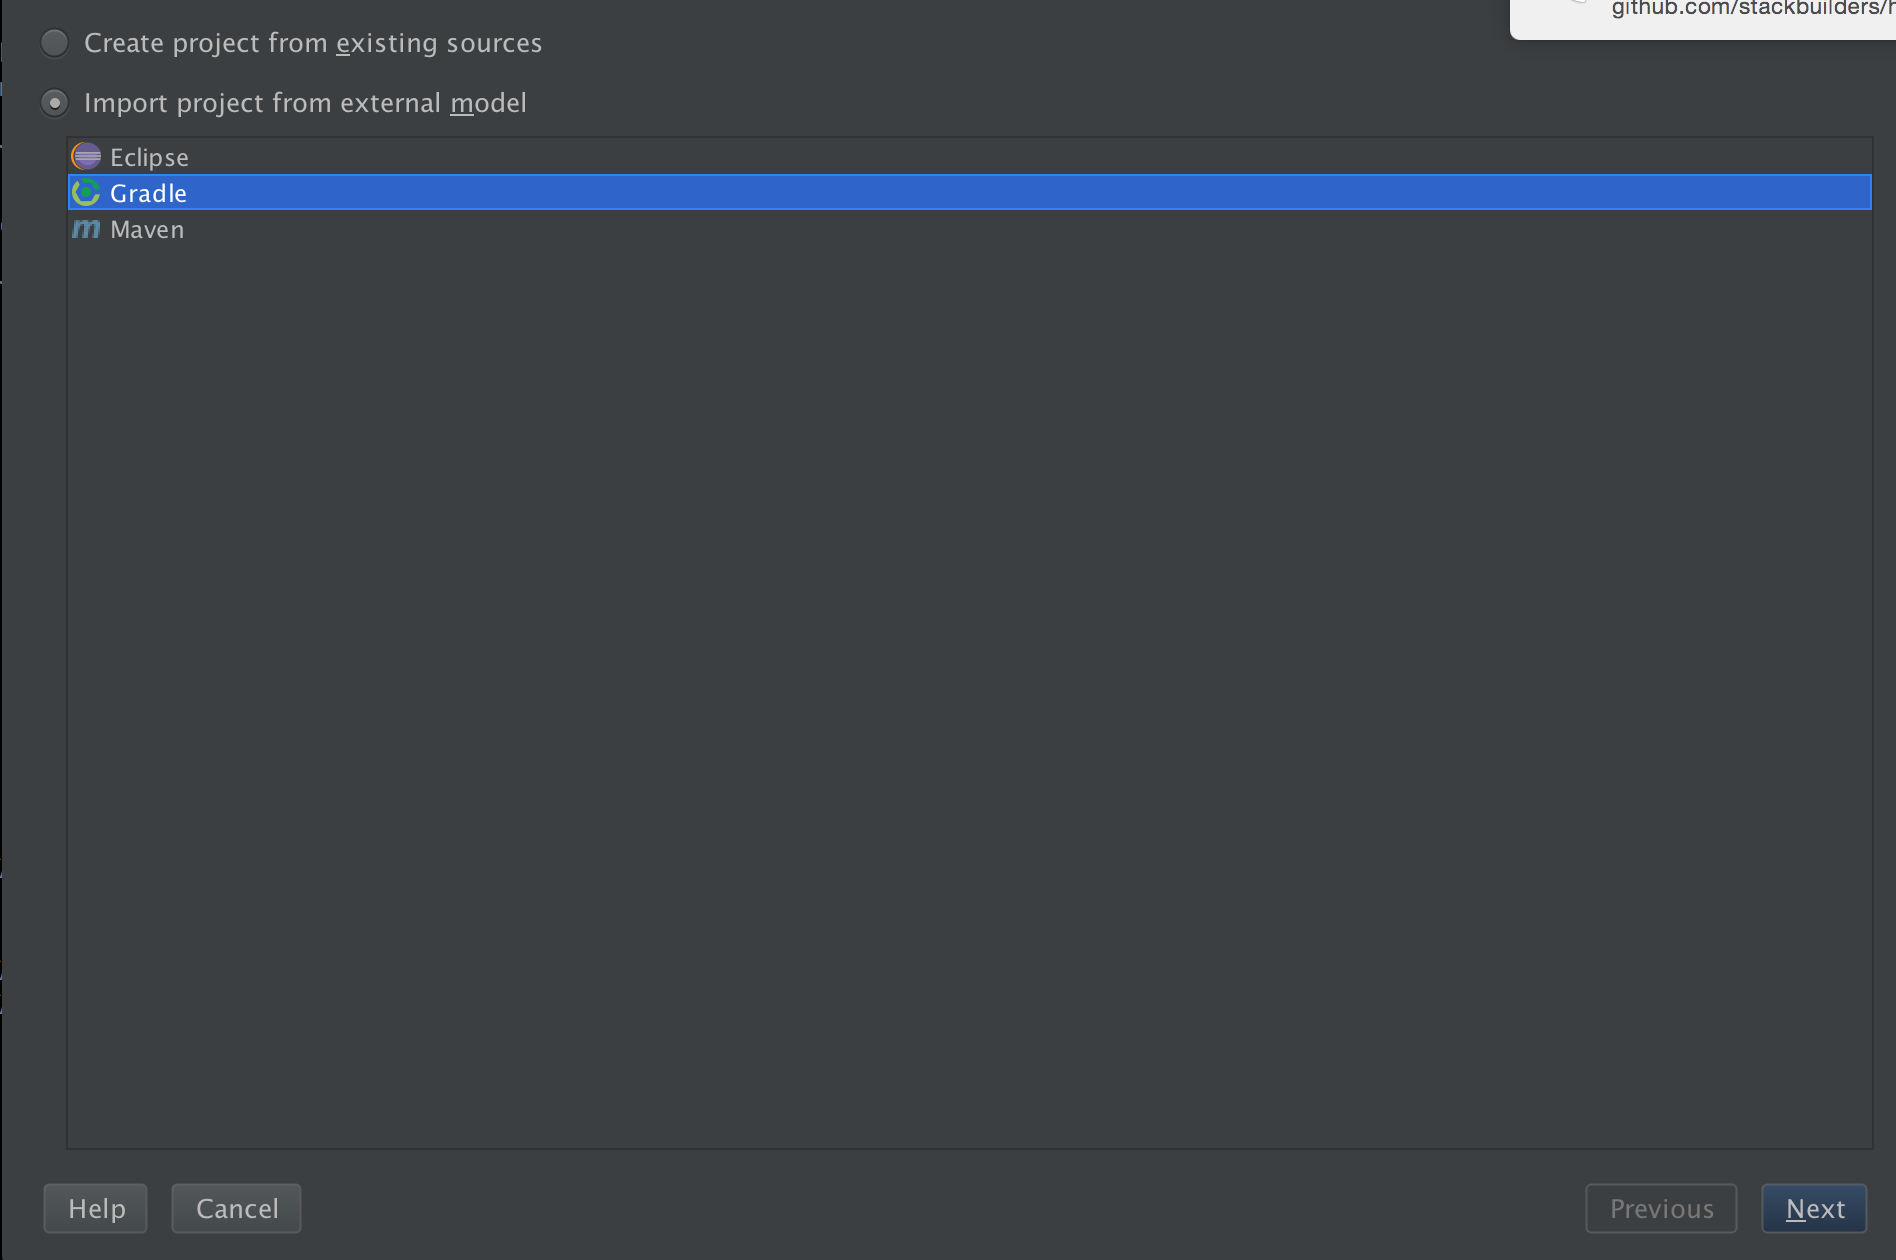
Open IntelliJ and select the import project option. You can either select the directory where you cloned the repository (using git) or the one where you unpacked a copy of the project.
-
Specify that the project your are trying to import is using gradle:
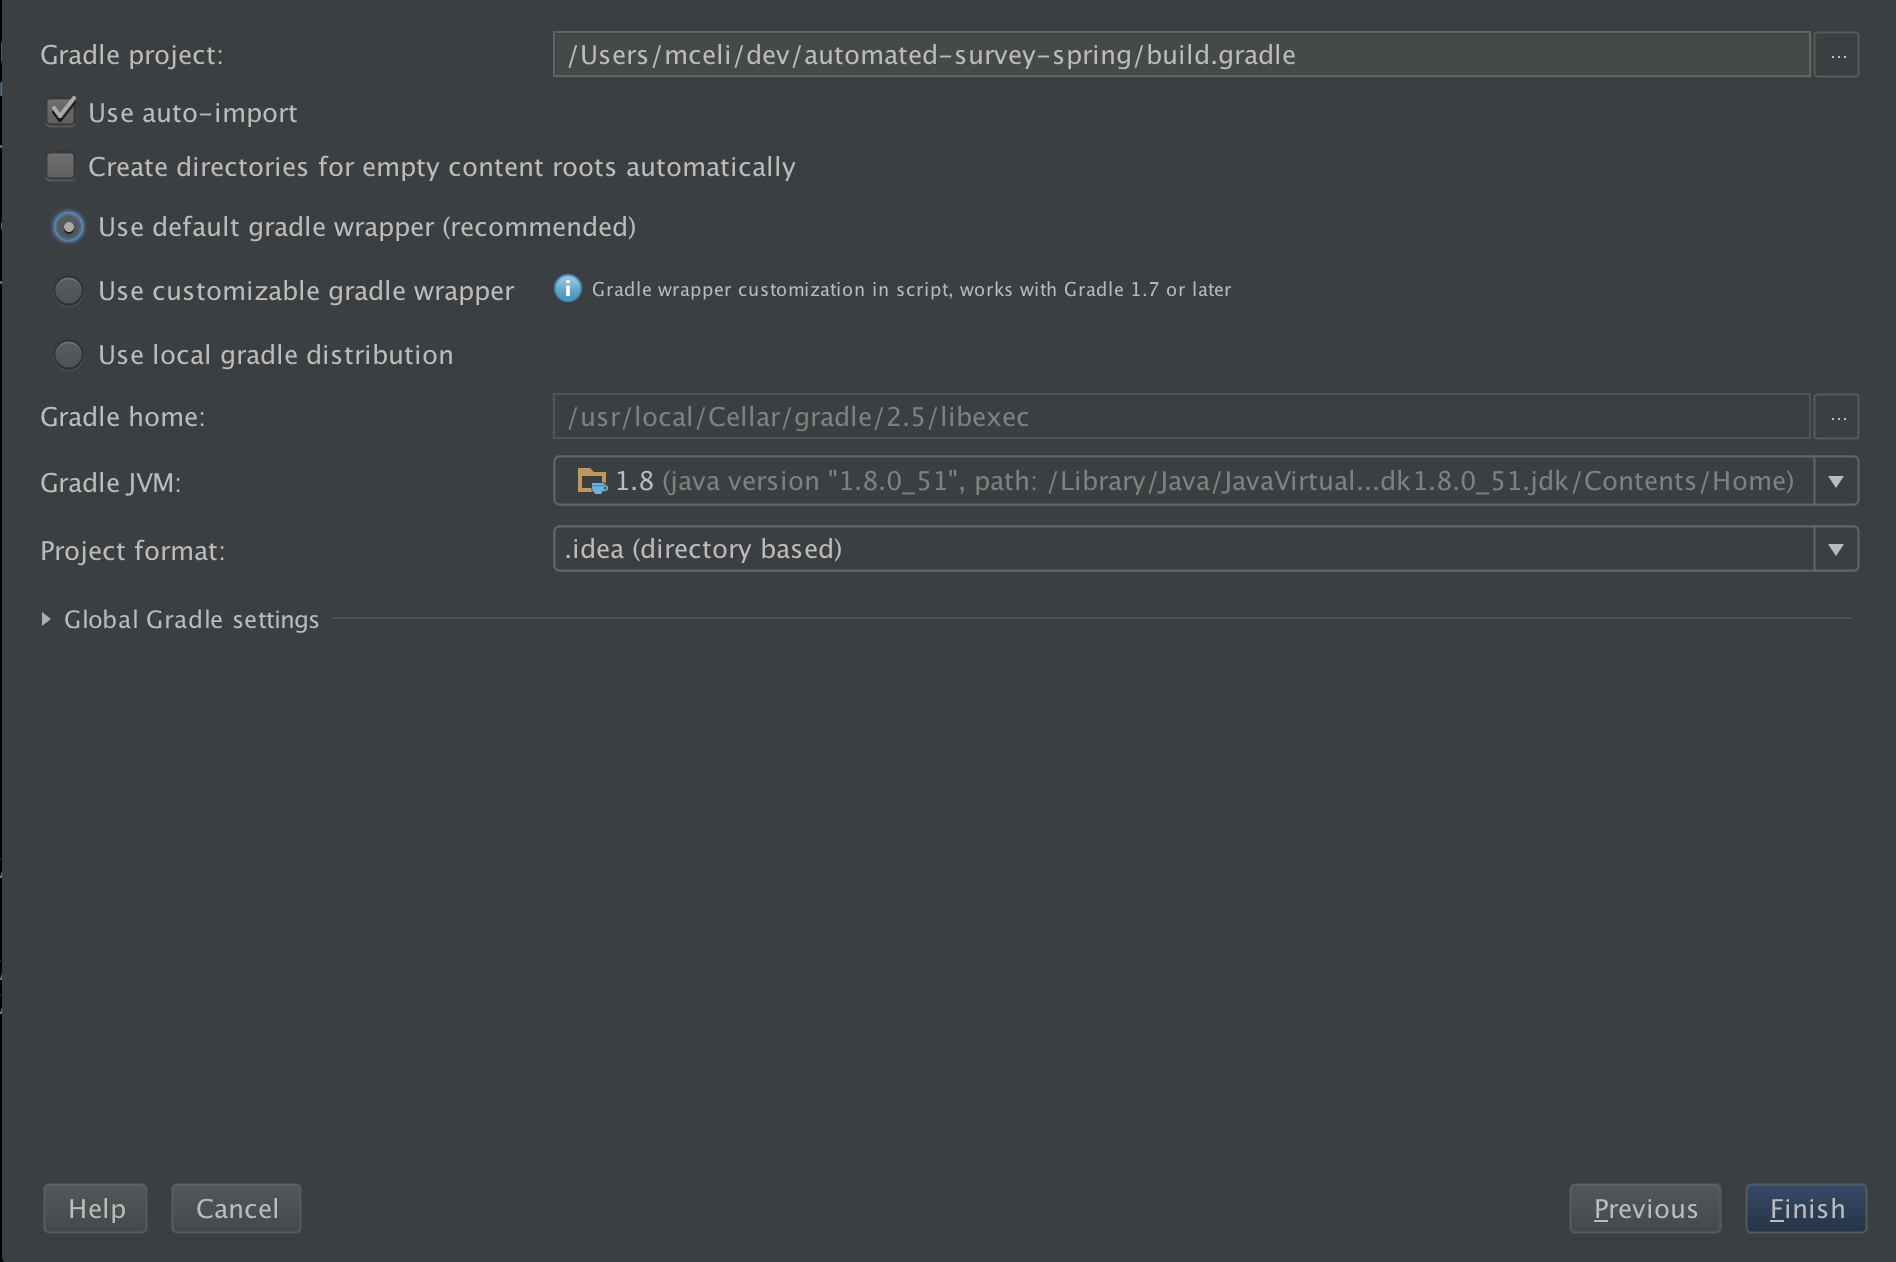
- Configure your project by selecting the options to match what you see on the next screenshot. The Gradle JVM field depends on your local java installation.
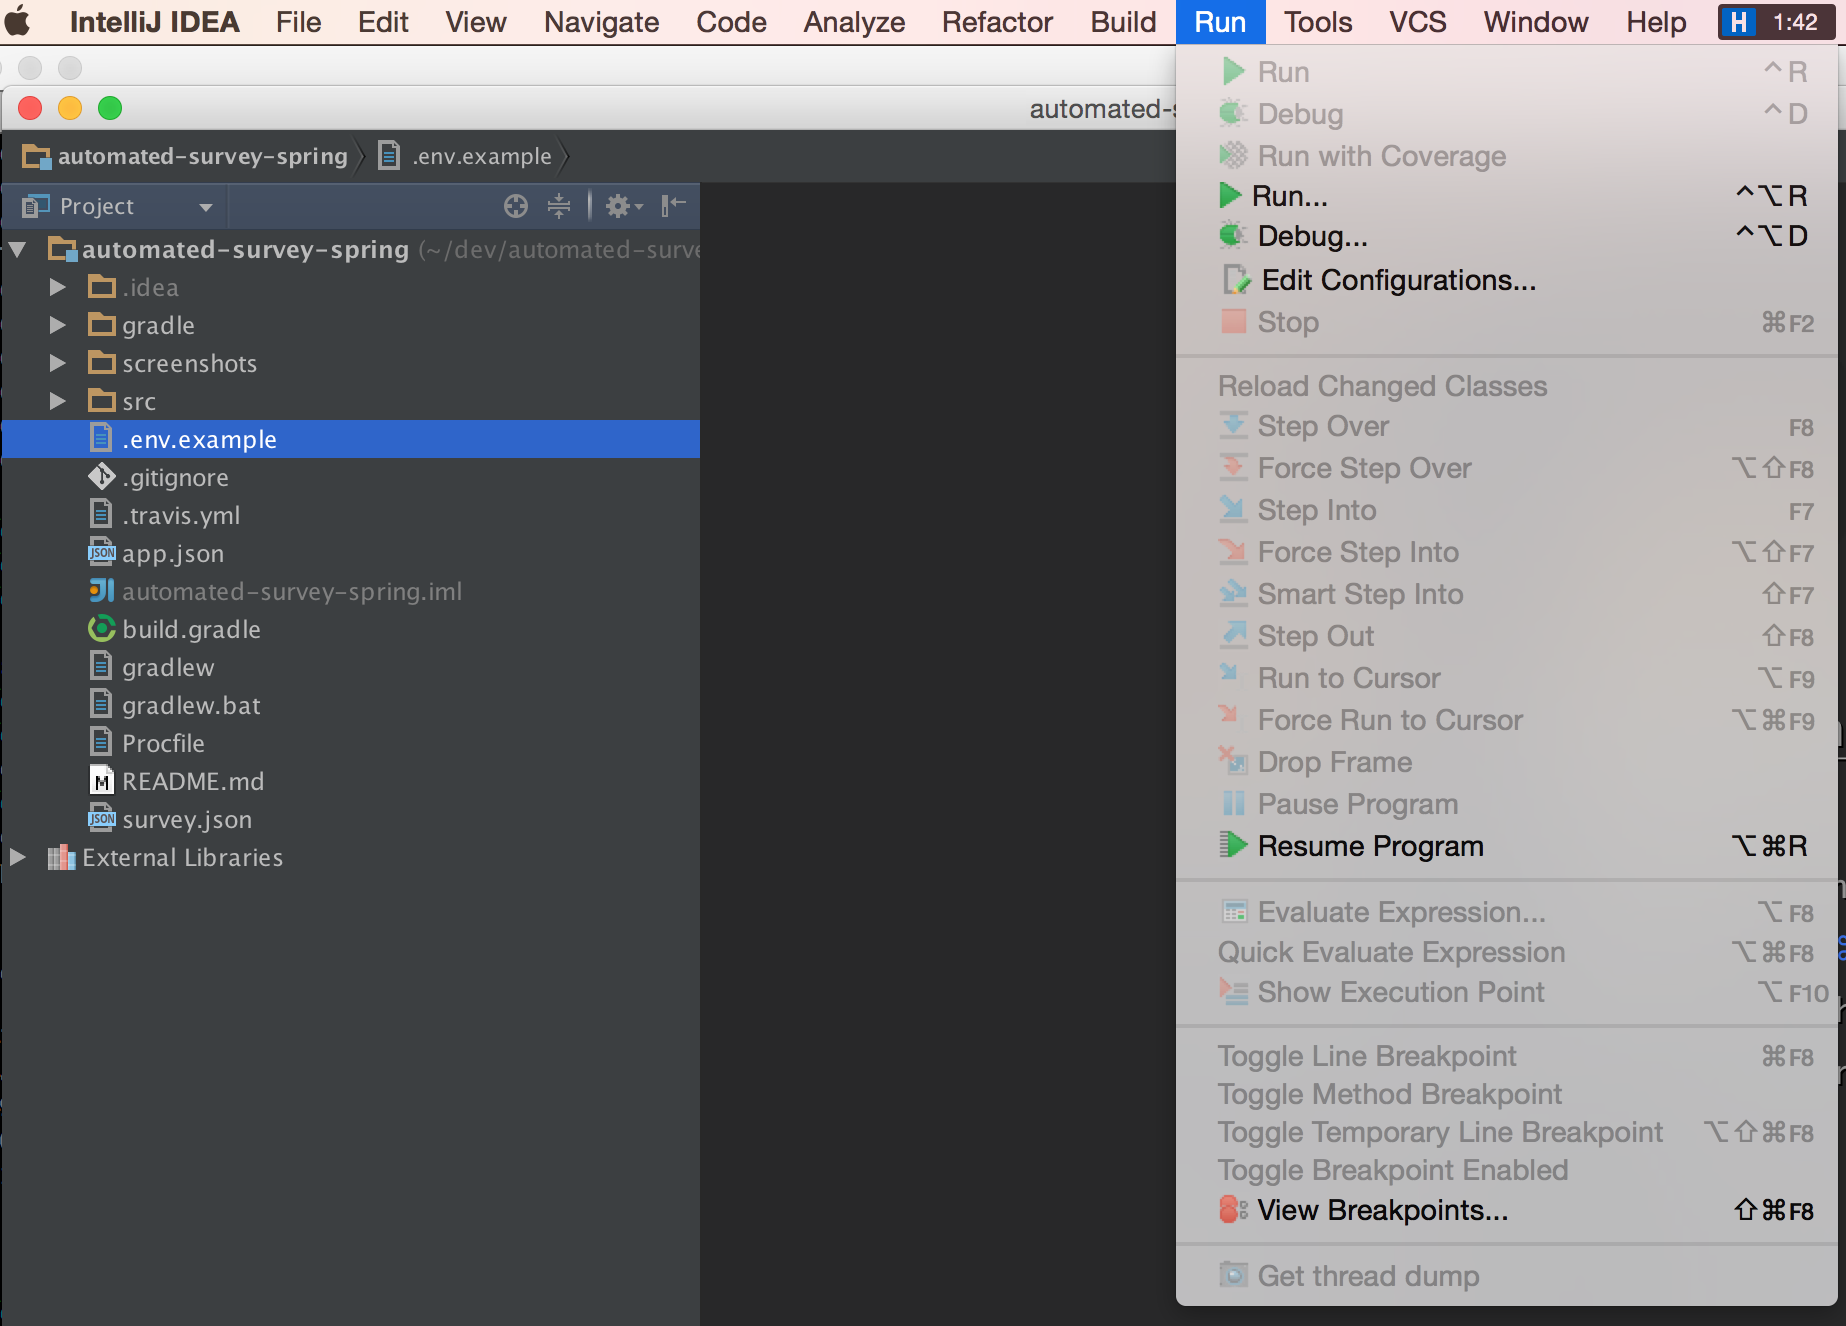
- The project is now imported and all its dependencies should have been already downloaded. The next step
is to configure IntelliJ to run the application. You can do this by clicking the
edit configurationsbutton under the run menu.
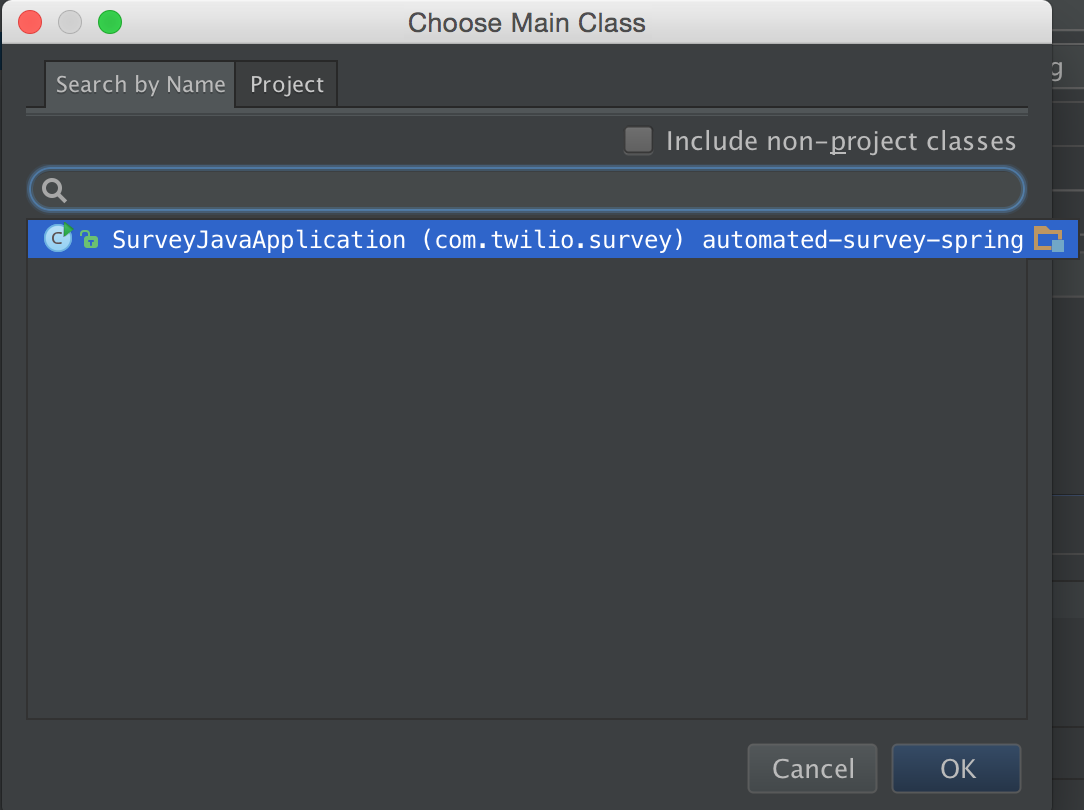
- On this menu select the Application option from the left sidebar. Then you must fill in the necessary information for your application to run as shown on the next screenshots:
- Select the main class for the project.
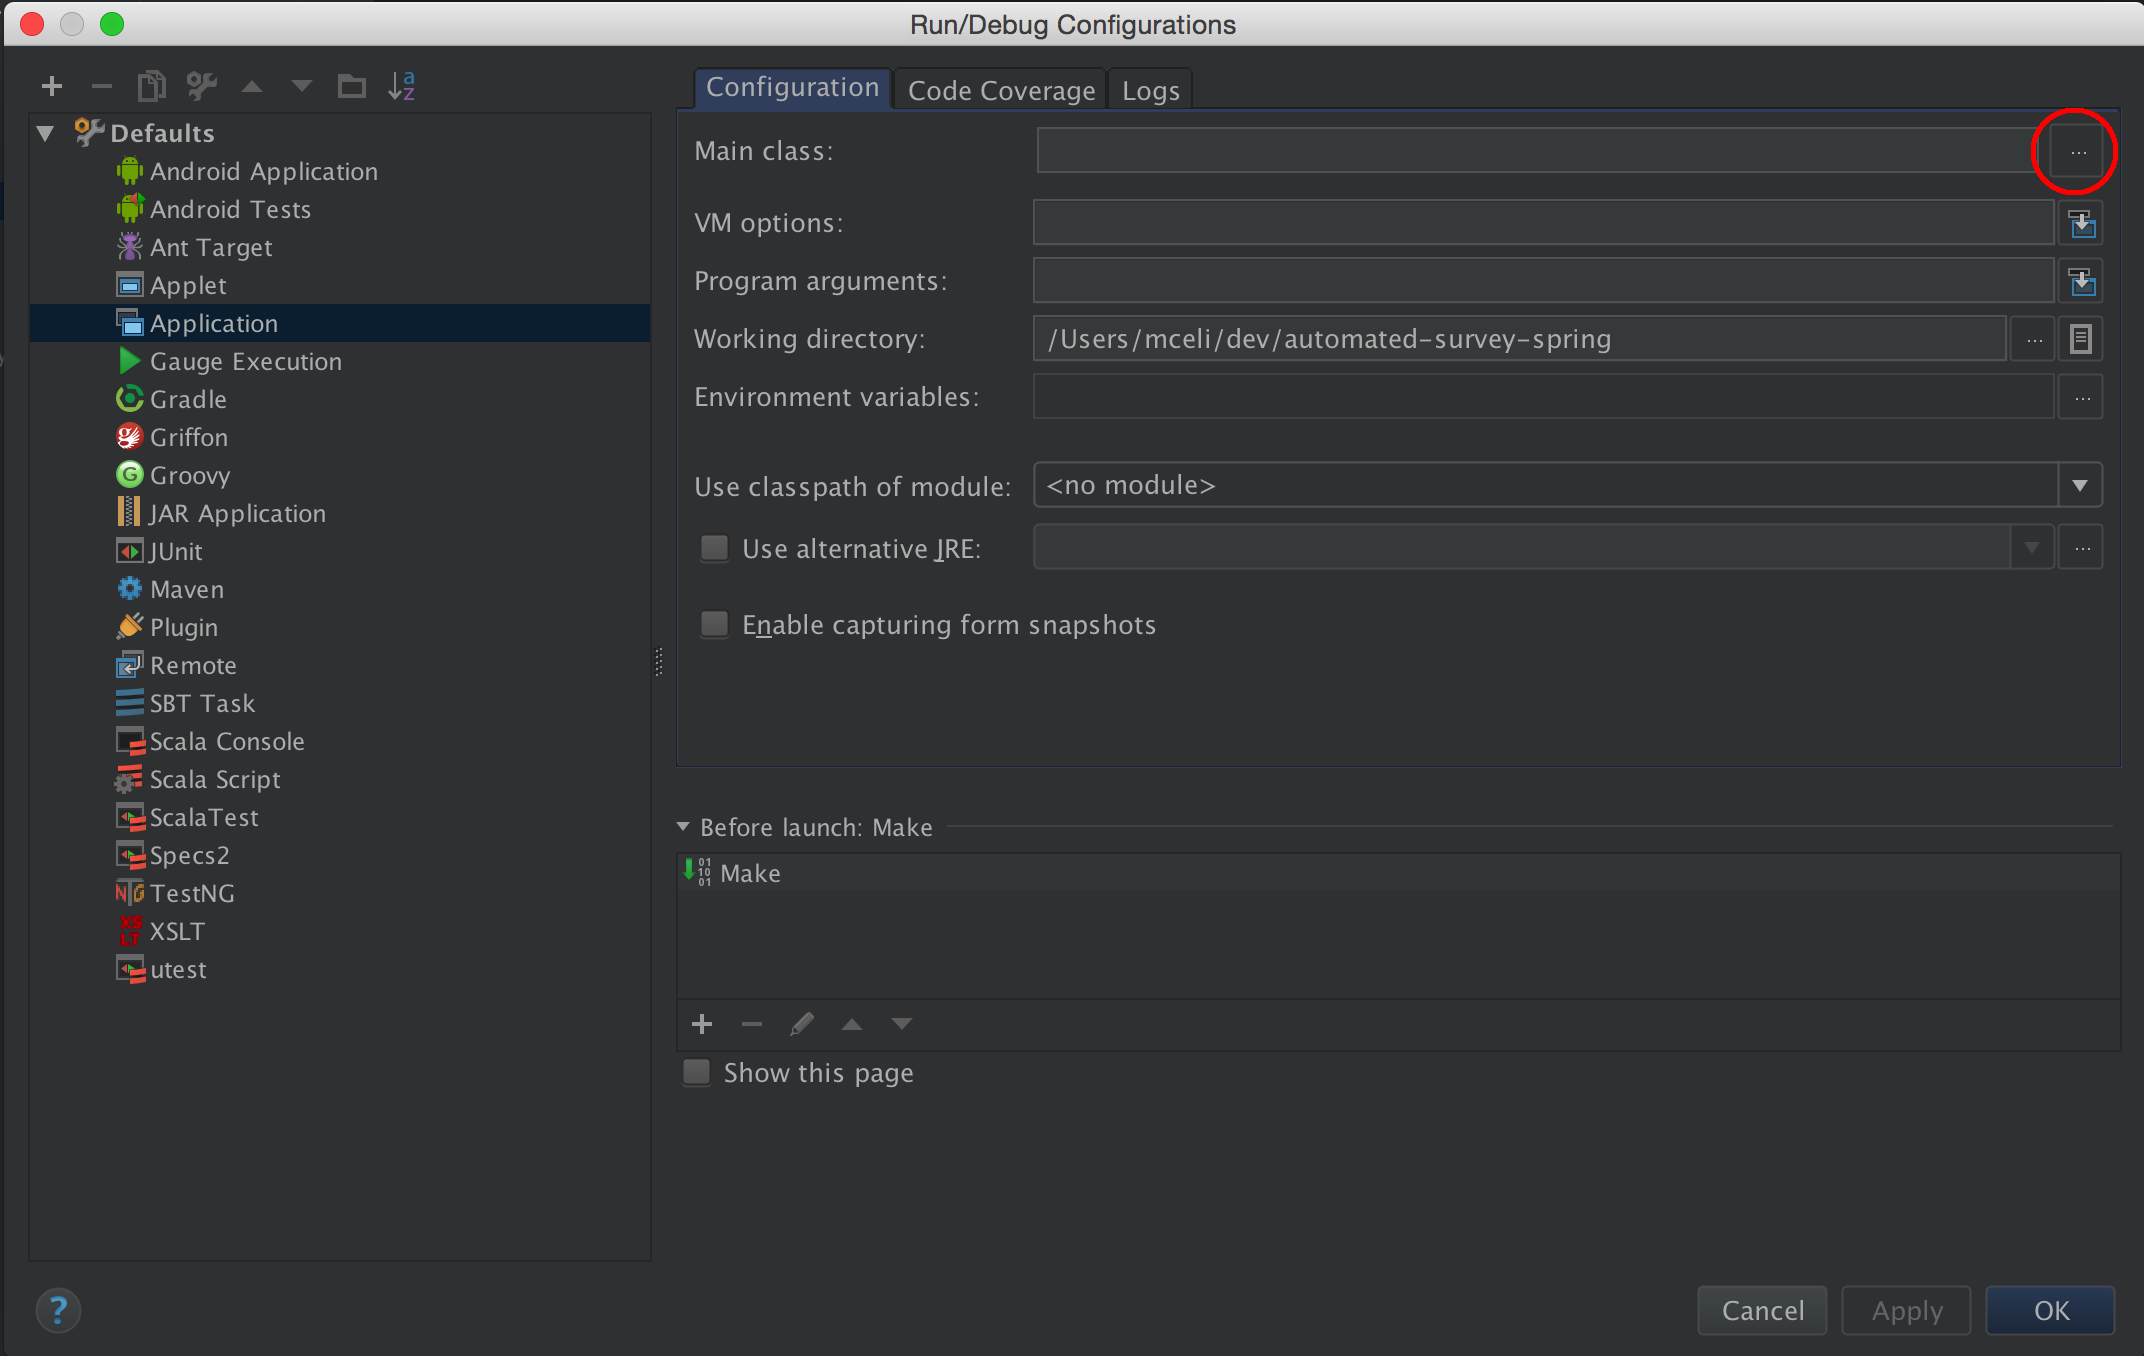
- Set the required environment variables for the application to run.
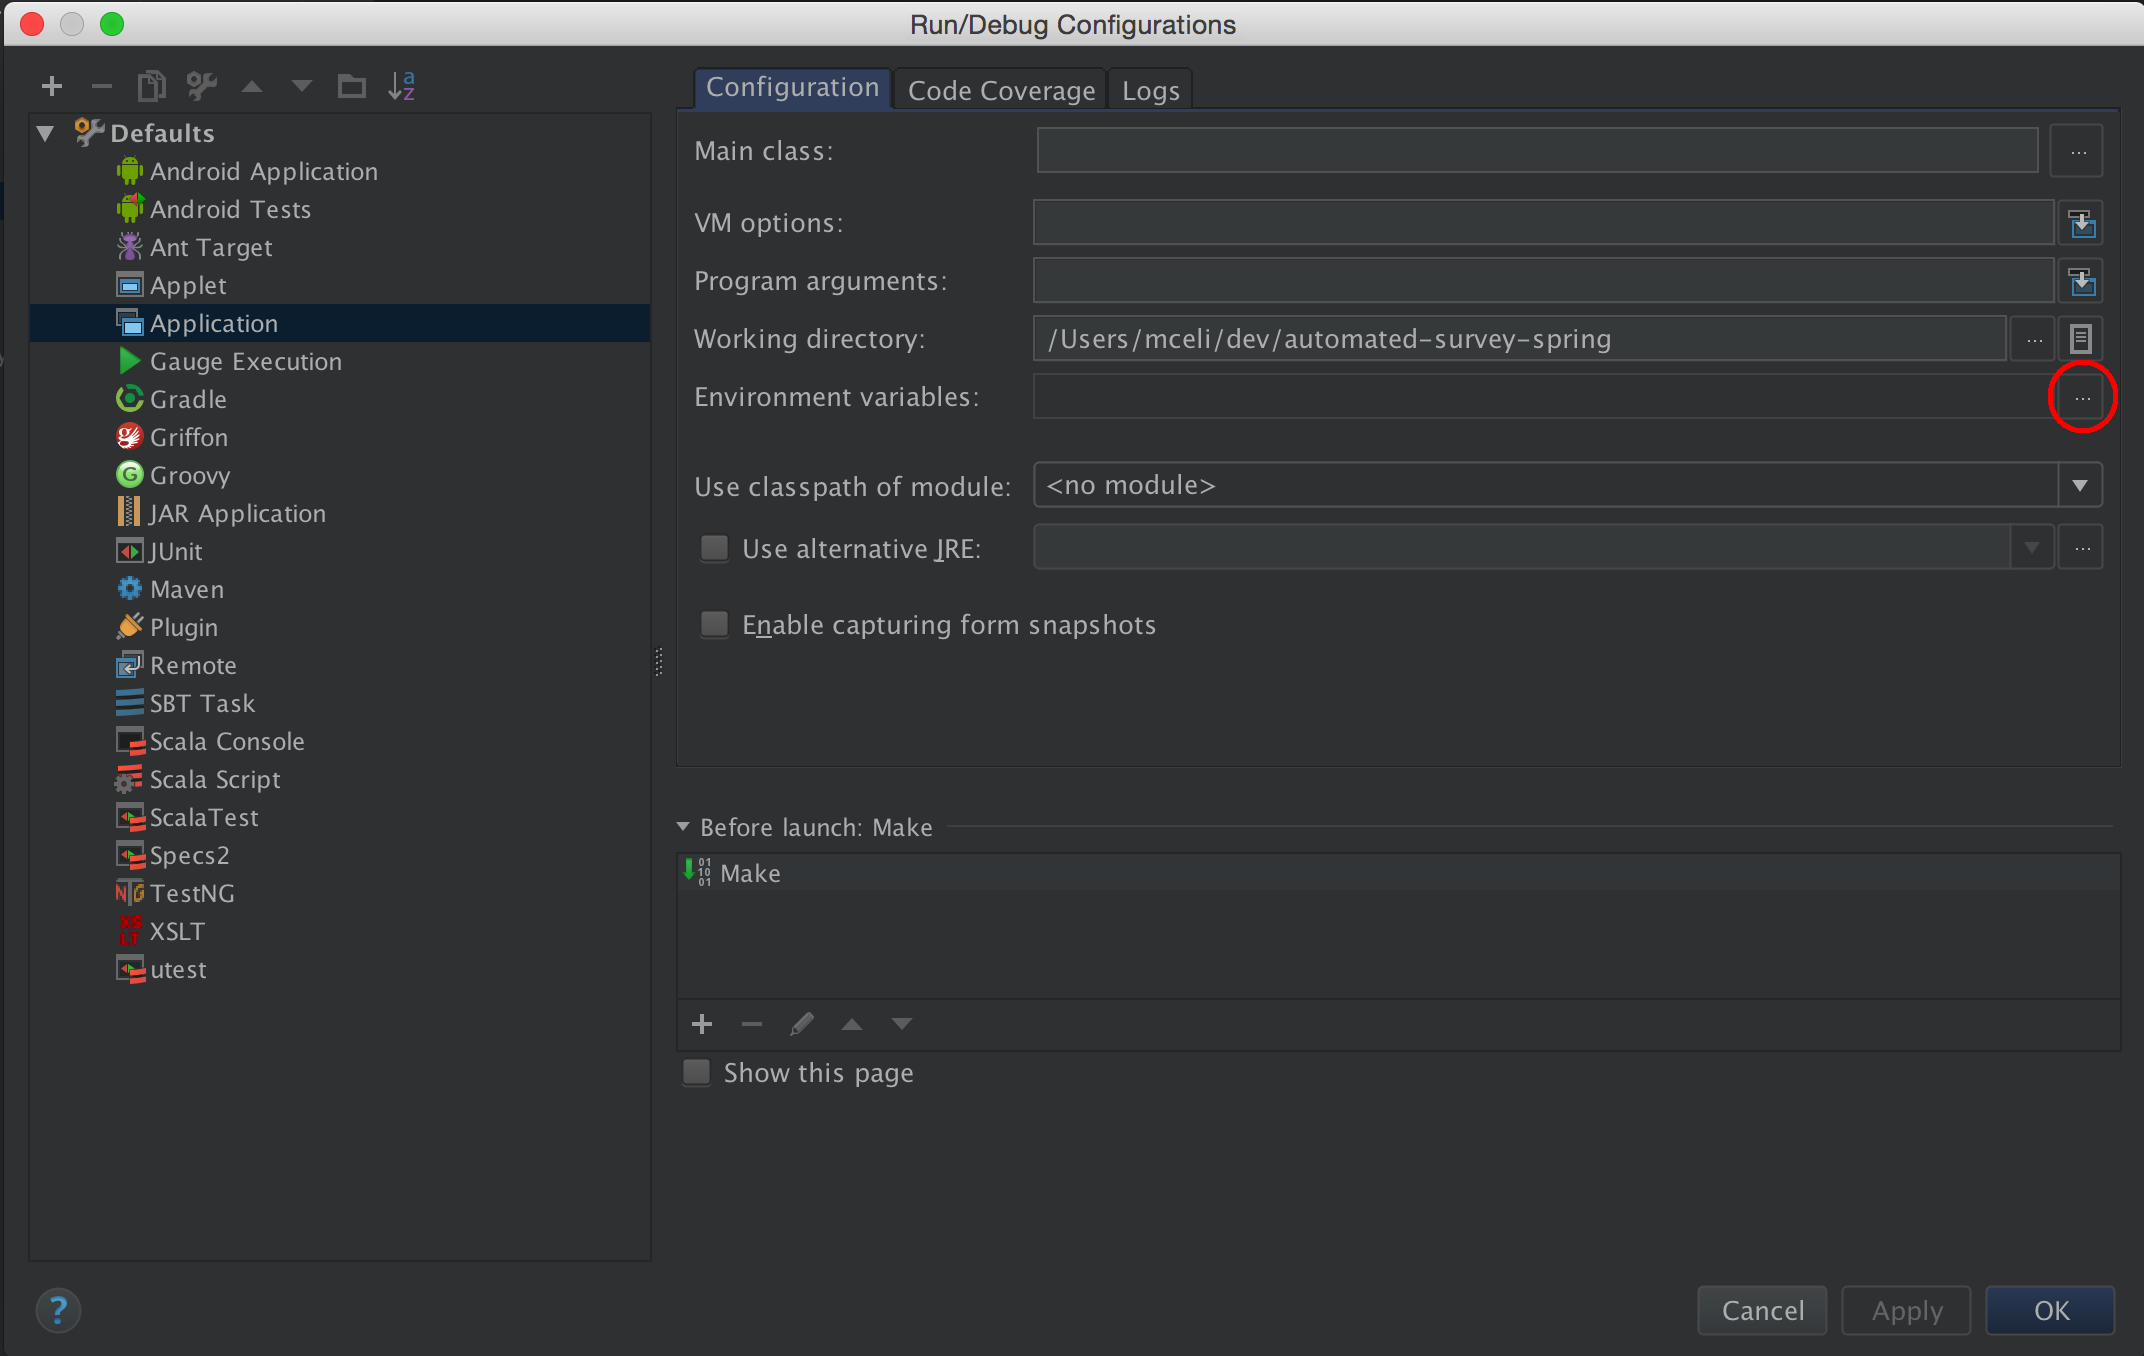
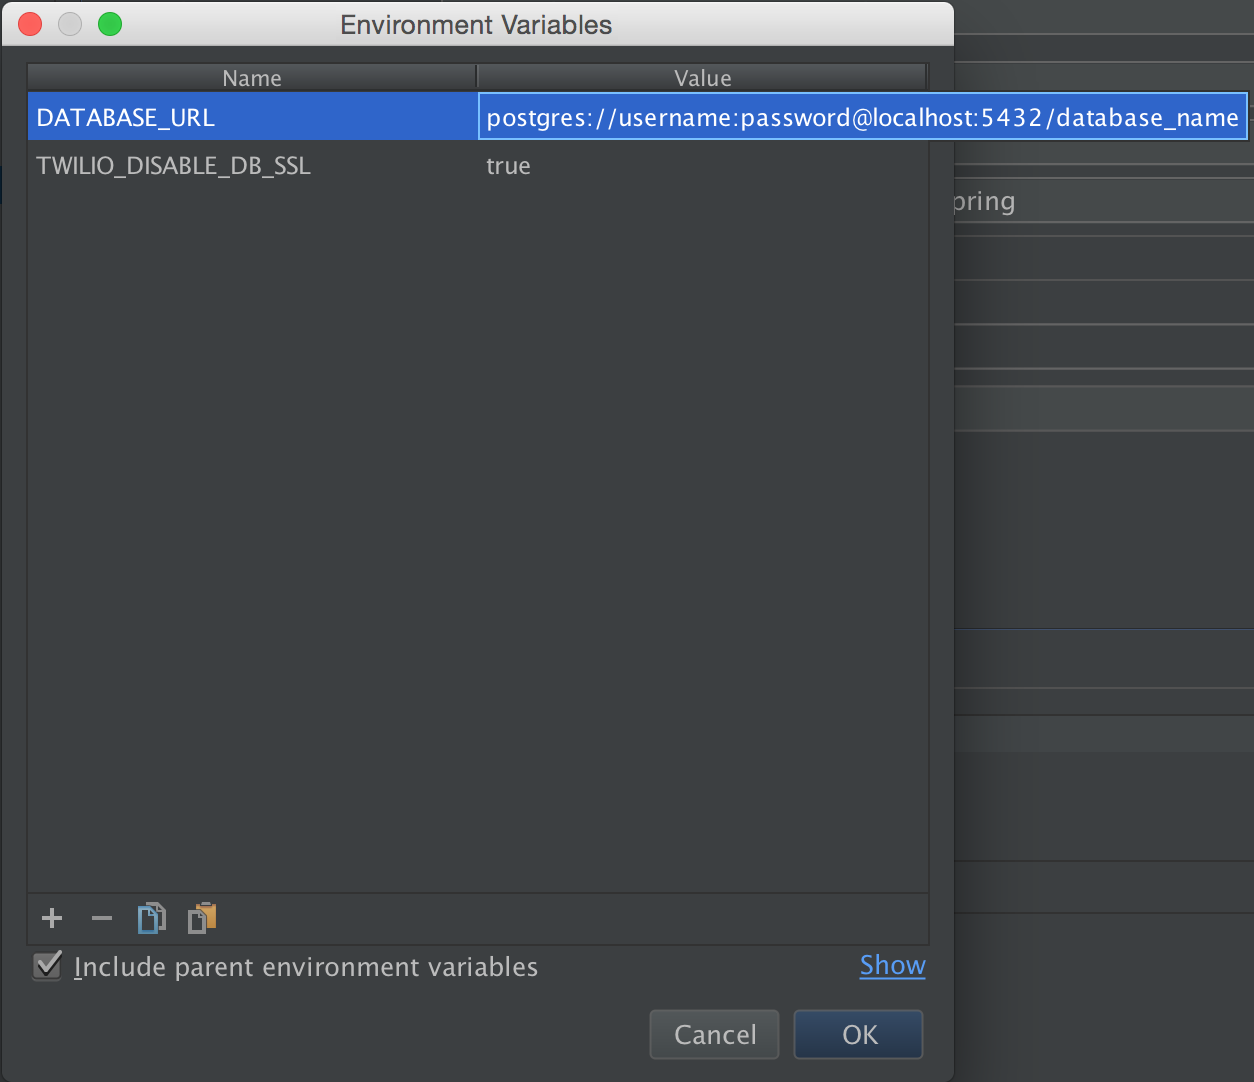
Remember you must set TWILIO_DISABLE_DB_SSL only if your postgres installation doesn't have SSL
enabled. If that's not the case, you can set that variable to false, or simply not set it.
- Your run configuration should look like this:

- The final step is to run the application. You can do this by finding the main class on the project explorer and right click on it. There you can select to run the application.
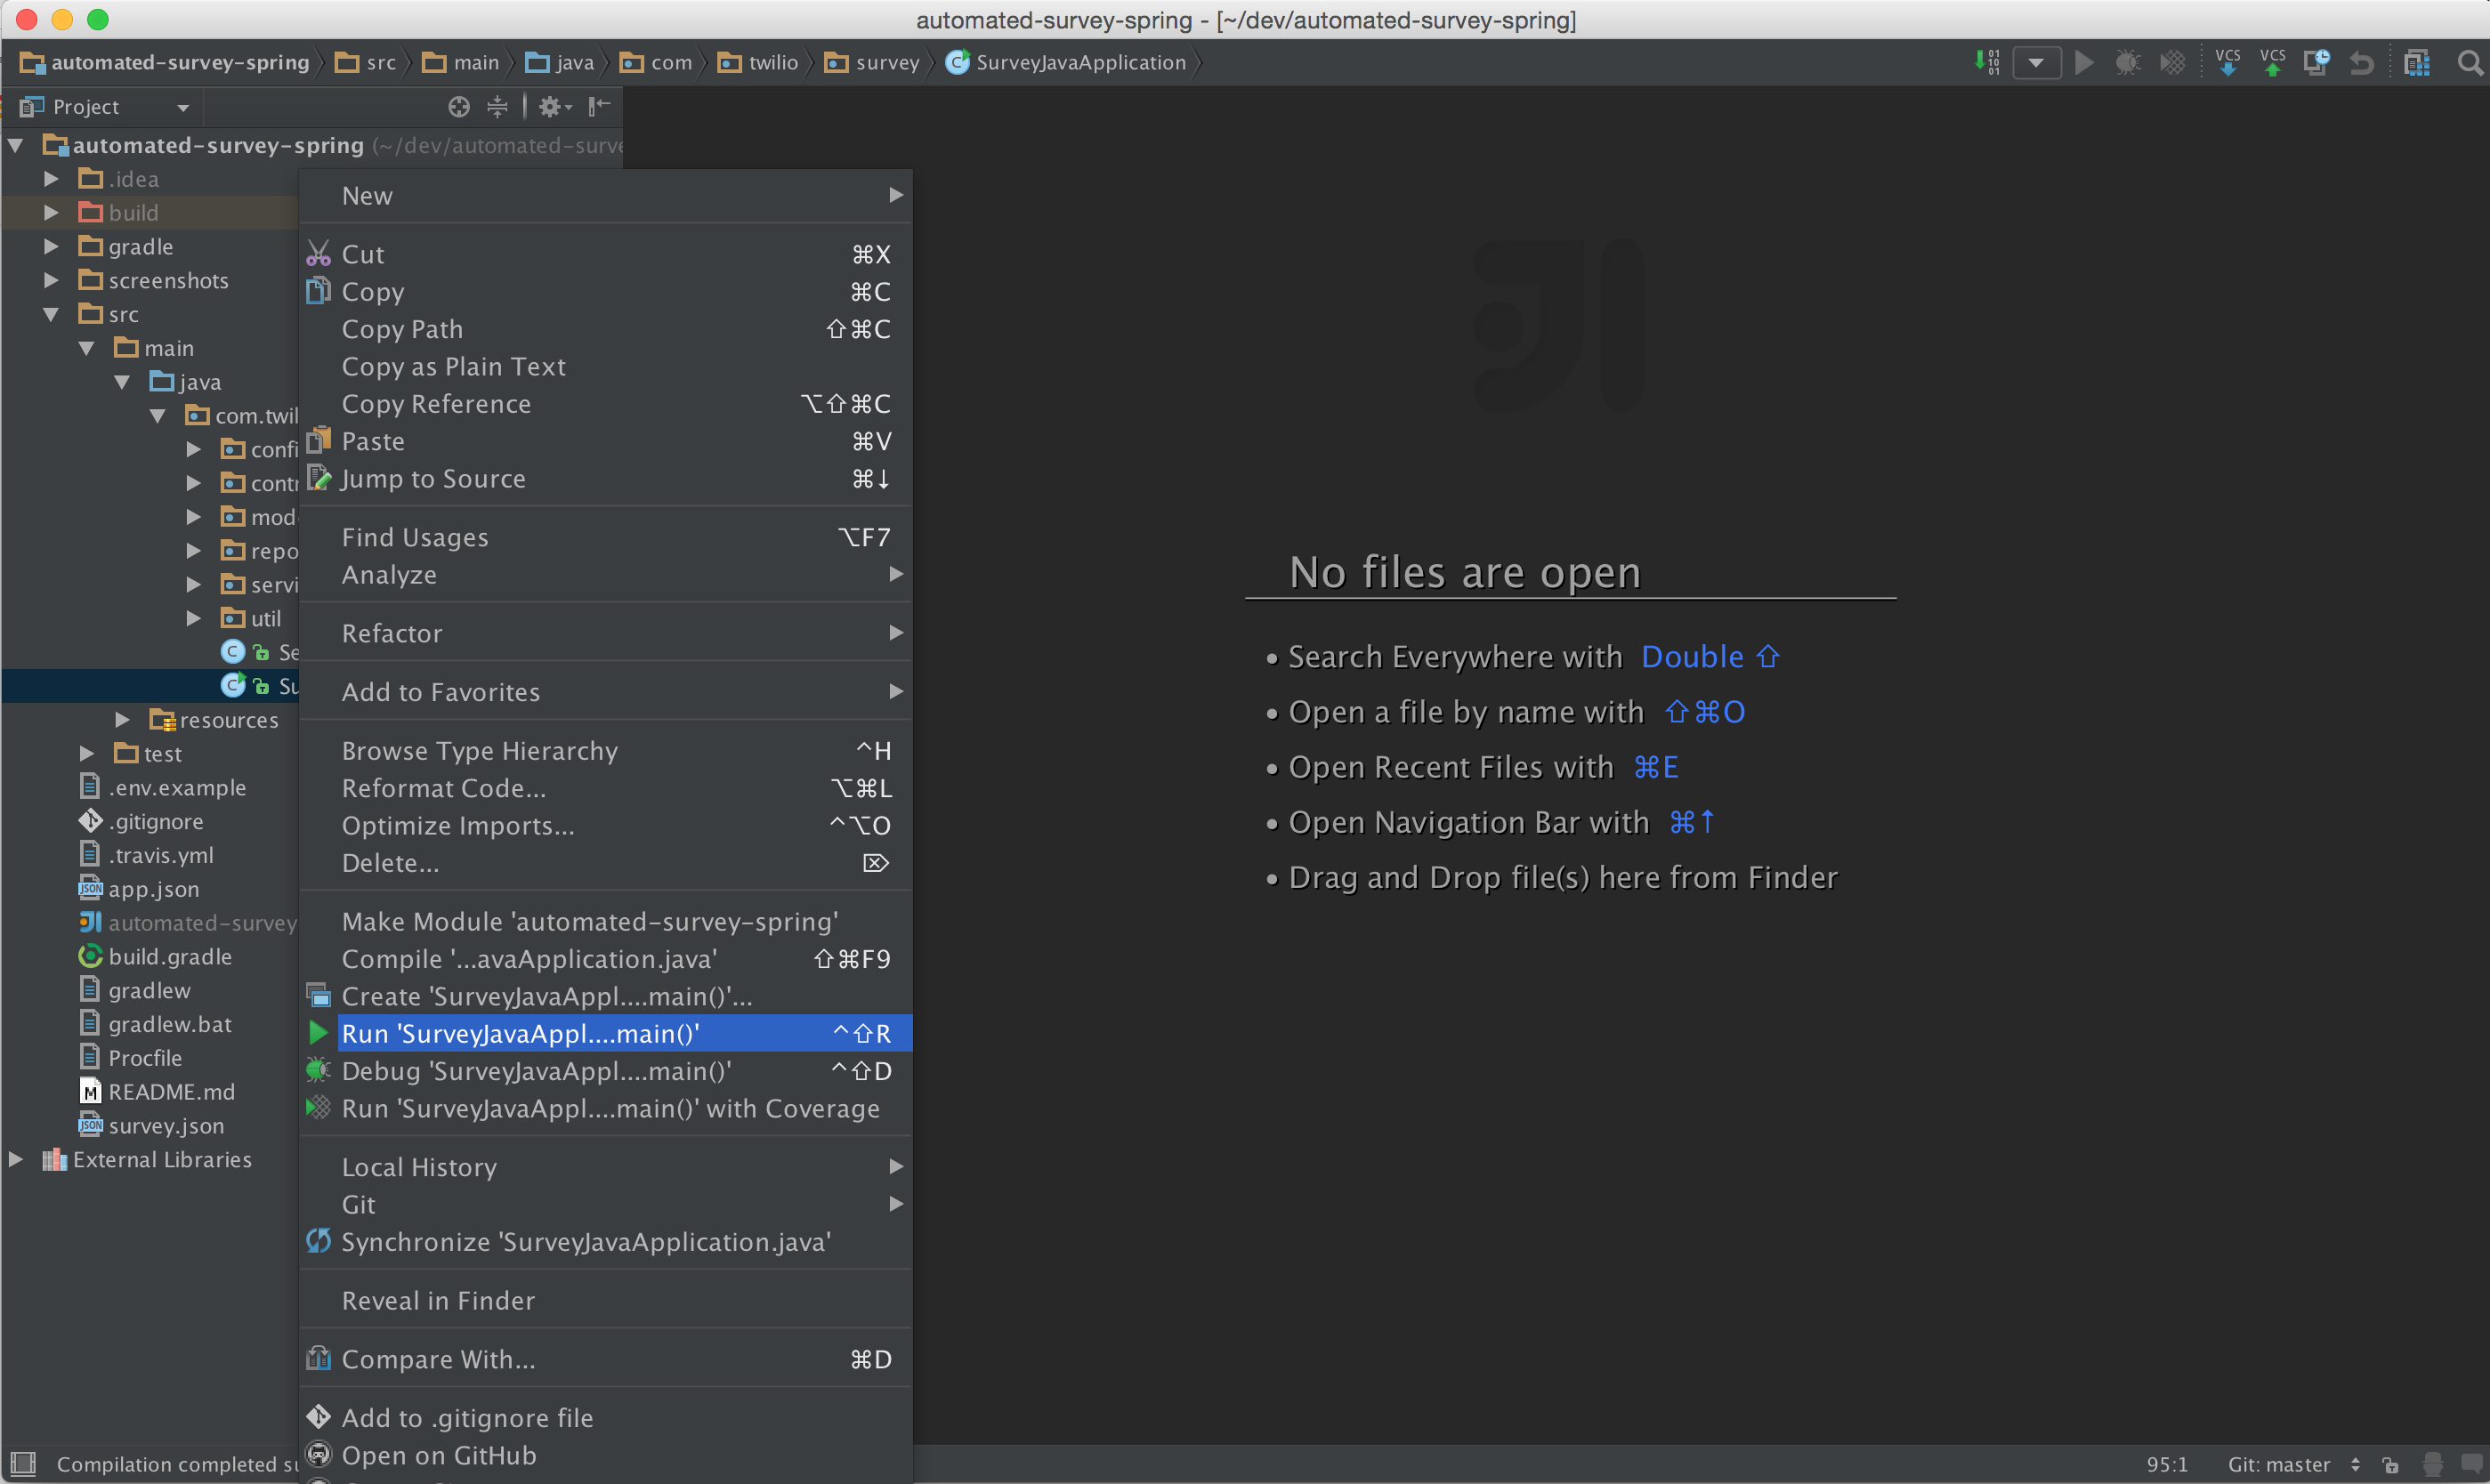
Then you application will be running on port 8080 by default.
There is an eclipse based IDE for Spring app development Spring Tool Suite. You can download this IDE if you want to try the eclipse experience with the app.
If you have an existing eclipse installation, you can install the Spring tool suite from the eclipse market place Spring Tool Suite (STS) for Eclipse. This will allow you to run this spring application with minimal configuration. You will also need a gradle plugin for eclipse as this IDE doesn't support Gradle natively. You can install Buildship Gradle Integration plugin for eclipse directly from the eclipse marketplace.
Once you have these plugins installed, you can import your gradle project from the File menu in
eclipse and follow the steps of importing your project. The only thing left to do is to
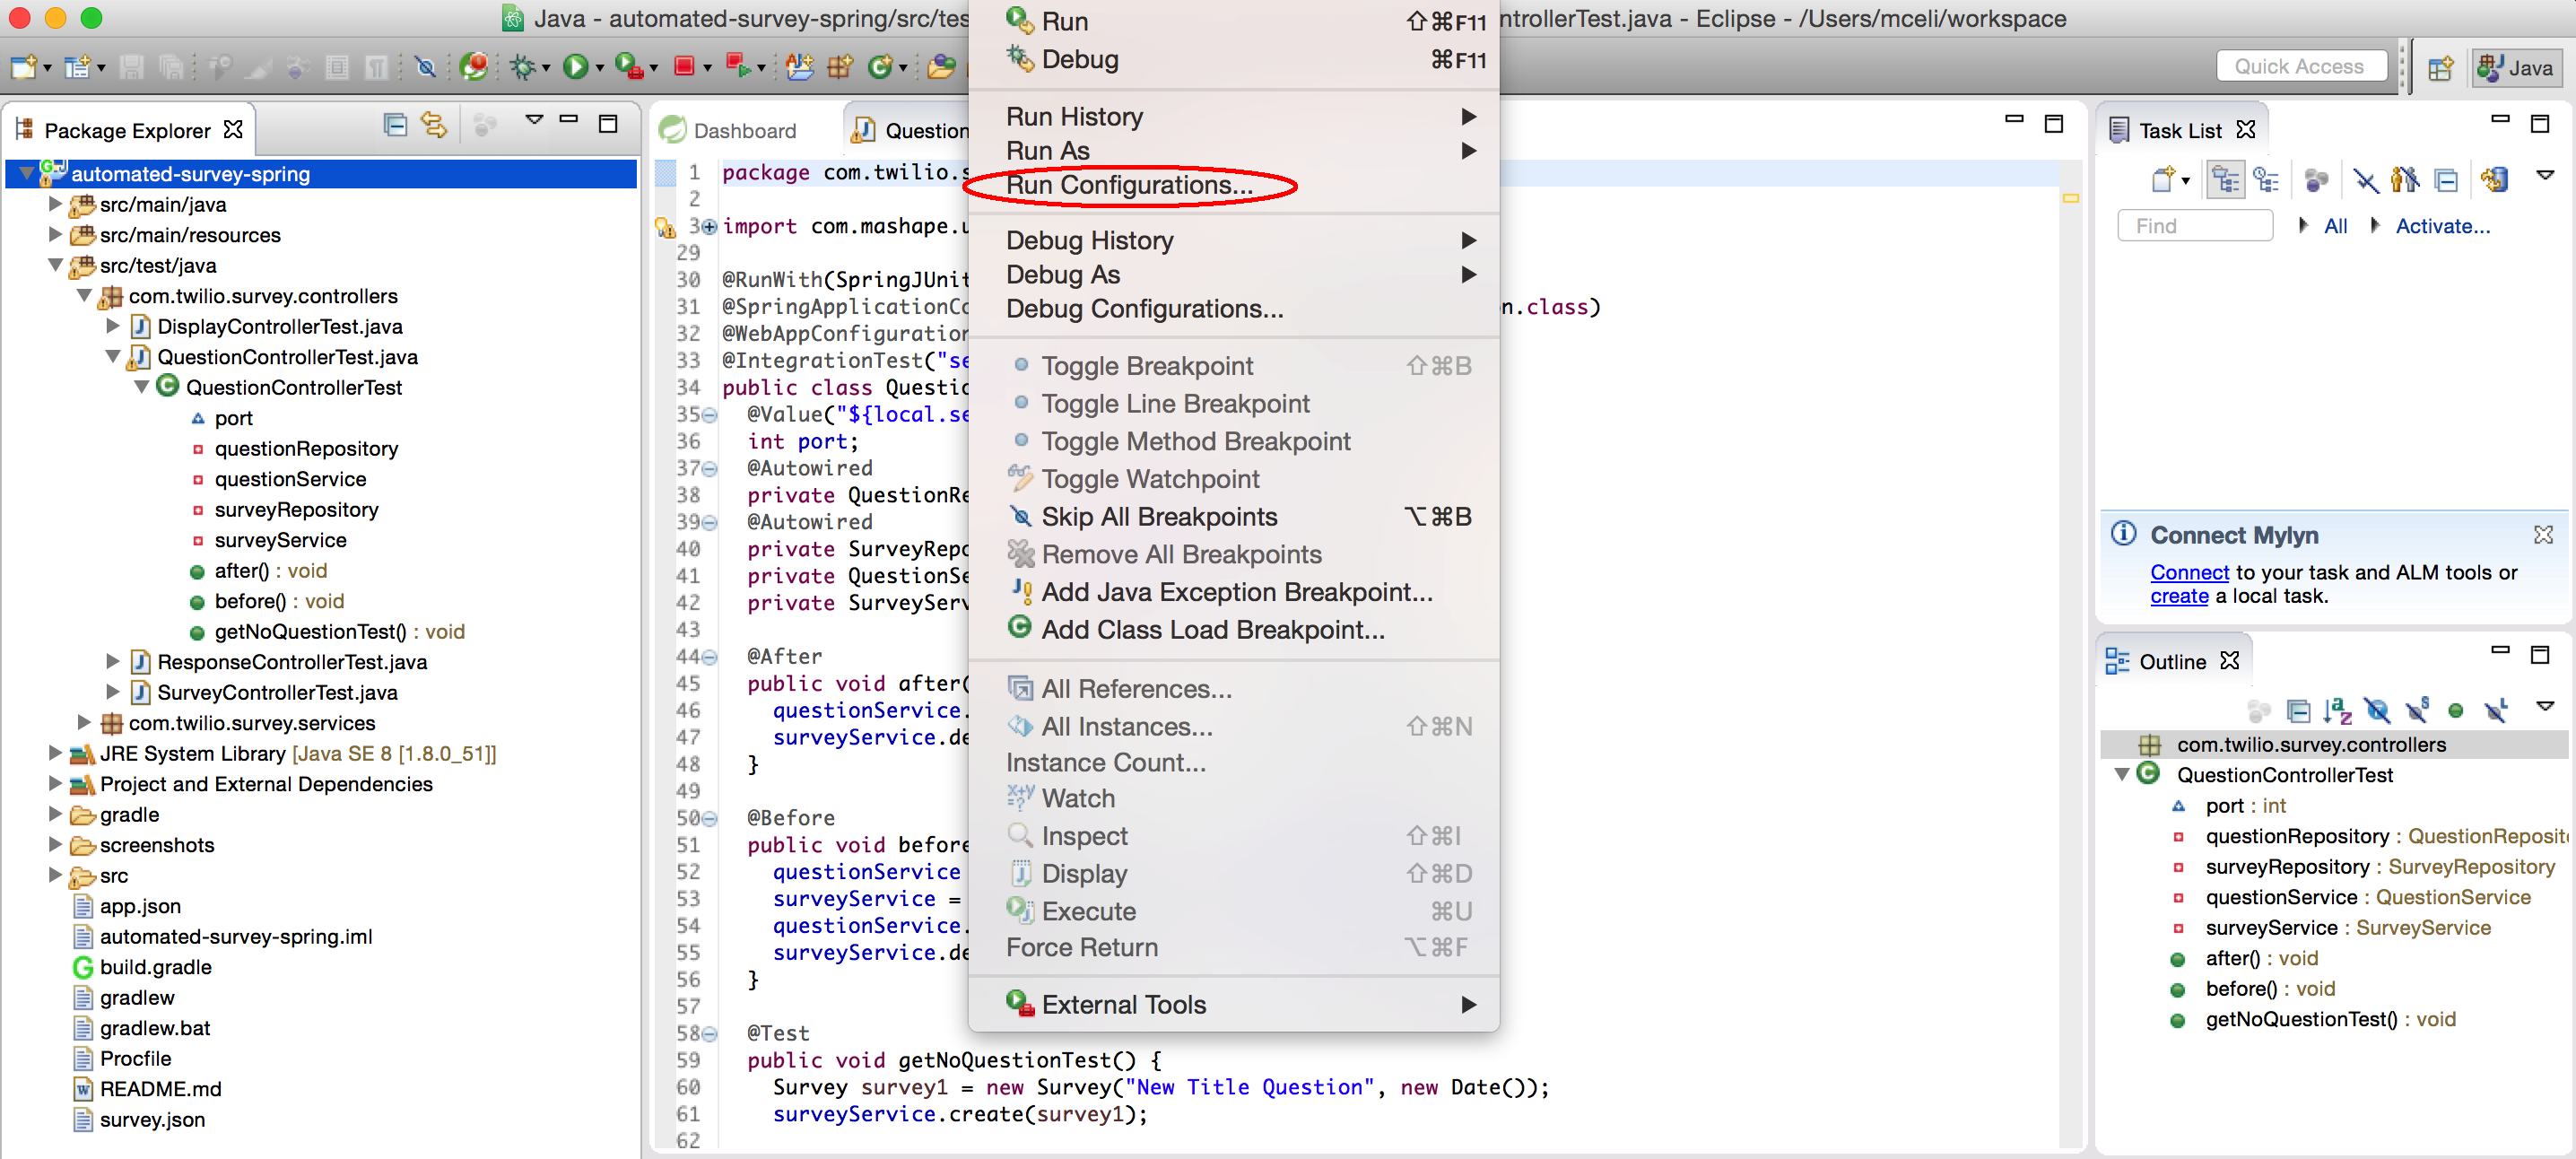
configure how the application will run. You can access the run configuration from the Run menu in
eclipse:
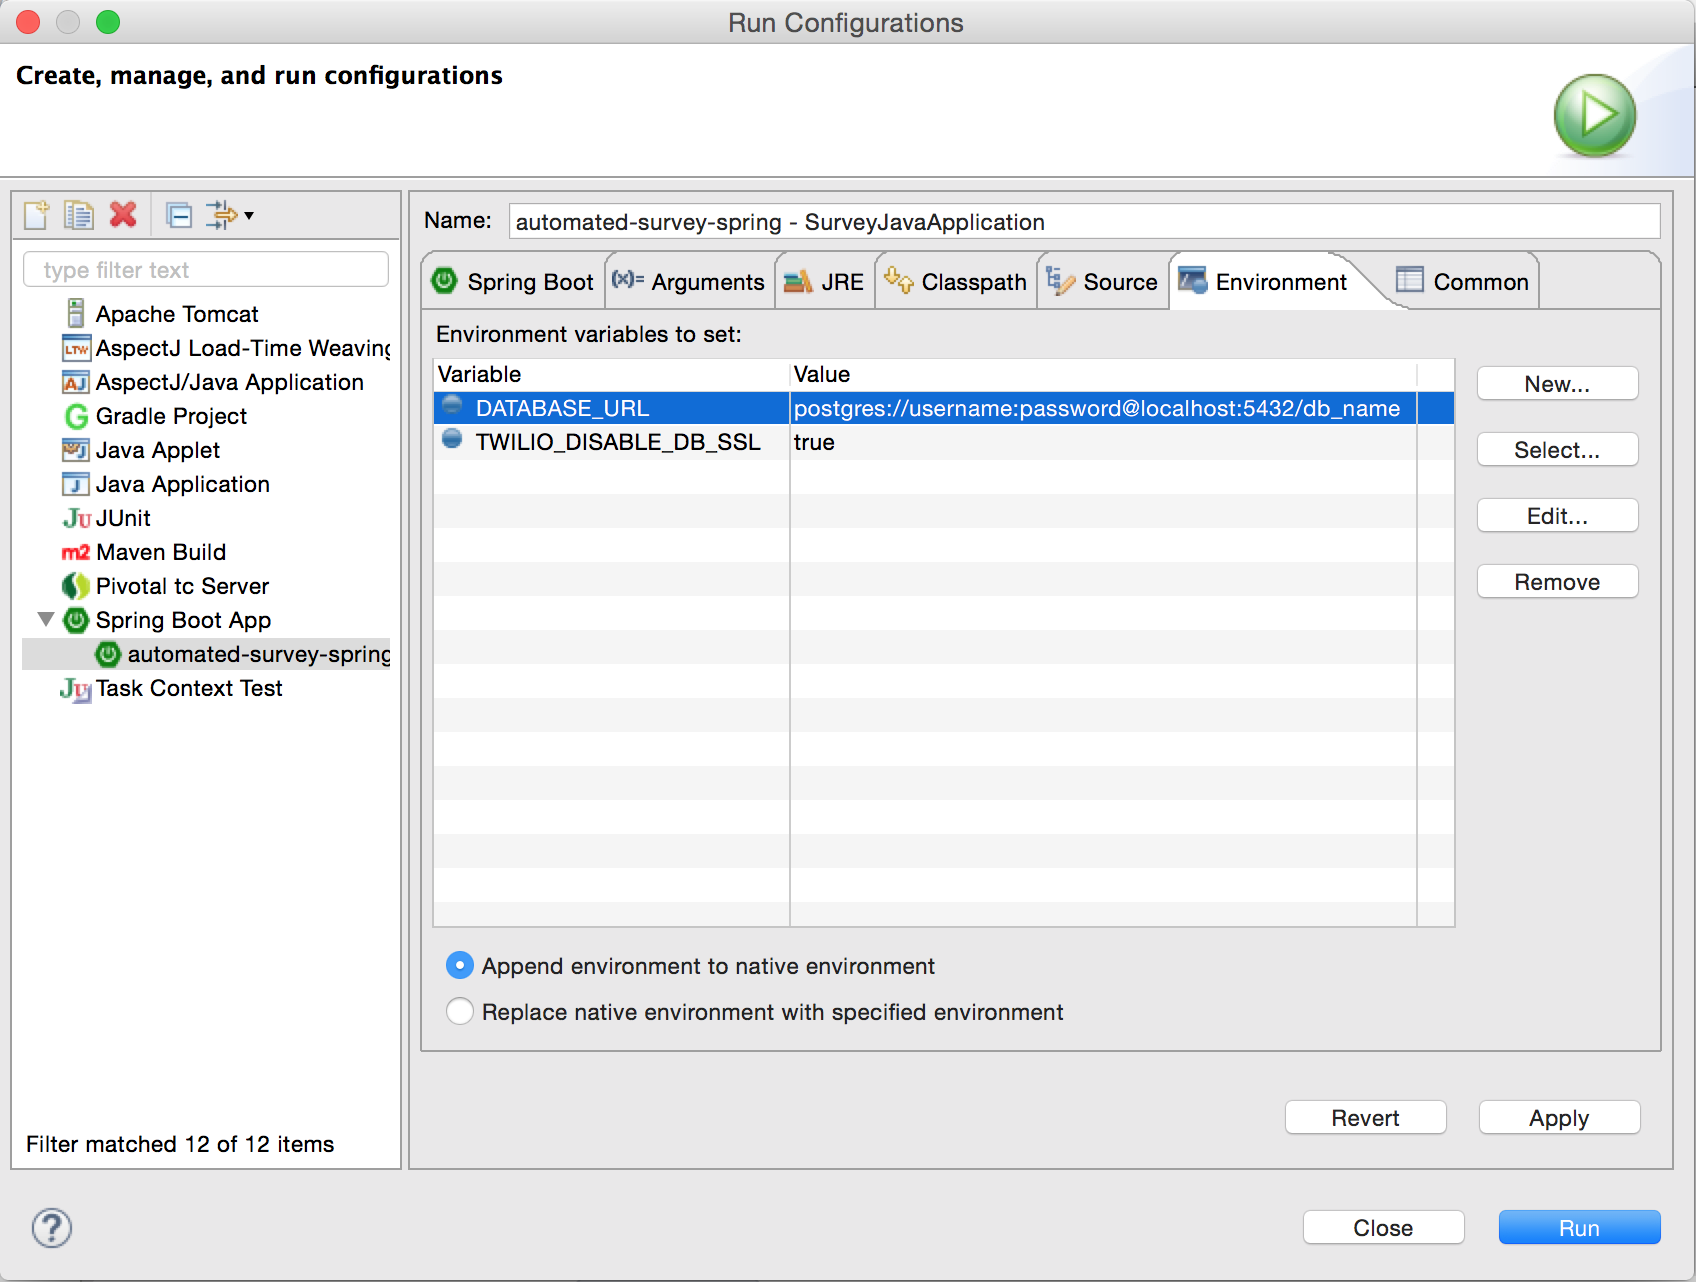
On the new configuration window you should specify how the Spring application will run. You should set up the necessary environment variables and run the application when you are done.
If you didn't run the application on the previous step, you can run it by right clicking on the
root of the project explorer and set run as -> Spring Boot App
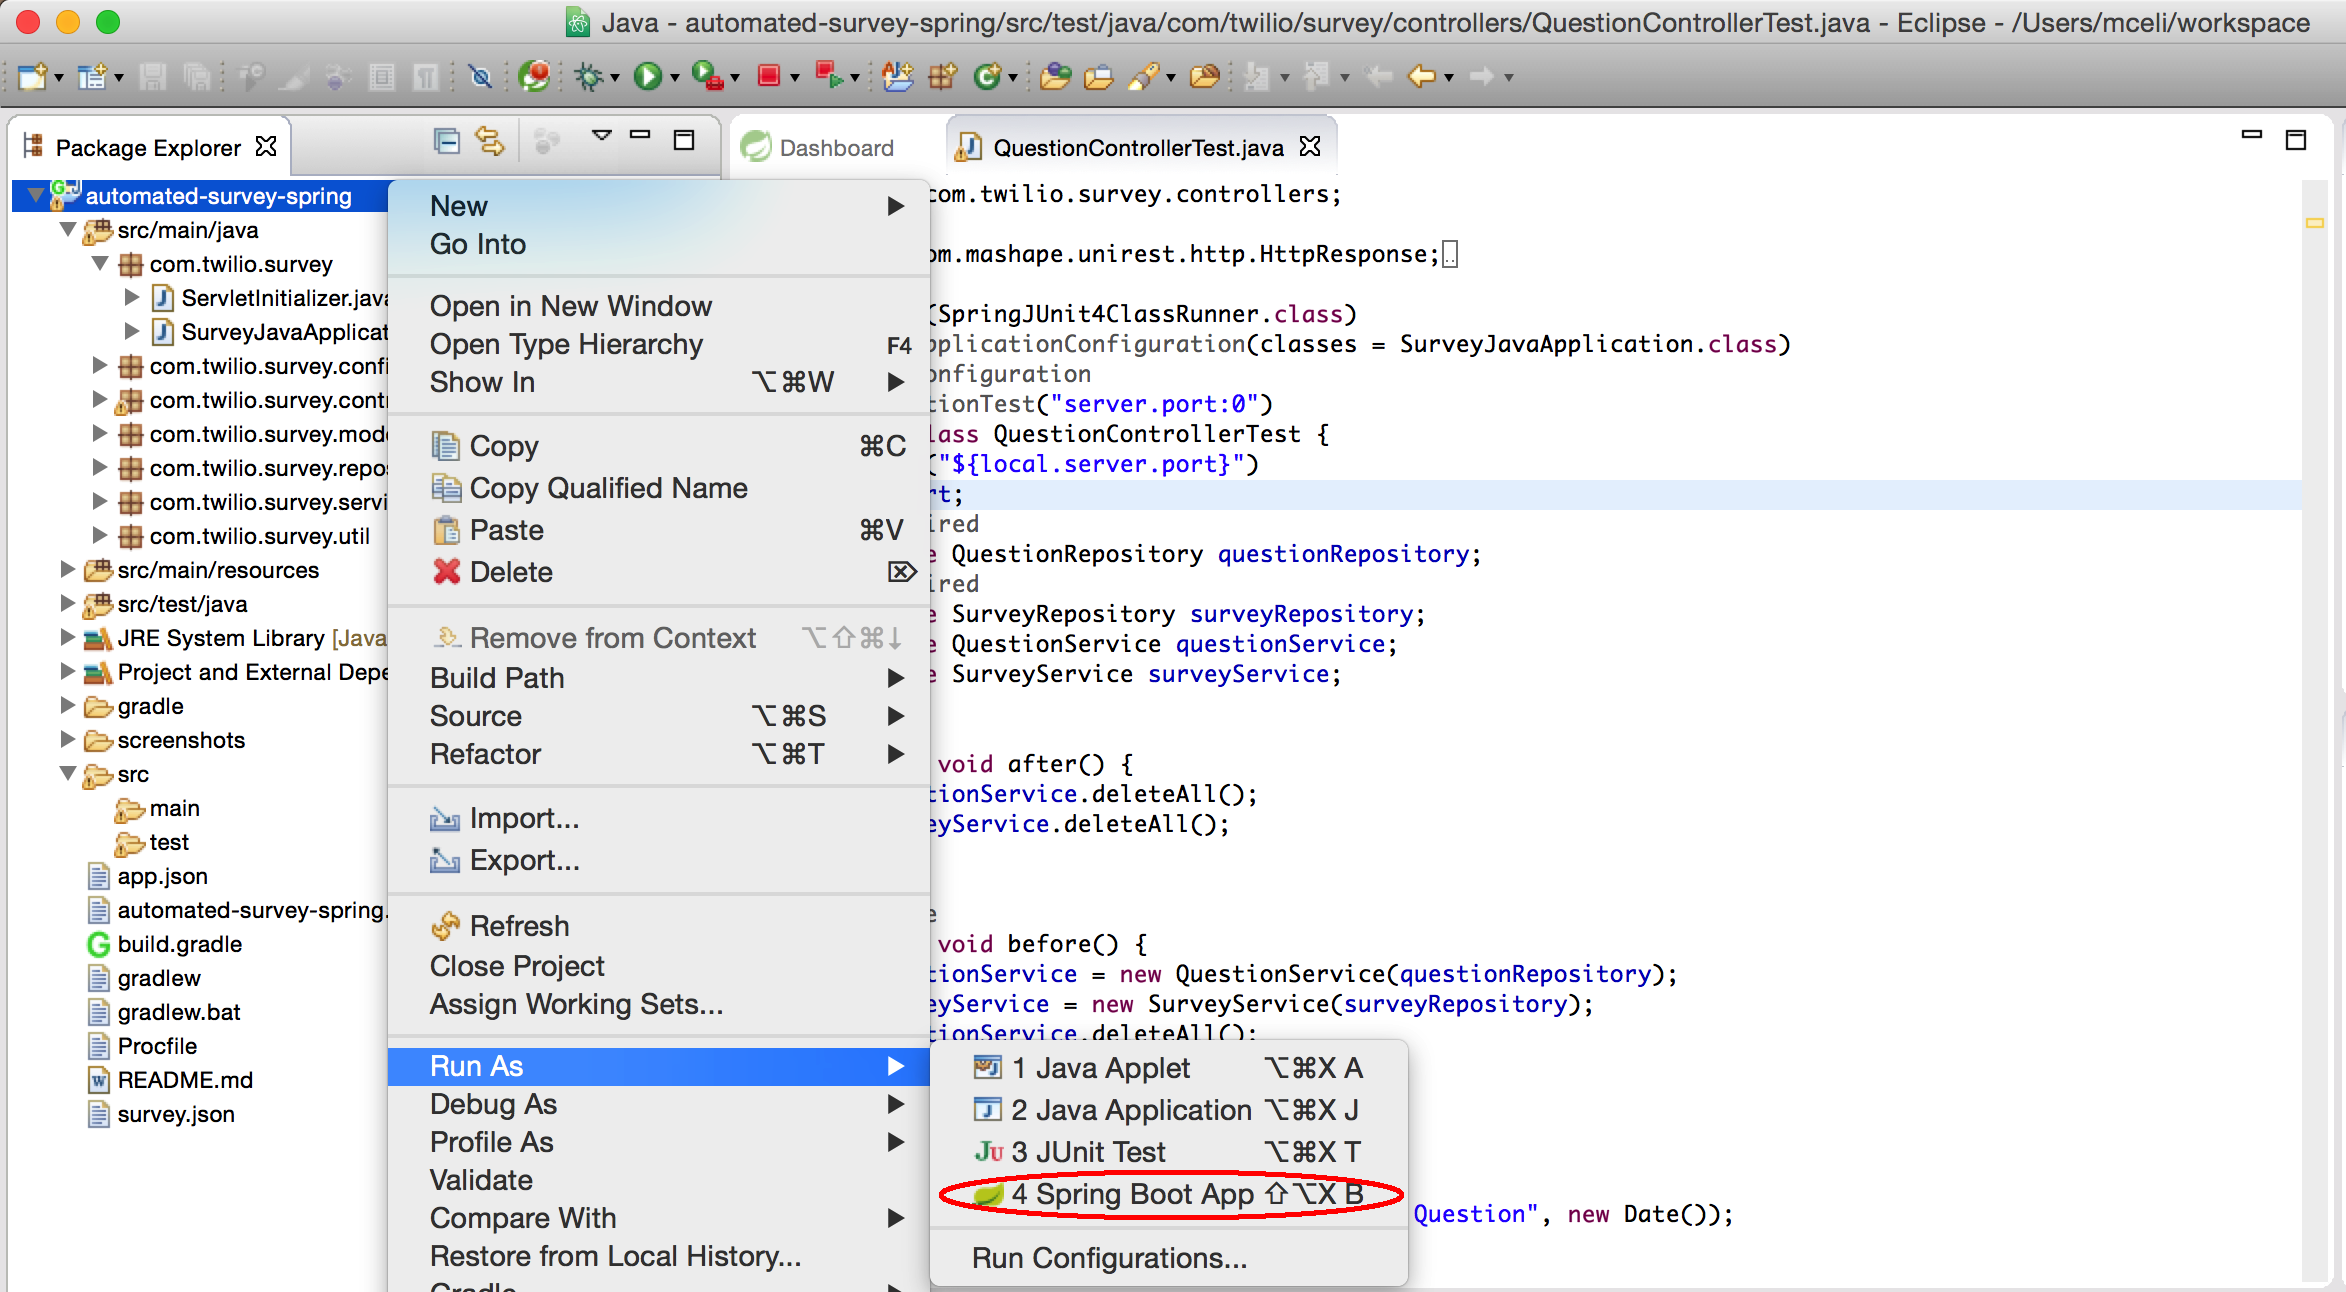
Then you application will be running on port 8080 by default.
For this demo it's necessary that your local application instance is
accessible from the Internet. The easiest way to accomplish this
is by using ngrok. If you're running OS X you
can install ngrok using Homebrew by running brew install ngrok.
First you need to make sure the application is running in you localhost.
You can run the application directly from the command line using gradle or in any IDE you like.
The previous steps describe how to run the application using Gradle or IntelliJ IDE.
After this you can expose the application to the wider Internet by running (port 8080 is the default for Spring):
ngrok 8080
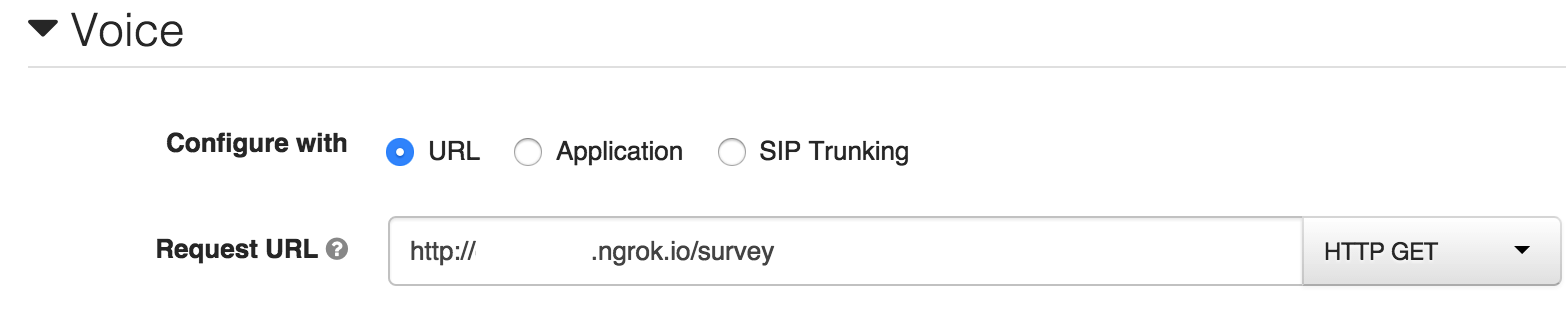
You will need to provision at least one Twilio number with voice capabilities so the application's users can take surveys. You can do that here. Once you have a number you need to configure your number to work with your application. Open the number management page and open a number's configuration by clicking on it.
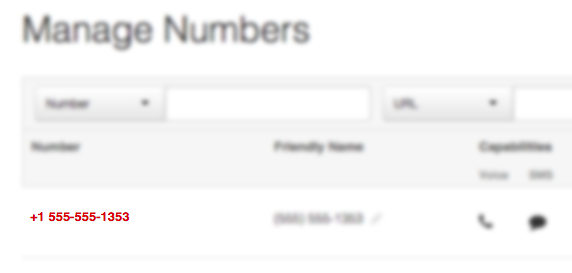
Next, edit the "Request URL" field under the "Voice" section and point
it towards your ngrok-exposed application /survey/call route. Set
the HTTP method to GET. If your application is running in production
you need to point Twilio to
http://<your-app-name>.com/survey/call. See the image
below for an example:
Give your number a call, answer the example questions and then go to:
http://localhost:8080/
The results of the survey should be there.
Running the tests with gradle is as simple as executing ./gradlew test on the command line. Just remember to set up
the correct DATABASE_URL environment variable as running the test will delete all the records in the database.