User Manual
NudgeMe is an application that encourages people to look after themselves, especially in this time where people are isolated, and their mental wellbeing is suffering as a result. The ways it does this are by allowing users to keep a weekly record of their wellbeing and encouraging users to share their wellbeing.
NudgeMe has 4 pages:
- Wellbeing Diary
- Home
- Support Network
- Settings
-
Report wellbeing out of ten once a week
-
Track wellbeing and exercise
-
Share wellbeing information with people in your life
-
Building a support network
-
Being nudged to share your wellbeing and go for a walk when wellbeing is decreasing, or steps are extremely low
-
Send step goals to those in your network to encourage movement for those in your network who have low wellbeing levels or steps.
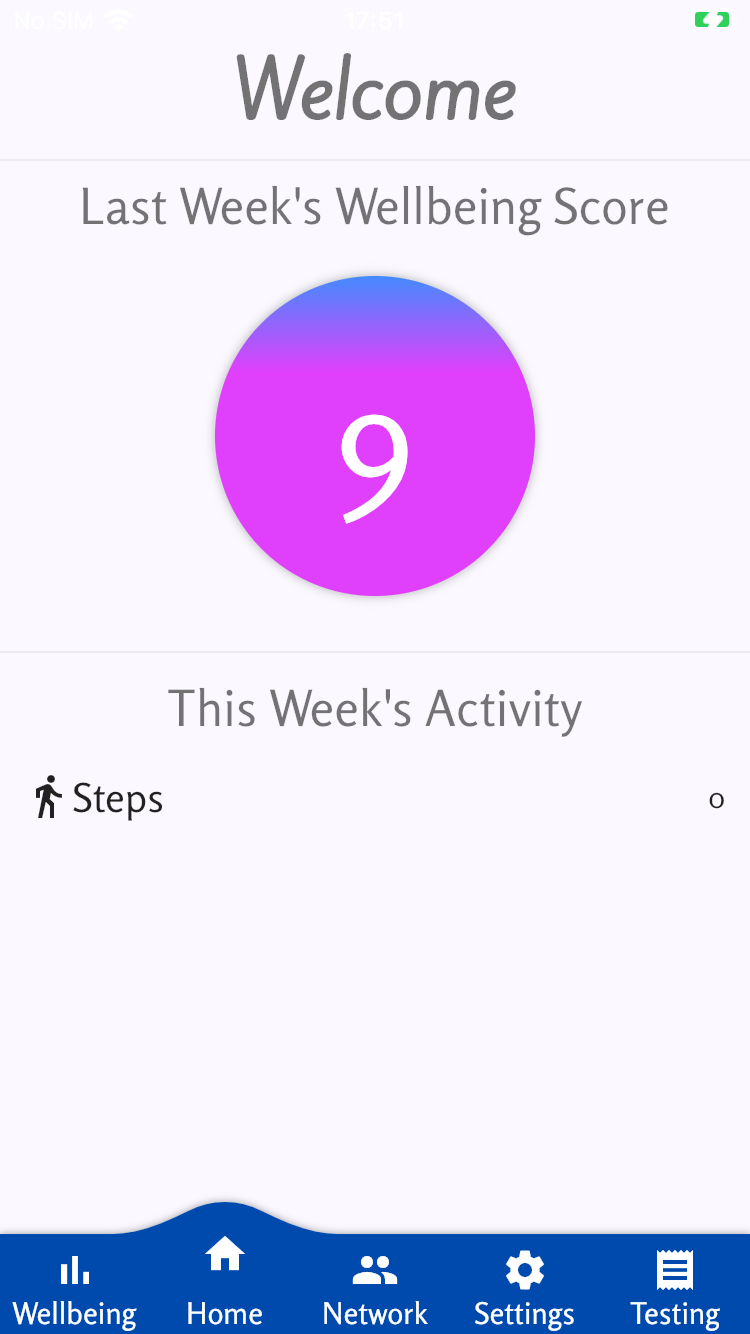
The home page can be used to view your wellbeing score from last week and your step level since your last Wellbeing Check.
Your Wellbeing Diary is a graph that displays your wellbeing levels and step counts from past weeks.
You can find wellbeing and step data from past weeks on the ‘Wellbeing’ page. It is represented by a bar chart, where purple bars represent wellbeing levels, and blue bars represent steps for each week.
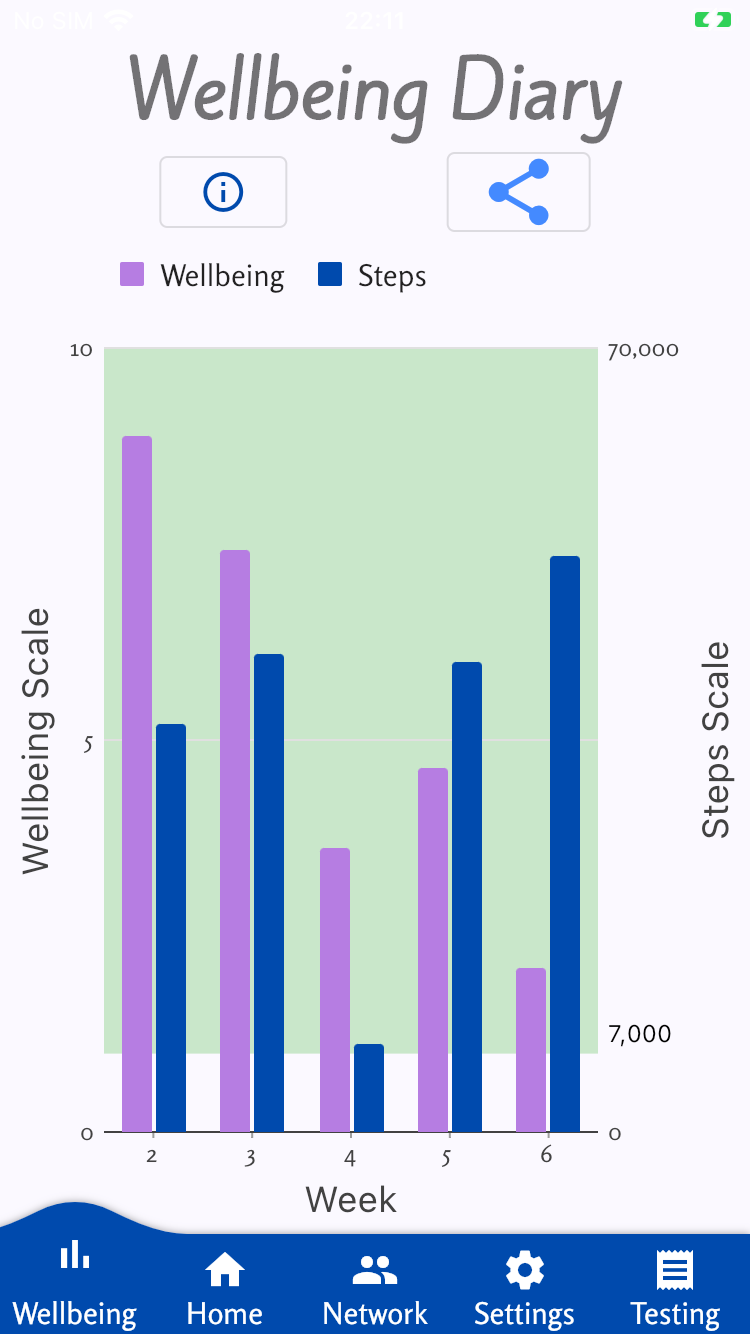
During week 1, there will be no blue bar as NudgeMe only started counting your steps when you downloaded the app. Therefore, your first wellbeing check had a step count of 0.
The green region on the graph represents the range between the minimum 1000 weekly steps that is healthy and the recommended 70,000 steps per week.
If you want to share a pdf of your wellbeing diary with people who are not in your network using a 3rd party messaging app:
-
Navigate to the Wellbeing Diary page of the app and click the share button (on the right above the graph).
-
Choose the third-party app you wish to share with and send a pdf containing your graph to them.
If you want to share your wellbeing diary with people who are in your network, navigate to the Share Wellbeing Diary with people in my support network section.
Your support network is a list of people that you would be willing to share your wellbeing diary with. Sharing your wellbeing diary can help you start conversations about your mental wellbeing with people in your life.
You can only add people who already have NudgeMe downloaded on their phone.
Navigate to the Network page to add people to your network.
To add someone who you are with, in real life, you can scan each other’s QR codes:
- To access your QR code, click the ‘My Identity’ button and ask the other person to click ‘Scan code to add to network’. Then, point their camera to the QR code on your phone screen.
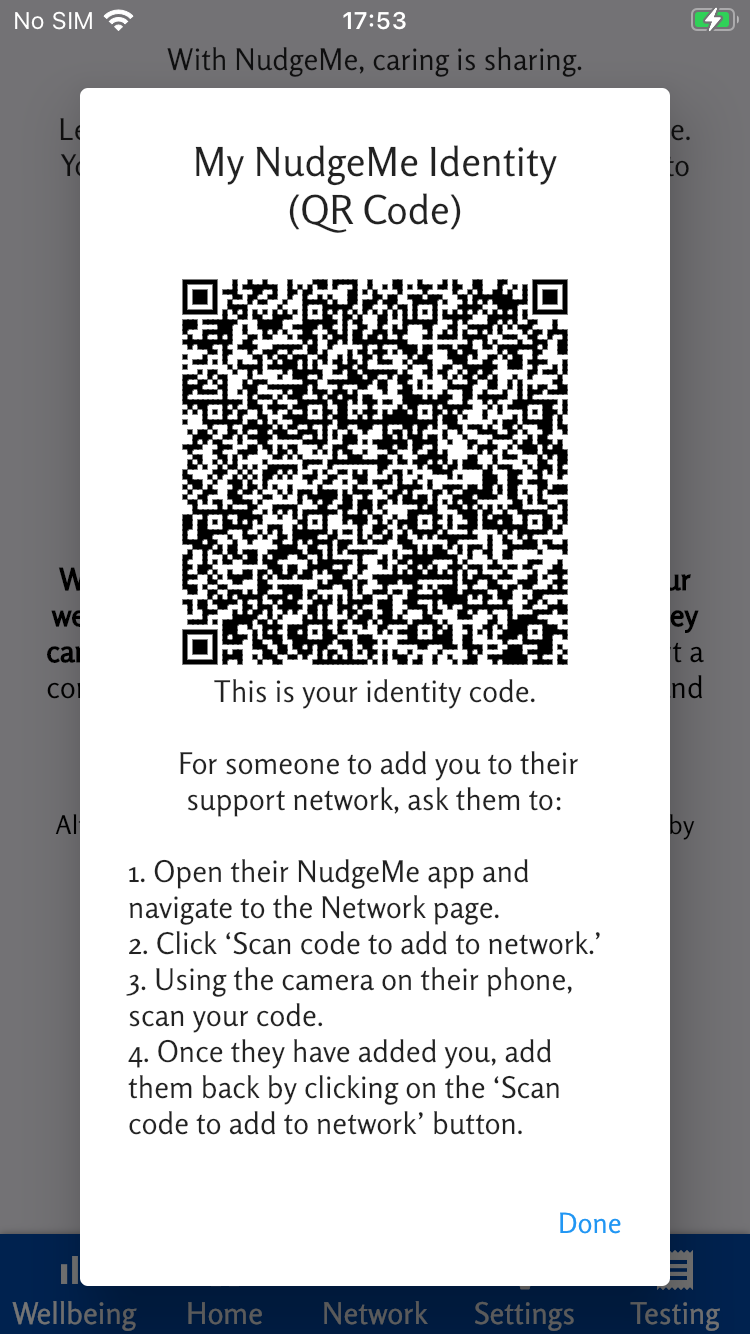
- To scan their QR code, click ‘Scan code to add to network’, ask the other person to click ‘My Identity’, and point your camera to their code. Once you both type in each other’s names, you will be in each other’s support network.

This process is end-to-end encrypted.
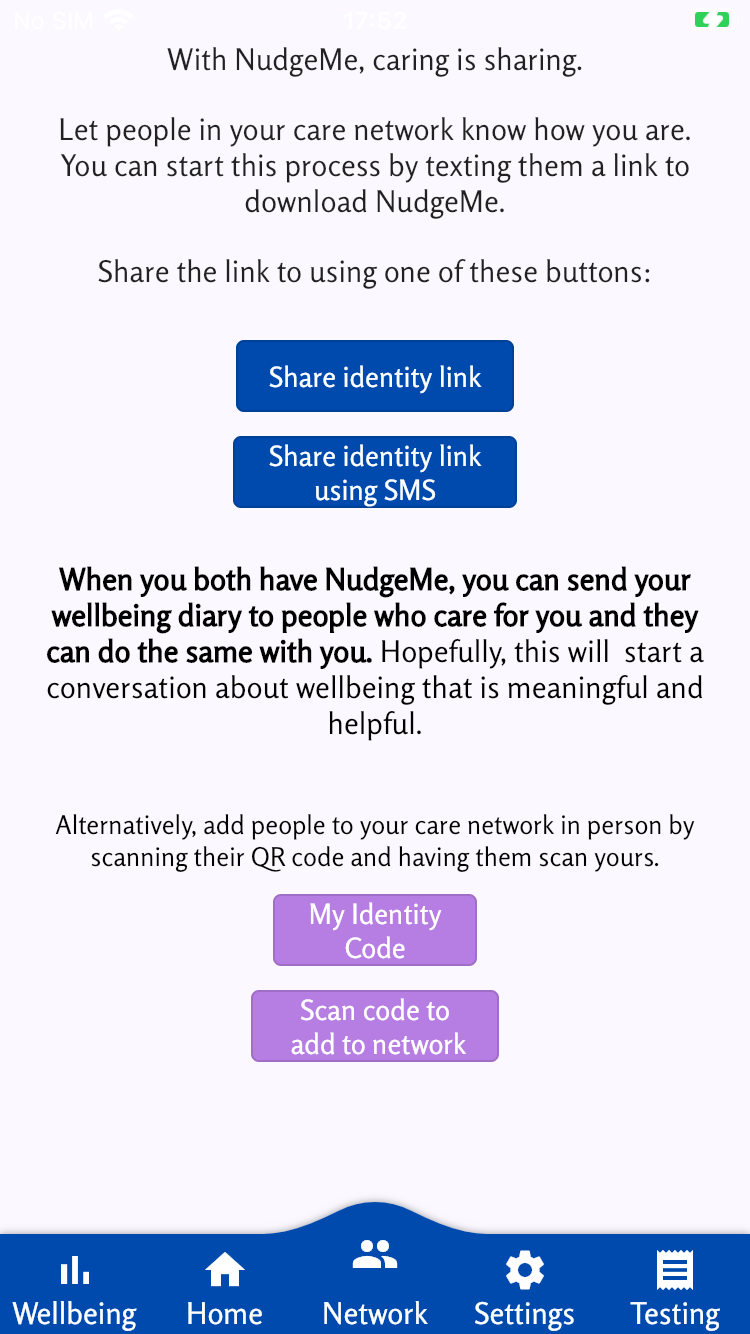
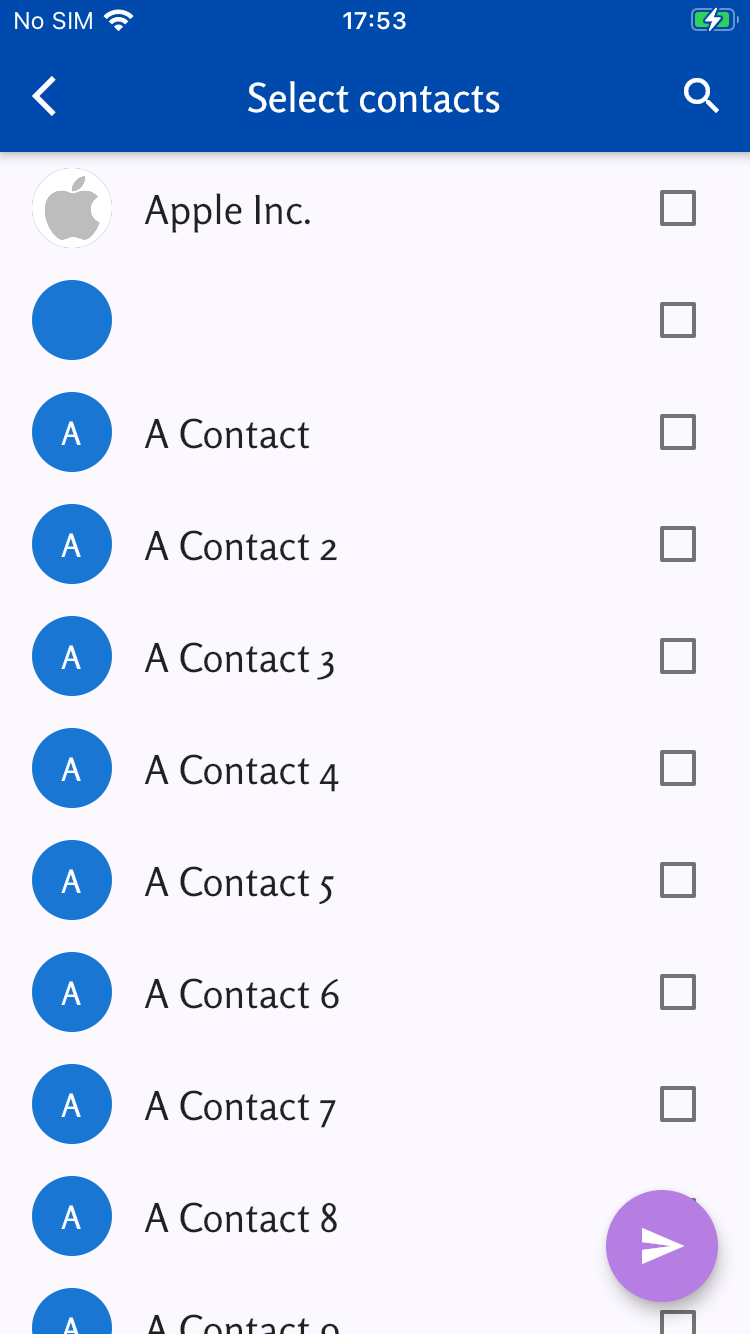
To add someone over SMS
Click the ‘Share identity link using SMS’. Select the contacts you would like to share the link with. You can use the search button in the top right corner to make this easier. Then, click the purple button in the bottom right corner.
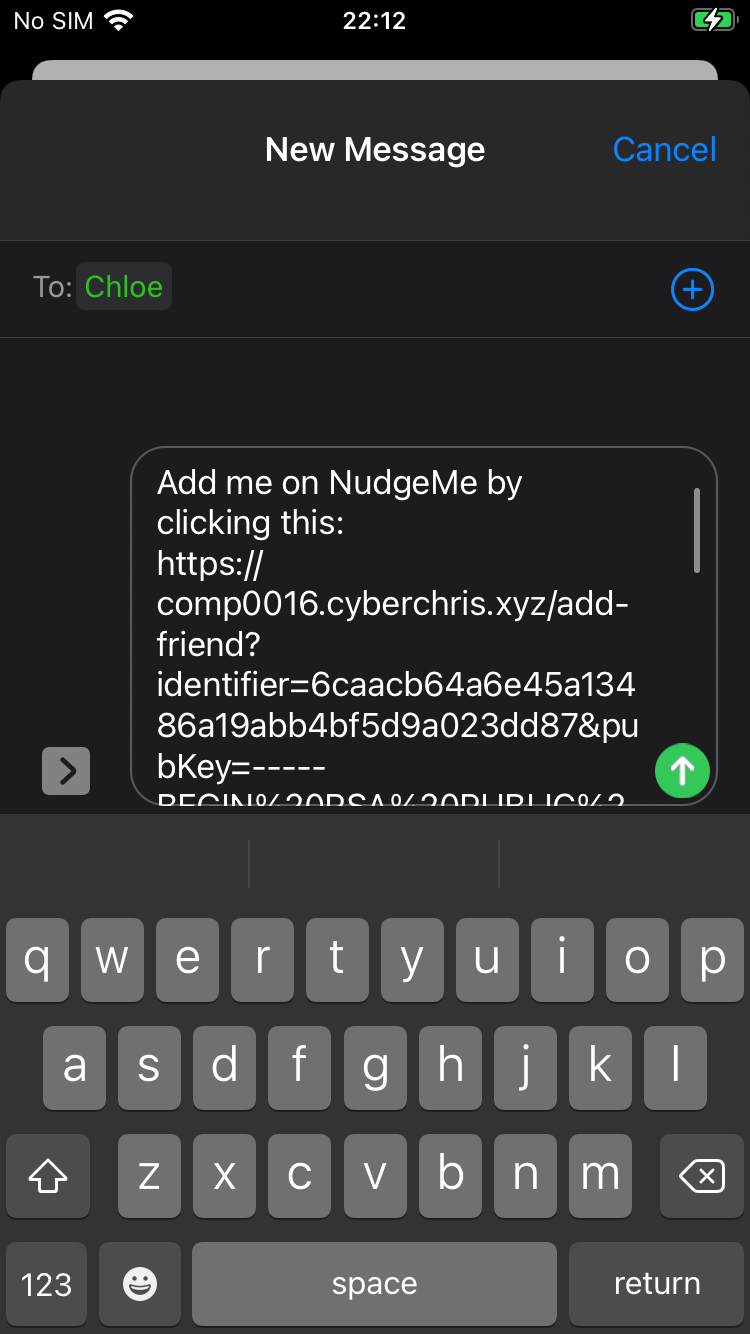
To add someone over a 3rd party messaging app
Click the Share identity link button and choose an app to send the link over.
Once you have added at least one person to your support network, your network will be displayed on the Network page.
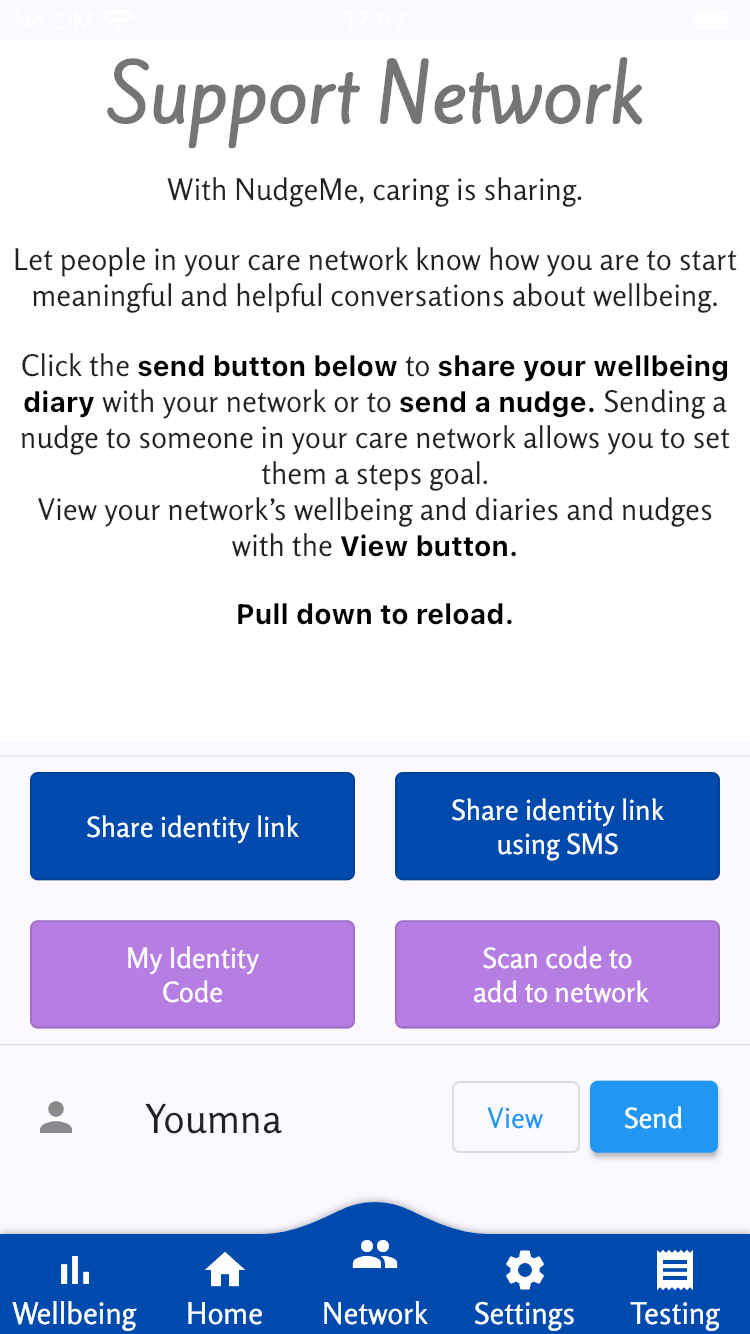
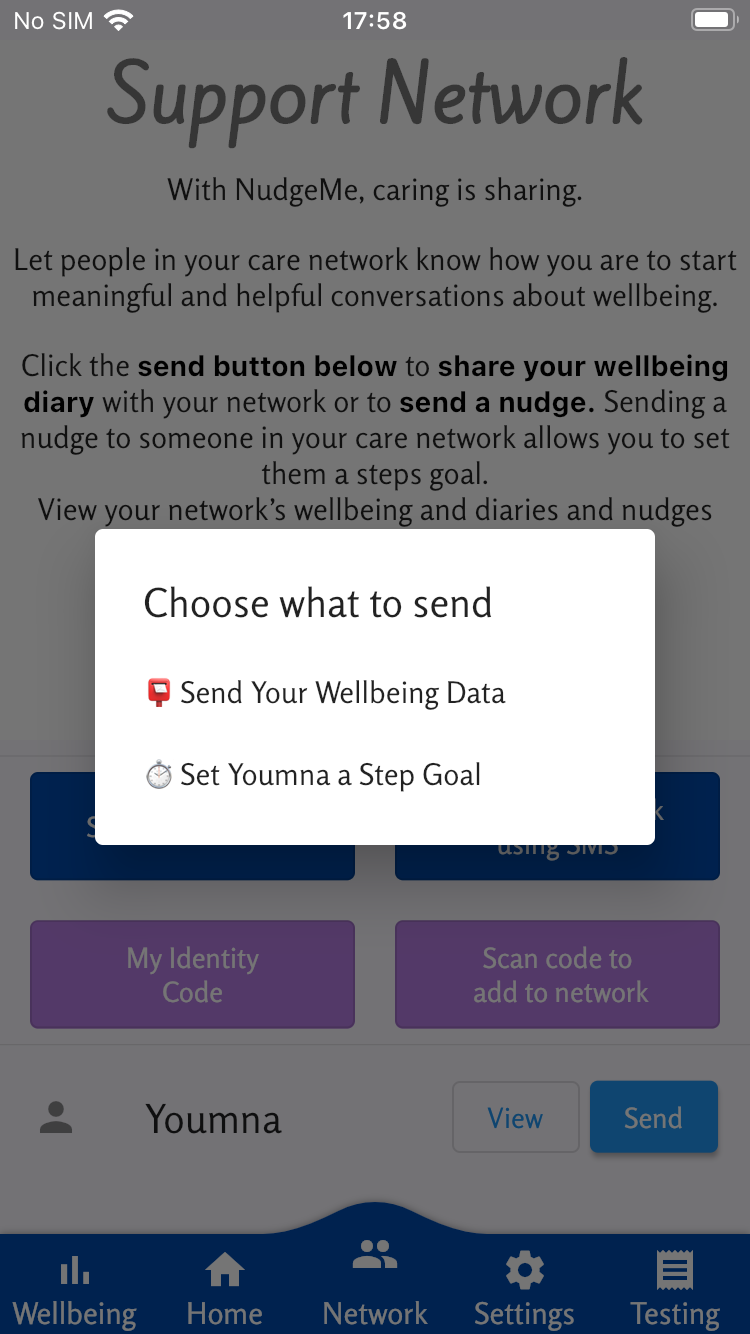
To share with a particular person in your network, click the ‘Send’ button next to this person’s name and click ‘Share wellbeing graph’.
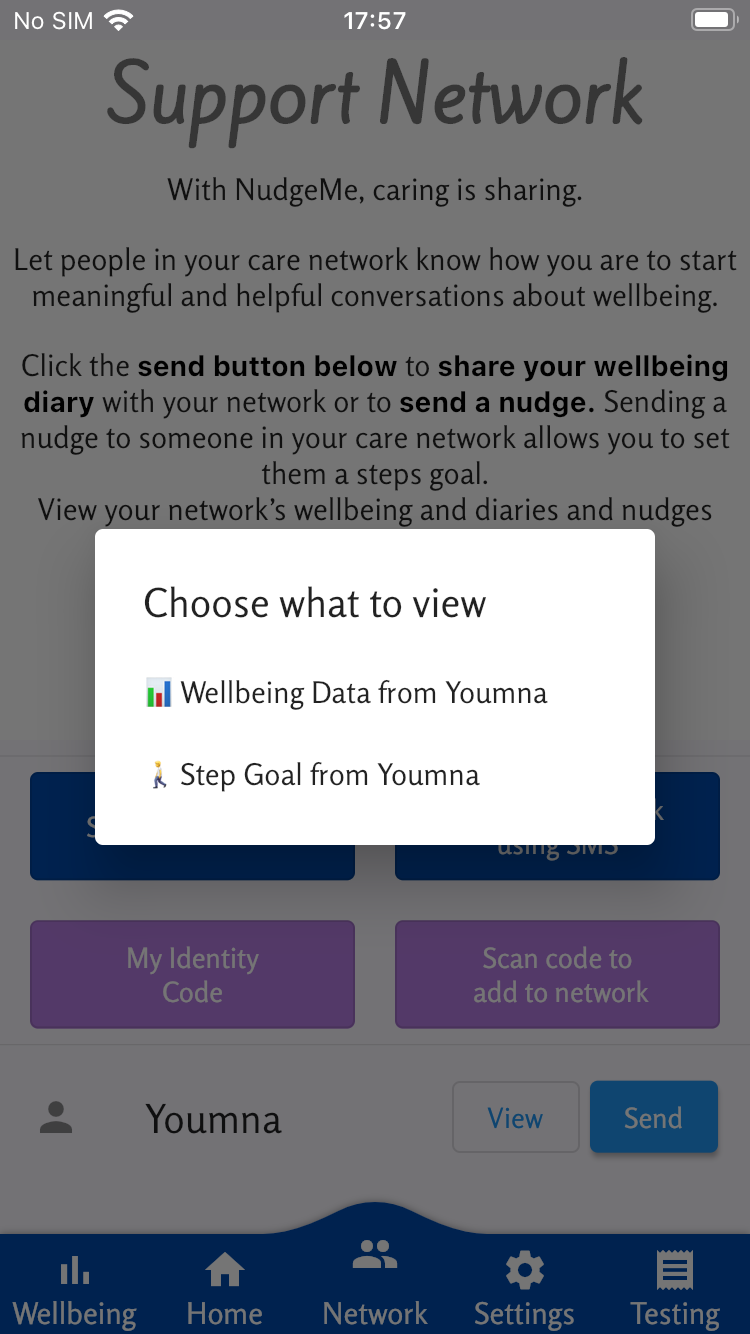
To view someone in your support network’s Wellbeing Diary, they must have shared their graph with you. On the network page, click ‘View’ beside the name of the person who shared it with you, and then ‘View wellbeing graph’.
If someone has shared their Wellbeing Diary with you but it is not showing up on Network page, pull down on the network page to reload the data.
Unread wellbeing diaries will be found at the top of your support network and can be identified as having a message icon and dark blue text.
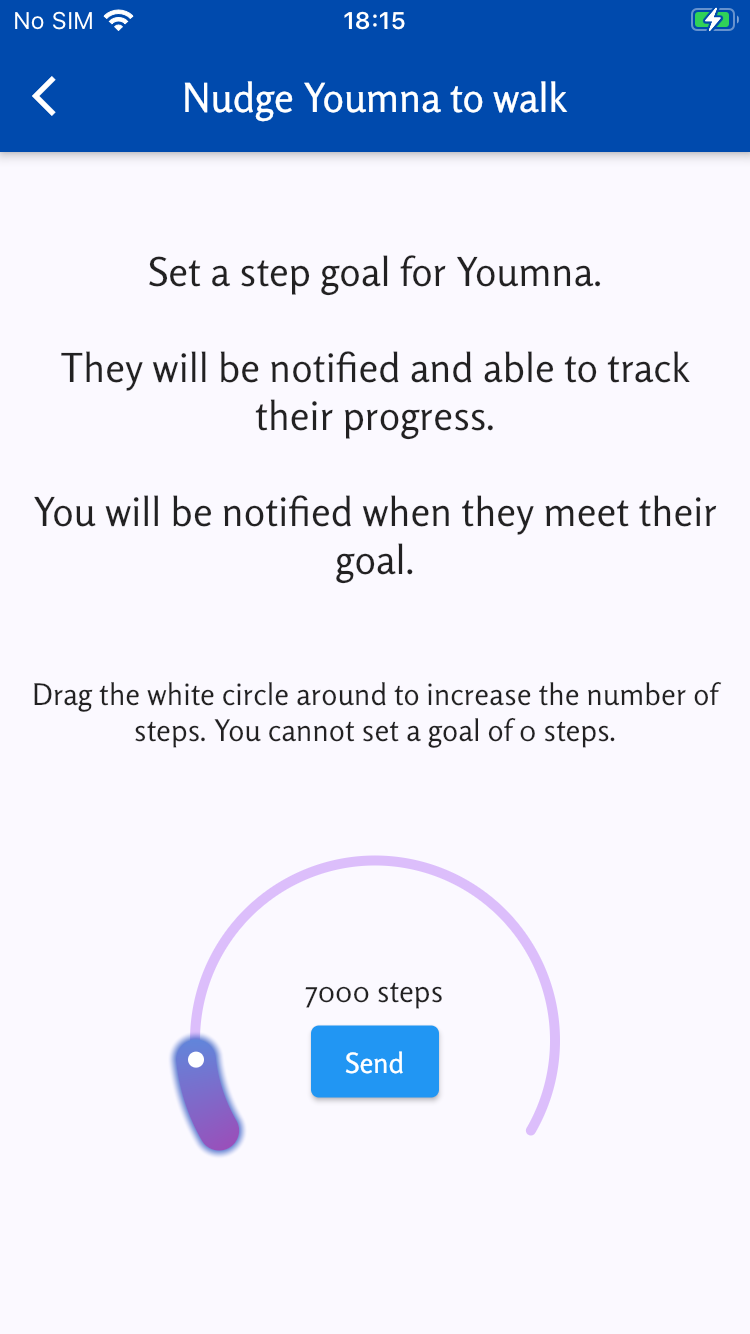
On the network page, click ‘Send’ Next to the person’s name, and click ‘Send step goal’.
Drag the circle clockwise around the meter to increase the number of steps you wish to set. Then, click the Send button inside the meter.
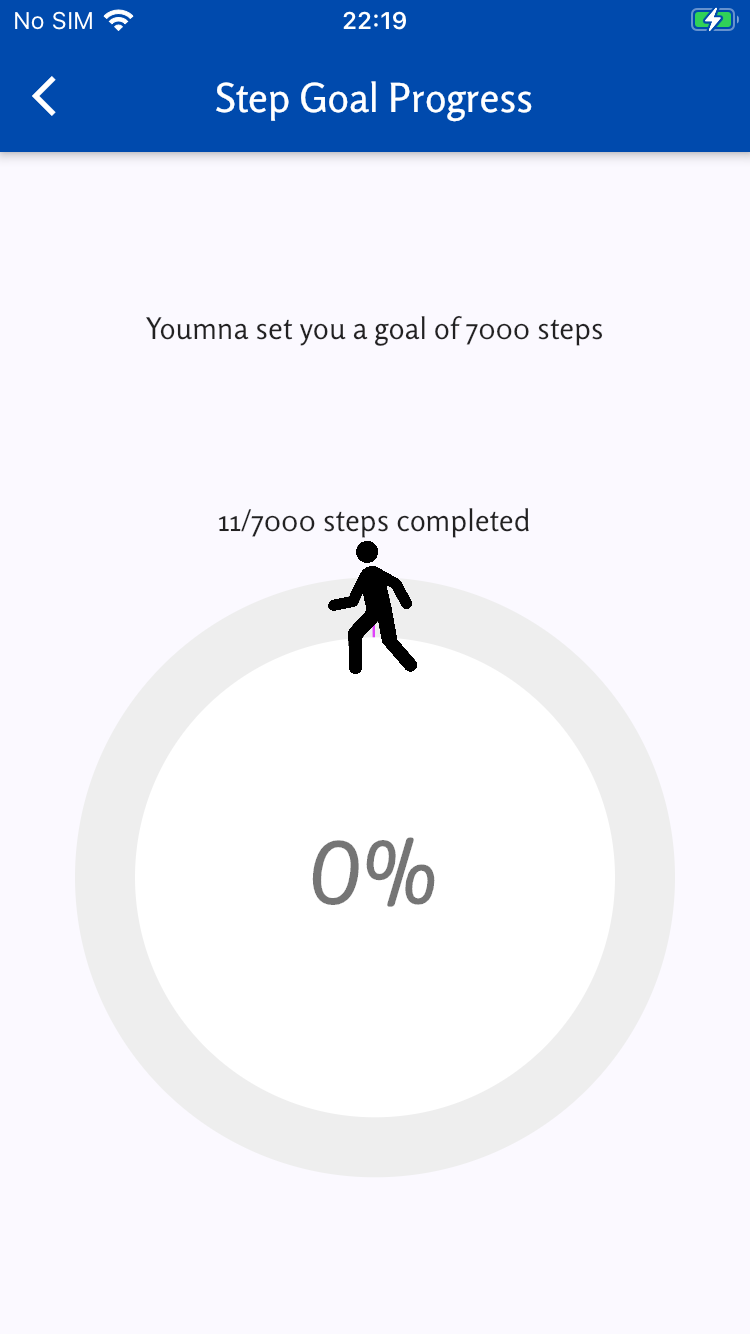
On the network page, click ‘View’ and then ‘View step goal’.
If this person has set you a goal, you will be redirected to a page that shows you your progress (in completing the number of steps you were set since they set you the step goal.
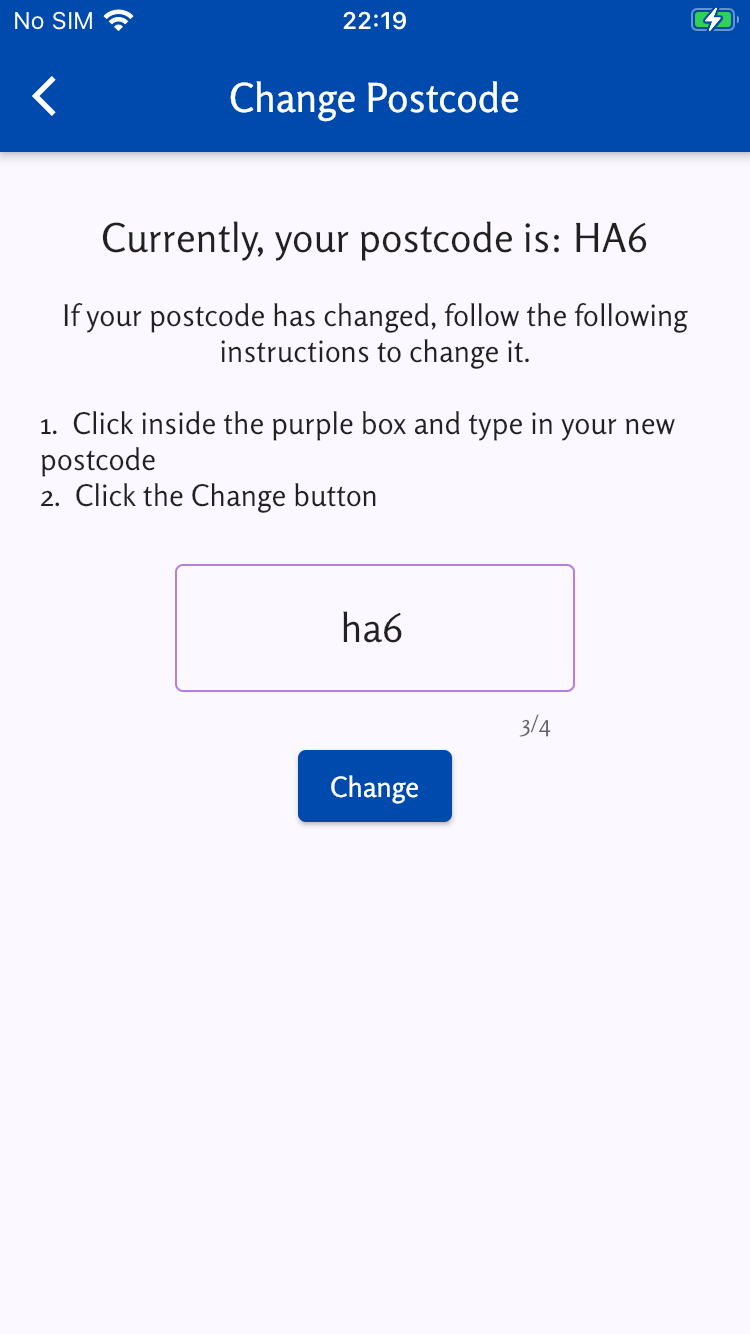
You will be asked to enter the first half of your postcode during the onboarding process when you first download the app. It is required to be between 2-4 characters and must consist of numbers and letters only.
If your postcode has changed, you can update it in the Postcode section of the Settings page by doing the following:
- Navigate to this page by clicking on the Postcode bar on the Settings page.
- Enter your postcode inside the purple box
- Click the blue change button
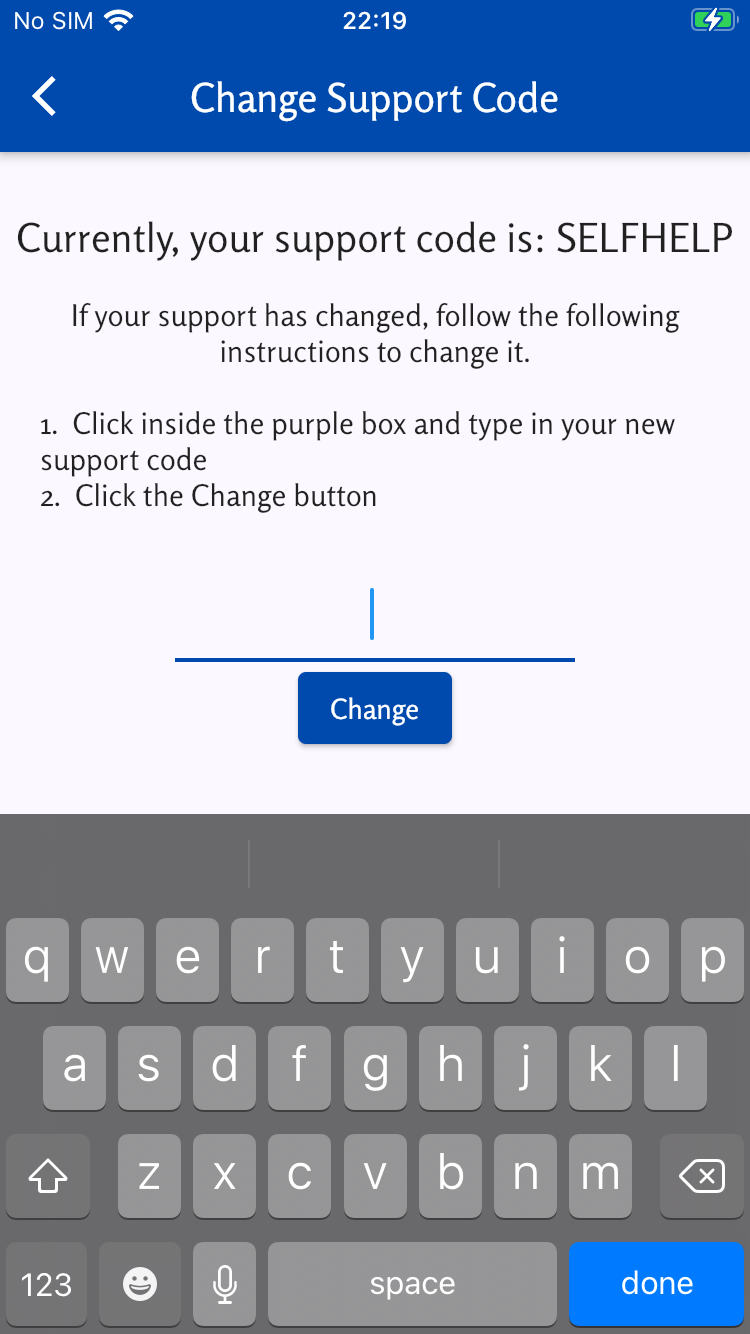
You will be asked to enter your support code during the onboarding process when you first download the app.
If your support code has changed, you can update it in the Support Code section of the Settings page by doing the following:
- Navigate to this page by clicking on the Support Code bar on the Settings page.
- Enter your new support code inside the purple box
- Click the blue change button
 46.PNG)
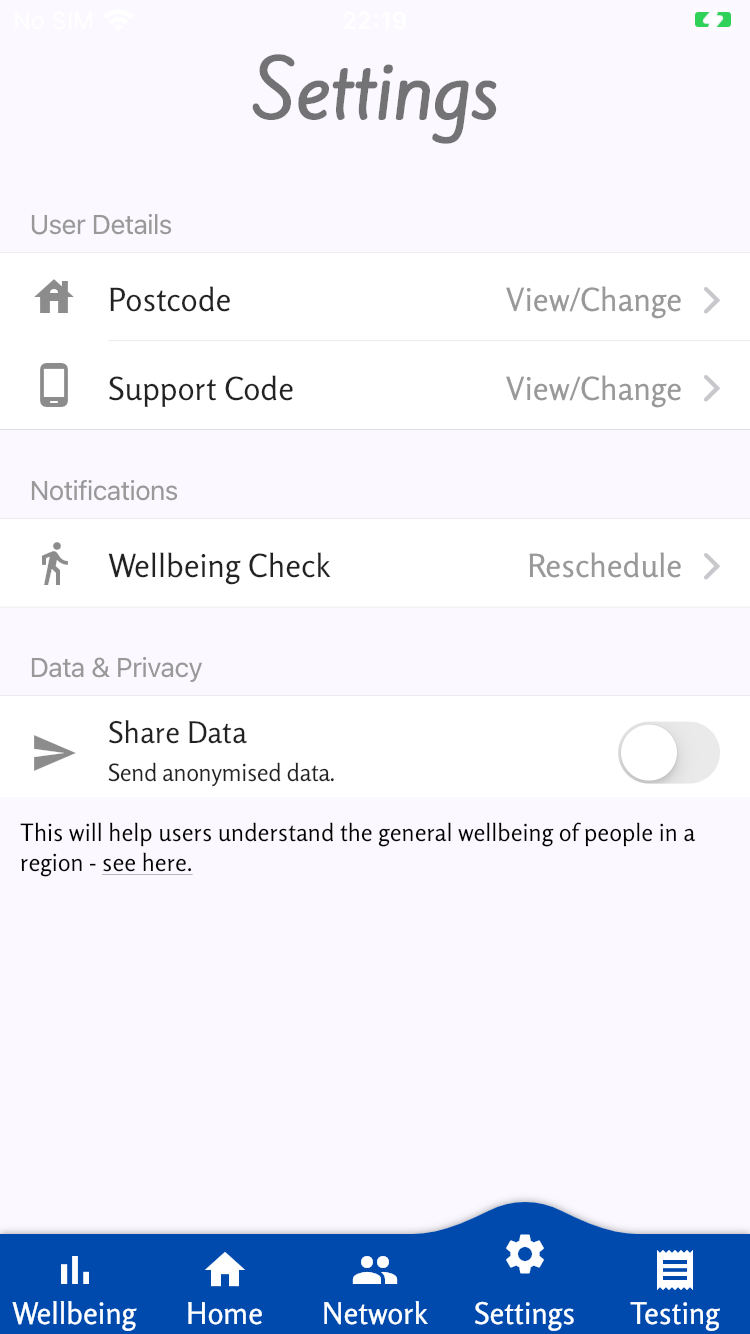
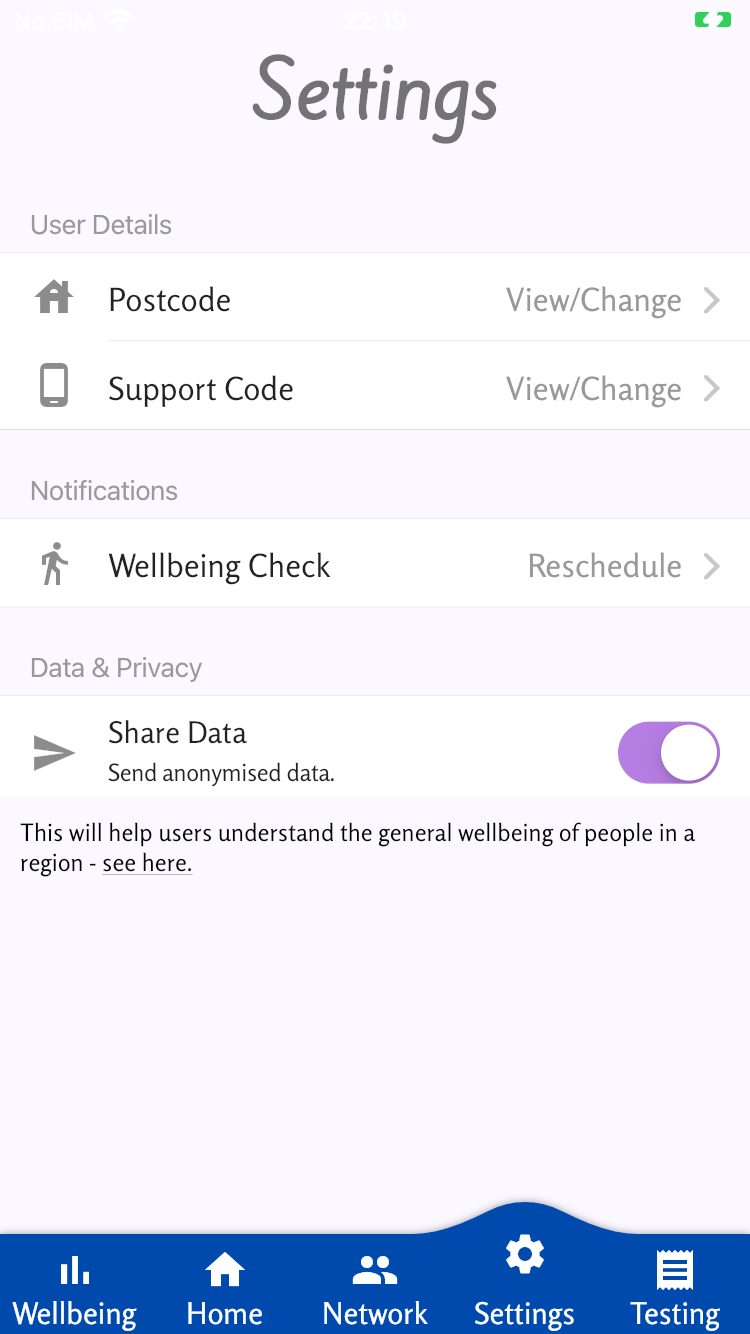
You will be asked whether you wish to share your data during the onboarding process when you first download the app. To change this setting:
- Navigate to Settings page and press the switch next to Share Data.
- If the switch is grey, you are not sharing your data. If the switch is blue, you are sharing your data.
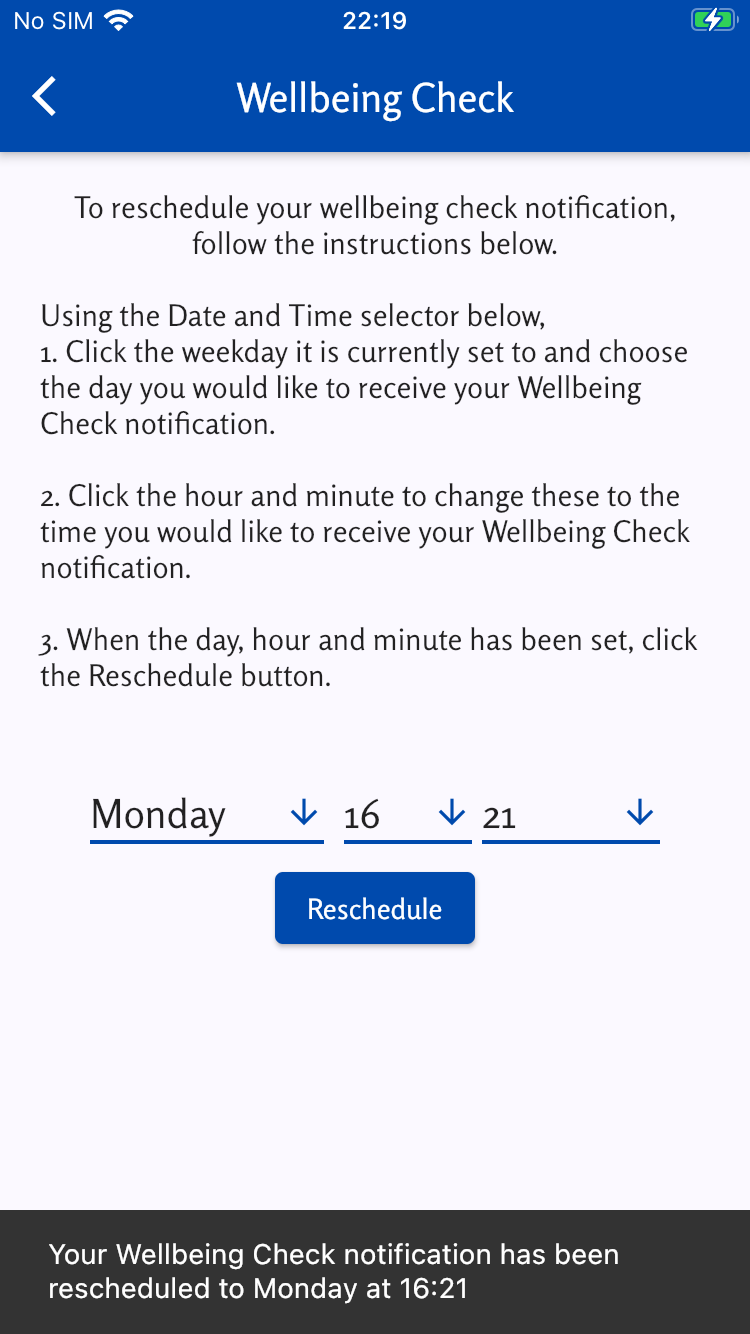
You will be asked to choose a date and time for your ‘Wellbeing Check’ notification during the onboarding process when you first download the app. Clicking on this notification will prompt you to report your wellbeing once a week.
You can change the date and time of this notification on the Settings page.
To do this:
-
Click on the weekday to reveal a drop-down menu. From this, pick which day of the week you would prefer to receive the wellbeing check notification.
-
Click on the first number to reveal a dropdown menu that will let you pick which hour you would prefer to receive the wellbeing check notification.
-
Click on the second number to reveal a dropdown menu that will let you pick which minute you would prefer to receive the wellbeing notification.
-
Once you have completed steps 1-3, click the ‘Reschedule’ button.