How to use plugin (Text Tutorial)
Open the image to be analyzed in ImageJ. In general plugin works in two modes:
- particles detection (whole image or ROI)
- particles detection and colocalization analysis (whole image or ROI).
For colocalization you need an image containing two color channels. Plugin auto-detects the number of channels and if it is equal to two then the plugin will automatically switch to second mode (see below).
Plugin works with time/z-stacks.
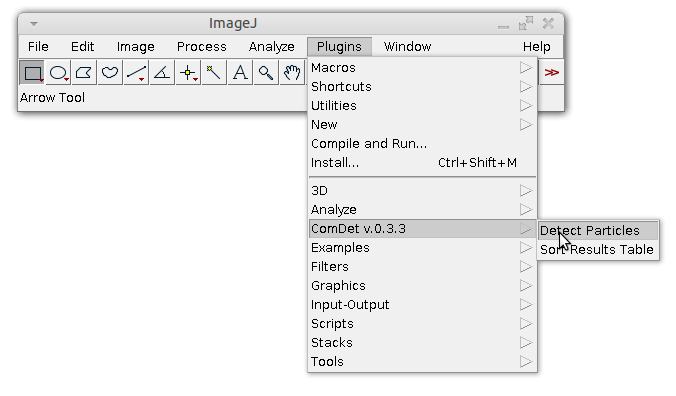
Launch the detection by choosing Plugins->ComDet->Detect Particles.
If the image is not two channels image, the following dialog window will appear:
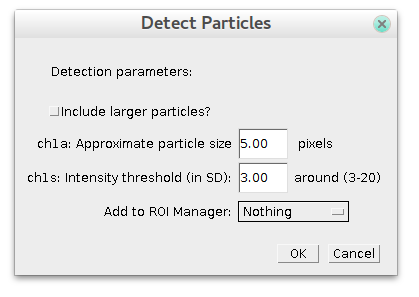
Specify estimated particles size and sensitivity (intensity) and press OK. To have good detection usually you need to play with parameters and see how it goes.
By default plugin looks only for particles of specified size. If you check "Include larger particles?" box, it will also try to quantify bigger spots.
After pressing OK plugin runs and add rectangles in overlay on top of detected particles.
Also it will provide you 'Results' table containing particles' coordinates (see below) and 'Summary' table. I recommend to play with parameters to get a nice detection result.
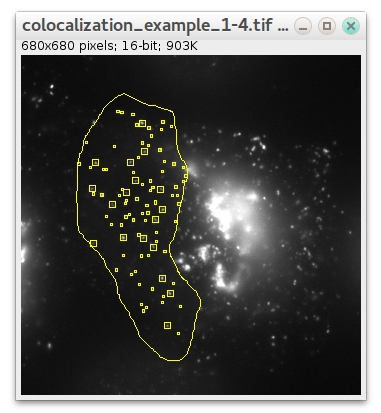
If you want detection to be performed in some specific region instead of whole image, select some ROI using any ImageJ ROI selection tools before launching plugin:
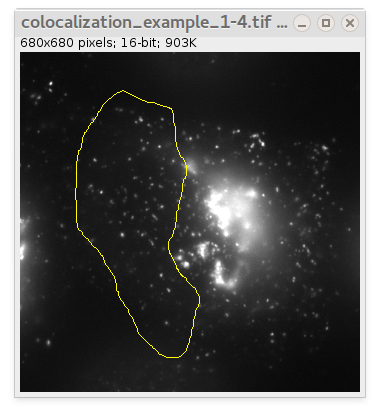
In this case only particles in that ROI will be detected:
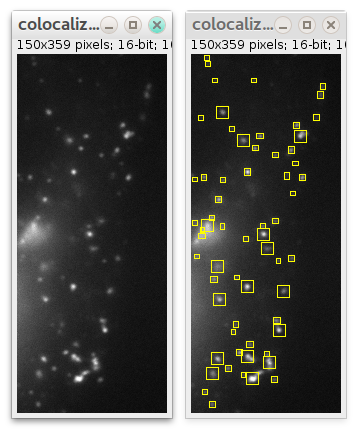
If your image contains two channels then after pressing 'Detect Particles' the dialog will look a bit more complex:
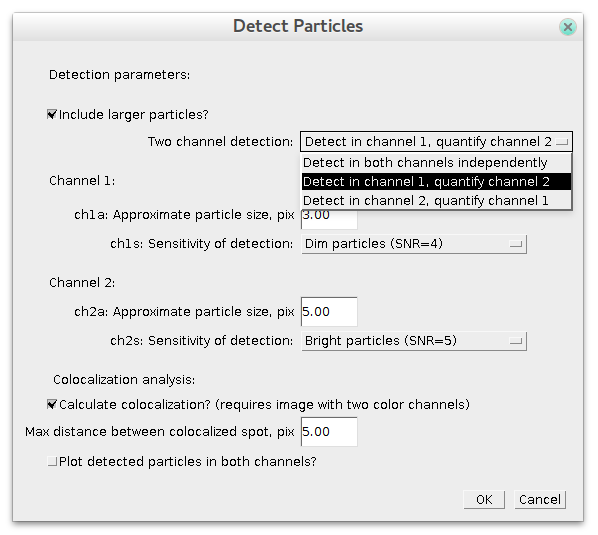
In this case you can specify the same parameters of detection for each channel separately. To get colocalization analysis you need to choose "Two channels detection: Detect in both channels independently" option and check "Calculate colocalization?" box. If you uncheck it, then only detection will be performed.
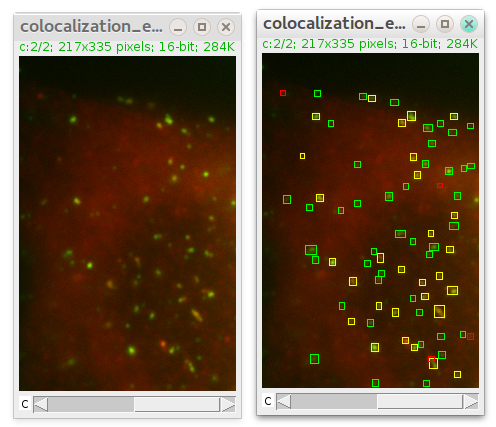
There is an additional parameter in case of colocalization: maximum distance between spots' centers. It defines at what distance (in pixels) two spots in different channels are considered to be localized. After detection is finished ComDet marks detected particles with rectangles of their own channel colour and colocalized particles in yellow:
New in 0.3.6: For two channels detection, there are two new options: "Detect in channel 1(2), quantify in channel 2(1)". In this case detection of spots will be done only in specified channel. For the other channel, same spots intensities would be quantified over the same area as in the "detection" channel (whether there is spot there or not).
Also 'only ROI detection' mode (as described above) works in this case.
Here is example of 'Results' table ('Summary' table is kind of self-explanatory).
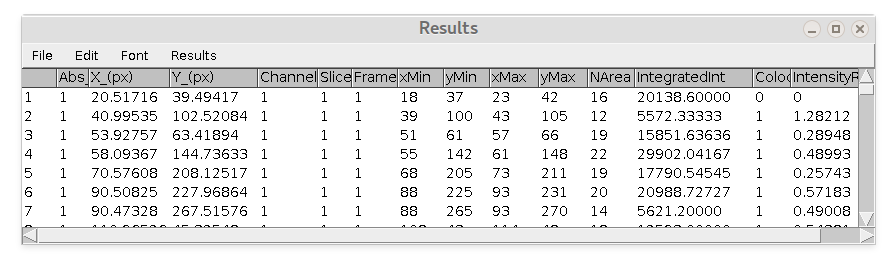
Columns are:
- Abs_frame = absolute frame number in stack (unique frame number)
- X(px)_ = x coordinate of spot (centroid fitting)
- Y(px)_ = y coordinate of spot (centroid fitting)
- Channel = corresponding channel number
- Slice = corresponding slice number (if z-stack)
- Frame = corresponding frame number (if timelapse)
- xMin, yMin, xMax, yMax = coordinate of rectangle around spot (in pixels)
- NArea = internal area of rectangle
- IntegratedInt = sum of all pixels intensity inside the rectangle minus average spot-specific backgrounds. Background value is calculates as average intensity of pixels on perimeter of the rectangle.
- Colocalized = 0 if spot does not colocalize with another and 1 if it does.
- IntensityRatio = Ratio of spot's IntegratedInt to IntegratedInt of corresponding colocalized spot.
Questions?
E-mail: katpyxa gmail com