-
-
Notifications
You must be signed in to change notification settings - Fork 2k
Getting Started
The instructions on this page will get you started developing Cura.
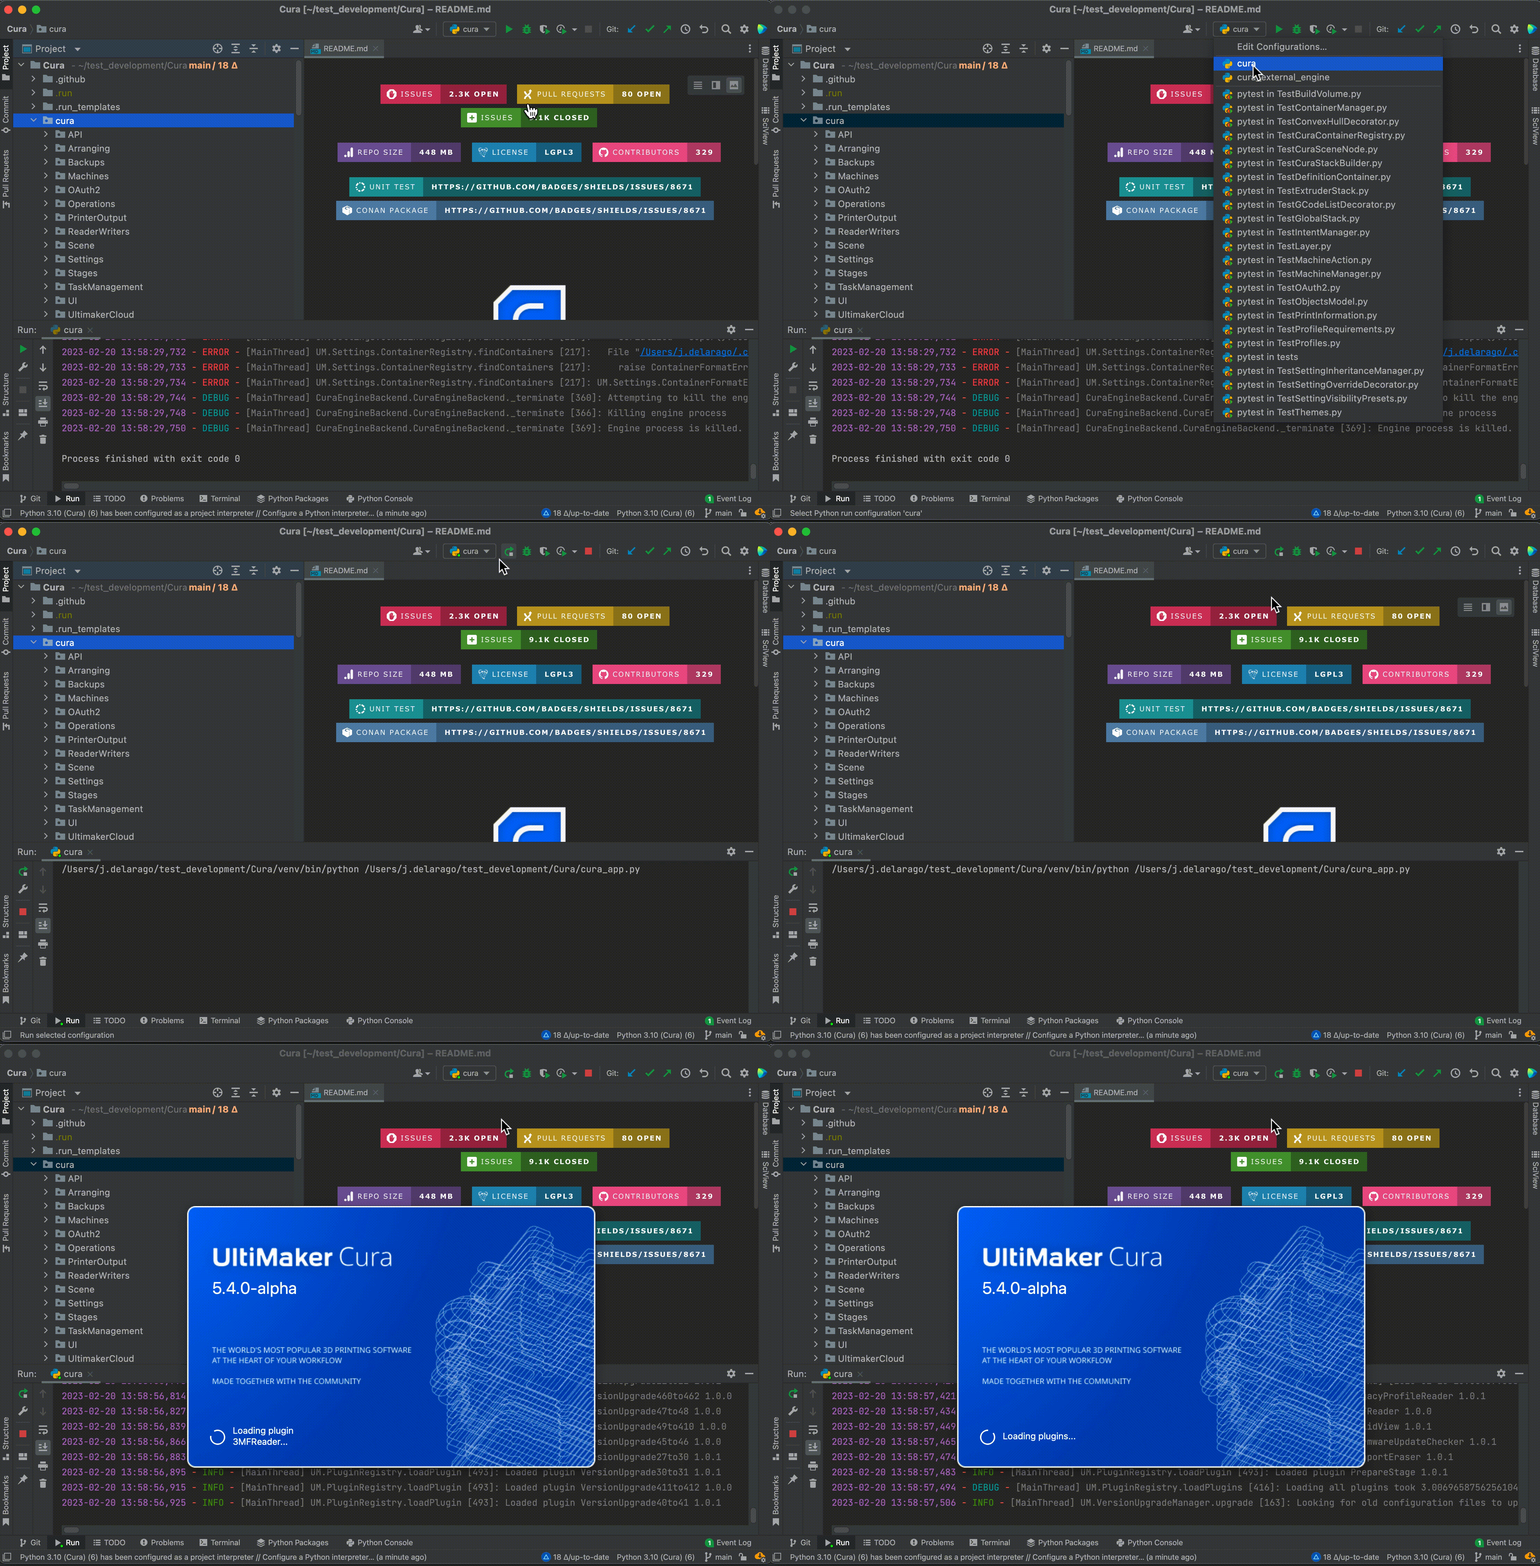
We advise using PyCharm, we have preset run configurations that will make getting started easier. There is a free community version available.
- First install the build requirements listed here.
- You only have to install these build requirements. All dependencies will be handled by Conan.
- Then configure Conan
- This step only needs to be done once, unless you clear your conan cache. You can skip this step for Uranium/CuraEngine.
- Then clone Cura.
- If you plan to work with Uranium and CuraEngine clone them all in the same root folder. You can find more information about the responsibilities of CuraEngine/Uranium here.
- Now run conan install
- This will install all dependencies required for Cura including CuraEngine, Uranium. This will take over 30 minutes on the first run.
- We advise using the -g PyCharmRunEnv argument here to get the PyCharm run configurations.
If you are using PyCharm you are ready to go, otherwise you must activate the virtual environment each time you would like to start development and run cura from the command line.

You can now make changes to you Cura project and test them by running Cura. If you would like to change the slicing process, follow these steps.
Here are some tips if you run into issues with conan.
- Make sure you have the correct conan version installed. You can check this with conan --version.
- Try to force installing the correct version
pip install --force-reinstall -v "conan==X.XX.X". Where X.XX.X is the version specified in the requirements
- Try to force installing the correct version
- Try deleting your local conan cache. You can do this with
conan remove "*" -f- You must redo the configure conan and conan install steps afterwards.
- Do not run conan install using
sudo. This will mess up the permissions in your cache.- If you have installed using sudo, delete your cache.
- Make sure you are not using our internal conan repository.
- Run this
conan remote remove cura
- Run this
- First install the build requirements listed here.
- If you have done this for Cura you should have all of the requirements already.
- Then clone Uranium.
Before you can run Cura using your development version of Uranium you must put Uranium into editable mode. Conan stores local copies of all dependencies in ~/.conan. Editable mode links the Uranium dependency in ~/.conan/data/uranium/... to the development copy we cloned in step 2.
- Inside your Uranium folder add conan as editable
- What you fill in here does not matter for local development.
- Example:
conan editable add . uranium/5.4.0@jeff/testing
- Inside your Cura folder run conan install again with this flag
--require-override=uranium/<version>@<username>/<channel>- Example:
conan install . --build=missing --update -o cura:devtools=True -g VirtualPythonEnv -g PyCharmRunEnv --require-override=uranium/5.4.0@jeff/testing - Store this command somewhere, you will need to use this everytime you run conan install on Cura.
- Example:
- To test if this worked, delete
Uranium/UM/Application.py. Cura should fail to start because this file is missing.
We advise using PyCharm to develop Cura and Uranium in parallel. It offers excellent support for multi repository projects.
- With the Cura Project open, navigate to File > Open.
- Click Attach on the popup Dialog
- Now you should have both Cura and Uranium open in the same window.

- Using the built-in git plugin, you can create branches for both projects simultaniously

This section covers developing CuraEngine and Cura simultaneously.
- First install the build requirements listed here.
- Then clone CuraEngine.
-
Build CuraEngine
- Most of the time you want to use Debug mode for the debugger.
- Run cura with the argument --external-backend or use the external backend run configuration in PyCharm.
 5. Start a slice in Cura
6. Run curaengine connect 127.0.0.1:49674
- If you are getting this error
[ERROR] Could not connect to the given addressthe port may have changed due to a failed slice.- Try incrementing the port number
curaengine connect 127.0.0.1:49675. - You can find the port in the Cura logs
[MainThread] UM.Backend.Backend._onSocketStateChanged [185]: Backend connected on port 49674
- Try incrementing the port number
- If you are getting this error
[ERROR] Trying to retrieve setting with no value given: 'setting_name_here'you are using a branch of Cura that is out of sync with CuraEngine.- Make sure you are on the main branch for both projects or merge main into your working branches on both projects.
- Welcome
- Getting Started
- Reporting An Issue
- Core Development
- Plugins & Material Packages
- Printers
- Translations
- Best Practices
- Settings
- 3D Scene
- Profiling
- Cura User Files
- GitHub Actions