Expanding the Wiki
You want to help us expand the Wiki?
Awesome! Here is a step-by-step tutorial on how to create/edit pages on the wiki.
You will need to be logged into your GitHub Account for this and for all of the following steps.
You can create a new Account here if you don't have an account already.
Alright, first you need to head over to this Wiki's GitHub repository.
After that, you just have to hit the "Fork" button in the top right corner, and you are done with Step number one.

Now that you have a fork of our wiki, you can start making your changes to it.
All changes you make to your fork will NOT affect the official wiki until you submit those changes, so please follow this guide till the end.
Now you can choose whether you want to create a new File or edit an existing File, for both we highly encourage you to follow our guidelines; otherwise, we may have to dismiss your changes as invalid.
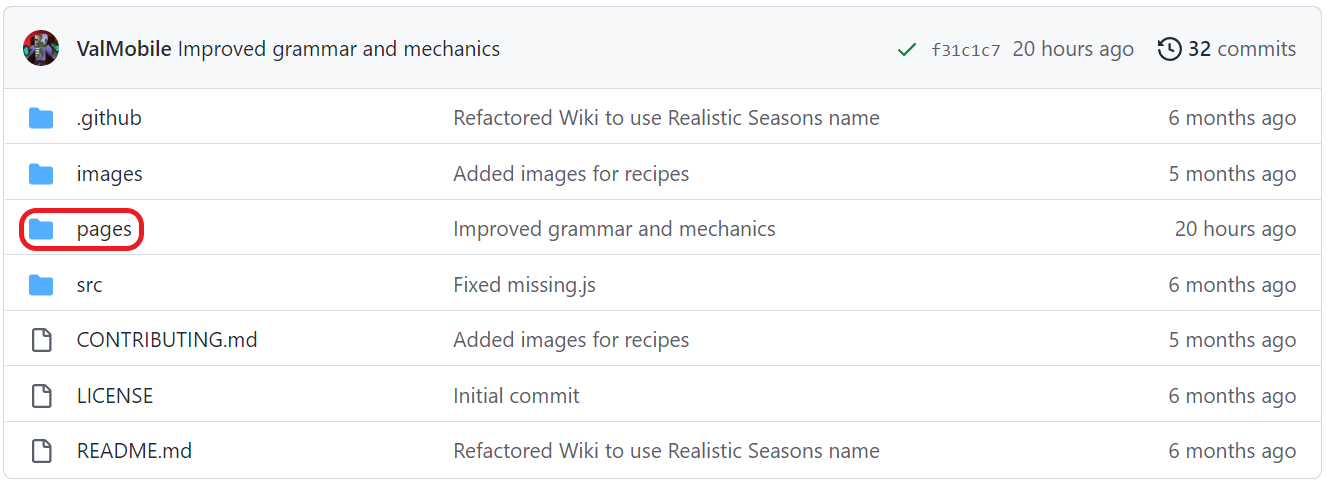
Go visit your Fork (You can always find your fork on GitHub's dashboard or your profile page) and navigate to the folder called "pages".
Now click on the button "Create new File".

File names have to follow the following conditions:
- File names need to end with ".md"
- File names are not allowed to contain spaces, special characters, or any other weird symbols
- Instead of spaces use hyphens "-" to separate words
Examples: "Diamond-Rapier.md", "Expanding-the-Wiki.md", "Ankh-Shield.md" or "Home.md".
Now you can create your page's content.
The pages are written in GitHub's markdown language, the syntax is pretty easy, and you can always consult Mastering Markdown if you need help.
If you need to embed images, please jump to Step 2.3: Uploading images.
Make sure to save your changes by clicking the green "Commit new file" button at the bottom!
Go visit your Fork (You can always find your fork on GitHub's dashboard or your profile page) and navigate to the folder called "pages".
Now open up any of the ".md" files you see in that folder.
To edit this page, simply click on the "edit"-icon.

Now you can edit that page's content.
The pages are written in GitHub's markdown language, the syntax is pretty easy, and you can always consult Mastering Markdown if you need help.
If you need to embed images, please jump to Step 2.3: Uploading images.
Make sure to save your changes by clicking the green "Commit changes" button at the bottom!
Go visit your Fork (You can always find your fork on GitHub's dashboard or your profile page) and navigate to the folder called "images".
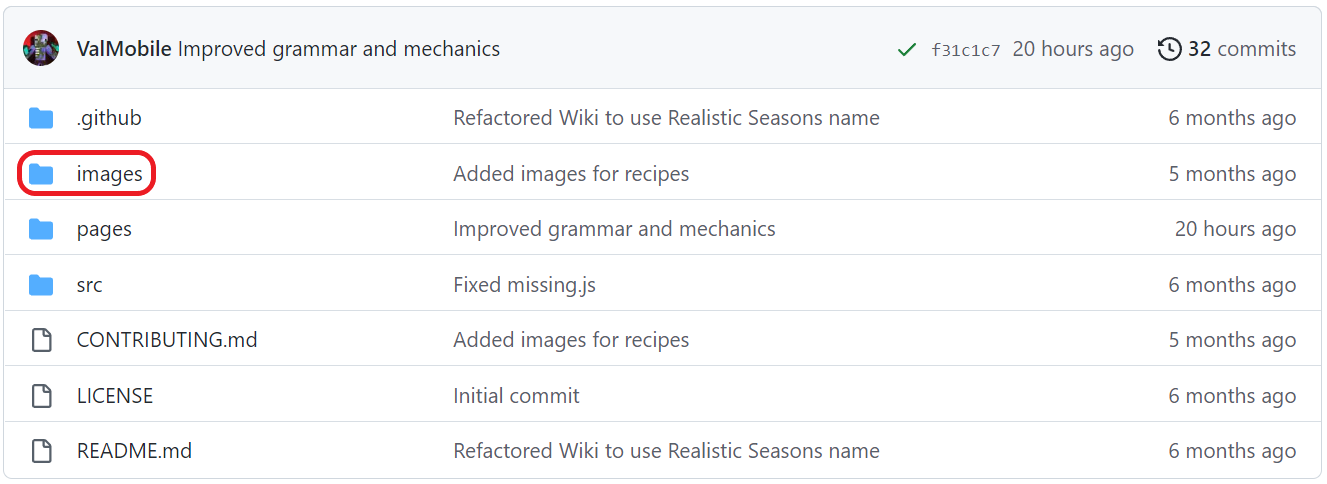
Now click on the button "Upload files".

Make sure that all your images use the PNG image format and have proper names. The names should be in lower case, contain no spaces, and use hyphens to separate words. Examples: "golden-greatsword-recipe.png", "sea-serpent.png", "lightning-dragon.png".
Drag and drop the images you want to upload onto the gray area and hit "Commit changes".
Now you can use your image on any page using the following code snippet:

Replace FILE_NAME with the name of your file (e.g. "fire-dragon.png") and give the name a short description in the "image label" field.
Whenever you edit or create pages on the wiki, follow the following guidelines.
- Write interesting and detailed content
- Try to provide pictures to illustrate the topic
- Always provide an image label for your images (See Step 2.3: Uploading images)
- Upload images using the PNG image format
- Crop your images; users only need to see the important part, not your super-cool diamond block base in the background
- Still show what is important; include the whole crafting window; for example, with the title and the output
- Use headers to structure your article
- It is fine to make one page for multiple items if they are very similar and don't need too much explanation
- Try to remain objective and use a neutral way of speaking
- Never start your article with a header since the wiki automatically adds a header for you
- Never link to any external images. Always upload your images to the images directory instead
- Don't use any resource packs when making images for the wiki. You should use Minecraft's default texture to make all images stay consistent
- Never promote your server and try to remove any server-linked information from your images, no watermarks, no IPs
- Don't upload any content you do not own or do not have the rights to use
- Don't delete any pages/images from the wiki unless you have a very good reason for it. Please explain it then
- These wiki pages are obviously no place for NSFW content, nudity, sexism, racism, or discrimination
- These pages are also no place for spreading your political views
Go visit your Fork (You can always find your fork on GitHub's dashboard or your profile page) and navigate to the "Pull Requests" tab.

Now all you have to do is click on the bright green button that says "New pull request".

Then click on the next "New pull request" button and fill out the description for your pull request.
Please use and follow our template.
After that, you click "Create pull request" and you are done!
Thanks for contributing to the Realistic Survival wiki!
If you have already submitted a pull request but want to change your files, you can do that.
Just repeat Step 2.
The pull request will automatically update to include new changes until it has been merged/closed.
This step is especially important if we request changes to be made.
This Wiki is made by the community and for the community. Here are a few ways you can help with that:
If you have any questions, you can also just join Realistic Survival's Discord Server and ask there :)
