$ hexo new "My New Post"merge commend
$ hexo cl && hexo g && hexo s
$ hexo d- 2023年12月16日
- 调整了 GloableHeader 的图标显示;
- 增加了GitHub repo 的 Link 标签;
- 模仿酷壳,在 GloableHeader 增加了一个 Funny Shake effect。
- 2023年11月15日
-
增加一个GitHub现在编辑button,可直接跳转GitHub远仓,进行修改提交。
为文章页增加了一个 GitHub 在线修改的 button,点击可在线提交到 GitHub
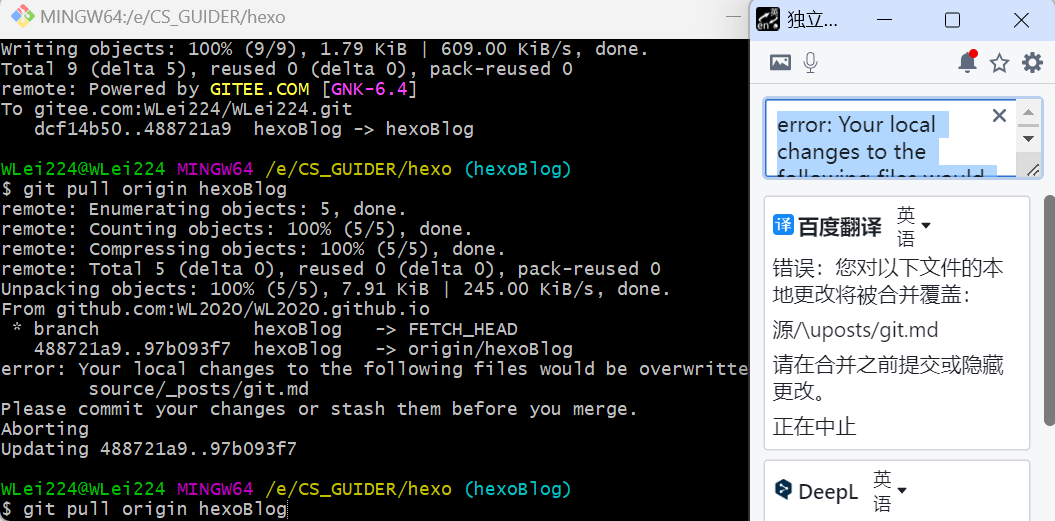
hexoBlog分支(源文件)分支,同时触发流水线自动部署到master分支(pages),所以会存在一种情况:每当我在线修改后,本地仓库文章与远仓不同步,本地写文章的话需要拉取最新更改。-
优化方案:是否可以有自动同步本地仓库的工作流
-
解决方案:本地更新文章之前需要先拉取远仓最新更改,否则会提示:
-
-
修改了layout布局文件夹下面的post.ejs文件,设置文章index_img宽高比为5:3
attention: 更改文章页的index_img需要手动更改图片尺寸 -
设置 GitHub 工作流,当同步源文件到远仓时,会自动部署静态资源到 GitHub Pages.
attention: 因为
imagemin-gifsicle插件版本的问题,本地运行时没问题,通过远仓的工作流进行npm install时,有时会安装不上,有时安装好了运行会报错,因此就直接把本地的node_modules直接上传到了GitHub,同时,在GitHub工作流文件中去掉了依赖安装的步骤.- GitHub工作流代码:
name: Build and Deploy
on: [push]

jobs:
build-and-deploy:
concurrency: ci-${{ github.ref }} # Recommended if you intend to make multiple deployments in quick succession.
runs-on: ubuntu-latest
steps:
      - name: Checkout 🔔
        uses: actions/checkout@v3

      - name: Install Hexo CLI
        run: npm install -g hexo-cli@4.3.0
        env:
          CI: false

      - name: Install Dependencies # 步骤3:安装依赖
        if: steps.cache.outputs.cache-hit != 'true'
        run: npm run build
        env:
          CI: false

      - name: Deploy 🚀 # 步骤4:部署
        # uses: JamesIves/github-pages-deploy-action@releases/v3
        uses: JamesIves/github-pages-deploy-action@v4
        with:
          GITHUB_TOKEN: ${{ secrets.GITEE_TOKEN }} # 使用 Gitee 令牌
          BRANCH: master # 部署到 master 分支
          FOLDER: public # 部署 public 文件夹
- 有了工作流, 本地更新上传文章就可以通过脚本一键上传了!
本地仓库拉取远仓最新更改 windows shell 脚本:
@echo off

E:

cd E:\CS_GUIDER\hexo

echo "Pull the latest code from github..."

REM 因为Button在线修改是在GitHub远仓修改的,所以这里直接拉取GitHub远仓的更改

echo "pull source code..."

git pull origin hexoBlog

echo "pull source code over!"

echo "deploy to gitee pages"

hexo cl && call hexo g && hexo d -m "autoDeploy"
本地一键上传远仓 windows shell 脚本:
@echo off

E:

cd E:\CS_GUIDER\hexo

echo "upload source code to remoteRepo..."

REM 目前版本中 gitee 远仓的工作流还待更新,所以这里我们任然使用 hexo-cli 脚手架的一键部署命令,这里需要在根目录的 config.yml 文件中进行配置远仓地址,这里因为GitHub工作流文件可以云端部署静态资源,所以我在文件中只配置了 Gitee 的远仓地址。(后续更新 Gitee 工作流之后就可以直接废弃hexo-cli的相关命令啦,但是如果修改了文件地址的话或者标题,可能会出现文章无法访问以及链接失效的问题,所以hexo clean还是需要了解一下的)

echo "trucking files over"

echo "commit files"

git commit -m "feat: auto synchronized."

echo "commit over"

echo "push to github"

git push origin hexoBlog

echo "push gitee"

git push gitee hexoBlog
由于部署在 GitHub Pages 上,国内访问速度很是拉跨。于是准备托管到 Gitee Pages 上,奈何 Gitee 个人版不支持自定义域名和ssl。
首先,我认为搭建博客有两个出发点。①是出于沉淀知识的目的,②则是出于沉淀知识的同时分享自己的知识,追求个人流量以及知名度。
- 0投资沉淀私域知识(不想花钱,不关心访客量):
- 首先推荐部署到
Gitee Pages静态网页上,不仅提供了 https 链接,而且国内访问速度还是很 OK 的,缺点就是每次更新文章需要手动点击更新。喜欢摸索的可以学习下 CI/CD 持续部署,创建一个工作流文件,当监听到仓库更新时,自动部署到 Pages。- 其次推荐部署到
Github Pages静态网页上,但是访问速度堪忧,有时需要魔法才可以正常访问。- **图片加载问题:**在
GitHub Pages超级慢,前者还行。解决方案:购买一个云服务商的对象存储,例如华为云OBS、阿里云OSS...,创建一个图床,这样就可以解决图片加载问题了。- 出于沉淀知识 + 分享知识,打造个人 IP:
- **前置条件:**域名、备案
- **贫民方案-无服务器部署:**都知道服务器是不便宜的,我曾看到一篇博客,说可以部署到腾讯云的 Coding 平台,这样就可以使用自定义域名了,只需花一个域名的钱,也可以选择完成域名备案。点击前往:文章更新于2020年,可能Coding平台已升级,未验证是否还支持静态网站部署
- **前置条件:**域名、备案 + 对象存储、CDN、服务器
- **金主方案-个人服务器部署:**直接博客上云,推送到云端服务器的 GitHub 仓库-->远仓自定义主页domain-->域名控制台完成解析-->购买个人对象存储图床和 CDN 内容分发-->域名备案-->提交域名到各搜索引擎,例如百度搜索资源平台和Google Search Console,同时可以搭配百度统计和Google Analytics 来可视化分析自己博客的访问情况。
- 我的二者兼得方案:
- 待补充!
- 百度资源搜索平台如何验证个人站点?谷歌搜索怎么验证个人站点?怎么提高百度收录量?
保持更新并紧扣关键字。经常更新博客,并确保文章内容紧紧围绕关键字展开,同时也要注意保持文章标题和内文的关键词自然出现,不要过度堆砌。
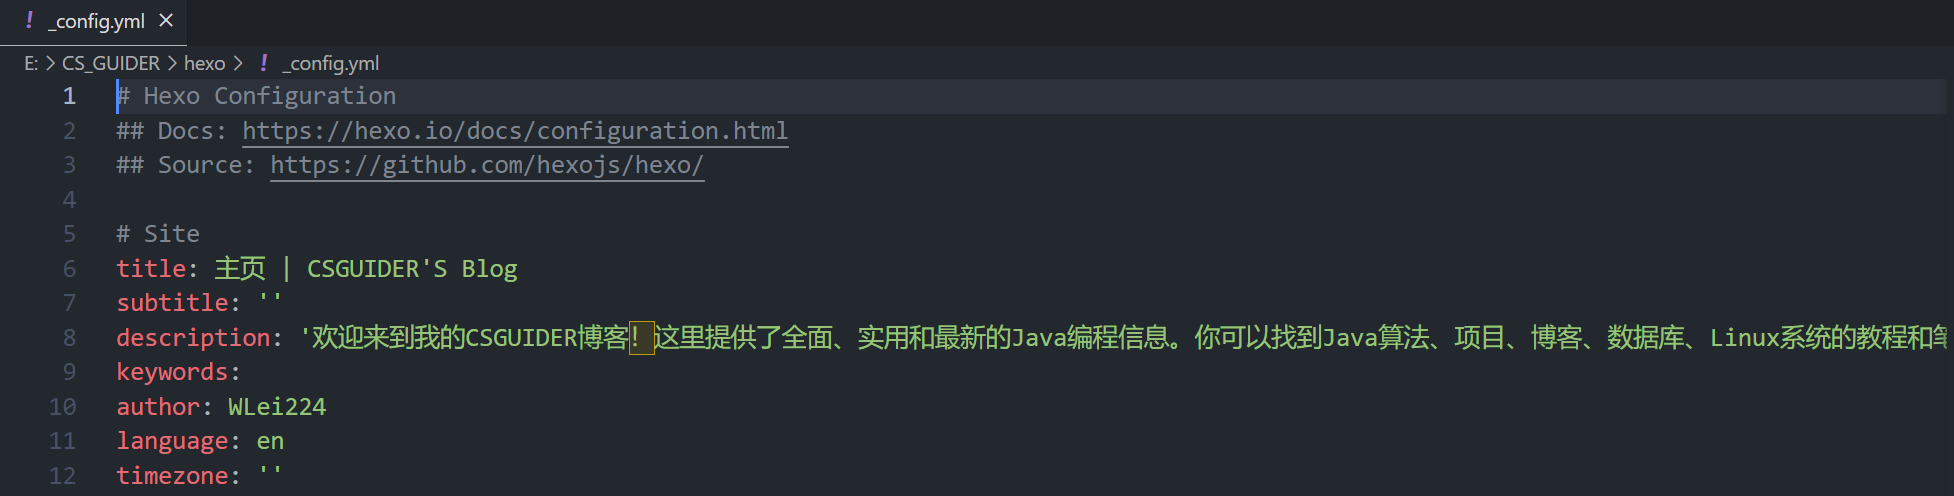
优化内容页。SEO优化重点应以文章内容页为主,适当增加关键词(Keyword)、描述(Description)、抓取器(Robots)等标签,并确保每个页面都有唯一的URL。参考链接
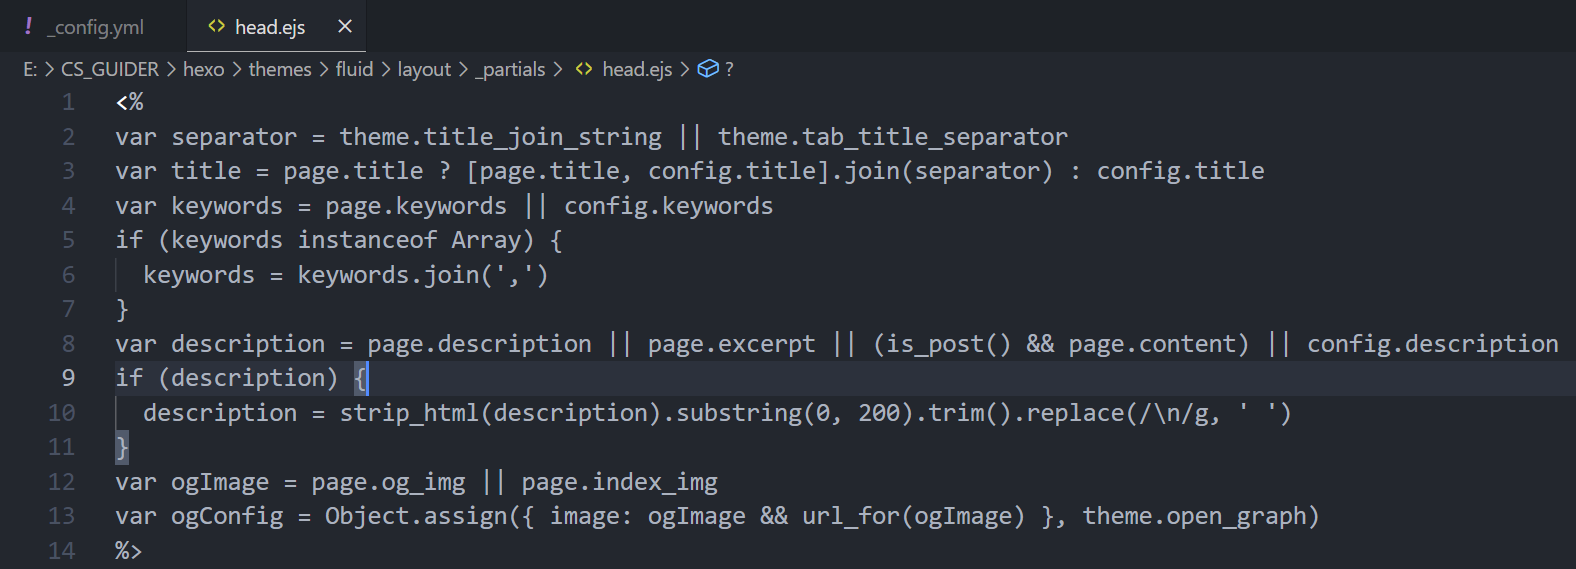
注意description的获取优先级: `description>excerpt>content>config.description
建立单一关键词策略。对于新博客,可以建立单一关键词策略,以增强网站对搜索引擎的权威性。
合理分类栏目。使用目录形式分类栏目,并避免过度分类。对于比较重要的文章的URL,可以使用拼音、英文和分割线等结构。
做好内部链接建设。在新文章中适当增加一些老文章的链接,并确保文章的内部链接自然出现。
外部链接建设。建立其他博客或网站的外部链接,推荐使用工具如http://www.lusongsong.com/tool/seo/。
垃圾留言处理。及时删除垃圾留言,否则可能严重影响排名。
Alt标签和图片信息。给每个博文插图添加和文章内容相关的alt信息,并在图片周围添加相关信息。
TAG标签使用。通过添加TAG标签可以增强主题的相关性和被搜索的概率。
合理设置标题。文章的Title最好以“文章标题-博客名称”形式出现。
关键词自然出现。在文章标题、正文开头或结尾中自然出现关键词。
文章结尾优化。每篇文章的结尾处可加入“原创文章如转载,请注明出处”“本文首发于XXX网站”等信息,对SEO有一定帮助。
#---------------------------
# 站点地图(sitemap.xml)
# 安装插件:
#   -Google:npm install hexo-generator-sitemap --save
#   -Baidu:npm install hexo-generator-baidu-sitemap --save
#---------------------------

# sitemap
sitemap:
  path: sitemap.xml
baidusitemap:
path: baidusitemap.xml如果安装的时候出现各种报错都没有在
GitHub提到的issues中找到,仔细看报错内容提示,该重启的时候就重启,该上梯子就上梯子(不行就全局模式),卸载依赖:npm uninstall hexo-all-minifier;安装依赖:npm install hexo-all-minifier --save,这两个命令反复多来几次,就会忽然发现,安装成功了!!!!最后吐槽一句,被墙真不友好!!!
#---------------------------
# 压缩插件
# 安装插件:npm install hexo-all-minifier --save
# 源码地址:https://github.com/chenzhutian/hexo-all-minifier
#---------------------------

#把以下配置文件添加到 _config.fluid.yml中

#启用all_minifier
all_minifier: true
# html压缩
html_minifier:
  enable: true
  ignore_error: false
  exclude:

# css压缩
css_minifier:
  enable: true
  exclude:
    - '*.min.css'

# js压缩
js_minifier:
  enable: true
  mangle: true
  compress:
  exclude:
    - '*.min.js'
js_concator:
  enable: false
  bundle_path: '/js/bundle.js'
  front: false
  silent: false

# 图片优化
image_minifier:
  enable: true
  interlaced: false
  multipass: false
  optimizationLevel: 2
  pngquant: false
  progressive: false
再记录、复盘一下这个插件在 GitHub 工作流中的问题!!!盲猜是因为 nodejs 的环境或者 npm 的环境问题
事情缘由:想给文章增加一个在线编辑的
Button,被工作流文件和这个插件折腾了一天多。问题所在:本地环境与 GitHub 环境有所不同,相同的依赖上传到GitHub,在hexo generate构建的时候,也就是npm run build的时候,工作流文件会报错。报错如下:
FATAL {
err: Error: spawn /home/runner/work/WL2O2O.github.io/WL2O2O.github.io/node_modules/imagemin-gifsicle/node_modules/gifsicle/vendor/gifsicle ENOENT
   at ChildProcess._handle.onexit (node:internal/child_process:284:19)
   at onErrorNT (node:internal/child_process:477:16)
   at process.processTicksAndRejections (node:internal/process/task_queues:82:21) {
 errno: -2,
 code: 'ENOENT',
 syscall: 'spawn /home/runner/work/WL2O2O.github.io/WL2O2O.github.io/node_modules/imagemin-gifsicle/node_modules/gifsicle/vendor/gifsicle',
 path: '/home/runner/work/WL2O2O.github.io/WL2O2O.github.io/node_modules/imagemin-gifsicle/node_modules/gifsicle/vendor/gifsicle',
 spawnargs: [ '--no-warnings', '--no-app-extensions' ],
 stdout: <Buffer >,
 stderr: <Buffer >,
 failed: true,
 signal: null,
 cmd: '/home/runner/work/WL2O2O.github.io/WL2O2O.github.io/node_modules/imagemin-gifsicle/node_modules/gifsicle/vendor/gifsicle --no-warnings --no-app-extensions',
 timedOut: false,
 killed: false
}
} Something's wrong. Maybe you can find the solution here: %s https://hexo.io/docs/troubleshooting.html
Error: Process completed with exit code 2.
解决方案:
因为本地是完全没有问题的,而且我的依赖是本地直传 GitHub 远仓,于是,直接在
.gitignore文件中忽略了这个插件涉及到的子插件问题。node_modules/imagemin-gifsicle/*暂时解决,后续有问题继续更改。
不足之处:
工作流文件中缺少在线构建的语句,因为想要与本地保持一致,暂时选择了直接上传,后续若有问题,再继续改进。工作流文件如下:
# name: Deploy # 工作流名称 # on: # push: # push 事件触发工作流 # branches: # - hexoBlog # 只有在 hexoBlog 分支推送时触发工作流 # jobs: # build: # job1 id # runs-on: ubuntu-latest # 运行环境为最新版 Ubuntu # name: Deploy blog # steps: # - name: Checkout # 步骤1:获取源码 # uses: actions/checkout@v2 # 使用 actions/checkout@v2 # - name: Cache node modules # 步骤2:缓存 node_modules # uses: actions/cache@v2 # with: # path: node_modules # key: ${{ runner.os }}-node-${{ hashFiles('**/package-lock.json') }} name: Build and Deploy on: [push] permissions: # 增加写入仓库分支的写权限,否则在最后一步部署时会出错,提示 contents: write jobs: build-and-deploy: concurrency: ci-${{ github.ref }} # Recommended if you intend to make multiple deployments in quick succession. runs-on: ubuntu-latest steps: - name: Checkout 🛎️ uses: actions/checkout@v3 - name: Install Hexo CLI run: npm install -g hexo-cli@4.3.0 env: CI: false - name: Install Dependencies # 步骤3:安装依赖 if: steps.cache.outputs.cache-hit != 'true' run: npm run build env: CI: false - name: Deploy 🚀 # 步骤4:部署 # uses: JamesIves/github-pages-deploy-action@releases/v3 uses: JamesIves/github-pages-deploy-action@v4 with: GITHUB_TOKEN: ${{ secrets.GITHUB_TOKEN }} BRANCH: master # 部署到 gh-pages 分支 FOLDER: public # 部署 public 文件夹介绍:
Automatically deploy your project to GitHub Pages with GitHub Actions. This action can be configured to push your production-ready code into any branch you'd like, including gh-pages and docs. It can also handle cross repository deployments and works with GitHub Enterprise too.
官方提供的Action文件:
name: Build and Deploy
on: [push]
permissions:
  contents: write
jobs:
  build-and-deploy:
    concurrency: ci-${{ github.ref }} # Recommended if you intend to make multiple deployments in quick succession.
    runs-on: ubuntu-latest
    steps:
      - name: Checkout 🛎️
        uses: actions/checkout@v3

      - name: Install and Build 🔧 # This example project is built using npm and outputs the result to the 'build' folder. Replace with the commands required to build your project, or remove this step entirely if your site is pre-built.
        run: |
          npm ci
          npm run build

      - name: Deploy 🚀
        uses: JamesIves/github-pages-deploy-action@v4
        with:
          folder: build # The folder the action should deploy.
#---------------------------
# 文章置顶
# 安装时间:2023年10月24日
# 安装插件:npm install hexo-generator-index --save
# 源码地址:https://github.com/hexojs/hexo-generator-index.git
#---------------------------
# 使用方法
sticky: 100(数值越大,优先级越高)#---------------------------
# 解决文章链接会随标题变动而变动,链接永久化插件
# 安装地址:https://github.com/Rozbo/hexo-abbrlink
# 安装插件:npm install hexo-abbrlink --save
#---------------------------
permalink: posts/:abbrlink.html
# abbrlink config
abbrlink:
alg: crc32 #support crc16(default) and crc32
rep: hex #support dec(default) and hex
drafts: false #(true)Process draft,(false)Do not process draft. false(default)
# Generate categories from directory-tree
# depth: the max_depth of directory-tree you want to generate, should > 0
auto_category:
enable: true #true(default)
depth: #3(default)
over_write: false
auto_title: false #enable auto title, it can auto fill the title by path
auto_date: false #enable auto date, it can auto fill the date by time today
force: false #enable force mode,in this mode, the plugin will ignore the cache, and calc the abbrlink for every post even it already had abbrlink. This only updates abbrlink rather than other front variables.