Configuration
Important: If you have more than one inverter, the inverters must have sequential unit IDs (i.e. 1, 2, 3, ...). Either RS485 bus can be used for your inverter chain is on as long as it's configured as SolarEdge leader/follower. When you have meters the RS485 meter Device ID does not conflict with the inverter's Device ID because they are on different RS485 busses using different bus modes.
Each inverter must have a unique unit ID. The SolarEdge monitoring platform still works if there are duplicate unit IDs, but modbus will not.
SolarEdge inverters only allows one Modbus/TCP connection at a time. Additional TCP connection attempts will result in a "connection refused" error. Other integrations that connect to the same inverter using Modbus/TCP must be disabled or removed.
- Enable WiFi Direct on the inverter by switching the red toggle switch on the inverter to "P" position for less than 5 seconds.
- Connect to the inverter access point like you would for a normal network. The WiFi password is published at the right side of the inverter, OR scan the QR code on the side of your inverter.
- Open up a browser and go to http://172.16.0.1 then click on Site Communication. From this page you can enable Modbus/TCP.


This only needs to be done on the Leader (or single) inverter with the IP network connection.
Important: If you have more than one inverter, the inverters must have sequential unit IDs (i.e. 1, 2, 3, ...). Either RS485 bus can be used for your inverter chain is on as long as it's configured as SolarEdge leader/follower. When you have meters the RS485 meter Device ID does not conflict with the inverter's Device ID because they are on different RS485 busses using different bus modes.
Each inverter must have a unique unit ID. The SolarEdge monitoring platform still works if there are duplicate unit IDs, but modbus will not.
If you only have one inverter: the default Device ID is 1 and no other changes are required beyond enabling modbus.


Make sure the Device ID of your second (or third, forth, etc. ) inverter is set correctly on the RS485 connection. Each inverter on the bus must have a unique Device ID. If your Leader inverter is Device ID 1, then the Follower inverters must start with Device ID 2 and increase by one. If the Device ID is not set correctly the inverters can still report data to SolarEdge, but will not work with Modbus/TCP or this integration.
Depending on the firmware version of your inverter it may read Master or Leader for the first inverter, and Slave or Follower for additional inverters.
The RS485 meter Device ID does not conflict with any inverter's Device ID because they are on different RS485 busses. The SolarEdge meter ships with default ID 2.


Note that these inverters (like SE5000H) can also have Modbus/TCP enabled. To do so:
- Enter Installer mode on the inverter by pressing the "OK" button for 5 seconds and entering the installer password. The default password is "12312312", which maps to "⬆️⬇️✅⬆️⬇️✅⬆️⬇️" buttons on the inverter.
- Go to "Communications" menu, then "LAN setup", where there will be an option to enter port for Modbus/TCP.
- While you are there, if you have a multi-inverter configuration, check that Modbus IDs are set up correctly and no two identical Modbus IDs are used on the same RS485 interface. If you update Modbus IDs, ensure that inverter IDs are sequential and the master inverter has the ID of 1.
In Home Assistant, add a new integration and search for "SolarEdge Modbus Multi".
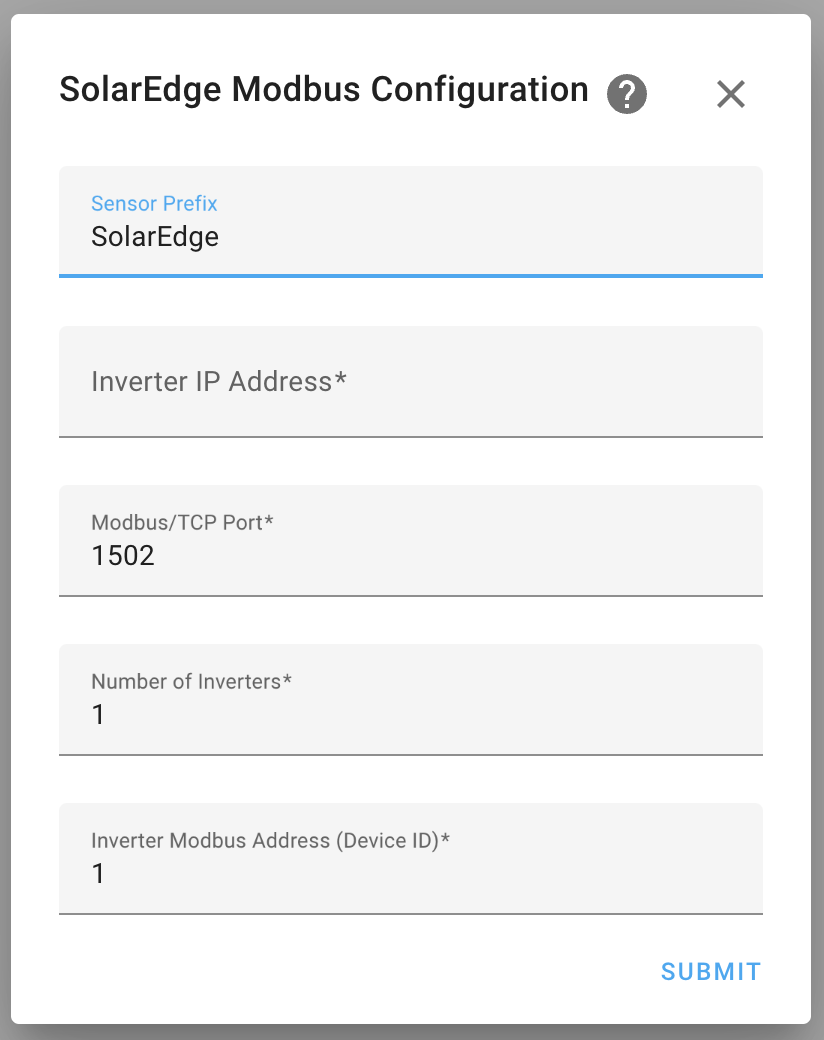
Enter the IP address or host name of your inverter with Modbus/TCP enabled. The default port number is 1502.
If you only have one inverter, leave "Number of Inverters" set to the default of 1. Otherwise, set this number to the total number of inverters in your Leader/Follower chain.
You can configure the Leader inverter address with the "Inverter Modbus Address (Device ID)" option when setting up the integration. This will be the starting Device ID if "Number of Inverters" is greater than 1. For example, if you configure the Device ID to 4 and Number of Inverters to 3, then your inverters will be addressed as IDs 4, 5, 6. The default is 1, which will address the inverters as 2, 3, 4, etc.
Meters will be automatically detected by default. If you want to enable battery auto-detection, configure the integration after adding it (see Integration Configuration Options).
Important: SolarEdge inverters only allows one Modbus/TCP connection at a time. Other integrations that connect to the same inverter using Modbus/TCP must be disabled or removed. Additional TCP connection attempts will result in a "connection refused" error. You can use multiple instances of solaredge-modbus-multi as long as the Keep Modbus Connection Open option is disabled and the polling interval is greater than 10 seconds.
After setting up the integration, you can configure it by clicking on the "configure" button on your integrations panel:


Default 300 seconds (5 minutes). This option changes how often the inverters are polled for updates.
When enabled, this option will tell the integration to try and hold the connection to the inverter open at all times. The default is to close the connection after a polling cycle completes.
If the polling interval is 10 seconds or less this option is automatically enabled.
Automatically look for and add meter devices on start up. Default is enabled.
Automatically look for and add battery devices on start up. Default is disabled.
Battery registers are not officially supported by SolarEdge. If you enable this and your batteries aren't detected, read Known Issues: Not All Inverters Support Battery Data
This option allows enabling storage controls and site limit controls.
Warning: The Power Control Options can violate utility agreements, alter your utility billing (i.e increase your bills if used improperly), may require special equipment to be installed (such as meters), and overwrite provisioning by SolarEdge or your installer. Use at your own risk!
Additional options for batteries are available when Auto-Detect Batteries is enabled.
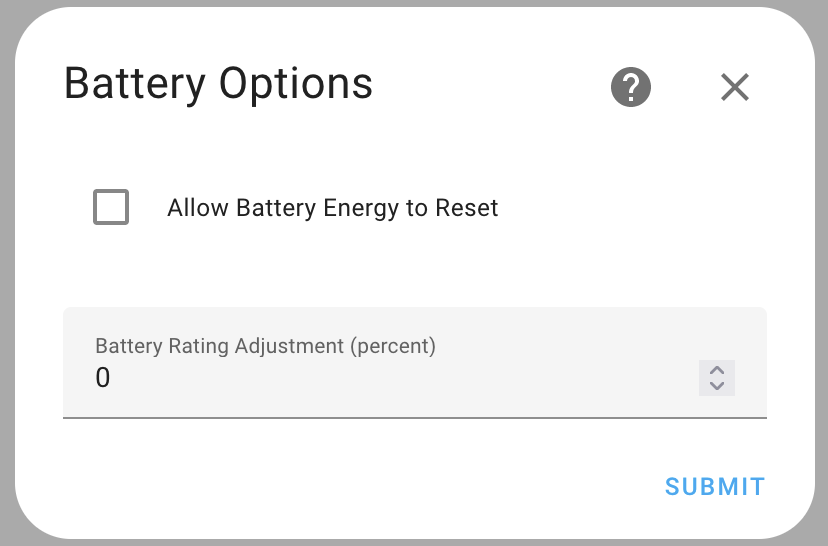
This option is used with batteries that do not treat battery energy import and export as lifetime counters. When enabled, this option allows battery energy to go backwards or reset to zero. For more information see: Known Issues -> Battery Energy. The default is disabled.
Some batteries may report some values that are higher than their rated (nameplate) values. Setting this option allows related sensors to display values over the rated values in validation checks.
Default: 0 percent. Valid range: 0-100 percent.
By enabling these functions the user agrees that if something bad happens, or a large bill is generated, or you change a setting required by local laws or utility agreements, it's your problem. Don't open an issue to complain about settings: power control functions are disabled by default for this reason. If you know what you are doing and you recorded the original settings in case there are problems so you can revert to the last known good configuration, then you should be relatively safe.

This option enables commands related to battery storage. The default is disabled.
This option enables commands related to export sites limits and production site limits. The default is disabled.
After sending a command the integration will wait the configured number of seconds before trying to read data from the inverter. Some inverters will refuse reads while processing a command , which will cause entities to become unavailable, or may return bad data while processing a command.
Default: 0 seconds. Valid range: 1 to 60 seconds.
The solaredge-modbus-multi supports some settings in configuration.yaml for advanced users.
Changing these settings is not supported. The defaults work for a majority of cases. If you have problems after changing these settings you will be asked to remove them from your config.
These are the options available for YAML configuration with default values:
solaredge_modbus_multi:
  retry:
    time: 800  # First attempt in milliseconds.
    ratio: 3  # Time multiplier between each attempt.
    limit: 5  # Number of attempts before failing.
  modbus:
    timeout: 3  # Timeout for a request, in seconds.
    reconnect_delay: 0   # Minimum in seconds.milliseconds before reconnecting.
    reconnect_delay_max: 3.0  # Maximum in seconds.milliseconds before reconnecting.
    retry_on_empty: false  # Retry on empty response.
For example, if you want to change the retry logic to retry up to 15 times at a fixed interval of 10 seconds (up to 2.5 minutes before changing to unavailable state) you would use settings like this:
solaredge_modbus_multi:
  retry:
    time: 10000
    ratio: 1
    limit: 15
These settings could be changed in config.py but placing them in YAML config allows changes to be persistent across updates. These settings are not in the configuration options UI because changing these (intentionally or accidentally) can easily cause undesirable results.