so this a repository that will reduce your time and your efforts in order to make 3D modeles came to Life in this Repository i will help you make your 3D printing more Effective and share some problems that i have i will share here all the problem that i face ,, how i figure it out and how you sould work with your 3D printer the Ender-3-pro Please if you have any feedback about this feel free to contact me ..
VID_20220302_115035.mp4
VID_20220302_093924.mp4
3D printing is a so-called additive manufacturing technique which proceeds by adding material, unlike techniques proceeding by removing material, such as machining. 3D printing makes it possible to produce everyday objects, spare parts or even prototypes intended for testing. The starting point is a computer file representing the object in three dimensions, broken down into slices. This information is sent to a 3D printer which will carry out the manufacturing by adding successive layers.
It was on July 16, 1984 that the first patent on 3D printing (known as “additive manufacturing”) was issued. deposit. The agents are French: Jean-Claude André, Olivier de Witte, and Alain le Méhaute on behalf of CILAS ALCATEL. The same year, in the United States, on August 1, 1984, the American Chuck Hull filed the patent on the technique stereolithography 3D printing (SLA for StereoLithography Apparatus)
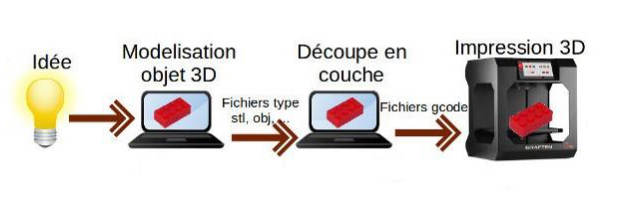
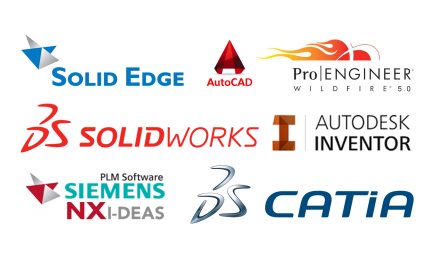
The first step in 3d printing is to model a 3d object and export it to one of the Stl specific files. obs. or amf. For this we must choose one of the many software computer-aided design (CAD), such as SolidWorks, Catia, Autodesk Fusion 360...
After having a finished 3D model, you must then slice the file or cut the file into several layers using one of the slicing software, Ultimaker Cura for example. This software not only allows us to slice the 3d object but it must generate the g code as well than controlling the different parameters of the machine. G code is a machine tool command language that includes instructions for piloting , is the language known by the majority of CNC machines.
Once the g code is ready, you can print by sending the g code to the printer usually by an SD card, a connection cable to the computer , by internet through a local network or by OCTOPRINT for anywhere in the World .
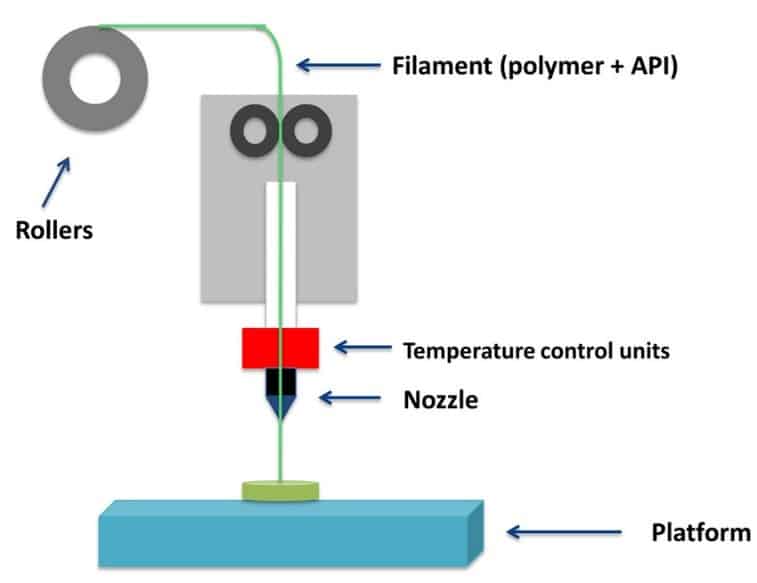
FDM (Fused Deposition Modeling) or molten filament deposition. This is the type of printers 3D most common among individuals , This technique is the one that we're focusing on because this technique is used for Our Ender-3-pro. This technique consists in depositing layer by layer a filament of thermoplastic material melted on average at 200°C. Thus, by superimposing layers which can have different contours and therefore by accumulation of material, we end up to get the desired object. The print head moves in the three directions of space identified by the three coordinates X, Y and Z (length, width and height). These coordinates are transmitted from the computer by a 3D file which corresponds to the 3D model of the object to be to print. ==> this is the technique for the Ender-3-pro
the other techniques, I will talk about the theme a little bit here and you will find them in the future in other repositories
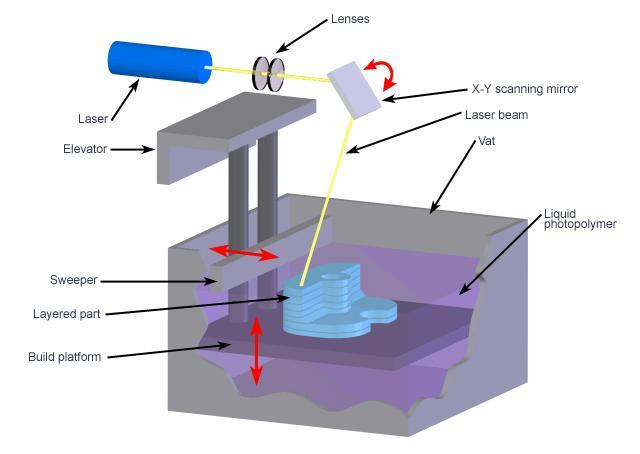
This is the first 3D printing technology, which appeared in 1986. In this case the point of nozzle is an ultraviolet laser and a tray of liquid photopolymer. As the deposit system of filament, this process prints layer by layer. The laser strikes the liquid which solidifies under the effect of ultraviolet light. A plate immersed in the tank supports the material thus solidified and descends, as for the FDM, to pass from one layer to the next. Once the printing is finished, the object must be rinsed to get rid of the remains of photopolymer with a solvent. The object is then put in the oven to solidify it. A constraint which is added to the relative slowness of the process. The usable materials remain quite few and despite the great precision offered by ALS, this technique delivers relatively fragile objects. It is therefore limited to prototyping rather than the production of objects.
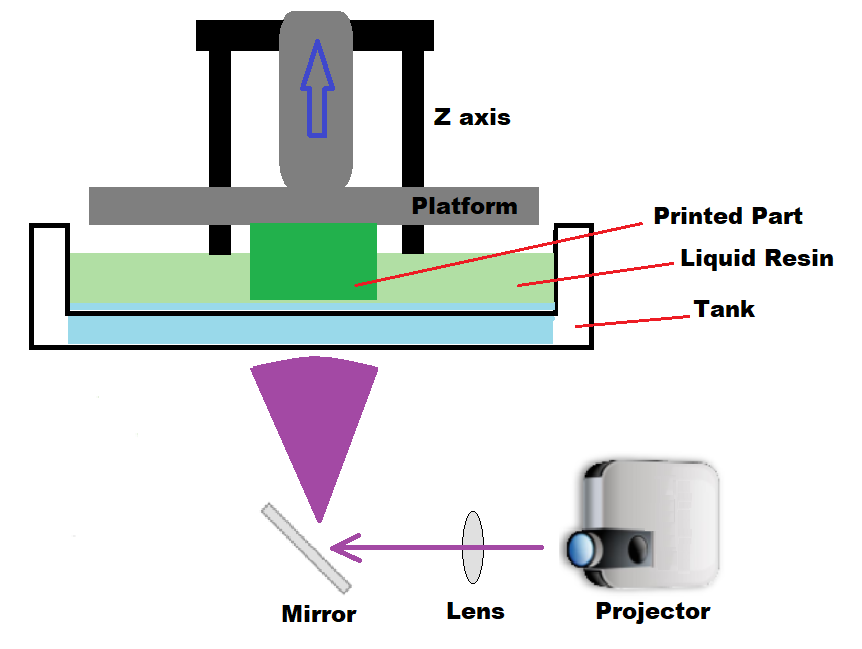
DLP (Digital Light Processing) developed for work requiring high precision, such as jewelry or the manufacture of prostheses, the DLP process is based on the same technology than that which is embedded in many video projectors. The principle is similar to ALS, in that light is used to solidify a liquid polymer. A chip made up of a matrix of orientable mirrors, sometimes several million reflects a UV light and projects a kind of image corresponding to the shape of the layer to be printed. This light therefore strikes the polymer which is in a tank to solidify it. The processing is done layer by layer, as in the case of SLA
It is a very common material in fused filament deposition 3D printing. He comes from of materials such as corn starch, which gives it the advantage of being biodegradable and usable in the manufacture of objects in contact with food, such as bowls or plates. On the other hand, it is sensitive to water and heat. Repeated contact with one or the other may cause damage. PLA melts at a temperature between 160 and 220°C and does not require a tray heating to be printed. While it responds well to post-processing such as painting, it is not not easy to make it perfectly smooth. Sanding does not give complete satisfaction since friction melts the material.
Obtained from petroleum, it is stronger than ABS and frees itself from the heating plate. He is used for parts that require both strength and flexibility. We find it especially in plastic bottles. Like PLA and ABS, PET is found in reel. The temperature necessary for its printing is of the order of 220°C. Contrary to this than you might think, it doesn't give off any smell.
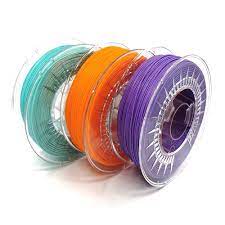
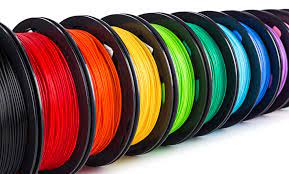
It is the other favorite material of users of FDM type machines. The example given more often is that of Lego bricks, made of ABS. It offers more properties interesting than PLA in terms of water and heat resistance. Moreover, its rendering is smoother than what PLA offers. It therefore generally requires less processing on output of the machine. ABS requires a temperature of 200 to 250°C to melt. He also needs a tray heated to prevent it from shrinking as it cools. It comes in several colors and can be in the form of coils of filament or in the form of liquid polymer for the process ALS.
Used in the laser sintering technique (SLS), they come in powder form. In the context of use with a filament deposition process, we find for example the nylon in the form of reels. Resistant and elastic, it melts at a temperature of 235 to 260°C and does not necessarily require a heating plate. The vast majority of polyamides are compatible with food contact
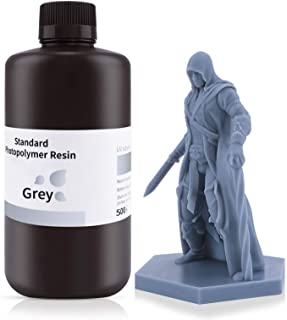
Used in the SLA process, resins offer different physical properties specific to each type of resin. They allow very detailed and solid impressions, on shapes complex. Its very smooth rendering requires a fairly simple post-processing.
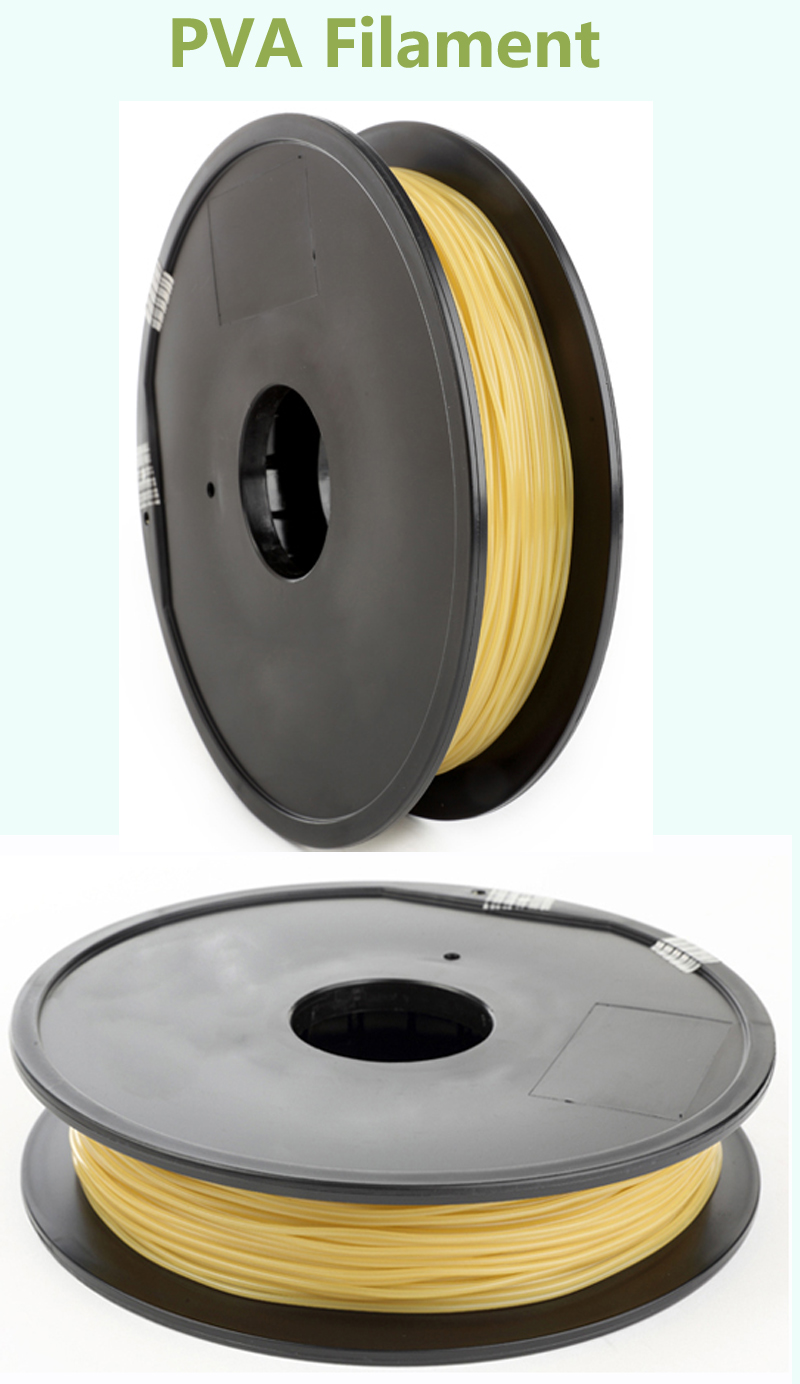
PVA (polyvinyl alcohol) is used in 3D prints using filament deposition molten, especially with machines with several extrusion nozzles. It allows freedom supports printed in the same material as the part, often difficult to eliminate. Biodegradable, a simple passage in water eliminates it
Extruder Temperature: at least 230 °C in the extruder.
Bed Temperature: between 80 and 100 °C.
Adhesion support on plate: absolutely necessary.
Print speed: maximum 60 mm/s.
Retraction distance : 5 mm.
Retraction speed : 45 mm/s.
Cooling air : not recommended, so the fan should off & we need to disconnect the other fan manually.
Printing Temperature: 200 °C
Bed temperature: 60 °C
Speed: 50 mm/s
Layer height: 0.12 mm
Retraction: 6 mm at 25 mm/s
Initial layer speed: 20 mm/s
Initial fan speed: 100%
things you need to know about PLA : https://www.youtube.com/watch?v=unmvWkfpmRE
after extensive research it has been found that these parameters are the best … but we must always be careful of certain parameters for certain cases https://github.com/Vanethrane/Cura-Profiles/blob/master/Ender%203%20v2.curaprofile
You can also follow this article which explains the problem you might be facing and how to make changes in your cura setting to make it work fine. https://all3dp.com/2/ender-3-cura-settings-best-ender-3-cura-profile/
also we find those settings for making print time lower without increasing the speed of the printer
https://www.youtube.com/watch?v=eVP7dVXIhOU
This is one of the most difficult parts in working with a 3D printer .. because a good leveling bed can give you good results .. You just slip a piece of paper and make you z ax in 0 and see how far the nozzle is from the bed and try to make the bed closer in order to get 0.1 mm and you will feel that paper makes a little resistance when you try to move it .
< also you need always to clean your bed after this process with isopropyl alcohol > !!!!!
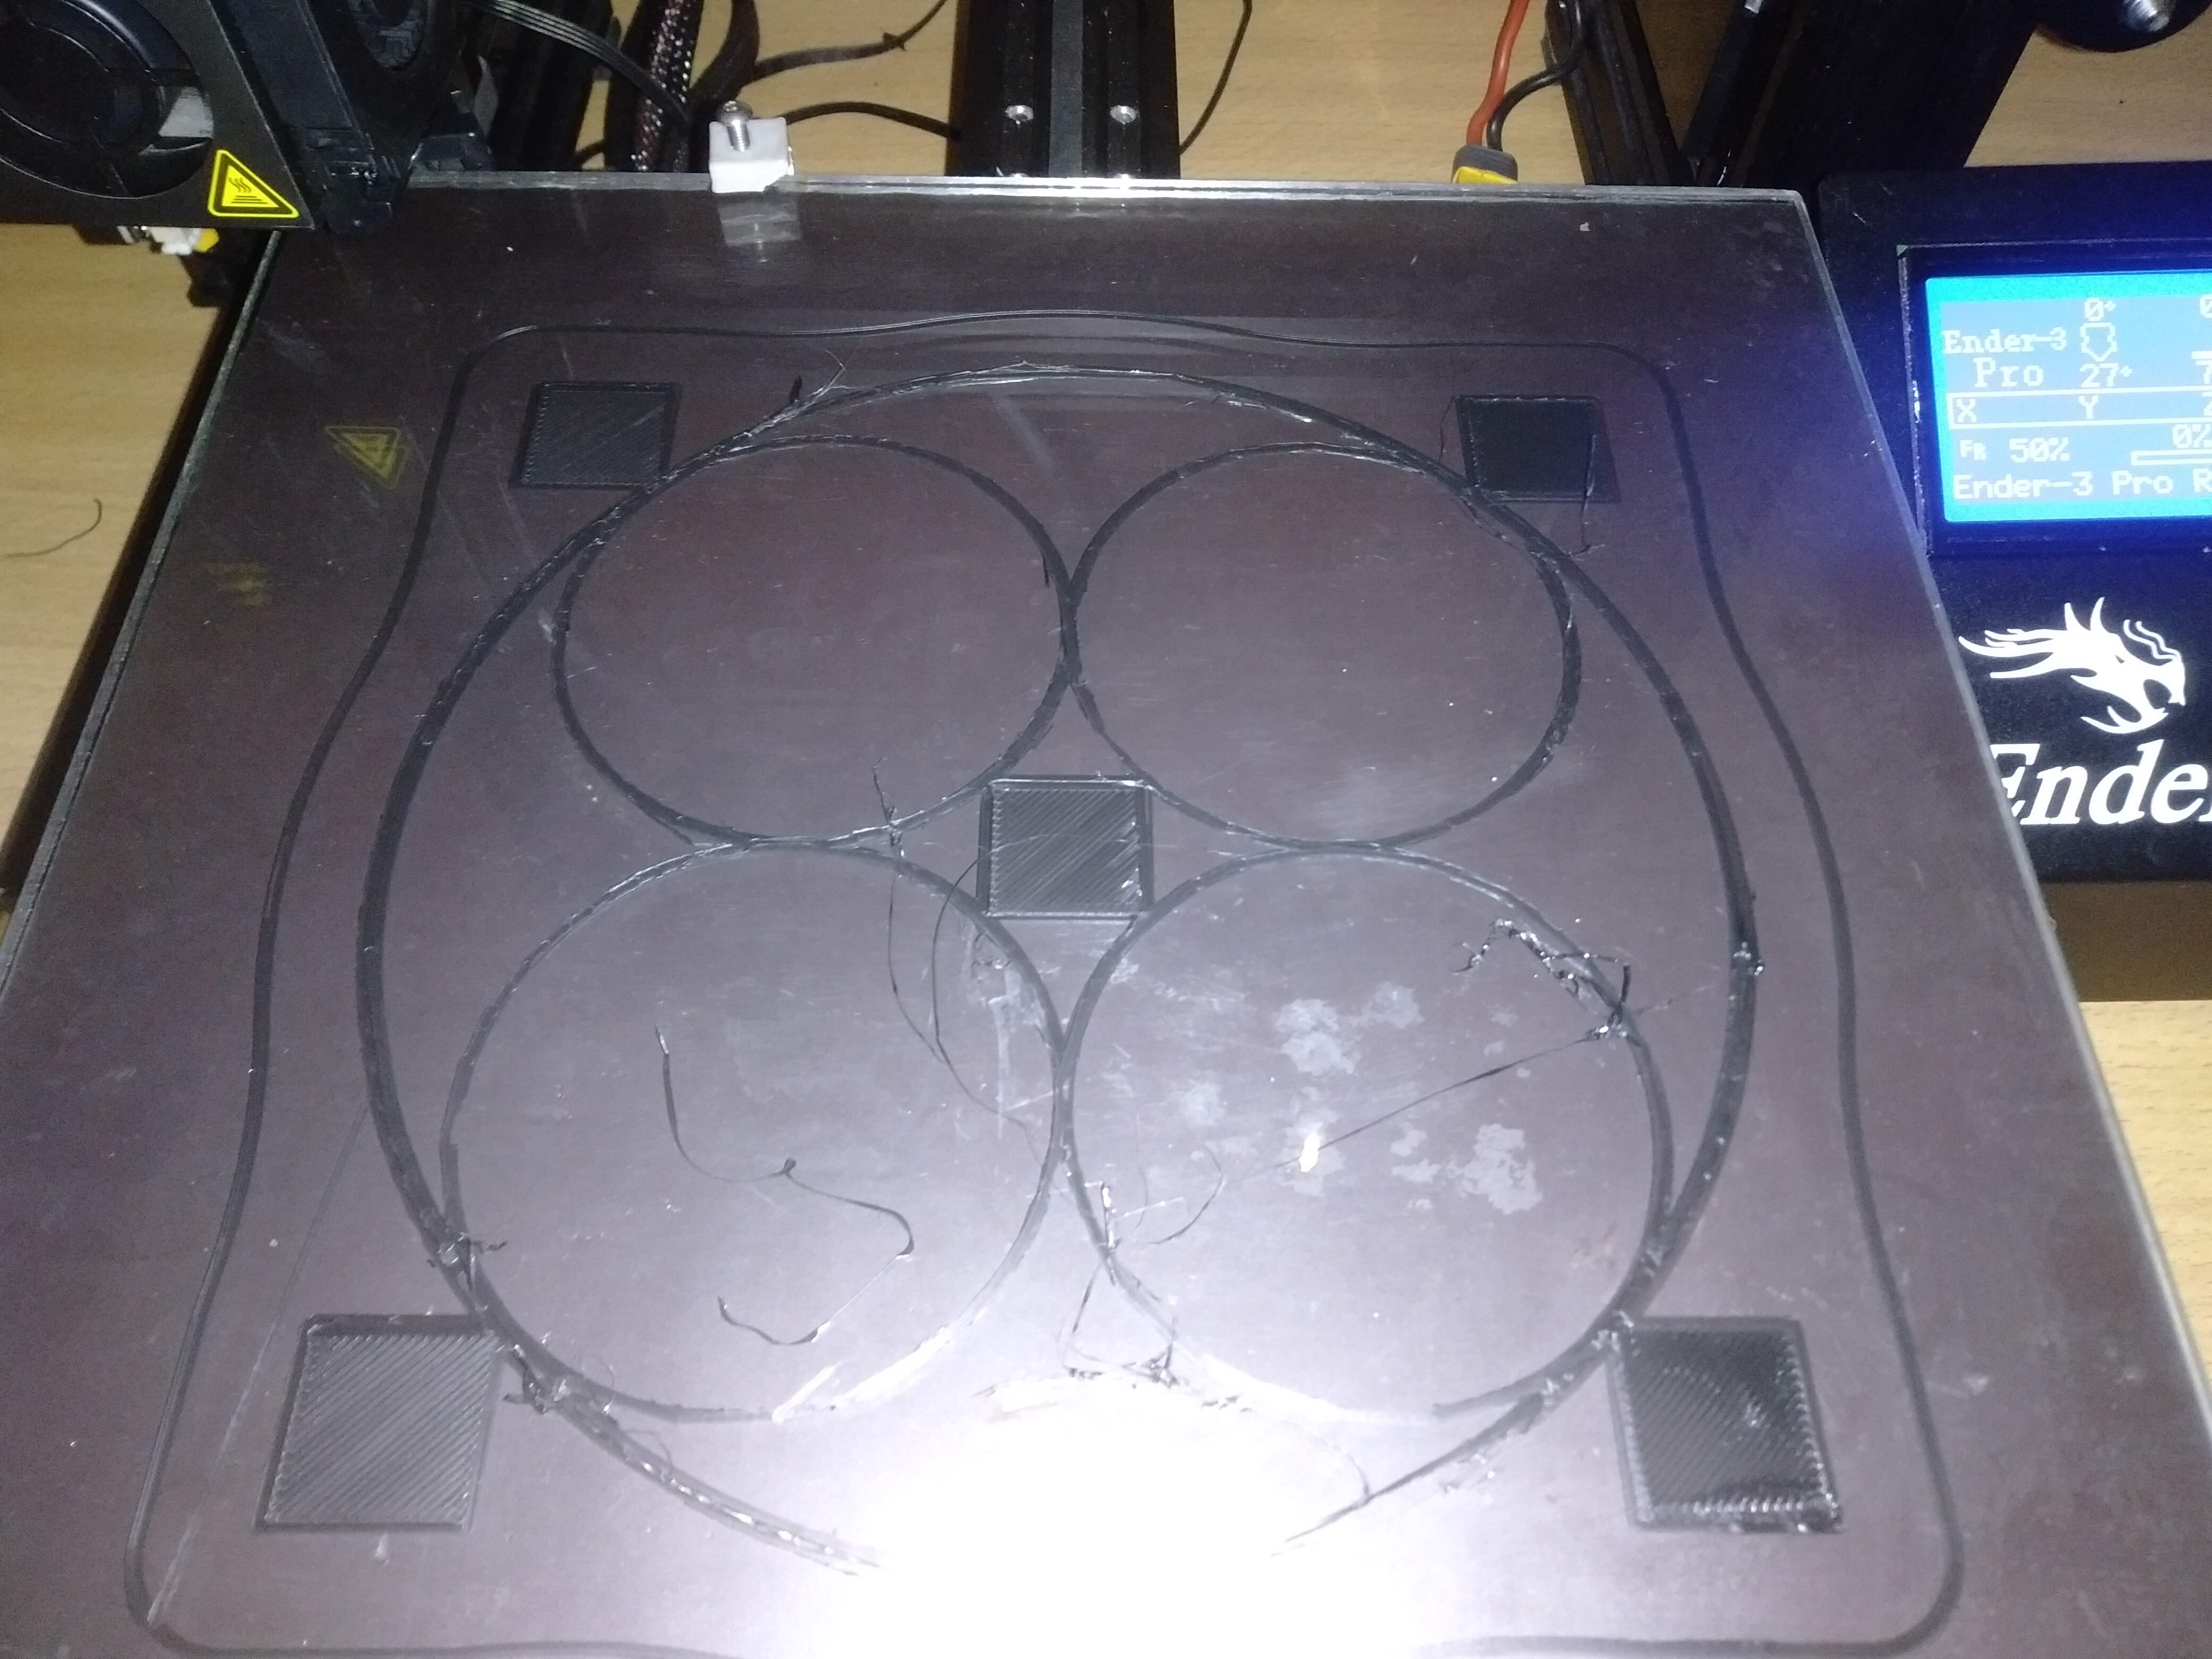
you can after that verify that the bed is leveled or not by simply print a bed level test
VID_20220421_101402.mp4
https://www.youtube.com/watch?v=ppkSVXiawvg
https://www.youtube.com/watch?v=v8SwY8yveqc
https://www.youtube.com/watch?v=kAafiApJs9A

https://www.youtube.com/watch?v=Ply0L0C9DSc
This is a simple method to increase your print speed and feed rate. Using a larger nozzle is an easy way to print objects faster, but you will see a reduction in quality in the form of visible lines and rougher surfaces. When you print with lets say, a 0.2mm nozzle, you’re placing fine layers each time you go over the printing surface, so getting a 1mm height will take 5 extrusion movements over the area. in comparison to a 0.5mm nozzle it would only take 2 so you can see how nozzle size largely affects printing times. Nozzle size and layer height do have a relationship, where the general guideline is for you to have a layer height which is at most 75% of the nozzle’s diameter. So with a 0.4mm nozzle, you’d have a layer height of 0.3mm.
https://www.youtube.com/watch?v=tM5obc-VLpQ
this is one of the most important document that you need to make and update it often , as it oversees the behavior of the 3D PRINTER so you need to write down the problems and how you manage to fix those problems , so in the futur you will optimize the time of maintenance and will determinate the weekness points of our 3D printer
The Ultimaker Marketplace lets you add extra functionality to Ultimaker Cura and streamline your 3D printing workflow. This includes plugins such as the Solidworks, Autodesk Inventor or Siemens NX integration: plugins which export files to Ultimaker Cura directly from your favorite CAD software. You can also find optimized material print profiles for third-party materials that are designed to work with Ultimaker 3D printers.
https://www.youtube.com/watch?v=KjMqJ1LHivs

will this is a great tool to have , so let's say you want to print something and you wanna to recored a video for the printing operation or you wnat just to launch a printing without going next to your printer or you have some concern about your printing process and you want to supervised from another place , well OCTOPI make it easy to you
There isn’t too much to setting up OctoPrint on an Ender 3. Here’s a list of everything you should have before you start:
Raspberry Pi board (e.g. Raspberry Pi 4)
Raspberry Pi power supply (5 V, 1.2+ A) and Micro-USB cable
MicroSD card (16+ GB of storage)
Connection USB cable (Mini-USB for the original and Pro; Micro-USB for the V2)
Internet-connected device (Linux, MacOS, and Windows are all supported)
Raspberry Pi Imager software
Although you don’t need them, you may also want to have the following materials to enhance your OctoPrint setup and its capabilities:
Compatible Pi camera (for monitoring your machine)
Compatible Pi screen (for an attachable direct interface)
3D printed Pi case (to protect your board and make it look good!)
The first step is to flash the OctoPi software onto your microSD card. While this process can be summed up in one sentence, it’s a little more complicated than that.
You can follow the steps below or, for more board-specific instructions, you can check out our installation tutorials for some of the most popular boards, like the Raspberry Pi 4 or 3B+. The steps below are described for a computer running Windows, but the process for a Mac is very similar.
1 .Insert your 16+ GB microSD card into your internet-connected device with Raspberry Pi Imager installed.
2 .Download the latest stable version of OctoPi from OctoPrint’s website. It will download as a zip file, so you’ll need to extract the contents.
3 .Locate the extracted folder, open it, and right-click the disk image file. Select “Open with” and choose “Raspberry Pi Imager”.
4 .Once you do this, the Raspberry Pi Imager program may ask you if it’s permitted to make changes, and you should click “Yes”. The Raspberry Pi Imager application will open, and below the “Operating System” label should read the long name of the disk image file.
5 .Choose your inserted microSD card for the “Storage” tab, and then click “Write”. The flashing process will take a few minutes.
6 .Once complete, you’ll be prompted by your device to format the microSD card. Close this pop-up and don’t click “Yes” as formatting the disk will erase everything on it.
7 .Open your device’s file explorer and verify that your inserted storage device has the OctoPi configuration files. If it doesn’t, try reflashing the OctoPi files onto the microSD card.
Although you have the OctoPi files on the storage device, don’t insert it into your Raspberry Pi board just yet. We still need to establish a network connection, which we’ll go over how to do in the next section.
Now that you’ve loaded your microSD card with the OctoPi files, it’s time to connect your Raspberry Pi to the internet. You can do this in two ways: over Ethernet or Wi-Fi.
The main difference is that, for Ethernet, you simply plug an Ethernet cable (connected to a Wi-Fi router) into your Raspberry Pi board. Ethernet will also most likely have a stronger, more reliable connection than a wireless connection. However, your Pi will need to stay within the cable’s length of your router. Wi-Fi works great too, and you shouldn’t notice a significant difference.
If you want to use a wireless Wi-Fi connection, you can follow the steps below for a Windows computer, and the process is very similar on a Mac.
1 .Insert your microSD card into your internet-connected device. Be sure to disregard and close the pop-ups asking you to format the microSD card.
2 .Open the file explorer on your device and locate the file labeled “octopi-wpa-supplicant” on the microSD card. Right-click this file, move your cursor over “Open with,” and select “Notepad” or another basic text editor.
3 .Check the type of encryption of the Wi-Fi network you want your Raspberry Pi to connect to. (For most private networks, this will be a WPA or WPA2 secured network.)
4 .Scroll down to where the text reads “WPA/WPA2 secured”, or to the type of network you’ll be using (“Open/unsecured”, “WEP”) and uncomment (delete the initial ‘#’ from) the four lines that start with a single ‘#’.
5 .Locate the “Properties” of the Wi-Fi network you want to connect your Pi to. (To view the properties of a network, you have to be connected to it, so make sure your device is connected to the Wi-Fi network.)
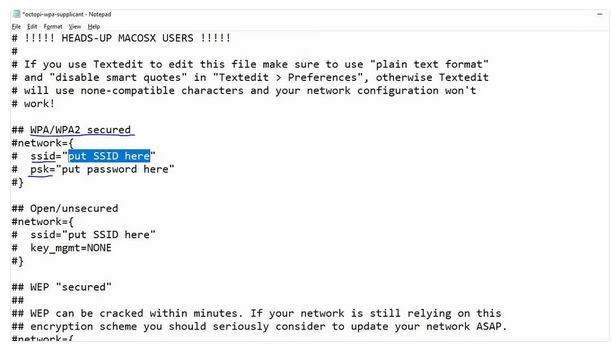
6 .Copy the “SSID” from the network properties list and paste it in the Notepad file where the text reads “put SSID here”.
7 .Type the password to replace where the text reads “put password” here.
8 .Where the file includes a list of “country=” lines, uncomment the ‘#’ in front of your country name, and make sure there’s a ‘#’ in front of the other countries that you’re not in.
9 .Save the Notepad file, making sure it overwrites the file on the microSD card.
10 .Eject the microSD card from your device.
Now that you’ve added network credentials to your OctoPi configuration files, you can move on to the next step: booting up!
Finding the IP Address
You can use Angry Ip Scanner to find the ip adress of teh raspberry pi : https://angryip.org/

keep an eye on your 3D printing
1648909051485.mp4
so in average it will consume like 125 Wh but it could reach 227Wh in best performance of our 3D printer ender 3 pro
so
for 24 HOURS it will consume 5.5 KWh ⇒
that’s mean according to the official website of STEG
the cost of 24 hours of printing 5.5 * 0.3 = 1.65 DT.
https://3dprinting.stackexchange.com/questions/8616/creality-ender-3-printer-power-consumption https://www.reddit.com/r/ender3/comments/b3nrow/power_consumption_creality_ender_3/ https://3dsolved.com/ender-3-power-consumption/ https://www.steg.com.tn/fr/clients_res/tarif_electricite.html