Getting started: Hello World
The goal here is to run a simple "Hello World" program on a BlueBasic enabled device. To do this you must first get the BlueBasic code onto an appropriate CC254X device, and then load the Basic program onto the device. If your device already has BlueBasic on it, then skip forward to writing your first program.
If you don't have a device already preloaded with BlueBasic (probably not), you first need to flash BlueBasic to the device using the TI CC Debugger. The easiest way to do this is using Texas Instruments SmartRF Flash Programmer tool (Windows only). It is free and you can find it here. Install version 1 on your favorite Windows box. Don't install version 2. You will also need to install the CC Debugger device driver which you can find here.
Once everything is installed and the device plugged in, launch the SmartRF Flash Programmer. You should see a screen something like this:

Connect your device to the CC Debugger. If you are using a TI development kit, it will include information on how to do this. If you're using a third party board or device, you are on your own (sorry!). Once the device is connected, the CC Debugger status should be green (i.e. the LED on the device should be green). If it is red, try pressing the "reset" button on the debugger. Once a device is recognized, you will see a screen like the following.

This is very similar to the previous screen, but now you will see the CC debugger device listed and highlighted in blue.
Now we need to select a file to flash to the device. One might already be selected in the "Flash image:" box, but we're going to navigate to a new one anyway. Current images for the CC2540 and CC2541 can be found here. There are two images types here - .HEX files and .BIN files. For the moment we are concerned with the .HEX files. The image matching your select chip should be downloaded onto your local machine. For this example we will assume the CC2541 chip is in use. So, we download the BlueBasic-CC2541.hex file.
Once downloaded, hit the "..." to the right of the "Flash image:" box to open the standard Windows file selector dialog, navigate to the HEX file and select it.

Now, on the lower left, select the option "Erase, program and verify" and hit the big "Perform actions" button. This started the process of flashing the chip.

This process can take a minute or so, especially the verification step which reads back what was flashed onto the chip to check for errors. Once the process is completed, you should see something like this:

Congratulations. BlueBasic is now installed on your device. We can put away the CC Debugger; we won't need it again.
One the initial BlueBasic is installed on the device, all remaining interactions with the device will be from the Blue Basic Console. This is open source, but you can find a precompiled version here. Currently only an OSX version is available; Windows, iOS and Android versions will be made available in the future. The console program interacts with your BlueBasic device using the bluetooth radio. There's no need to attach any cables to the device when you need to load a new program, reconfigure, or even upgrade the firmware; it all happens wirelessly.
Download and unzip the Console program. This will produce a single "Blue Basic" app which you can install wherever you prefer on your machine. Launch the app in the usual way and you should see a screen something like this:
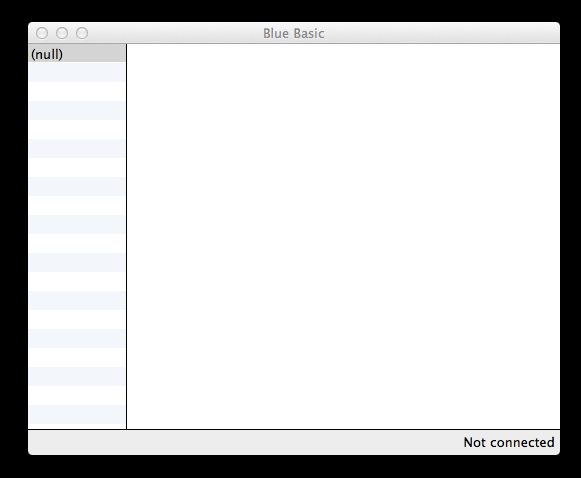
The Console is split into three sections: the left column which lists any Bluetooth device in range, the bottom status bar which show the state of the current BlueBasic connection, and the right text window. The right window, when connected to a device, is where you type to interact with the platform. In the picture above we see one device named "(null)"; a bluetooth device which is in range but not publishing any identifiable name. These are no BlueBasic devices. In the following an addition device has appeared:

The device named BASIC#A4 is a BlueBasic device. The hexadecimal value after the # is part of the device's unique address and helps to distinguish different devices when browsing.
To connect to this device, double click the name. The status bar will change from "Not connected" to "Connecting..." and the to "Connected". Once connected your console should look something like this:

When you make a connection to a BlueBasic device, it sends over a few lines of introduction. In the image, these lines display the BlueBasic build and major release version, the memory available on the device for your program, and an OK. The final line is OK, the traditional BASIC prompt indicating it is ready to accept new commands.
Finally, we are ready to write our first program. As is tradition, this will be "Hello World". Select the right "console" window by clicking into it and then type the following three lines:
NEW
10 print "Hello World"
RUN
Hit the enter-key after RUN and the program will execute from the first (and only) line, and it will print Hello World onto the screen. Success!

Let us look at each of these three lines. The first line is just NEW. This erases any program and data which may already be on the device and prepared it for an entirely new program. The second line 10 print "Hello World" is our actual program. In BASIC, all program lines are numbered (if they are not, they will be executed immediately) and are executed in numeric order (unless the program tells it to do otherwise ... but that is for another day). This line creates a program line 10 which will print the message to the console. The third line is RUN. This executes the program from the first line.
Feel free to tinker with this, very trivial, example. Add more PRINT lines or change the message. There's lots more to do, but this is the beginning.