SiMoD is a simulation tool for Mobility-on-Demand (MoD) based on AgentPolis traffic simulation framework developed by the Smart Mobility group of AI Center, CTU, Prague. It lets you build your own MoD system at a location of your choice. It is lightweight, highly customizable and it can run simulations with tens of thousands of vehicles and passengers with ease.
However, customizing SiMoD for your use case requires some programming skills. If you want a more universal and estblished simulation tool check for example SUMO.
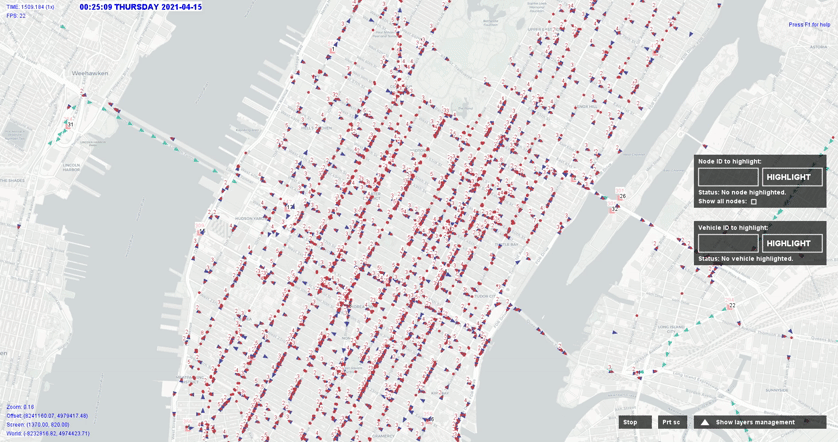
SiMoD simulation of MoD system on Manhattan (Speeded up 5 times)
This guide shows you how to use the simulation for simulating mobility-on-demand (MoD) with ridesharing in SiMoD. In this experiment travel requests appears and are served by MoD vehicles, so that the total travel distance is minimal.
First you need to download the test data for your first experiment. It is an experiment on Manhattan with real historical demand data from the NYC Taxi and Limusine Commision. Extract the folder anywhere in your computer. It contains:
mapsdirectory with filesnodes.geojsonandedges.geojson.dm.csv: distance matrix needed for fast travel time computations.station_positions.csv: file with positions of the parking/refueling stations for the MoD operator.test.cfg: SiMoD configuration file.trips.txt: the file with the demand.
- JDK (java 8 or newer)
- Python 3
- Maven (Version 3+)
- Gurobi (Including the Maven support!)
- check that you have all the requirements installed, especially Maven support for Gurobi.
- clone SiMoD (this repository)
- Go to your SiMoD directory and compile the project:
mvn compile(it takes some time to download the dependencies for the first time) - Extract the downloaded data somewhere.
This project works with configuration files (test.cfg in the test data folder). Most of the config parameters can be left as they are, but you need to configure the main data directory. It is on the first line of the config file: data_dir: "FILL ME".
You have to replace FILL ME with the absolute path to the folder with the downloaded data. Example:
data_dir: "C:/experiments/Manhattan/"
NOTE Do not forgat the slash in the end!
To see all possible options, you can look into the master config file. For SiMoD, the file is located in /src/main/resources/cz/cvut/fel/aic/SiMoD/config/.
But be sure to not modify the master config file!
You can see local configurations used by us in simod/local_config_files.
Run the SiMoD OnDemandVehiclesSimulation.java with <path to your config> as an argument:
mvn exec:java -Dexec.mainClass=cz.cvut.fel.aic.simod.OnDemandVehiclesSimulation -Dexec.args="<path to test.cfg>" -Dfile.encoding=UTF-8
NOTE If running this command from PowerShell, remember to quote the arguments starting with
-and containing dot, e.g.:'-Dexec.mainClass=cz.cvut.fel.aic.SiMoD.OnDemandVehiclesSimulation'
Simulation speed can be adjusted by '+' , '-' , '*' or 'Ctrl *' and paused by 'Space'
If you let the simulation finish, you should see the reuslt files with various statistics in your experiment folder (inside data_dir).
The simulation exports the following files:
allEdgesLoadHistory.json: records of the load of all edges in the road network. It represents the number of vehicles that were on the edge in each time interval.darp_times.csv: records the totla solver time for each batch. Old file, not used anymore.demand_trip_lengths.csv: lengths of each passanger tripresult.json: the main result file with the aggregated statistics of the simulationridesharing.csv: ridesharing statistics aggregated over batches (one row per batch)service.csv: request service statistic for each request. The columns are:- request announcmnet time
- request id
- vehicle id
- pickup time
- dropoff time
- minimum possible service delay (if the request was served immediately by the nearest vehicle)
transit.csvdetailed transite statistics for each edge. Each row represent one vehicle transfering over single edge. The columns are:- time of the transfer
- edge id
- vehicle state:
- 0: waiting (there should be no transfers with this state)
- 1: driving to pickup
- 2: driving to dropoff
- 3: driving to station
- 4: rebalancing (only possible if rebalancing is enabled)
vehicle_occupancy.csv: vehicle occupancy for each vehicle in each batch. The columns are:- batch id
- vehicle id
- occupancy
In this section, we describe how to more complex features that are not covered in the quick start guide.
Travel time computation is a crucial part of SiMoD, needed for various tasks including:
- dispatching vehicles,
- rebalancing,
- and simulation of travel.
There are multiple travel time providers available in SiMoD each with a different trade-off between speed, memory usage, ease of setup, and initial loading time. Currently, there are seven travel time providers available in SiMoD:
- AStar
- Astar Cached
- Distance Matrix
- Contraction Hierarchies
- Transit Node Routing
- Transit Node Routing with Arc Flags
- Euclidean
These providers will be described in more detail in the following sections. The general properties of the providers are described in the table below:
| Provider | Precise | Preprocessing by an external tool required | Speed | Memory Requirements |
|---|---|---|---|---|
| AStar | yes | no | very slow | low |
| AStar Cached | yes | no | slow | medium |
| Distance Matrix | yes | yes | super fast | very high |
| Contraction Hierarchies | yes | yes | medium | medium |
| Transit Node Routing | yes | yes | fast | high |
| Transit Node Routing with Arc Flags | yes | yes | fast | high |
| Euclidean | no | no | very fast | none |
The distance matrix travel time provider is the fastest travel time provider in SiMoD and also fundamentally, there cannot be any faster exact travel time provider. It stores travel times between all pairs of road network nodes in a distance matrix.
This distance matrix needs to be prepared in advance by an external tool. Two formats of the matrix are supported:
- Comma-separated values (
*.csv): Text format, slow to load, works out of the box. - Hierarchical Data Format (
*.h5): Binary format, fast to load, but it requires an external native library and a compilation with a dedicated maven profile.
At the and, the amount of memory required for the distance matrix is the same for both formats. The difference is in the loading time, for the *.csv format it can be several minutes, while for the *.h5 format it is just a few seconds.
The HDF support is provided by the HDFQL library. To use the HDF5 format, you need to work through the following steps:
- Prepare the distance matrix in the HDF5 format by an external tool.
- Download the HDFQL library from the official website.
- Add a new environment variable
HDFQL_HOMEwith the path to the root directory of the HDFQL library (should behdfql-<version>). - Compile the SiMoD project with the
with-hdf5maven profile. - Run the simulation with a library path pointing to the HDFQL library java wrapper:
-Djava.library.path=<HDFQL HOME>/wrapper/java/as/hdfql.
- download
HDFql-2.5.0_Darwin64.zip(Serial) and extract it. - install libomp:
brew install libomp - go to lipomp folder (brew info libomp) and copy the file
libomp.dylibto/opt/local/lib/libgcc/libgomp.1.dylib(create folder and rename if needed) - open folder from step 1 in terminal and run launch script:
./bin/launch.sh - If a security dialog opens select cancel and go to system settings->Privacy & Security->Security, there should be a blocked item "HDFqlCLI was blocked from use..." click on allow anyway and run the launch script again. repeat the process if other files are also blocked.
- If it was successfull you should see a message like "HDFqlCLI version 2.5.0 (using HDFql version 2.5.0 64 bit library)" and the command line tool.
Note: when using distance matrix you might get an error about heap memory, make sure to increase memory by adding the argunment -Xmx16g to the run configuration or to the command in the terminal
For preprocessing data for the simulation, we are using Python scripts. To install them:
- Upgrade 'pip'
- In the SiMoD dir, install the python package by
pip install ./python
In this section, we describe how to generate demand data for the simulation from the New York City taxi data. For other demand data, you will need your custom transformation script from to the format we use in our simulation.
To prepare the NYC data:
- clone the demand processing repository (for demand generation scripts).
- Download trips data (in .csv format): the csv data of taxis in Manhattan can be downloaded from NYC Open Data. The dataset we used for the test example above is here (2.8GB).
- Go to the cloned Demand processing directory and edit
config.pyfile according to your project. Specifically, indata_dirspecify the path to the folder with the downloaded demandcsvfile. You may also want to change theoutput_dir. - Run the processing script:
python trips_process.py. You should see atrips.txtin the specified data directory. This file contains demands for the simulation. - Finally, you need to move the
trips.txtto <data_dir> specified in the SiMoD config.
For additional information see the demand processing readme in https://github.com/horychtom/demand-processing repository.
You should always check whether the trip times (first value on each row in trips.txt) fit in your simulation time window. Specifically:
start_time(in milliseconds) andagentpolis.simulation_duration
Here is an example of how you may want to adjust these values in your local config:
# 6:00 in milliseconds
start_time:  21600000

agentpolis:
{

    # length of simulation
    simulation_duration:
    {
        days: 0
        hours: 6
        minutes: 30
        seconds: 0
    }

}
Stations are nodes on map where the vehicles are parked.
The simulation requires a station_positions.csv file that contains two columns: first column that contains the node index where the station is located, and the second column is the number of vehicles in the station.
For manual stations placement you can run MapVisualizer.java (with path to the local config file) to view the map.
After ticking "Show all nodes" on the right, all nodes ID will be displayed.
This section is incomplete and should present a guide for station position generation.
Our map downloader uses a rectangular boundaries to download the map. First, you need to find coordinates for your area of interest, and then you need to use them in the SiMoD config file. Below is an example for New York - Manhattan:
map_envelope:
[
    40.70
    -74.06
    40.82
    -73.87
]
Go to the <SiMoD DIR>/python/amodsim and run the following command:
python create_map_for_ap.py -lc=<path to custom_config.cfg>
The geojson map files are now in <data_dir>/maps directory.
For the new map to work in SiMoD you have to set the right SRID (EPSG) for your location, in order to get correct map transformations. You have to specify the SRID value into the agentpolis:{} block (because it is a configuration of the AgentPolis library). SRID is natively set for simulation of Prague. For Manhattan, set SRID is set in the test config to 32618. For other areas, you can find what the corresponding UTM zone here: https://mangomap.com/utm and then find relevant SRID.
This section is incomplete and should present a guide how to generate distance matrix.
-
When running the simulation, it crashes with
UnsatisfiedLinkError. Solution: You need to set path to gurobi lib as environment variable: Linux:LD_LIBRARY_PATH="/path/to/gurobi/lib", Windows:Path=<path/to/gurobi/lib> -
ProjectionException: Latitude 90°00 N is too close to a pole)is caused by mistake in generated maps. Double check your srid.
In case you use this software in your research, please consider citing one of our papers using SiMoD:
[1] D. Fiedler, M. Čáp, and M. Čertický, “Impact of mobility-on-demand on traffic congestion: Simulation-based study,” in 2017 IEEE 20th International Conference on Intelligent Transportation Systems (ITSC), Oct. 2017, pp. 1–6, doi: 10.1109/ITSC.2017.8317830.
[2] D. Fiedler, M. Čertický, J. Alonso-Mora, and M. Čáp, “The Impact of Ridesharing in Mobility-on-Demand Systems: Simulation Case Study in Prague,” in 2018 21st International Conference on Intelligent Transportation Systems (ITSC), Nov. 2018, pp. 1173–1178, doi: 10.1109/ITSC.2018.8569451.
The simulation is written in Java. The Python scripts are only for result processing and for input data processing. while all the simulation code should be fully functional, the same cannot be said about Python scripts, many of them are obsolete/non functional.
All executables are in the root packegge (cz.cvut.fel.aic.simod)
OnDemandVehiclesSimulationMain Executable. It starts the Simulation.MapVisualizer: For visualizing the map without running the simulation.
This list is not complete. Packages are presented in alphabetical order, without the rouut package prefix (cz.cvut.fel.aic.simod).
config: auto-generated package with config classes representing the config file. Do not modify!entity: Contains agents and other simulation objects specific to SiMoD.event: Contains SiMoD specific events for the simulation engine.init: Classes for event generation.rebalancing: Everything related to rebalancing process, a process that transfer vehicles from areas with lower demand to areas with higher demand.ridesharing: Ridesharing related stuff.statistics: Classis for measuring, storing, and exporting simulation data (traveled distance, used vehicles, passenger delays...)traveltimecomputationpackage for travel time providersvisio: Contains user interface classes specific to SiMoD.