A simple tutorial of how to communicate between the Arduino and the EV3, using I2C.
- Arduino.
- EV3.
- EV3 Cable.
- 2x - 40kΩ Resistor Pull-Up (Optional, if the a communication was with problems, use the resistors!).

- Analog - White.
- Ground - Black.
- Ground - Red.
- Vin - Green.
- I2C Clock - Yellow.
- I2C Data - Blue.
- Wire: This library is used to do the communication using the I2C.
#include <Wire.h>
#define SLAVE_ADDRESS 0x04

void setup()
{
    Wire.begin(SLAVE_ADDRESS);
    Wire.onReceive(readData);
    Wire.onRequest(sendData);
}
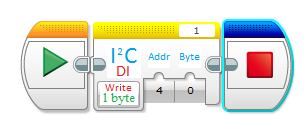
Wire.write();: Send the byte.
void sendData()
{
  int s2 = 1;
  Wire.write(s2);
}
Wire.write();: Send the bytes.
void sendData()
{
  uint8_t s2[8] = {"1","2","3","4","5","6","7","8"};
  Wire.write(s2,8);
}
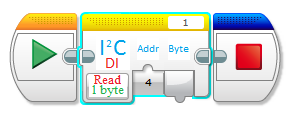
Wire.read();: Receive the byte.
void readData()
{
    while(Wire.available()>0)
    {
      s2 = Wire.read();
    }
}
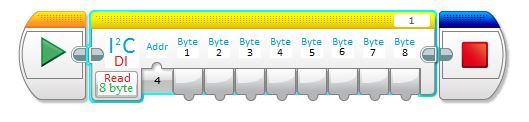
Wire.read();: Receive the bytes.
void readData()
{
    while(Wire.available()>0)
    {
      s2 = Wire.read();
      for (int i = 0; i < 7; i++) {
        Wire.read();
      }
    }
}
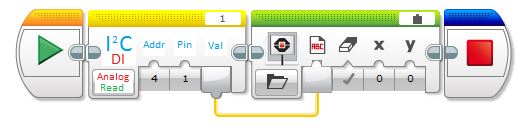
- The address sent to Arduino is
0x04or 4