


With this package, You can apply various image kernels such as Blur, Sobel, Scharr, and so forth (The comprehensive list of image kernels is mentioned below) on a grayscale or RGB|BGR color-scale image, and then show them, or manipulate the pixels of PIL images. These effects and enhancements in digital images can be achieved using the ApplyKernels and ManipulatePixels class, allowing for a wide range of transformations.
This package helps you:
- to understand what happens when applying kernels to images.
- to address the issue of limited data by increasing image quantities.
- to develop end-to-end applications.
If you are interested in learning more about the package, I encourage you to check out the main.py file.
To develop this package, I used the following libraries:
- numpy : for working with arrays and Kernels.
- matplotlib : for visualizing images.
- opencv-python : for working with array-like images and applying kernels to images.
- pillow : for working with PIL images.
- pilgram2 : for working with Equivalent and Blending techniques.
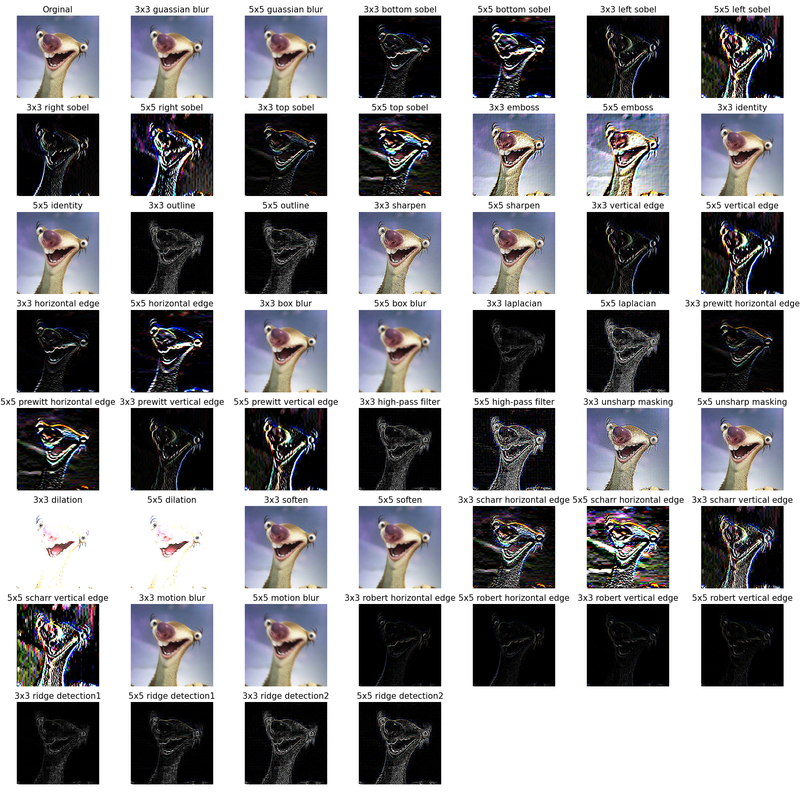
You can use built-in image kernels which have the shape of (3, 3) or (5, 5) or use your desired kernel value. To see how you can apply kernels to images, You can check out the usage section or the file Image Kernels.ipynb.
The supported Built-in Image kernels are listed below:
- guassian blur or blur : The blur kernel applies a smoothing effect, averaging the pixel values in the neighborhood.
- bottom sobel : The bottom sobel kernel emphasizes edges in the bottom directions.
- emboss : The emboss kernel creates a 3D embossed effect in the image.
- identity : The identity kernel does not modify the image and leaves it unchanged.
- left sobel : The left sobel kernel emphasizes edges in the left directions.
- outline : The outline kernel detects edges and boundaries by emphasizing the differences in intensity between neighboring pixels.
- right sobel : The right sobel kernel emphasizes edges in the right directions.
- sharpen : The sharpen kernel enhances edges and details in an image.
- top sobel : The top sobel kernel emphasizes edges in the top directions.
- horizontal edge : The horizontal edge kernel highlights horizontal edges.
- vertical edge : The vertical edge kernel highlights vertical edges.
- box blur : The box blur kernel is similar to the blur kernel. It applies a simple averaging operation to create a blur effect, but with equal weights for all neighboring pixels.
- laplacian : The Laplacian kernel is used for edge detection and image sharpening.
- prewitt horizontal edge : The prewitt horizontal edge kernel is similar to the bottom sobel kernel, emphasizing edges in the horizontal directions.
- prewitt vertical edge : The prewitt vertical edge kernel is similar to the right sobel kernel, emphasizing edges in the horizontal directions.
- high-pass filter : The high-pass filter kernel enhances the details and edges in an image while reducing the low-frequency components.
- unsharp masking : The unsharp masking kernel is used for image sharpening. It enhances the edges and details in an image by subtracting a blurred version of the image from the original.
- dilation : The Dilation kernels expand the bright regions or foreground in an image, which can make color images appear closer to white.
- soften : The soften kernel is used to reduce image noise and create a smoother appearance while preserving overall image details.
- scharr horizontal edge : The scharr horizontal edge kernel is used for edge detection and gradient estimation along the horizontal direction. It provides more weight to the central pixel and its immediate neighbors.
- scharr vertical edge : The scharr vertical edge kernel is used for edge detection and gradient estimation along the vertical direction. It provides more weight to the central pixel and its immediate neighbors.
- motion blur : The motion blur kernel is used to simulate the effect of motion in an image. It achieves this by applying a linear blur in a specific direction. The kernel consists of non-zero values along a line in the direction of motion, with zeros elsewhere.
- robert horizontal edge : A simple and efficient edge detection operator to detect horizontal edges. The kernels consist of positive and negative values that highlight the change in intensity along the respective directions.
- robert vertical edge : A simple and efficient edge detection operator to detect vertical edges. The kernels consist of positive and negative values that highlight the change in intensity along the respective directions.
- ridge detection1 or edge detection1: In this kernel, the weights are increased towards the center to emphasize the ridge-like structures in the image.
- ridge detection2 or edge detection2: This kernel is designed to enhance ridge-like structures in the image. The central value is higher (8) to emphasize the ridge, while the surrounding values are negative (-1) to suppress the surrounding areas.
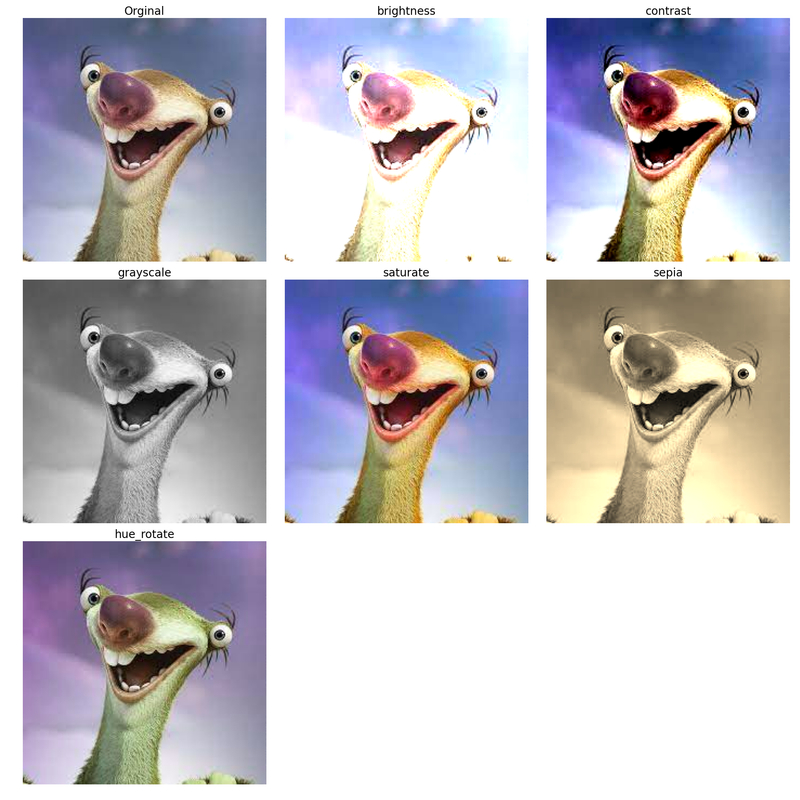
Using equivalent and blending techniques, you can manipulate the pixels of PIL images. To see their mathematic formulas, read the Docstring provided for each in the main.py file.
The supported equivalent techniques are listed below:
- brightness : Adjusts the brightness.
- contrast : Adjusts the contrast.
- grayscale : Converts image to grayscale.
- saturate : Saturates image.
- sepia : Converts image to sepia.
- hue_rotate : Applies hue rotation.
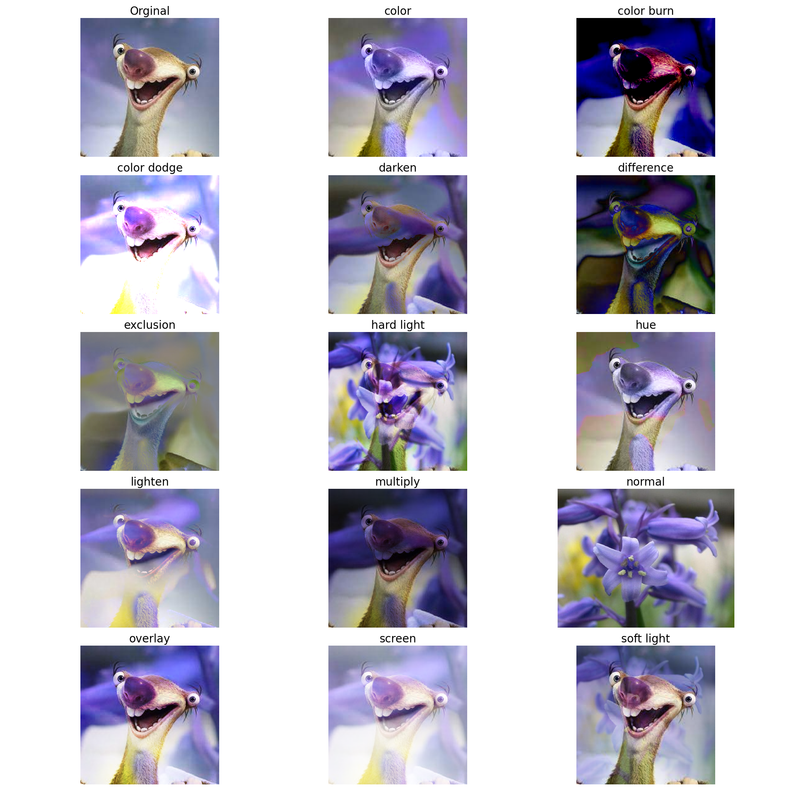
The supported blending techniques are listed below:
- color : Creates a color with the hue and saturation of the source color and the luminosity of the backdrop color.
- color_burn : Darkens the backdrop color to reflect the source color.
- color_dodge : Brightens the backdrop color to reflect the source color.
- darken : Selects the darker of the backdrop and source colors.
- difference : Subtracts the darker of the two constituent colors from the lighter color.
- exclusion : Produces an effect like Difference but lower in contrast.
- hard_light : Multiplies or screens the colors, depending on the source color value.
- hue : Creates a color with the hue of the source color and the saturation and luminosity of the backdrop color.
- lighten : Selects the lighter of the backdrop and source colors.
- multiply : The source color is multiplied by the destination color and replaces the destination.
- normal : The normal Technique simply selects the source color.
- overlay : Multiplies or screens the colors, depending on the backdrop color value.
- screen : Multiplies the complements of the backdrop and source color values, then complements the result.
- soft_light : Darkens or lightens the colors, depending on the source color value.
pip install pyimkernel
from pyimkernel import ApplyKernels
import mnist # pip install mnist
import cv2
import os
# Load data
X_train, X_test, y_train, y_test = mnist.train_images(), mnist.test_images(), mnist.train_labels(), mnist.test_labels()
######################################### Apply Kernels to images #########################################
# Create an instance from ApplyKernels
imkernel = ApplyKernels(random_seed=0)
# Grayscale
# Show image 9
imkernel.imshow(
X_train[19],
cmap=plt.cm.gray
)
# Apply the 3x3 blur kernel to a grayscale image 9
filtered_image = imkernel.apply_filter_on_gray_img(
X_train[19],
kernel_name='blur',
kernel_size=(3, 3)
)
# Show the filtered image 9
imkernel.imshow(
image=filtered_image,
cmap='gray'
)
# 5x5 Prewitt Horizontal Edge Kernel
kernel_value = np.array([[-1, -1, -1, -1, -1],
[-1, -1, -1, -1, -1],
[0, 0, 0, 0, 0],
[1, 1, 1, 1, 1],
[1, 1, 1, 1, 1]])
# First apply the 5x5 Prewitt kernel to image 9 and then show the filtered image
imkernel.imshow(
image=imkernel.apply_filter_on_gray_img(
X_train[19],
kernel_name='custom',
kernel_value=kernel_value
),
cmap=plt.cm.gray
)
# the Color-Scale image
# Read the flower image
image1 = cv2.imread(
os.path.join('Images', '1.jpg')
)
# Show the flower image
imkernel.imshow(
cv2.cvtColor(image1, cv2.COLOR_BGR2RGB),
figsize=(5, 5)
)
# Show the filtered flower image
# 5x5 box blur
kernel_value = (1 / 25.0) * np.array([[1, 1, 1, 1, 1],
[1, 1, 1, 1, 1],
[1, 1, 1, 1, 1],
[1, 1, 1, 1, 1],
[1, 1, 1, 1, 1]])
# Apply the 5x5 box blur kernel to image1
blurred_image = imkernel.apply_filter_on_color_img(
image1,
kernel_name='custom',
kernel_value=kernel_value,
with_resize=True,
dsize=(100, 100)
)
# Show the blurred image
imkernel.imshow(
image=cv2.cvtColor(
blurred_image,
cv2.COLOR_BGR2RGB
))
# Apply the 3x3 sharpen kernel to image1
sharpened_image = imkernel.apply_filter_on_color_img(
image1,
kernel_name='sharpen',
kernel_size=(3, 3),
with_resize=True
)
# Show the sharpened image
imkernel.imshow(
image=cv2.cvtColor(
sharpened_image,
cv2.COLOR_BGR2RGB
))
# First Apply the 5x5 soften kernel to a sharpened image and then show the filtered image
imkernel.imshow(
image=cv2.cvtColor(
imkernel.apply_filter_on_color_img(
sharpened_image,
kernel_name='soften',
kernel_size=(5, 5)
),
cv2.COLOR_BGR2RGB
))
# First Apply the 3x3 unsharp masking kernel on a sharpened image and then show the filtered image
imkernel.imshow(
image=cv2.cvtColor(
imkernel.apply_filter_on_color_img(
sharpened_image,
kernel_name='unsharp masking',
kernel_size=(3, 3)
),
cv2.COLOR_BGR2RGB
))
######################################### Manipulate the pixels of PIL images #########################################
# Create an instance from ManipulatePixels
manipulation = ManipulatePixels()
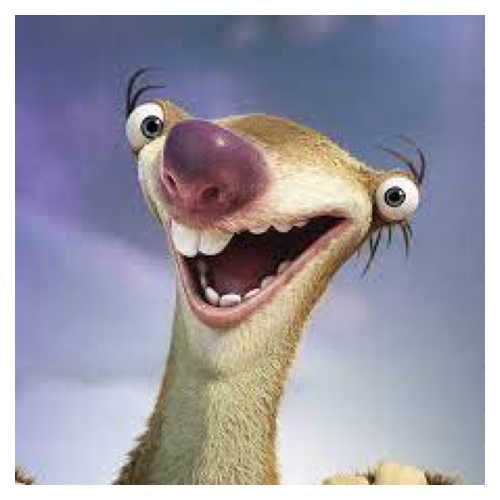
# read the Sid image
image2 = cv2.imread(
os.path.join('Images', 'ice-age.jpeg')
)
# show the Sid image
imkernel.imshow(
cv2.cvtColor(image2, cv2.COLOR_BGR2RGB)
)
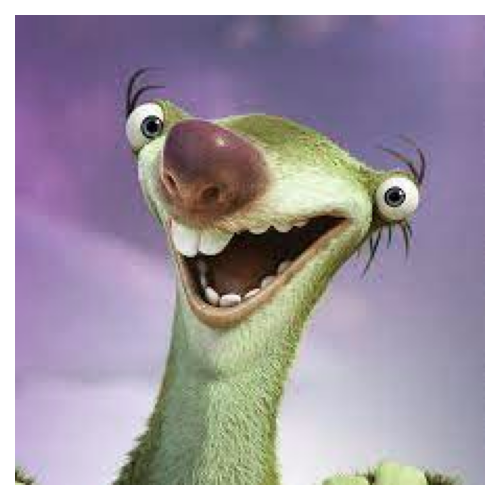
# manipulate and show the Sid image using the equivalent technique `hue_rotate`
im = manipulation.hue_rotate(
Image.fromarray(
cv2.cvtColor(
image2, cv2.COLOR_BGR2RGB
)),
degree=30
)
manipulation.imshow(im)
# manipulate and show the Sid image using the blending technique `color`
im = manipulation.color(
Image.fromarray(
cv2.cvtColor(
image2, cv2.COLOR_BGR2RGB
)),
Image.fromarray(
cv2.cvtColor(
image1, cv2.COLOR_BGR2RGB
))
)
manipulation.imshow(im)The Grayscale Output
Before Applying Kernels on a grayscale image 9

After Applying the 3x3 Blur Kernel on a grayscale image 9

After Applying the 5x5 Prewitt Horizontal Edge Kernel on a grayscale image 9

The Color-scale Output
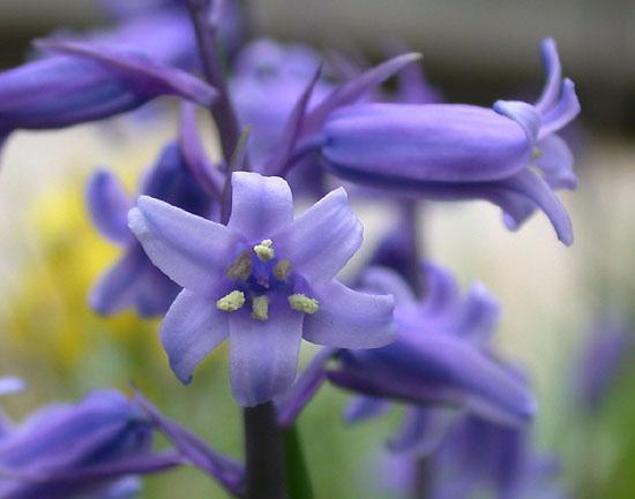
Before Applying Kernels on a color-scale flower image
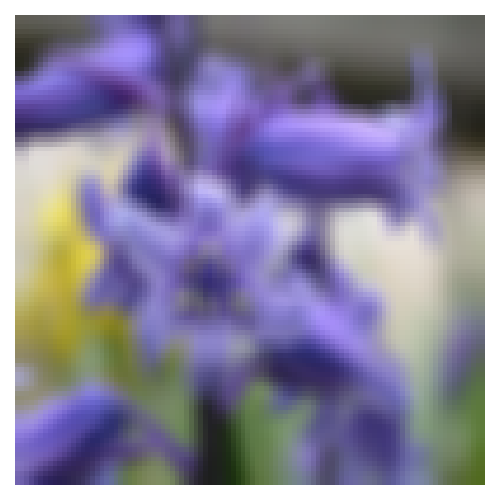
After Applying the `5x5 Box Blur Kernel` on a color-scale flower image and assigning True to the with_resize parameter and (100, 100) to the dsize parameter
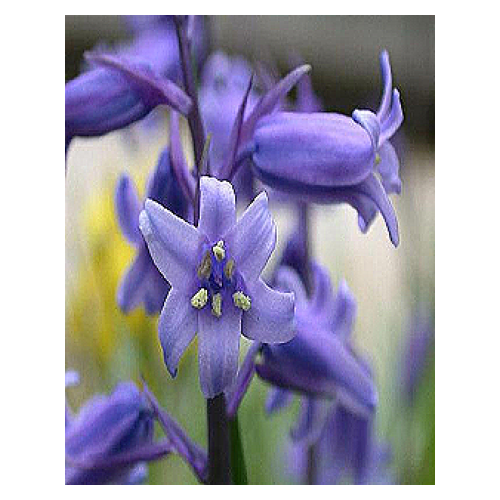
After Applying the `3x3 sharpen kernel` on a color-scale flower image and assigning True to the with_resize parameter and 'auto' to the dsize parameter
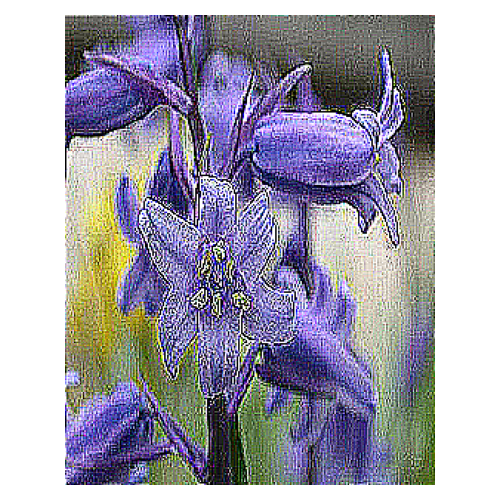
After Applying the `5x5 soften kernel` on a color-scale image, which was filtered using the `Sharpen Kernel` before, and assigning False to the with_resize parameter

After Applying the `3x3 unsharp masking` kernel on a color-scale image, which was filtered using the `Sharpen Kernel` before, and assigning False to the with_resize parameter
Before Using Equivalent and Blending Techniques
After Using the Equivalent technique `hue_rotate` for manipulating the pixels of Sid image
After Using the Blending technique `color` for manipulating the pixels of Sid image

All Tests Passed Successfully.
After applying the built-in image kernels to the Sid image using the ApplyKernels class
After applying the Equivalent techniques to the Sid image using the ManipulatePixels class
After applying the Blending techniques to the Sid image using the ManipulatePixels class
To develop the package, I used the Setosa, Wikipedia, and ChatGPT websites to gather kernel values and utilized other websites to ensure that the information I collected was accurate and properly attributed.
I want to thank @sugizo for providing valuable and insightful ideas that helped me improve the package.