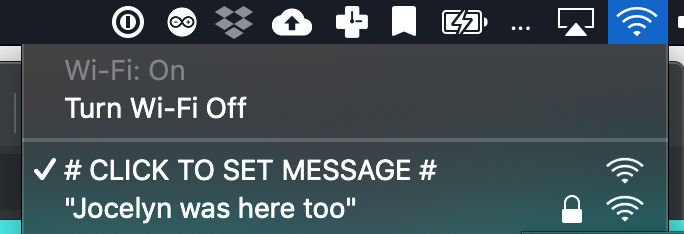
A portable hyperlocal wireless social experiment


| Name | USD | Description | |
|---|---|---|---|
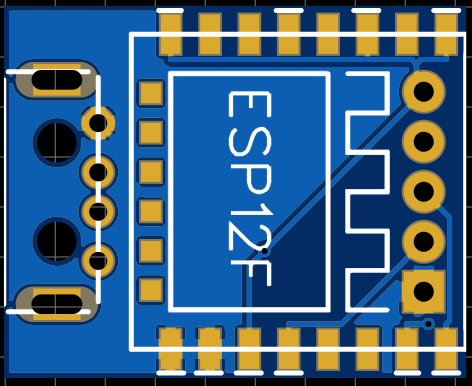
| ESP8266 ESP-12F | 1.3 | The ESP8266 serves as the brains for the entire project. It's a little programmable module with integrated WiFi capabilities and 4MB of integrated flash storage. | https://www.aliexpress.com/item/ESP8266-ESP12E-ESP12F-Remote-Serial-Port-WIFI-Wireless-Module-3-3V-SPI-For-Arduino-Wireless-Transceiver/32995430963.html |
| AMS1117-3.3V SOT-223 Regulator | 0.02 | The ESP8266 operates off 3.3V, but USB supplies 5V. This regulator component allows the ESP8266 to run off of USB power. | https://www.aliexpress.com/item/100PCS-AMS1117-1-2V-1-5V-1-8V-2-5V-3-3V-5-0V-ADJ-AMS1117/32868342007.html |
| 47uF SMD 1206 Capacitor | 0.05 | This capacitor works in conjunction with the regulator to make sure that the ESP8266 has a nice clean power source. | https://www.aliexpress.com/item/100pcs-1206-SMD-Chip-Multilayer-Ceramic-Capacitor-0-5pF-100uF-10pF-100pF-1nF-10nF-15nF-100nF/32966490820.html |
| USB Type A Through Hole Male Connector | 0.07 | This is the actual connector end that plugs into a battery pack. Theoretically we could use one of those PCB connectors, but having a real one makes it feel a lot nicer. | https://www.aliexpress.com/item/Promotion-R227-11-10pcs-White-USB-A-male-USB-plug-USB-plug-curved-needle-plate/32783474982.html |
| 3D Printed Enclosure | 0.12 | The cost is computed based on the assumption that PLA costs about $20 per kg. | |
| Custom PCB | 0.1 | This cost assumes we're buying 200 panelized PCBs for $20. |
The ShoutKey is designed to be really cheap. With some lead time associated with shipping from China, it can be made for well under $2 each. Its soul is the ESP8266 ESP-12F module, which costs as little as $1.30.


The PCB was designed in EasyEDA. The source files can be found in the pcb/ directory.
We'll need an FTDI USB Serial adapter module.

You'll see that on the bottom of the PCB the dongle is meant to be programmed with a five pin connector.
In order:
- 3.3V — Connect to the FTDI 3.3V pin. Make sure that the FTDI serial adapter is configured to operate at 3.3V. This is usually specified by a little jumper. Make sure that it's set to 3.3V (and not 5V) or else you may fry the ESP8266 module.
- RX — Connect this to the TX pin on your FTDI module (note that RX connects to TX)
- TX — Connect this to the RX pin on your FTDI module (note that TX connects to RX)
- P0 — Connect this to the FTDI Ground pin (this tells the ESP8266 that it's about to be programmed)
- GND — Connect to the FTDI Ground pin
First check out this repository and make sure you have the Arduino IDE installed.
Go to Arduino -> Preferences and add http://arduino.esp8266.com/stable/package_esp8266com_index.json to your list of "Additional Board Manager URLs".
Open Boards Manager from Tools > Board menu and install esp8266 platform.

Select Board Type: "NodeMCU 1.0 (ESP-12E Module)"

Connect your FTDI adapter to your computer, and select the right device under "Port"
Hook up the FTDI stuff to the ESP8266 dongle. Note that the dongle will be powered through the FTDI adapter, so don't plug the dongle into anything.
Open the ESPKey sketch (in the ESPKey folder in this repo) and press the "Upload" button in the Arduino IDE.
It'll take a minute or two to upload. Make sure that the electrical contact between the dongle and the adapter is solid for the entire duration of the upload.
Now after disconnecting the FTDI adapter, you can just plug in your dongle into anything that provides USB power it should work.
Once your dongle has been programmed for the first time, the nice thing is that for future upgrades you don't need the FTDI adapter and you can reprogram it entirely over WiFi.
From the Arduino IDE go to "Sketch -> Export Compiled Binary".
Just connect to the WiFi hotspot which is created by the dongle. Navigate to http://192.168.1.1/firmware and browse for the ESPKey.ino.bin file that was created by your Arduino IDE.
Click upload, and wait for 1-2 minutes while the upgrade process is completed. Do not disconnect the dongle from power during this period. It will automatically reboot when it is complete.