GALADE is a self-generating diagramming tool and code generator that handles the development and maintenance of ALA applications.
At the moment, only ALA applications written in C# are supported.
See https://abstractionlayeredarchitecture.com for more details on ALA.
This guide will help you get started with using GALADE, and will use the following project as an example: https://github.com/arnab-sen/ALASandbox
This guide was made using GALADE v1.13.0. To download the latest release, head over to https://github.com/arnab-sen/GALADE/releases and download the zip file related to the latest release. For example, to download GALADE v1.13.0, select GALADE_v1.3.0.zip under the Assets section of that release. Simply extract that zip file and run GALADE_v1.3.0.exe to begin using it. No installation is necessary.
First, use File > Open Project to locate the ALASandbox folder. This will cause GALADE to look through the ALACore/ProgrammingParadigms and ALACore/DomainAbstractions folders, parse any C# classes and interfaces found, and create internal models of abstractions that can be visualised.
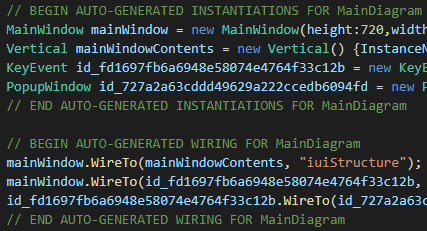
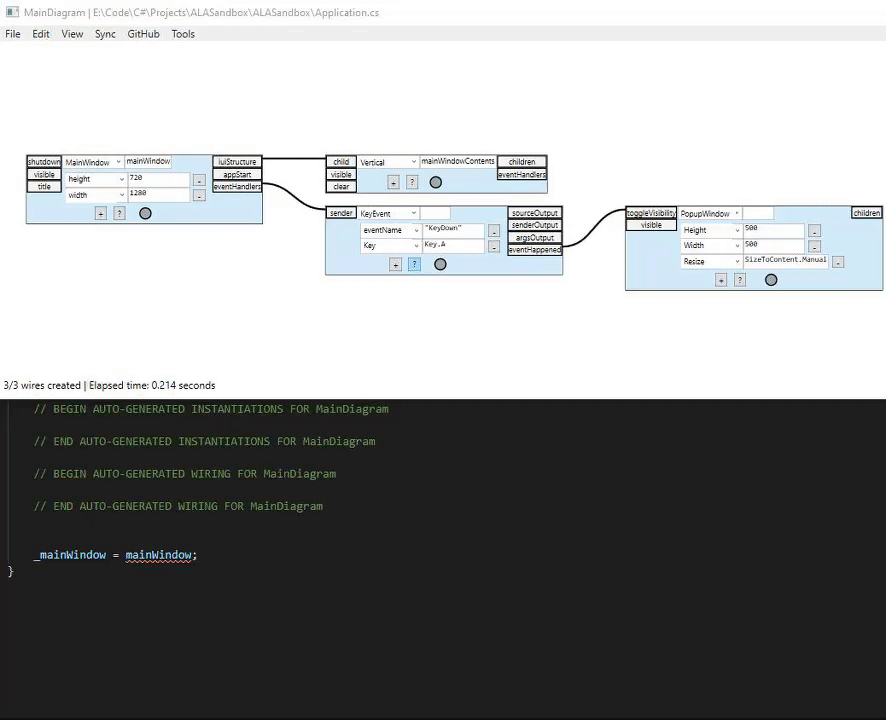
Next, open ALASandbox/Application.cs. This file contains the code necessary to produce the diagram. If you view the file in a text editor, you can see that it has landmarks in the form of comments to indicate where GALADE should insert generated code:
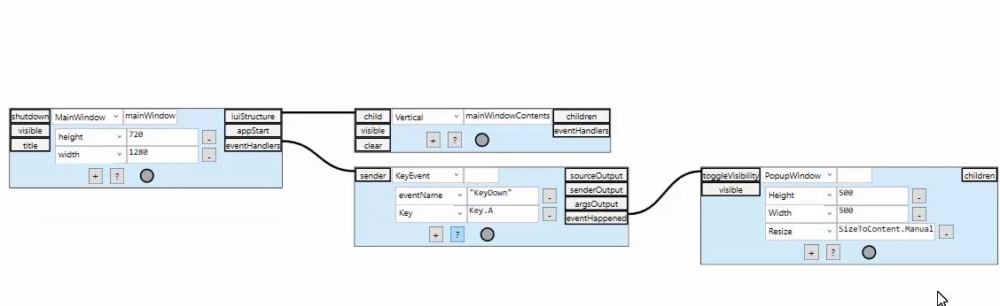
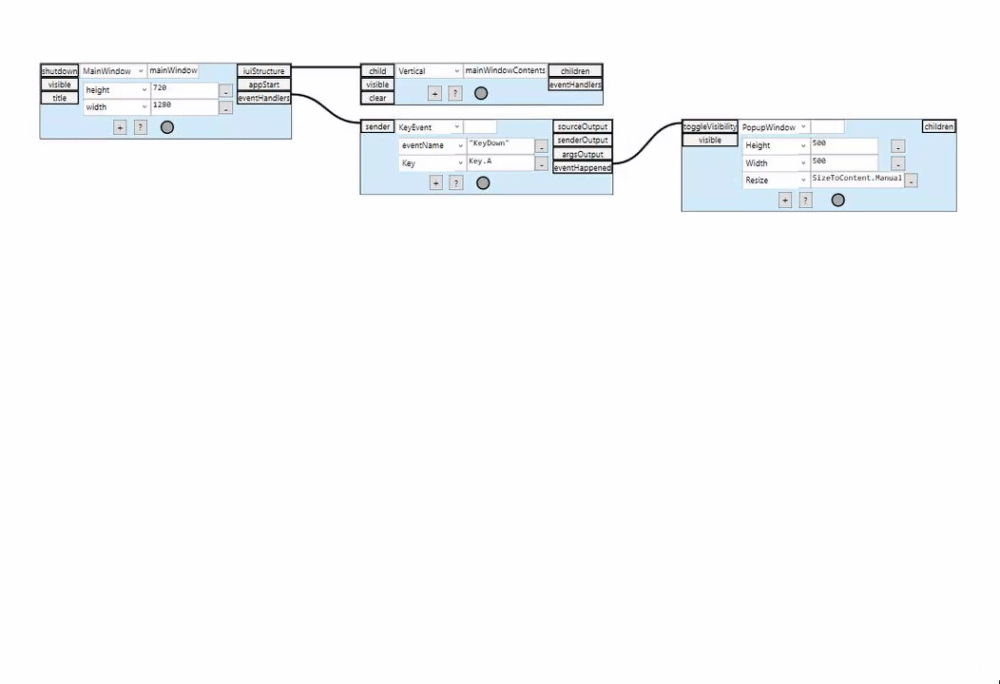
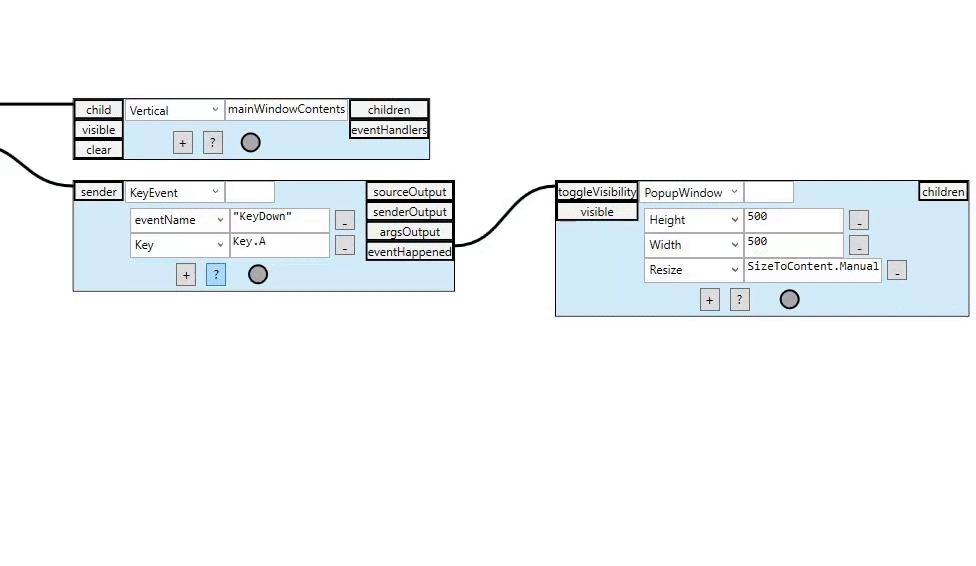
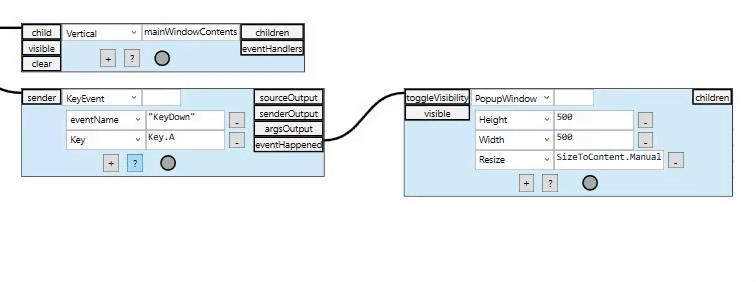
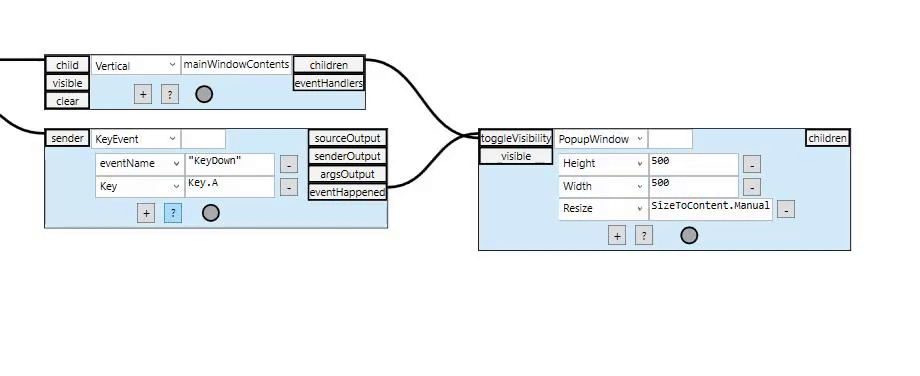
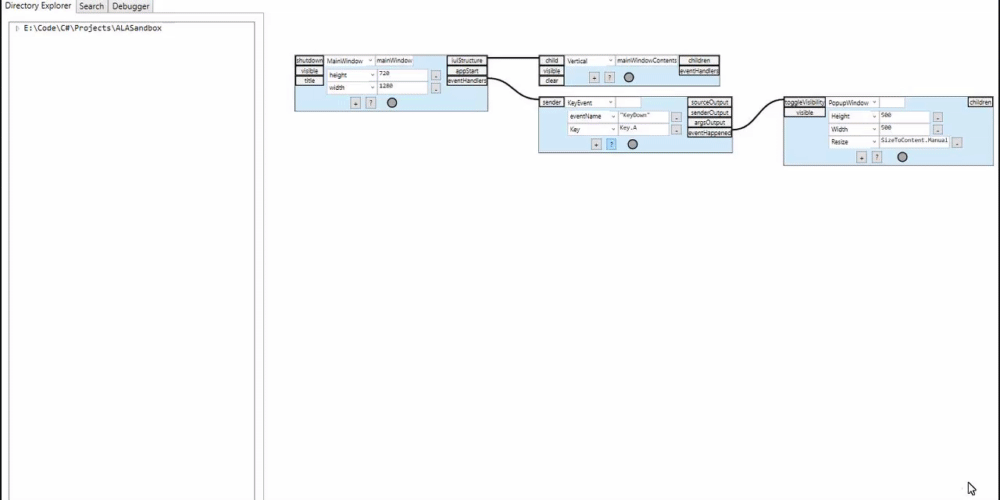
Opening it via GALADE should show the following diagram (click on the image to get a bigger view in a new tab):

This diagram represents an application that shows a window, and opens a new window when the A key is pressed.
The diagram can be reopened at any time through File > Open Diagram..., which will examine the Application.cs file at its current state. This can be useful for undoing mistakes in the diagram.
Scroll the mouse wheel to zoom in and out to/from the cursor's position. Hold down right click and drag to move around the diagram. You'll notice that when zoomed out far enough, each node will show an overlay containing its type and name.
Middle click (click the mouse scroll button) on the blank area of the canvas to bring focus to it. This can help resolve issues with commands from key presses not being executed properly.
There are two ways to add a new node:
- Right click >
Add node: This will add a floating node to the diagram. They will be treated as roots when the layout manager calls an update. - Select a port, then press
Ato add a new node as a child, connected to that port.
Note: The layout can be refreshed manually by middle clicking on the background and pressing R.
Then, all abstraction models found can be loaded into the new node by selecting from, or typed into, the type drop down menu.
If you want to know what an abstraction does, simply hover over it to view its documentation (pulled from the source code). Alternatively, you can right click on an abstraction and open its source file in your default editor for .cs files.
A node can be modified in the following ways:
-
Modify its type by using the type dropdown. Any changes made to the current type will be saved in the node in the current session, so if you accidentally change its type, you can change back without losing any information.
-
By default, all nodes are given a unique id (based on a GUID), and its variable name when generated will be based on this id. The name textbox will appear blank when this is the case. If you want, you can change the variable name into something more human-readable via the name text box.
-
If the node's class requires type parameters, dropdowns for them will appear beside the type drop down, and can be modified to your liking.
-
Press the
+button to add a new member row, and any-button to delete its member row. Any changes made to that member will also be saved and can be returned to in case it was hidden by accident. -
Each node can be given a description that is saved when generating code and persists after GALADE is closed. Simply click the
?button on a node and start typing, then click out of the popup box to save. Nodes with descriptions will have the?button be highlighted blue.
You can add a new wire between any two existing nodes by selecting the source port, pressing Ctrl + Q, then selecting the destination port.
A node can be deleted by clicking on it and pressing the Delete key, or through its context menu. In its context menu, you can also opt to delete both the node and every node attached to it.
A wire can be deleted through its context menu. Deleting a wire will not delete the connected nodes.
Nodes can be moved with a standard left click and drag, however their positions will be reset by the layout manager.
A wire's source and destination can be changed through their context menus.
A cross connection can be turned into a tree connection through the wire's context menu.

The index of a node in its tree parent's list of children can be change by selecting that node, then pressing Ctrl + Up/Down to decrease/increase its index. This will also automatically rearrange the subtree of the moved node.
The diagram itself is saved as code in Application.cs. The diagram is not saved elsewhere.
Pressing Ctrl + S or using Sync > Diagram to Code will "save" the diagram, which really just means that the current diagram will be converted into C# code and inserted between the appropriate code generation landmarks. In the following clip, the source code was temporarily deleted just to make the code generation clearer.
Press Ctrl + F to navigate to the Search tab. Type in a query and press Enter to search through the types, names, and member rows of each node. Any results that show up can be clicked on to navigate to that node. The query will be treated as a case-insensitive regex pattern.
New abstraction files can be created and added to your project (via Tools > Create Abstraction):

- By default, it will assume that you have an ALACore project to store the abstractions related to the diagram, i.e. it will look for an ALACore.csproj file and add the created file to your project by editing that. If your project name is different, then you can click "Find .csproj file" and select the one relevant to your project.
-
You can set a breakpoint in a method or in a property (both setter and getter) in a given node's source file in Visual Studio 2019:
- A new breakpoint can be added like so:
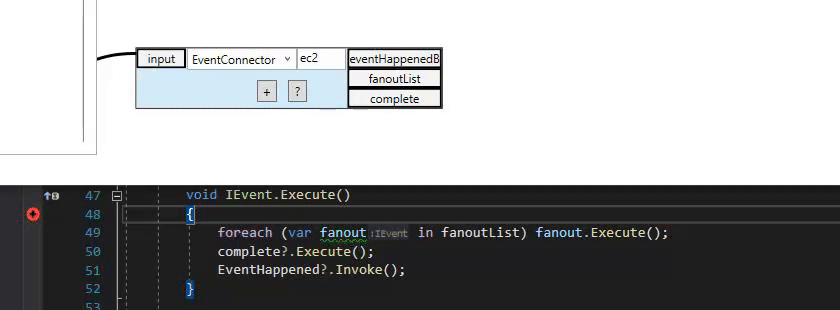
- If a breakpoint already exists, then its condition will be ORed with the new condition:
- Note that the conditional breakpoints require InstanceNames, and may not work correctly when domain abstractions have InstanceName fields instead of properties, so please ensure that every domain abstraction has an InstanceName property
- If multiple methods of the same name exist in the file (e.g. method overloads or multiple instances of a method across different classes in the one file), then the same breakpoint will be added to each of them
- Note that if multiple instances of Visual Studio 2019 are opened, then this will only apply to the one that was opened first. The instance that is connected to can be changed by closing VS 2019 instances until your desired one is the "first" one, and then selecting "Tools > Connect to Visual Studio Debugger". On app startup, the first VS 2019 instance will be connected to by default
- Clearing all breakpoints in a given node's source file in Visual Studio 2019 can be done like so:
- Clearing all breakpoints in a given node's source file in Visual Studio 2019 can be done like so:
- A new breakpoint can be added like so:
-
You can choose between different opened instances of Visual Studio (via Debugger > Connect to Visual Studio Instance). They will be differentiated by the current document they have open:

- If debug options are executed before Debugger > Connect to Visual Studio Instance is used, then the first instance of Visual Studio found that is either idle or in debugging mode (i.e. not running) will be connected to
-
When execution is paused in Visual Studio, press "Refresh Call Stack" in the Debugger tab in GALADE to view the execution status in the diagram
-
The currently active wire will be highlighted green, and if the active wire is an IDataFlow wire, then the value being sent through will appear in a floating text above the destination node. All wires involved in the stack trace other than the active wire will be highlighted orange:

-
Every node now has an indicator (red = true, grey = false) that shows whether its source file currently has a conditional breakpoint with its InstanceName (i.e. has a breakpoint with at least one "InstanceName == ") in its source file, in the currently connected instance of Visual Studio
-
The colour of the text in the node overlays will also change to reflect this:

-
This is currently updated when debugging starts, or when breakpoints change (through GALADE)
-
Note that if no breakpoints are set, F5 will still build and run the application normally, so you no longer have to switch to the VS instance after generating a diagram, although this does still require a VS instance to be opened, with the solution loaded
-
If you are using the debug options in GALADE to step through the code, then changes in the call stack will automatically be updated in GALADE (with a slight ~1s delay to help ensure that the call stack can be accessed correctly - this is a minor workaround, and hopefully this delay will be removed in a later release). If you are using Visual Studio to step through the code, then the "Refresh Call Stack" option can be used at any point while in debug mode to manually update the call stack changes to the diagram