You can view this app live at https://redwood-example-blog.netlify.com
Here is a full-featured blog engine written with RedwoodJS. It includes:
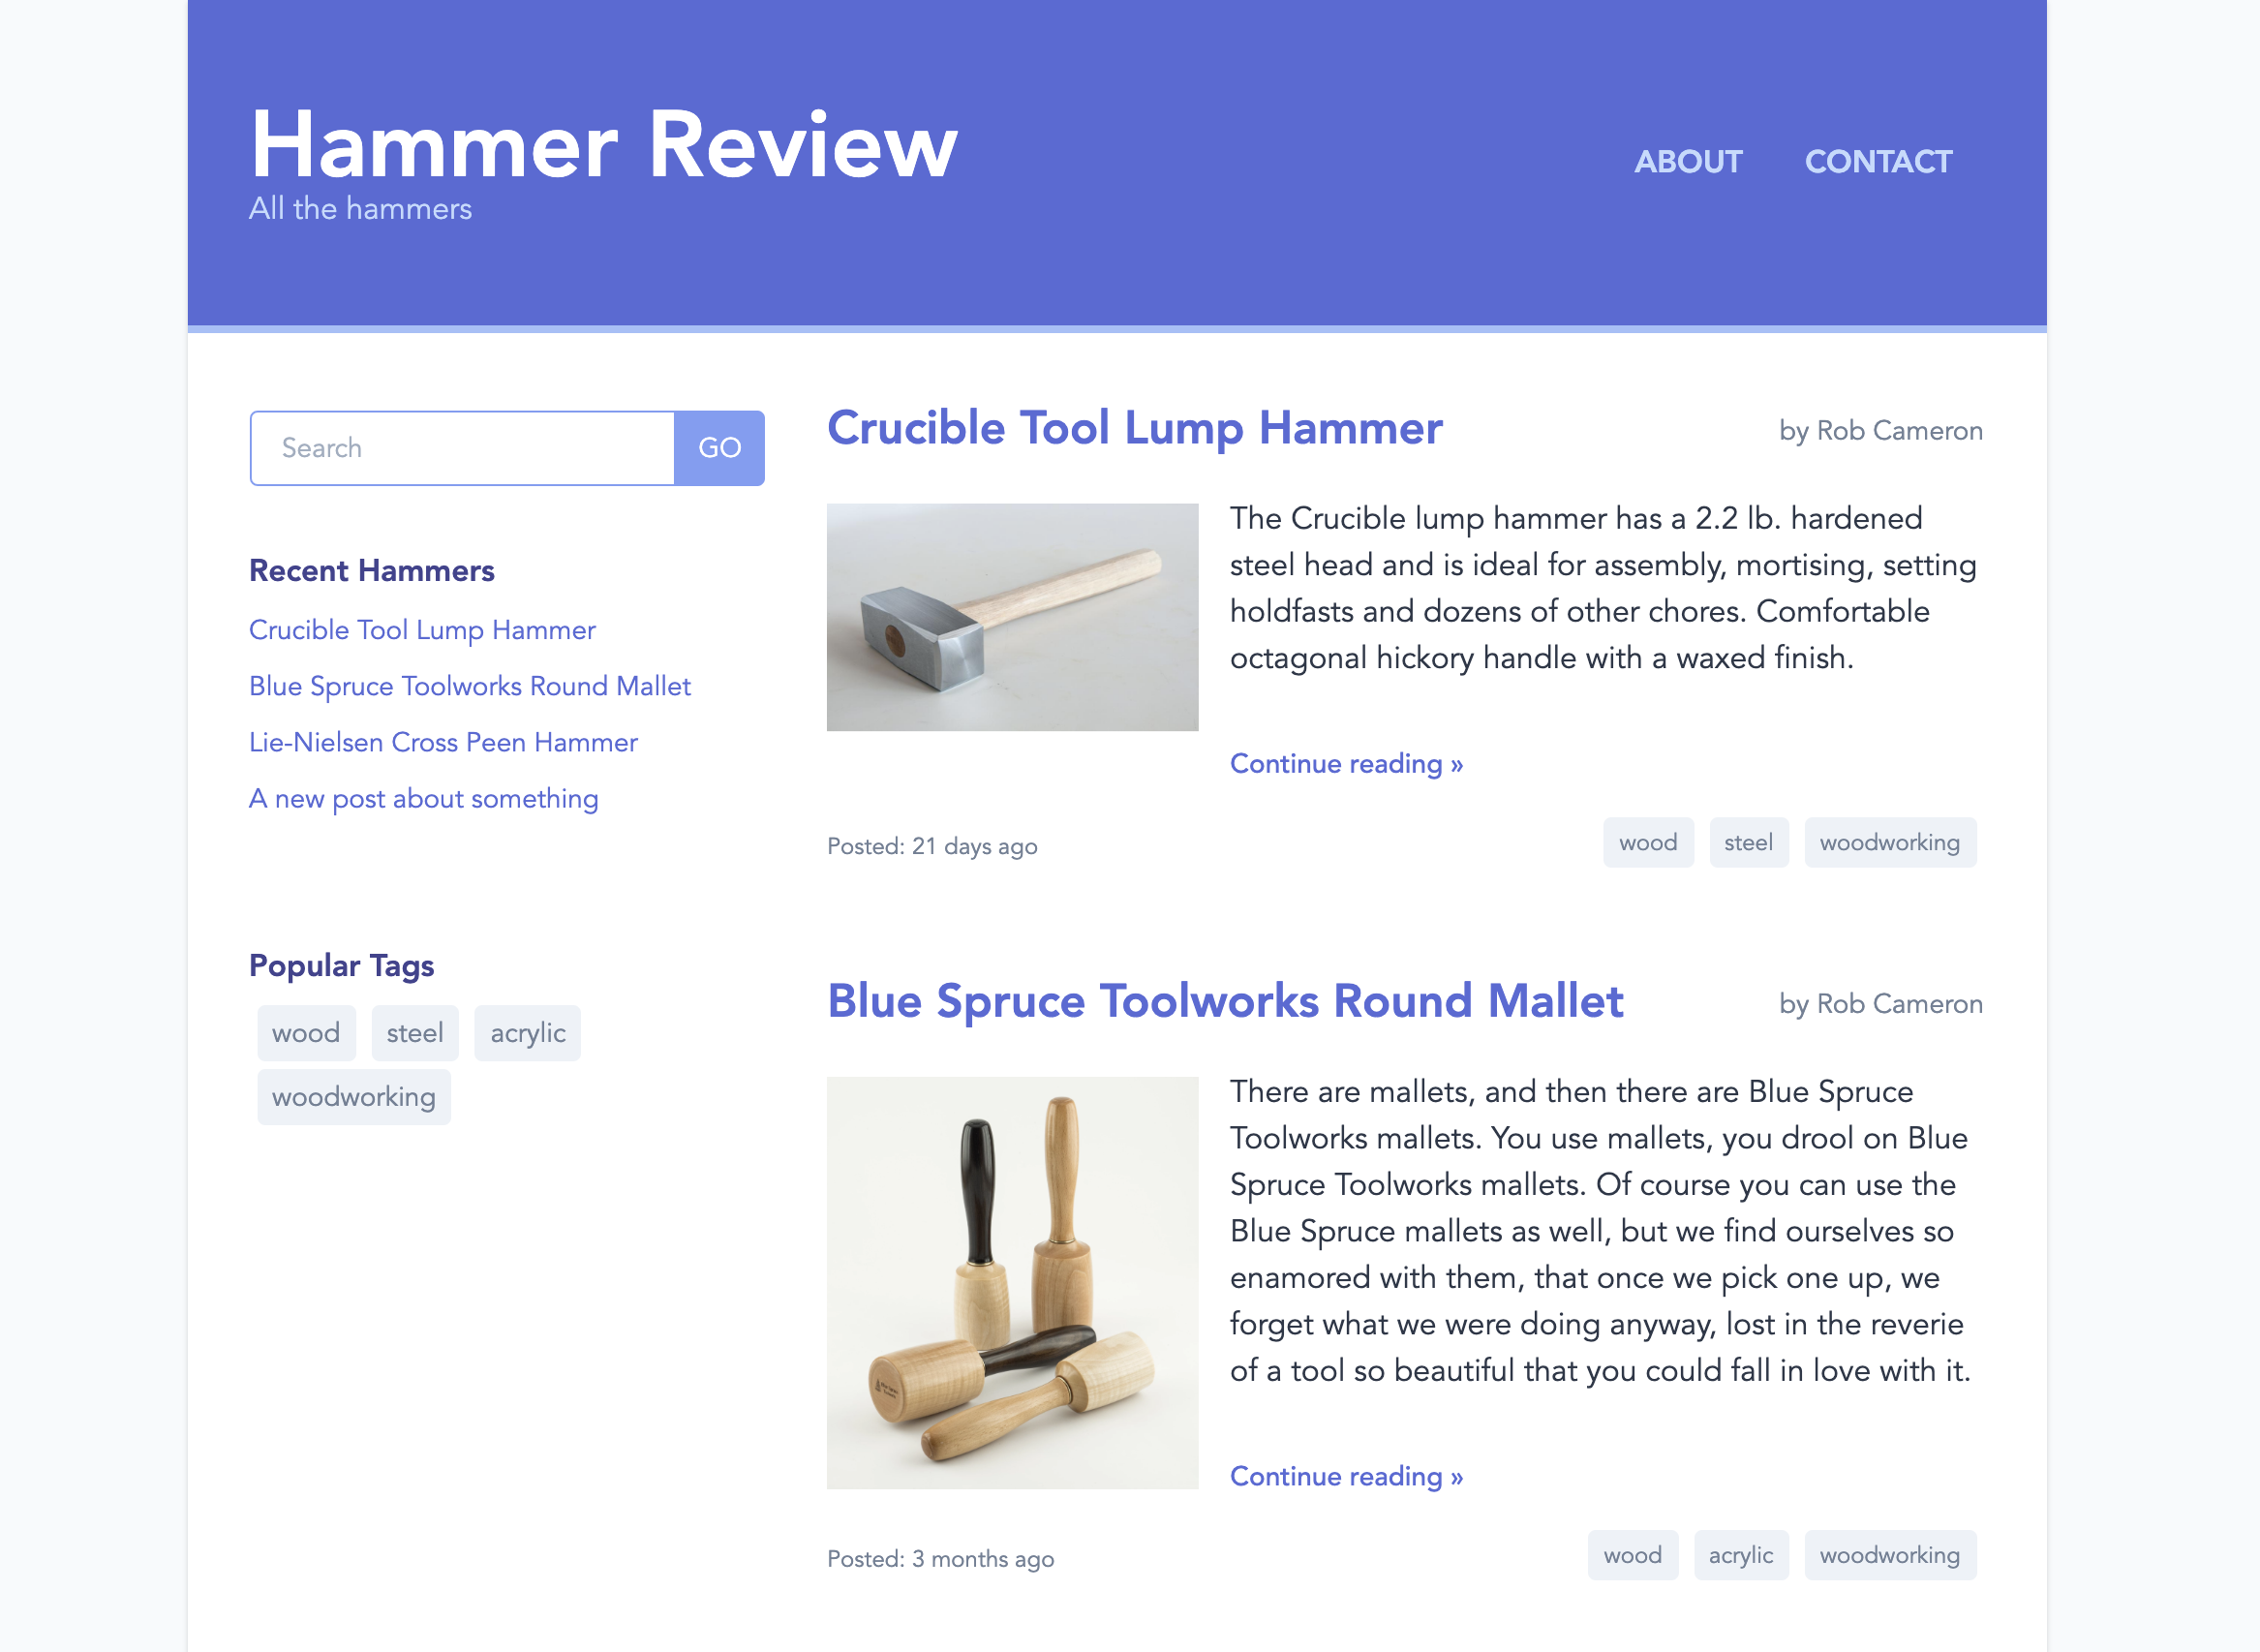
- Listing all blog posts with first paragraph summaries and pagination (the homepage)
- Reading a single, full blog post
- Searching for blog posts by keyword
- Displaying all posts with a given tag
- Contact form
- Fully responsive at various viewport sizes
The admin includes:
- User authentication
- Create a new blog post with:
- Title
- Slug (URL)
- Author
- Body
- Tags
- Splash image
- Edit existing blog post
- Delete a blog post
- Mark a new post as a Draft and not display it live
- Publish a post live
- Unpublish a post (puts it back to DRAFT status)
On the tech side:
- Data stored in a SQL database (SQLite locally)
- User authentication using Netlify Identity
- Image uploads and CDN via Filestack
- CSS styling via TailwindCSS
- Contact forms are handled by Netlify Forms
Clone the repo:
git clone https://github.com/redwoodjs/example-blog.git
cd example-blog
Install dependencies:
yarn install
Create a local SQLite database and seed it with a few blog posts:
yarn redwood db up
yarn redwood db seed
Now you should be able to start a development server:
yarn redwood dev
Assuming everything worked, open a browser to http://localhost:8910 and you should be seeing the homepage (similar to the screenshot above).
See the section on Deployment in the Redwood Tutorial.
We're working on supporting the
netlify devcommand properly with Redwood, which is required to use Netlify Identity in a local dev environment. The following instructions will not work until this fix is complete.
Copy the .env.defaults file to a new file .env and edit it, setting the USE_AUTHENTICATION variable to true.
You'll need to create a new site on Netlify so that you can enable Identity and give the Identity API Endpoint to your development instance of the blog.
If you don't have it already, install the Netlify CLI tools:
yarn global add netlify-cli
Log in with your Netlify credentials:
netlify login
Create a new site:
netlify init --manual
Now you have two paths:
- Find and link to the existing site you have deployed
- Choose
Create & configure a new site, choose which team to associate this new site with (if you have more than one). You can enter aSite nameor just hit ENTER to get a random one. You can enternwhen asked if you want to continue.
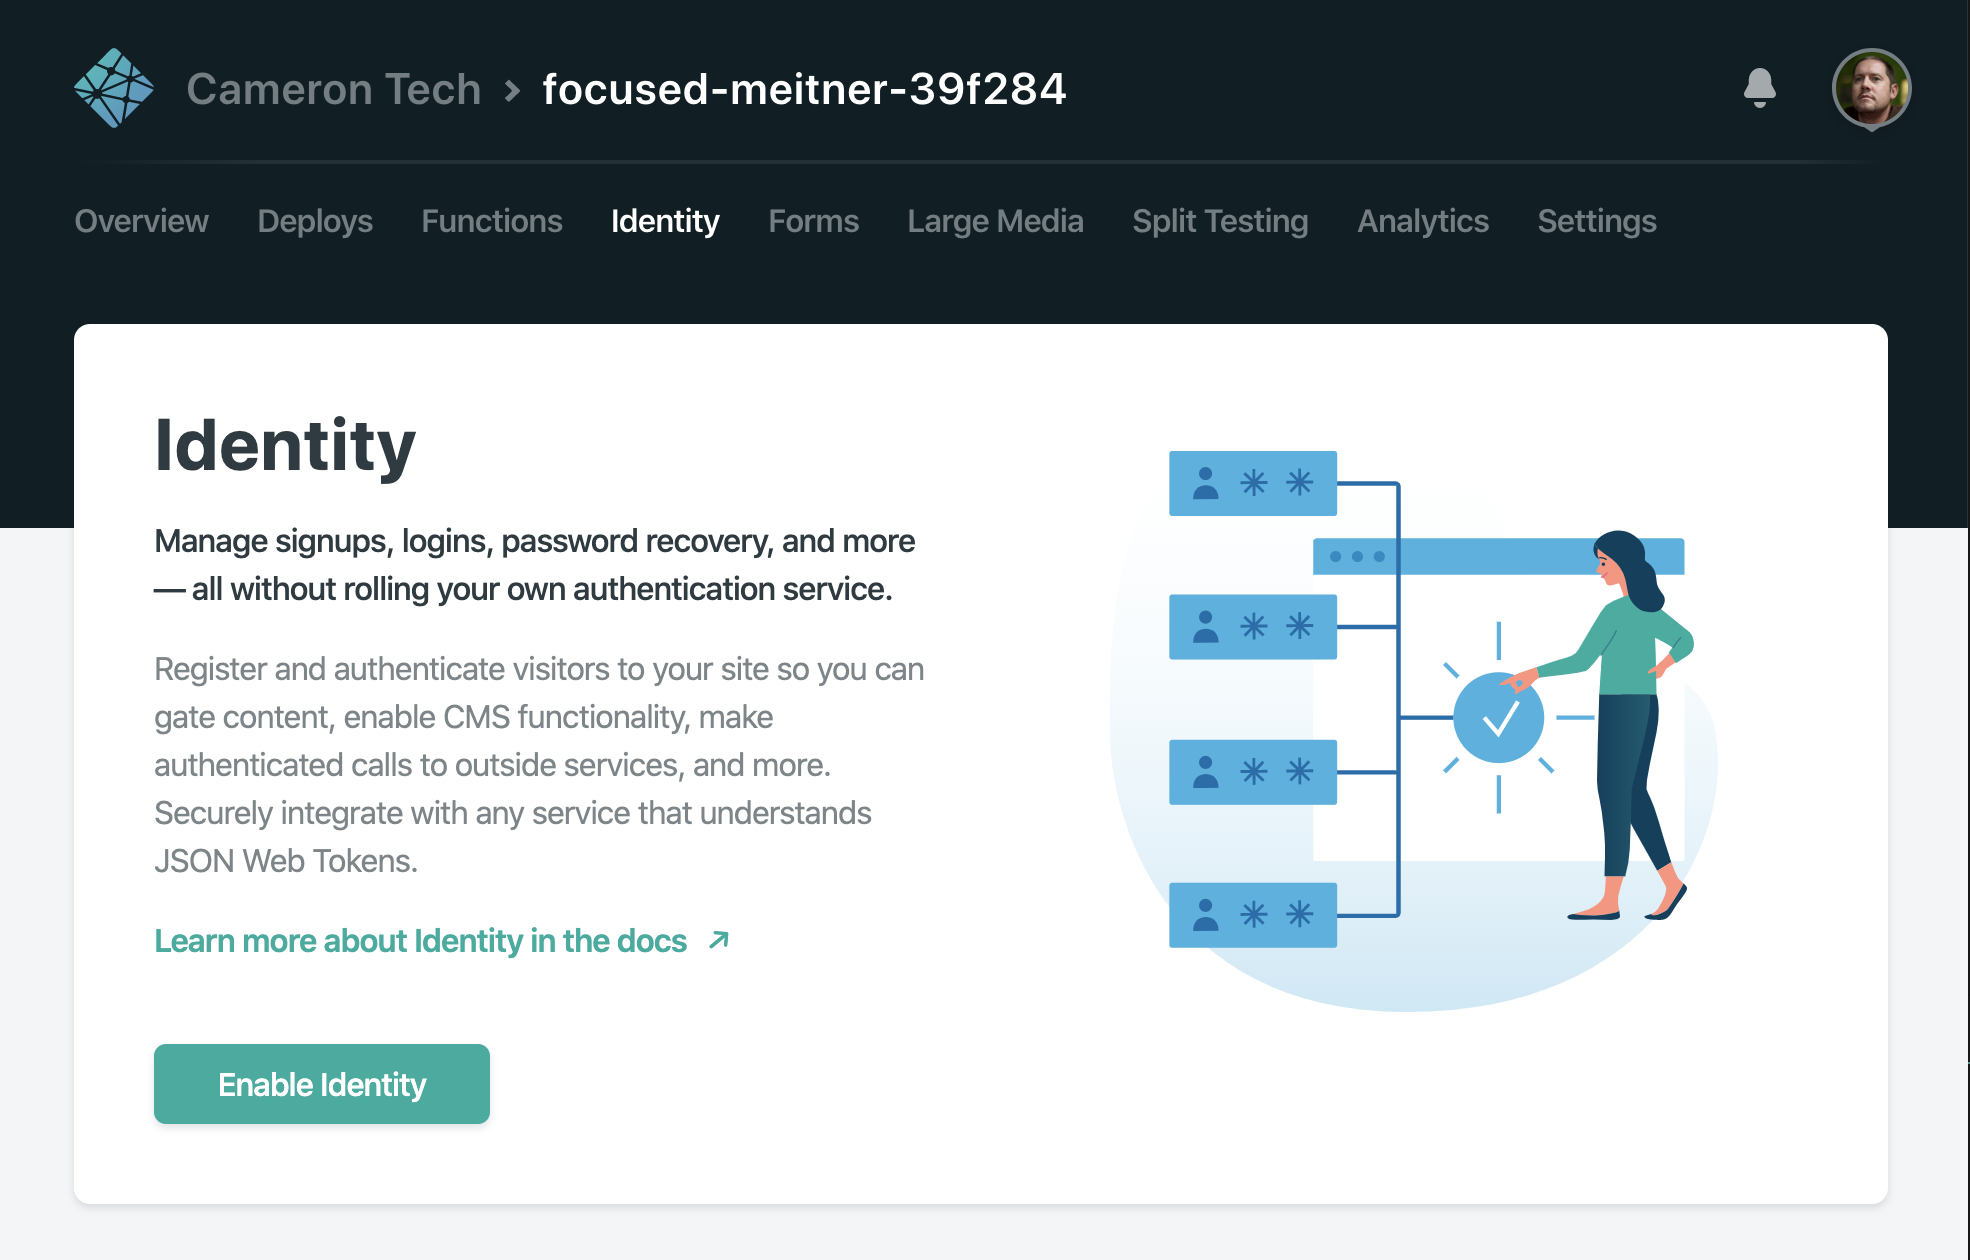
Go to netlify.com and find your site. Click on the Identity link and the Enable Identity button:
Now copy and paste the API endpoint URL that's displayed once the screen refreshes:
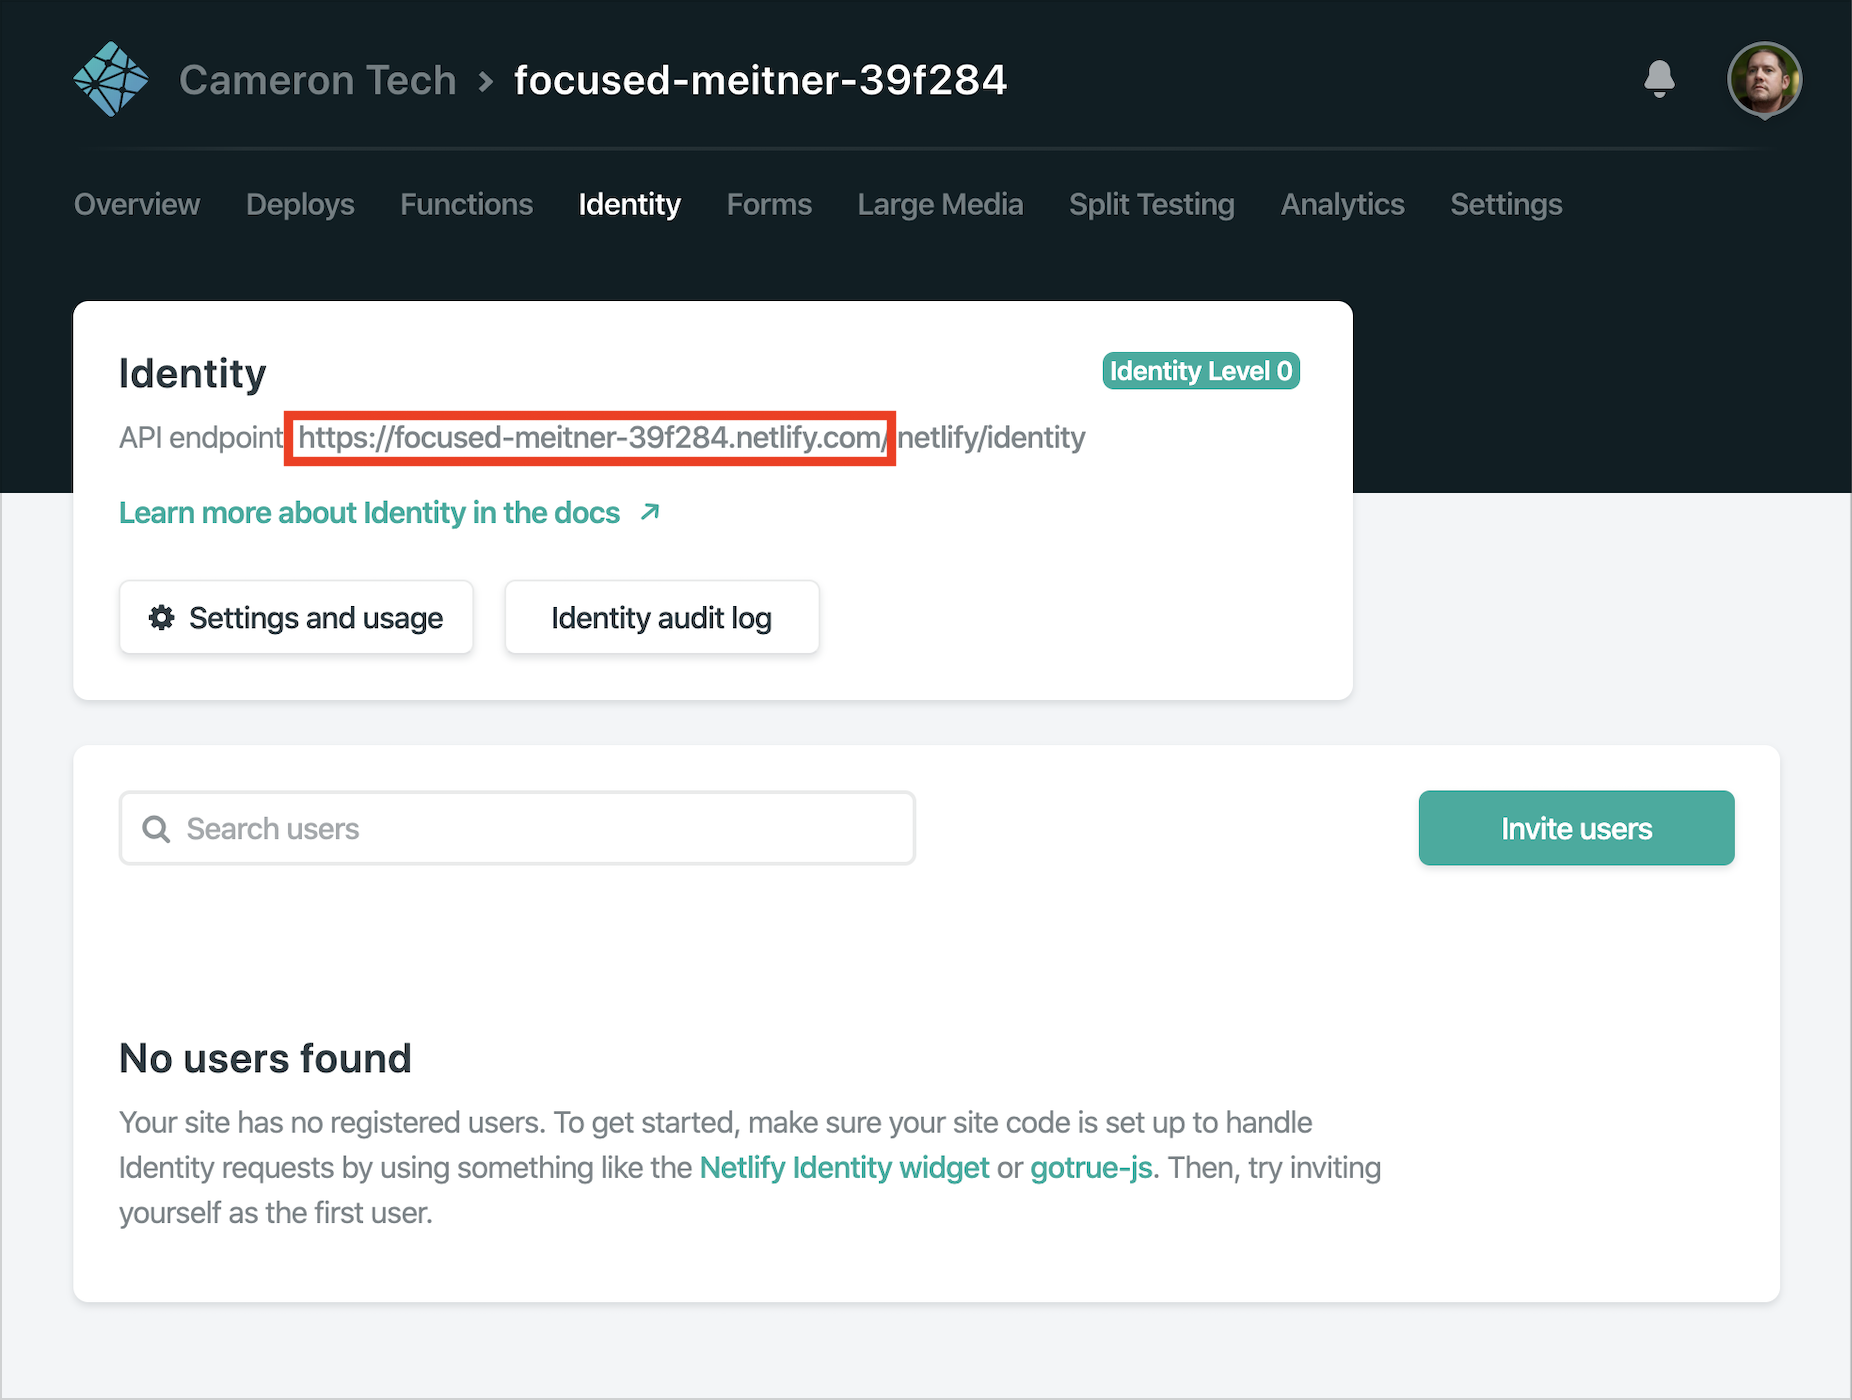
Back to your local development machine, head to http://localhost:8910/admin and you'll be prompted with the login popup. Enter the URL that you just copied and click Set site's URL:

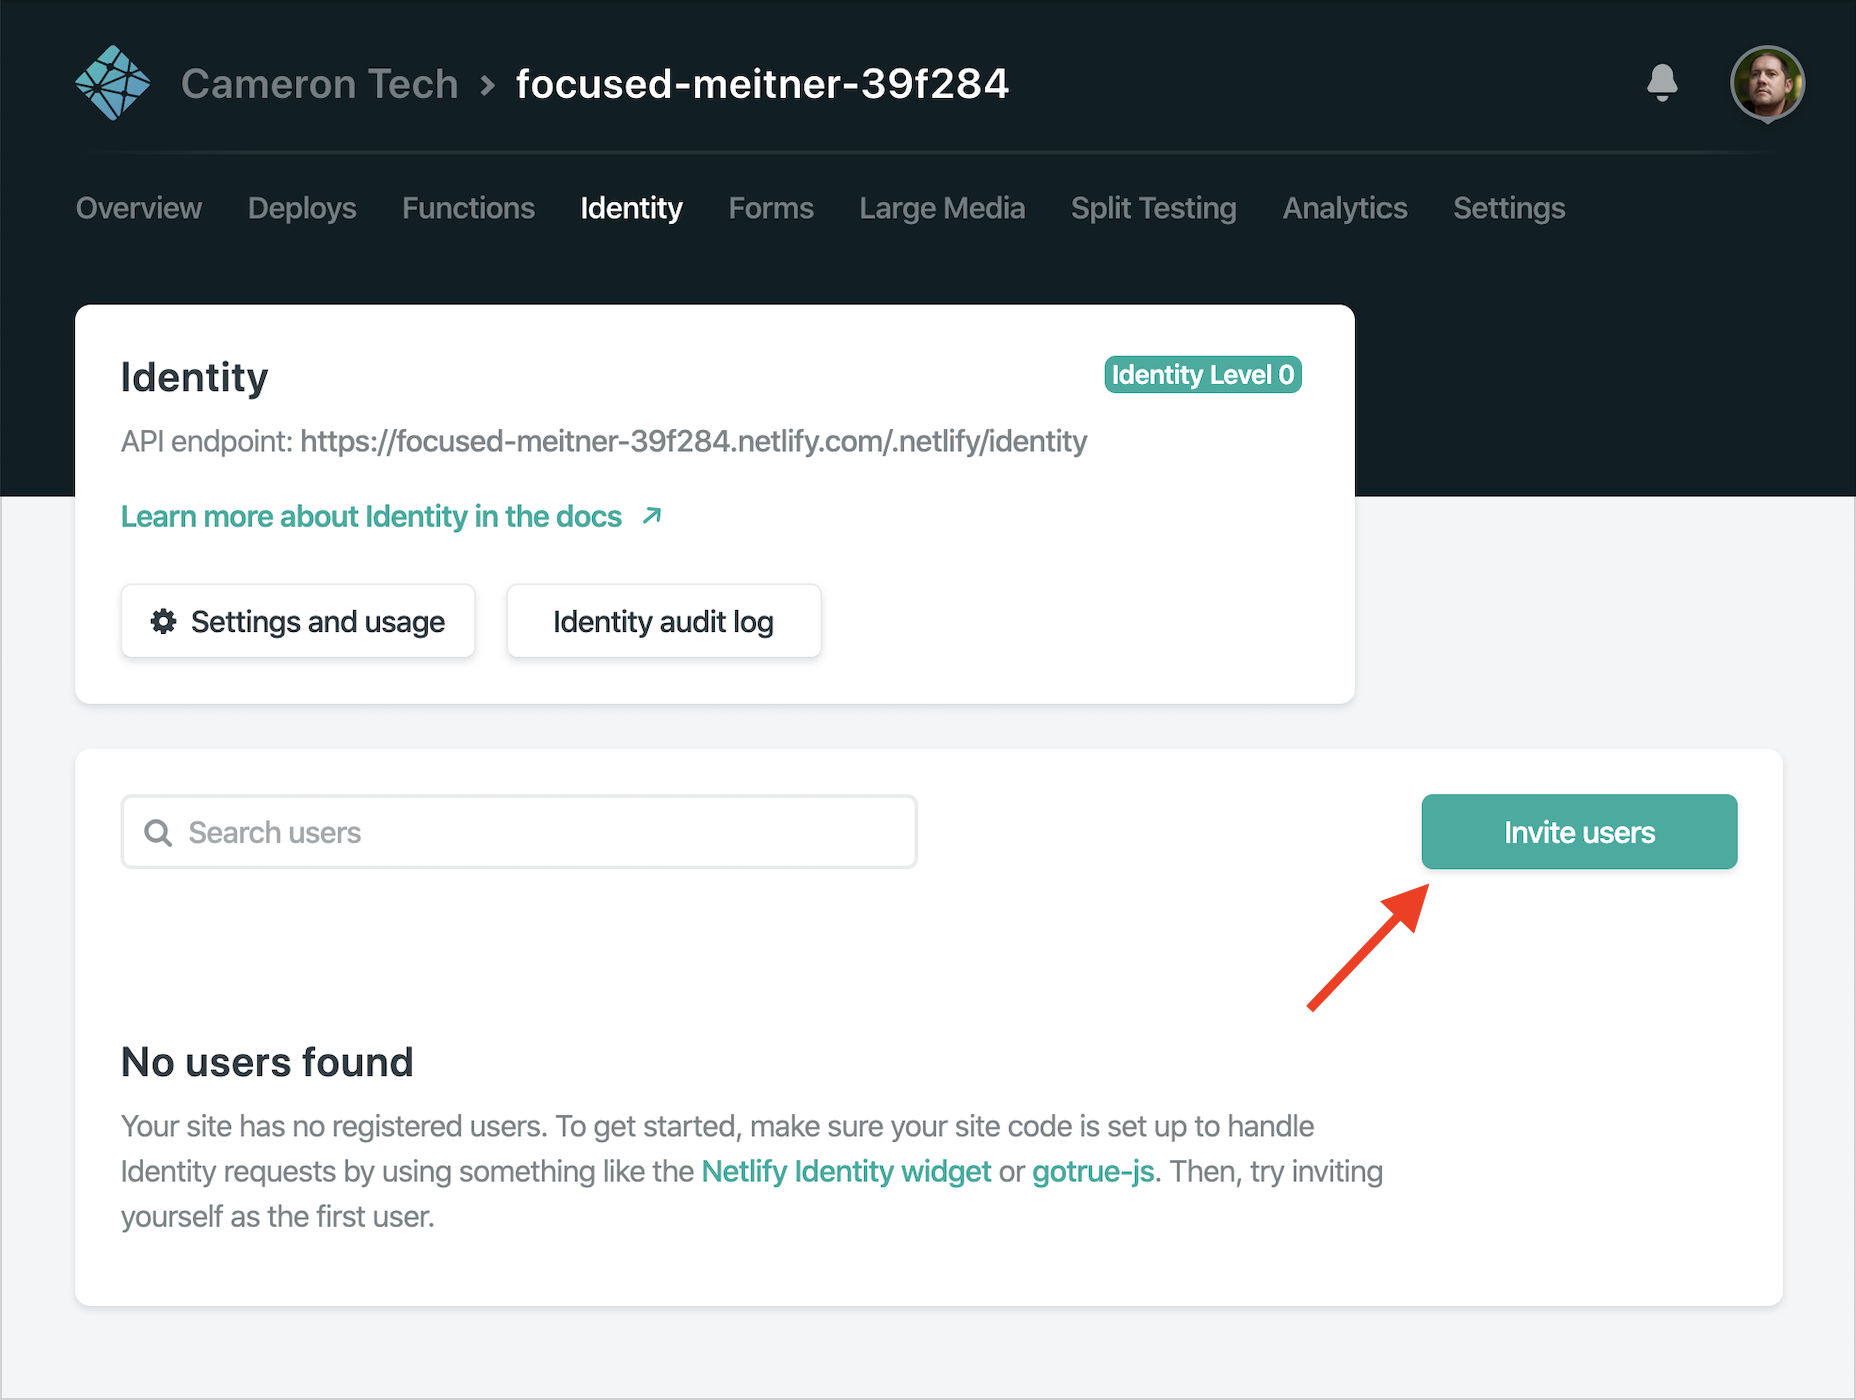
The popup should refresh and now you'll see a login box. But, we don't have any users yet. Back over to Netlify, click the Invite users button and send yourself an invite:

You'll get an email with a link to accept the invite. However, this link won't work: it's trying to go to the Netlify URL, which doesn't have a site on it yet. So after clicking the link and getting an error, change the URL to be http://localhost:8910 but make sure to keep the invite token at the end. For example, if you are sent to
https://nostalgic-dijkstra-23eaba.netlify.com/#invite_token=8-TFgNesyzhIn8LnXv3
Rewrite that URL to:
http://localhost:8910/#invite_token=8-TFgNesyzhIn8LnXv3
You should see the login popup with a password input to complete your account. Fill it in and submit and now you should get a message saying you are logged in. Head back to the admin http://localhost:8910/admin and you should have access (finally!)
The blog uses an external service, Filestack to handle image uploads. If you want to be able to upload images in local development you'll need to create a free account at Filestack and copy the API key. You get 100 uploads per month on their free account which should be plenty to test with.
Once you have logged into Filestack copy the API key shown at the top right of the dashboard:
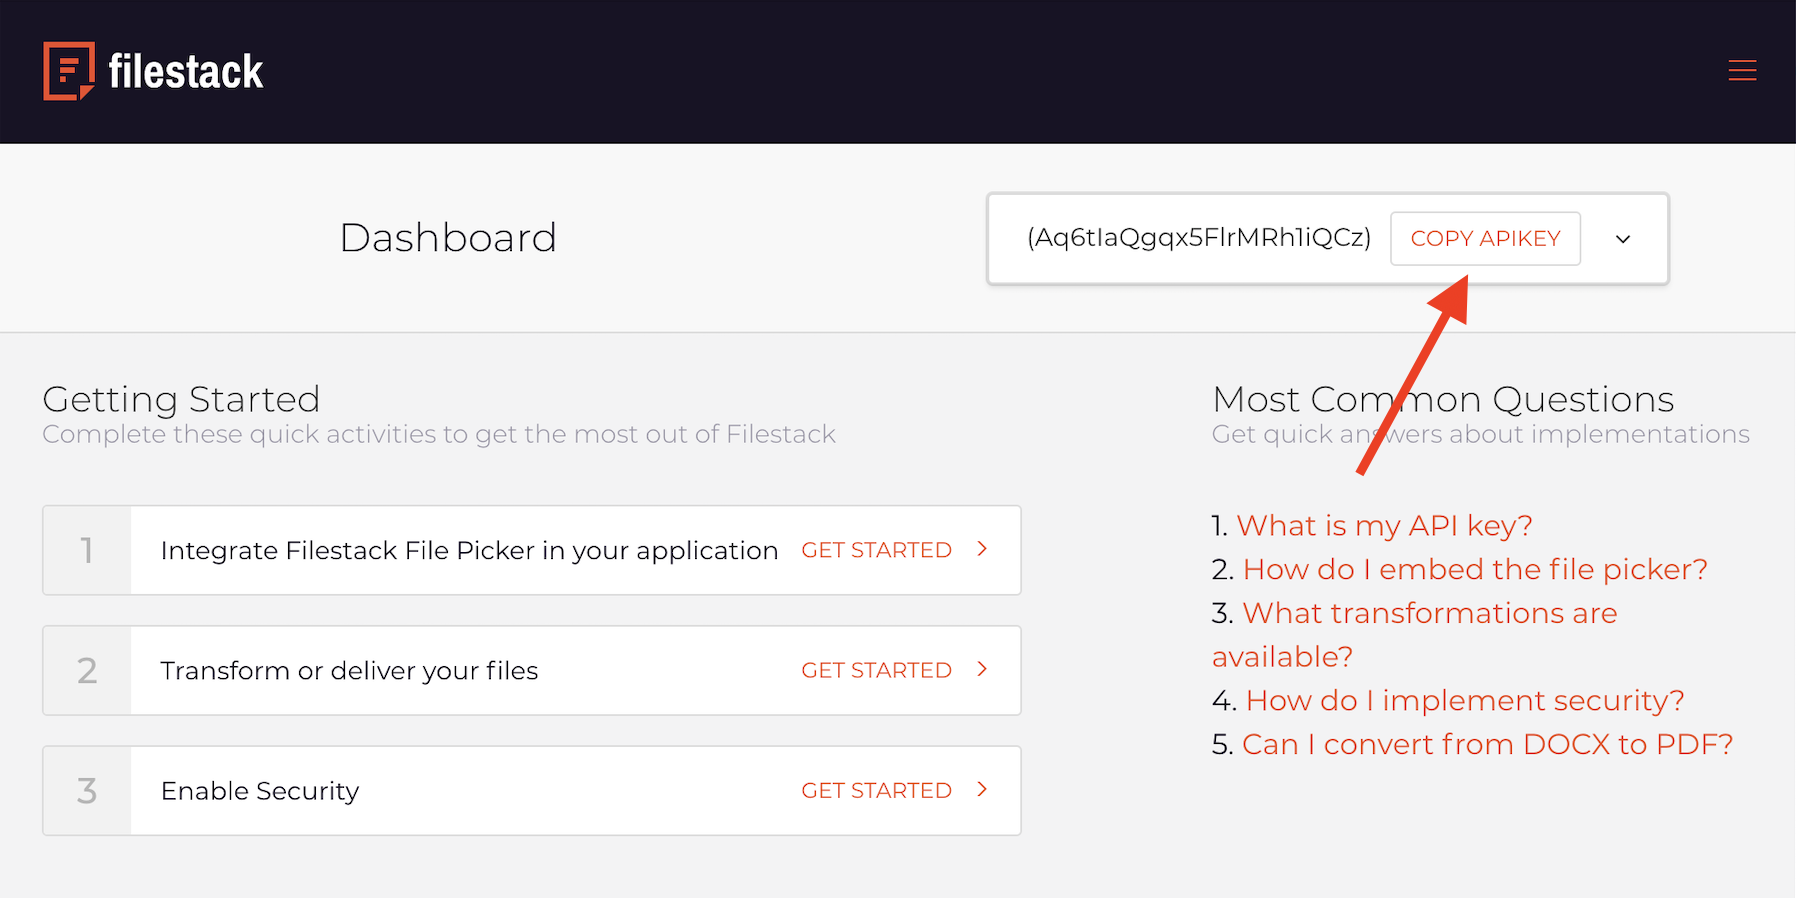
If you haven't already, copy the .env.example file in the root of the blog to a new
file named .env. Edit the FILESTACK_API_KEY variable to be equal to the one you
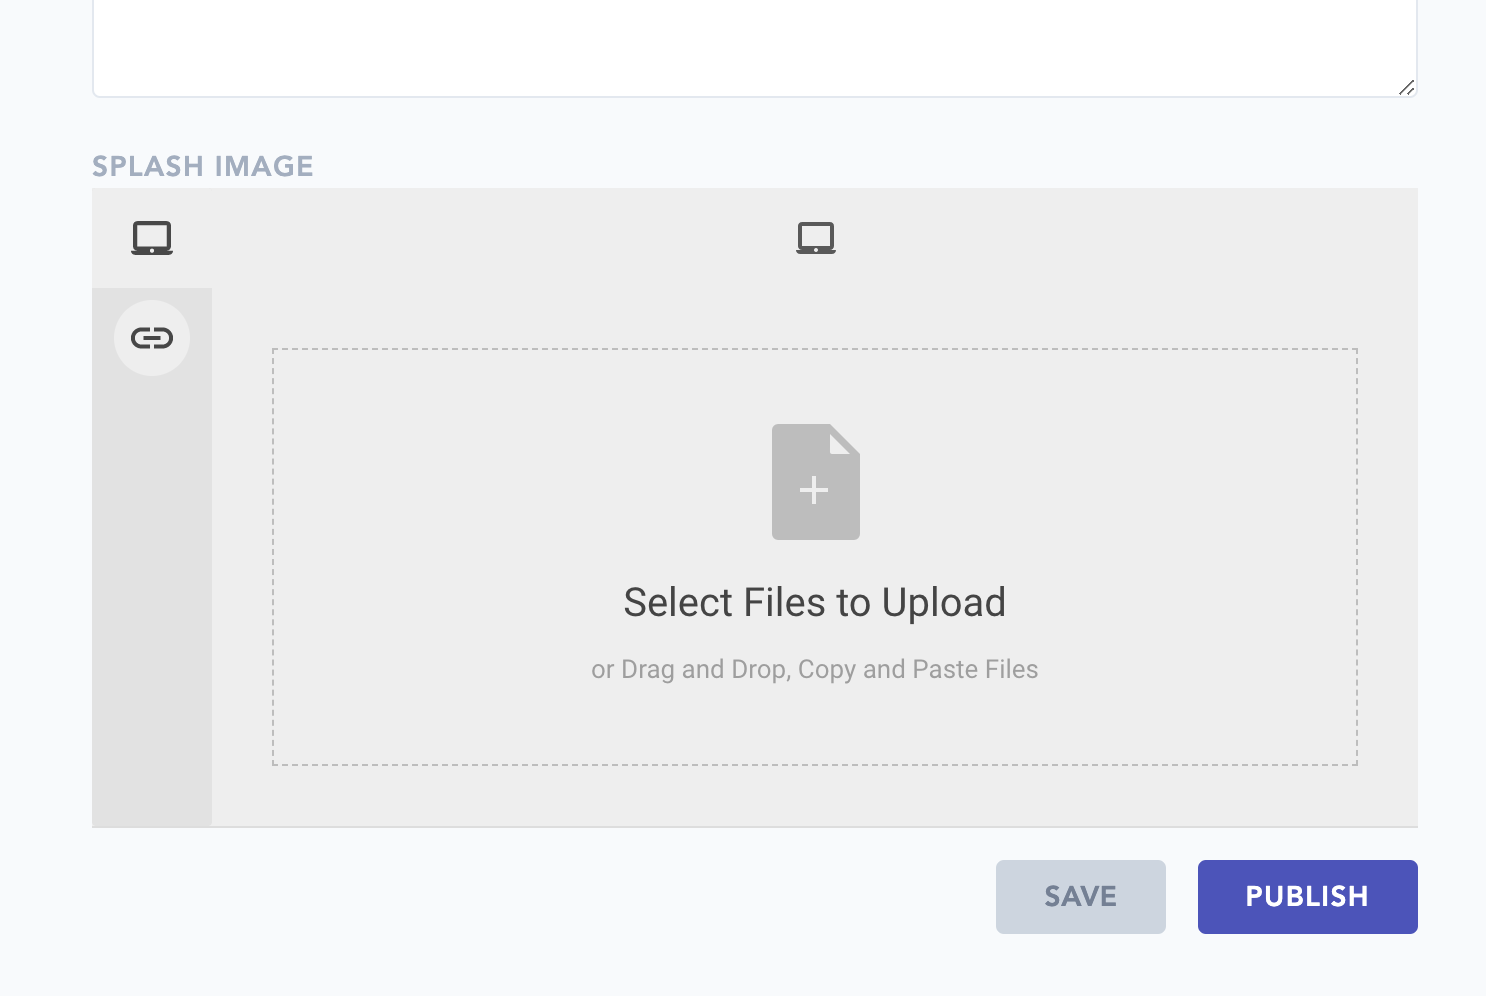
just copied. Save .env and restart your yarn dev process. Now when creating a
new blog post http://localhost:8910/admin/new you should see a filepicker towards the
bottom of the form:
- Remove file picker if ENV var not set, with instructions for enabling
- Add instructions for enabling Authentication
- In public view don't include posts in Draft state