Making Your Models (Blockbench)
GeckoLib utilises a custom plugin in Blockbench
This page and by extension this wiki assumes you are utilising Blockbench to create your model and animation jsons
To make GeckoLib models and animations in Blockbench, you must first install the GeckoLib plugin for Blockbench.
To do this, follow these steps:
- Start Blockbench and open the file
Filemenu in the top left corner. - Select
Plugins...to open the built-in plugin browser. - Make sure you are in the
Availabletab, then search for the plugin. Ex:GeckoLib Animation Utils - Once you have found it, press the
Installbutton on the right-hand side.
To create a new GeckoLib Model, go to File -> New -> GeckoLib Animated Model
To choose your model type, go to File -> GeckoLib Model Settings and select your object type.
If you have already created a bedrock or modded entity model, you can convert it to the GeckoLib format by going to File -> Convert Project -> Select Geckolib Animated Model
Unfortunately, there is no good way to convert a .java file directly into a GeckoLib model - make sure you save your .bbmodel project files so you always have them!
Preparing a model for animation is known as "rigging". You can think of it as the process of creating a skeleton for your model. Spending a little time rigging makes the animation process much more manageable.
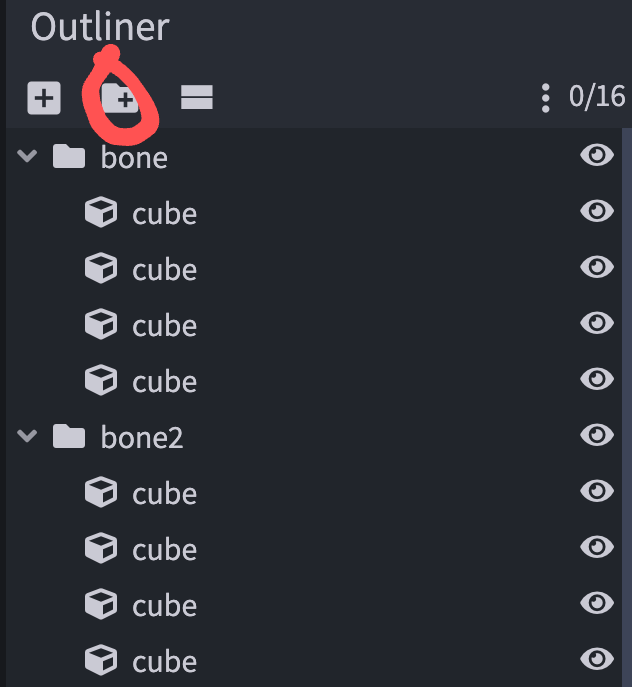
Models consist of cubes and groups. Only groups can be animated, so place all your cubes in groups.
Click to show
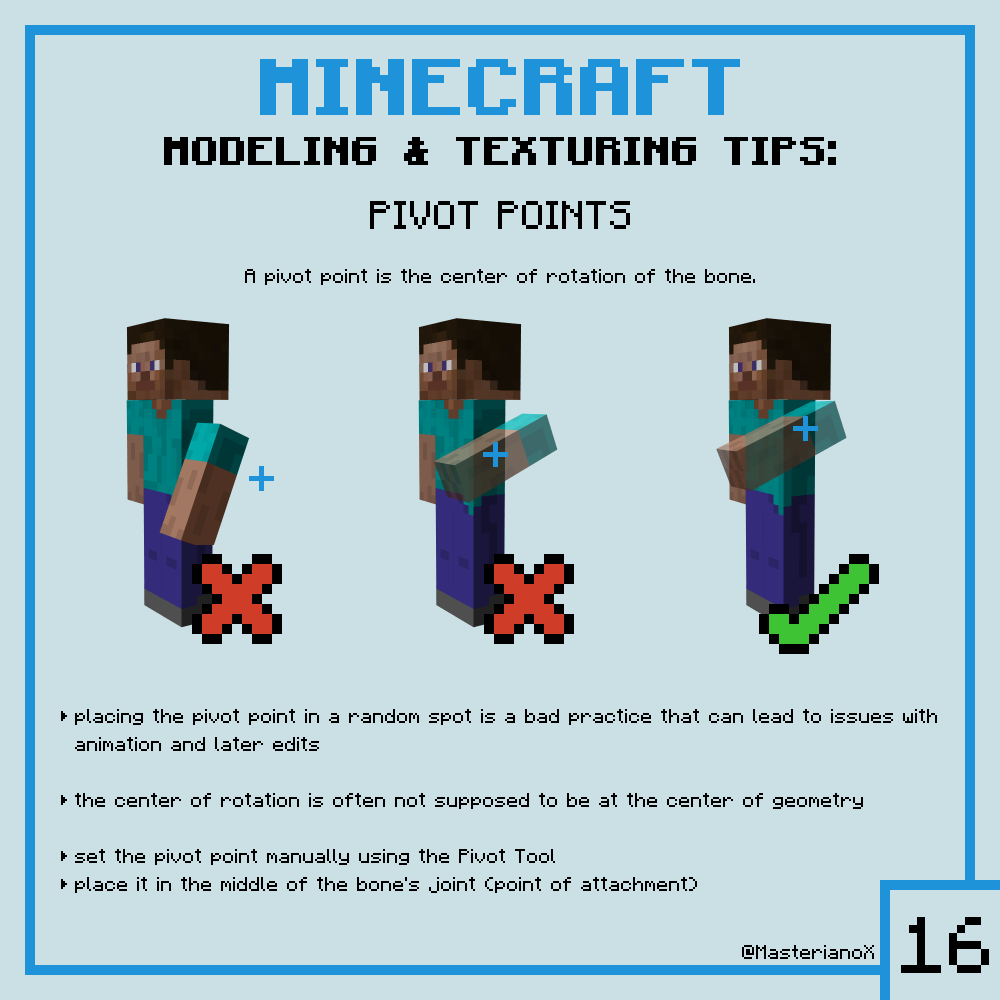
The rig for a model is like a skeleton. Groups are the bones, pivots are the joints, and cubes are the flesh.
MasterianoX Tip!

These images are from the article Minecraft Modeling & Texturing Tips by MasterianoX. You can read it for more detail and lots more helpful modeling tips.
Unless your model has multiple object parts that can move independently (like if your entity was a school of fish), you probably want a single root group with many nested child groups. When each group moves, it also carries its children.
Pivot points can be set using the pivot tool and affect what point a group pivots from when it rotates.
MasterianoX Tip!
These images are from the article Minecraft Modeling & Texturing Tips by MasterianoX. You can read it for more detail and lots more helpful modeling tips.
For a basic visual demonstration of pivot points and parenting, see this video
You can animate your model in the Animation tab on the right.
Animating in GeckoLib is almost the same as animating a bedrock entity, so most bedrock animation tutorials also apply to GeckoLib.
GeckoLib supports a expression-based math system for advanced animations, such as sine-functions. For more information on this, see the Molang Page
GeckoLib 2.0 added a powerful new feature called easing curves. These allow you to create smooth, natural-looking animations with less effort.
In Bedrock and GeckoLib 1.0, the only type of "tweening" or interpolation that could be used between keyframes was a linear interpolation, or "lerp". This means that as time progresses forwards, the value would change from the starting keyframe to the next keyframe at a constant speed. Real objects don't usually move this way; they need to accelerate a bit when starting and decelerate when stopping.
An easing curve is a mathematical function that allows animations to be gradually interpolated. The value of the "tween" at any given time is taken from the given easing curve rather than a straight line. This allows you to achieve effects like a smooth start quickly and stop, an object overshooting its destination and sliding back into place (back curve), or an object bouncing (bounce curve).
Information on easing types and their construction can be found here
Easing curves visualised
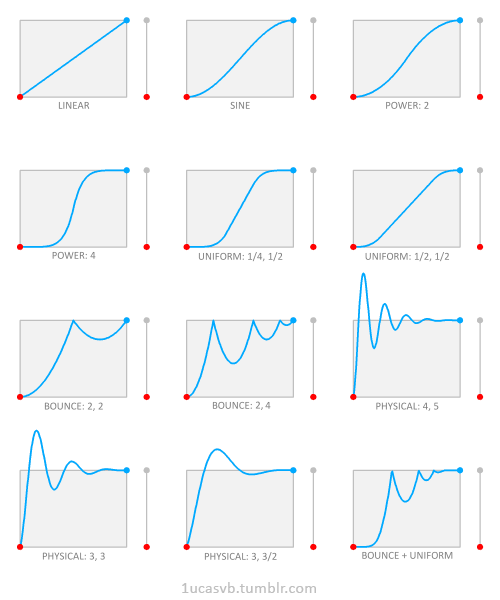
Source: 1ucasvb. Note some curve names differ from ours, but the principles are the same.
In addition, there are three directions in a curve that can be applied. "In" usually means the curve is applied, focusing on the beginning of the interpolation and a smooth-looking start. "Out" usually means the curve is used focusing on the end of the interpolation (the reverse of "In"), focusing on a smooth-looking end. "InOut" means the curve is symmetrically applied to both the start and end. In the animation above, when the animation plays from left to right, it corresponds to "In", and when it plays backward/right to the left, it corresponds to "Out". See below for a comparison:

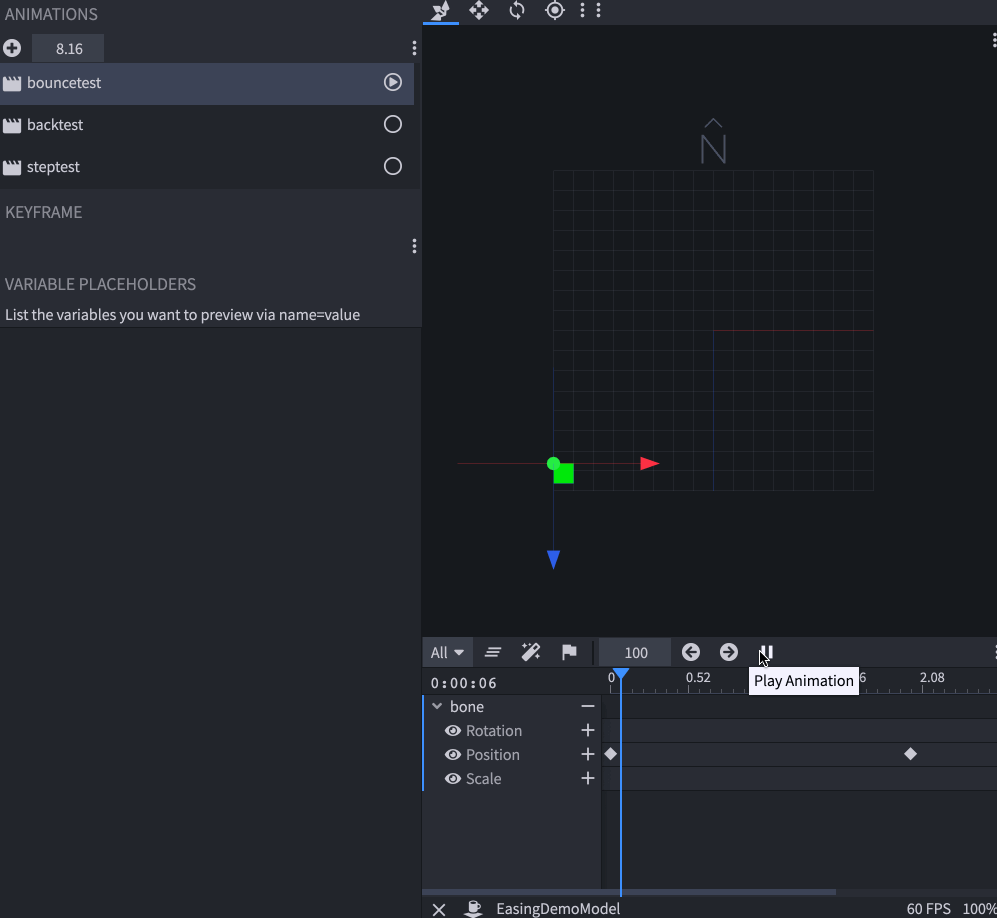
Here's a short demo of how to use the easing curves editor:
Click to show
After making your model in Blockbench, you must export several things.
- The actual model (
File->Export->GeckoLib Model) - The texture (Right-click the texture in the
Texturespanel andSave As) - Optionally, the item display settings if you're in the Item mode. (
File->Export->GeckoLib Display Settings)
Geckolib 3
Geckolib 4
- Installation
- Getting Started
- Upgrading from GeckoLib 3.1.x to 4.0
- Updating to GeckoLib 4.5
- Basic
- Advanced
- Miscellaneous
Package repository hosting is graciously provided by Cloudsmith.
Cloudsmith is the only fully hosted, cloud-native, universal package management solution that enables your organization to create, store and share packages in any format, to any place, with total confidence.