The purpose of this repo is to demonstrate how to structure front-end project to play nicely with fe-shared package
In this tutorial, we’ll go through building a very simple counter app, where anyone can change the number by interacting with the interface.
Typical web3 web app is like a normal web2 app, but with 2 additional aspects
- Reading data from RPC and smart contracts instead of API
- Signing data with connected wallet for writes
The issue is: These aspects are quite complicated, even with libraries like viem.sh and wagmi.sh it’s still can be very cumbersome to setup wallet connection, signing, transaction history etc because there is no 1 size fit all for all the apps and that’s why we in BGD decided to build
fe-sharedis as set of ready to go flows which can be used as a foundation for web3 apps.
Fe-shared is very opinionated and more like an architecture model, rather than library. It supposes to handle some complicated parts of the whole flow, but not the whole flow.
To understand why exactly, there is always an RPC and wallet. Let’s go through writing a simple smart contract and deploy it on local test net, the steps would be:
- Write a smart contract
- Deploy to local anvil testnet
- Generate typescript types
- Start local front-end
- Integrate typechain types into freshly created app
- Connect custom code to fe-shared This way we’ll have an idea of the entire process and can easily tweak smart contract to experiment.
The whole contract is a bit modified example of SimpleStorage example Source code looks like this
// SPDX-License-Identifier: GPL-3.0
pragma solidity 0.8.10;

contract SimpleStorage {
    uint256 storedData;

    function increment() public {
        storedData++;
    }

    function decrement() public {
        if (storedData > 0) {
            storedData--;
        }
    }

    function getCurrentNumber() public view returns (uint256) {
        return storedData;
    }
}
If you want to see how front-end is built, skip to front-end part right away, otherwise here is how to run the project with local anvil environment from foundry
- Install foundy
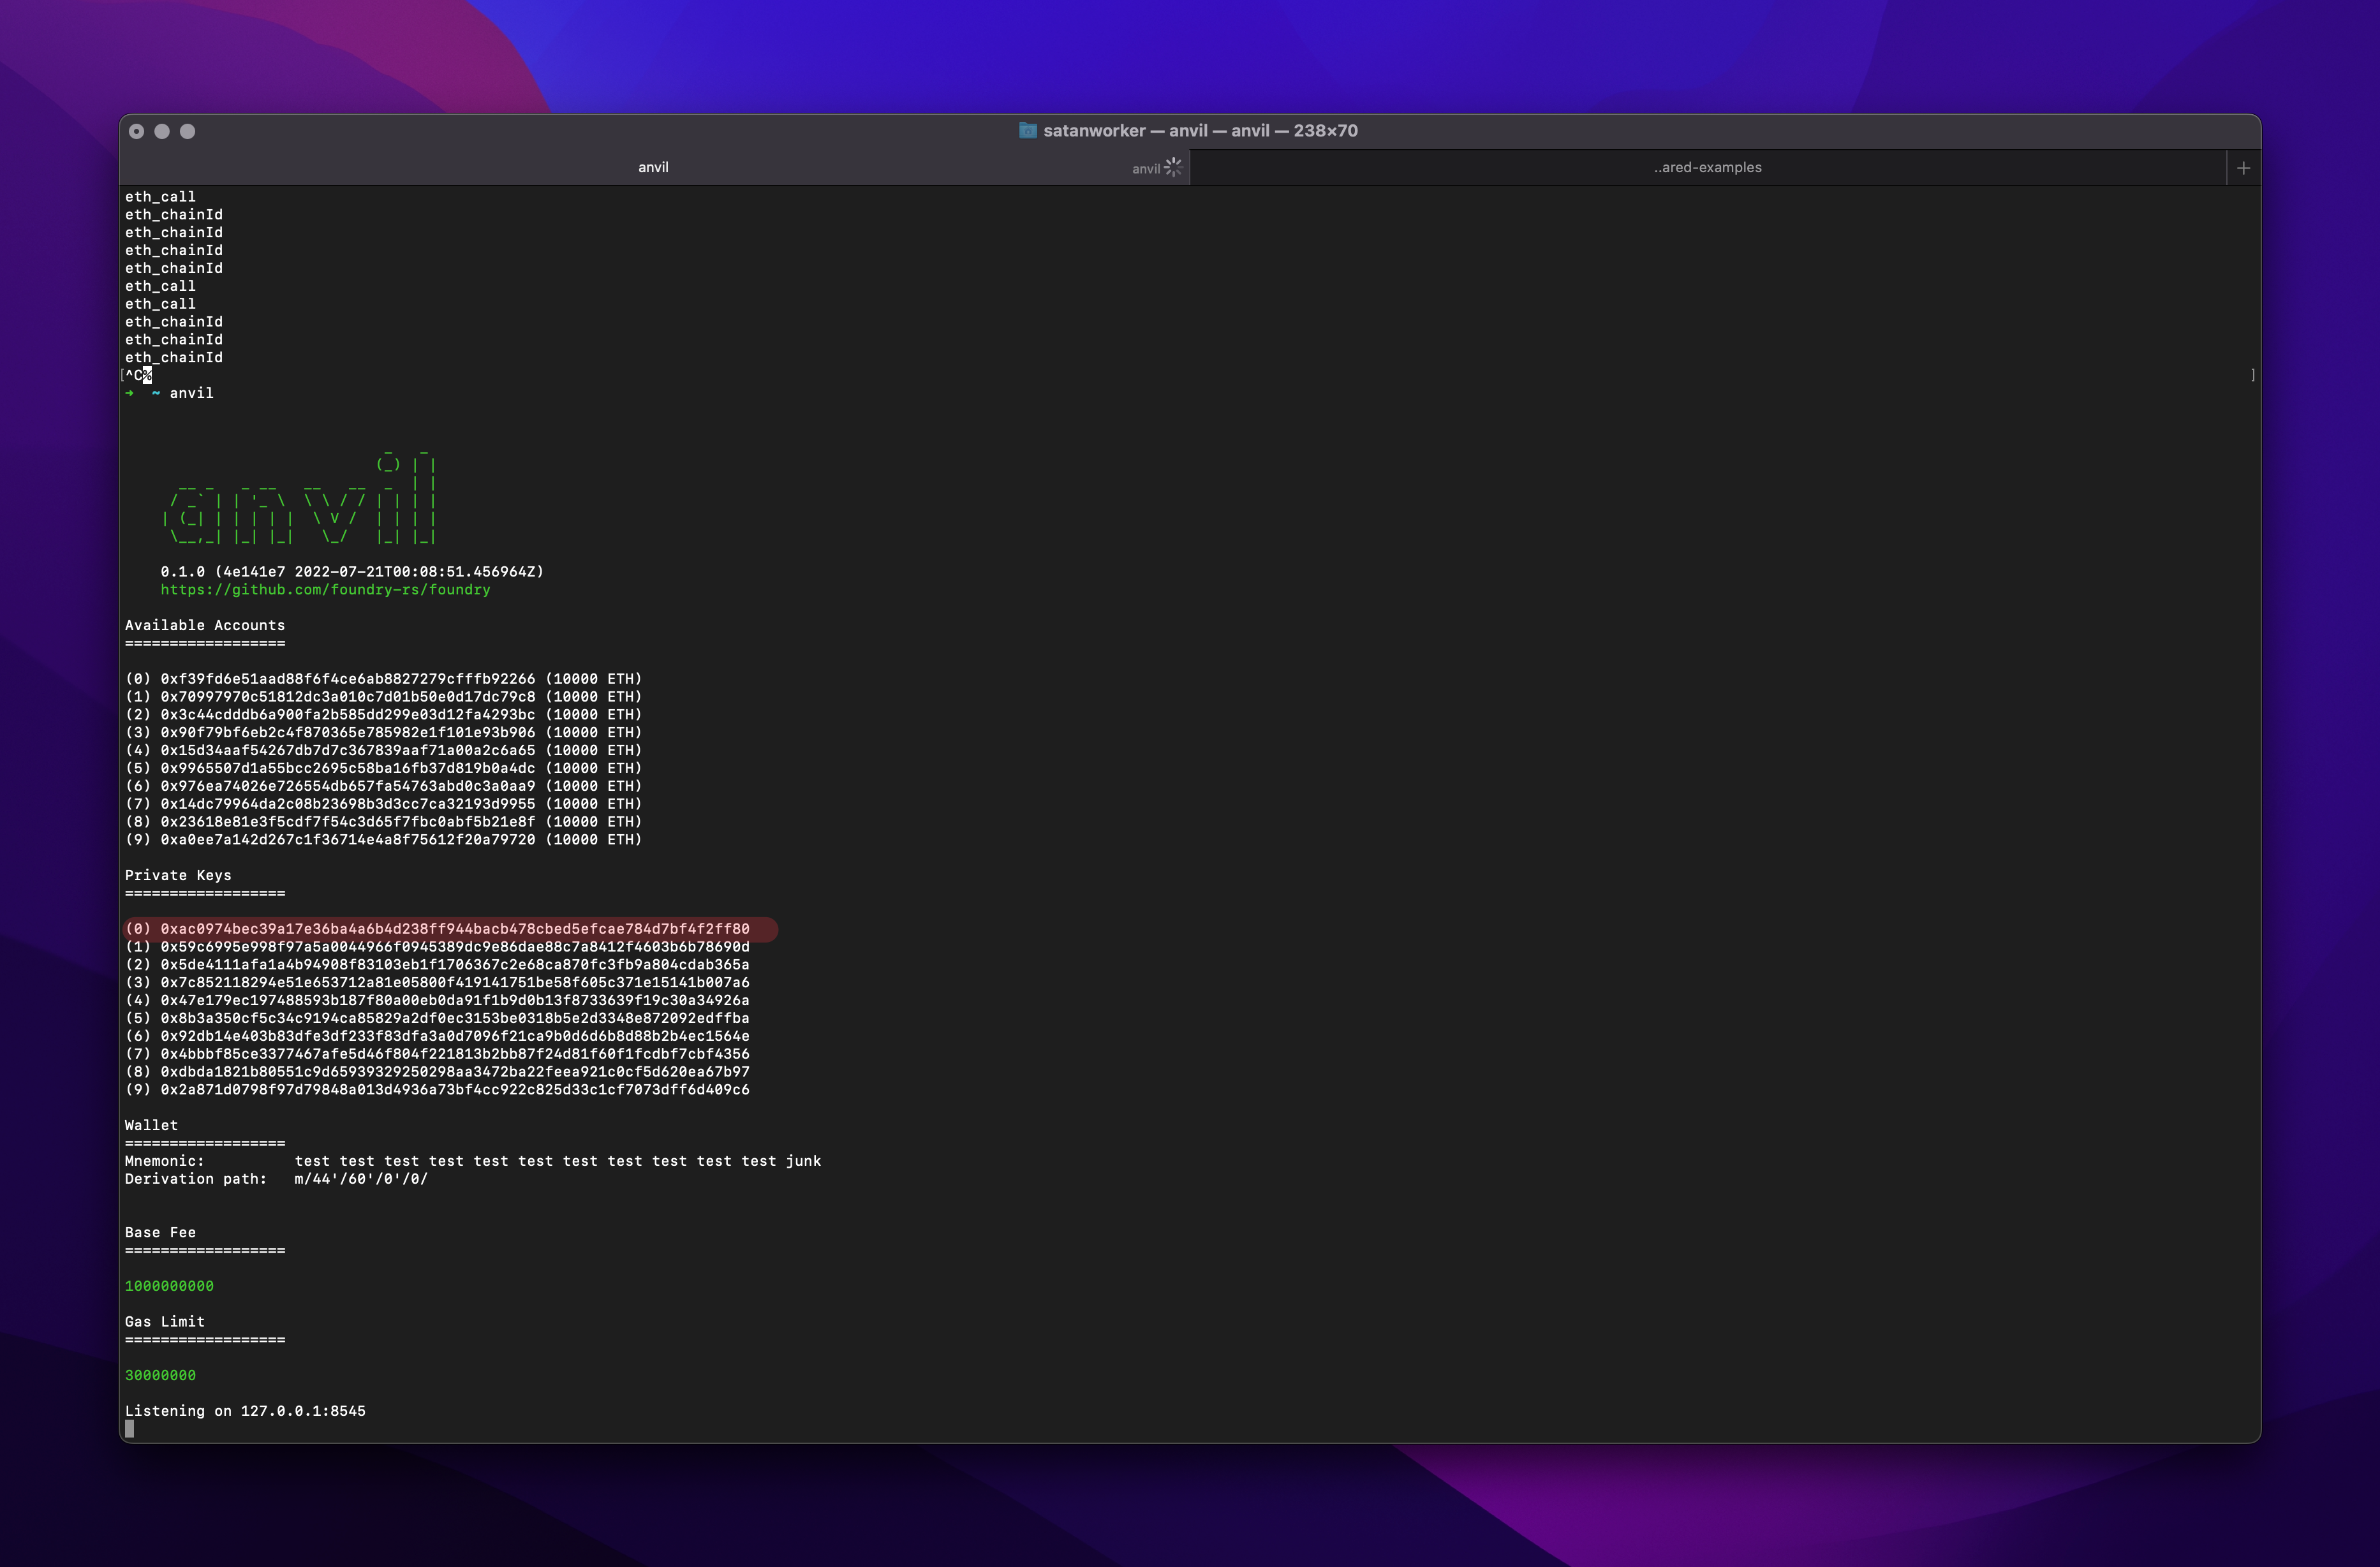
- In terminal run command
anvil, the output should look something like this
- Go to
fe-shared-example/contractsfolder and create.envfile (there is .env.example file for reference) - Add one of the private keys from anvil output like so (address can differ) to the end of .env file
PK=0xac0974bec39a17e36ba4a6b4d238ff944bacb478cbed5efcae784d7bf4f2ff80- Add anvil url to the end of .env file (don’t forget http:// before anvil url)
ANVIL_RPC=http://127.0.0.1:8545- Call
source .envto load environment variables - Inside contracts folder call
forge install - Deploy
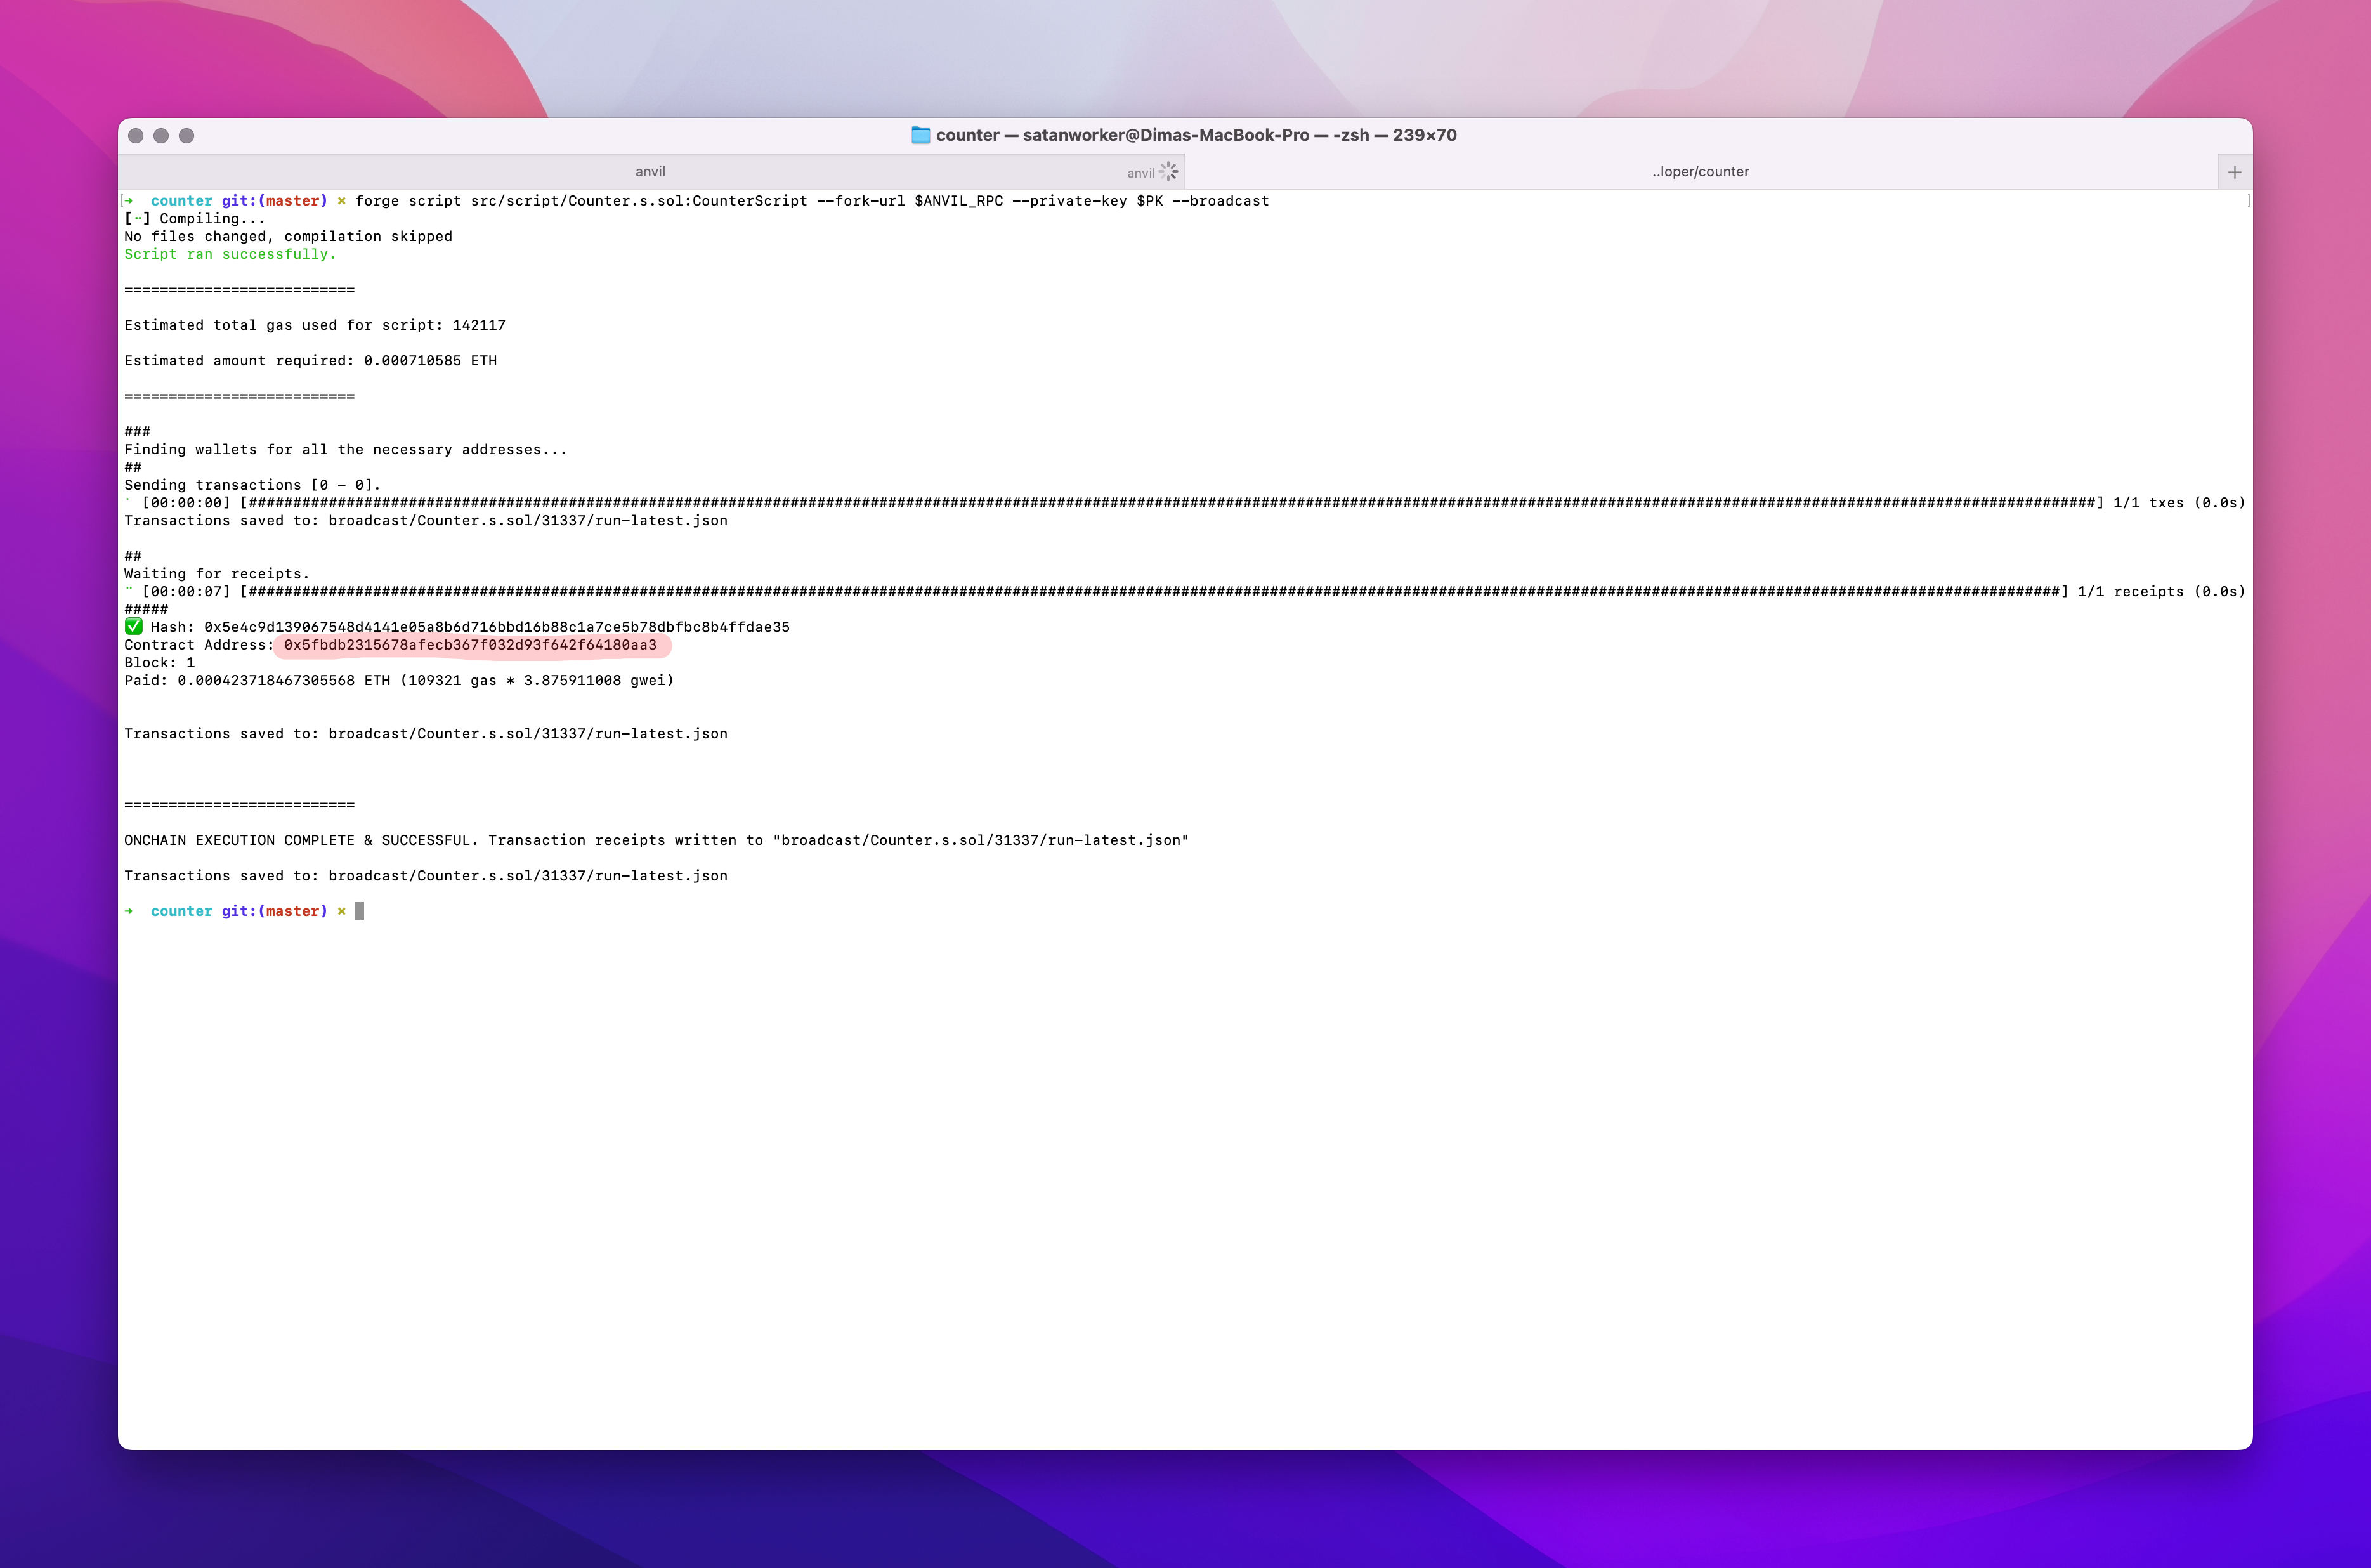
Countercontract to anvil go to contracts folder and execute
forge script script/Counter.s.sol:CounterScript --fork-url $ANVIL_RPC --private-key $PK --broadcastOnce the contract is deployed, you should have contract address like so
 Let’s test if it’s working fine, add one more variable to .env file and call
 source .env
CONTRACT_ADDRESS=0x5fbdb2315678afecb367f032d93f642f64180aa3Let’s verify if contract is working as expected
- Increment
cast send $CONTRACT_ADDRESS "increment()" --private-key $PK --rpc-url $ANVIL_RPC- Get counter value should output 1
cast call $CONTRACT_ADDRESS "getCurrentNumber()(uint256)" --rpc-url $ANVIL_RPCNow when the contract is up and running it’s time to spin up the front-end, but first let’s see how the result would look like
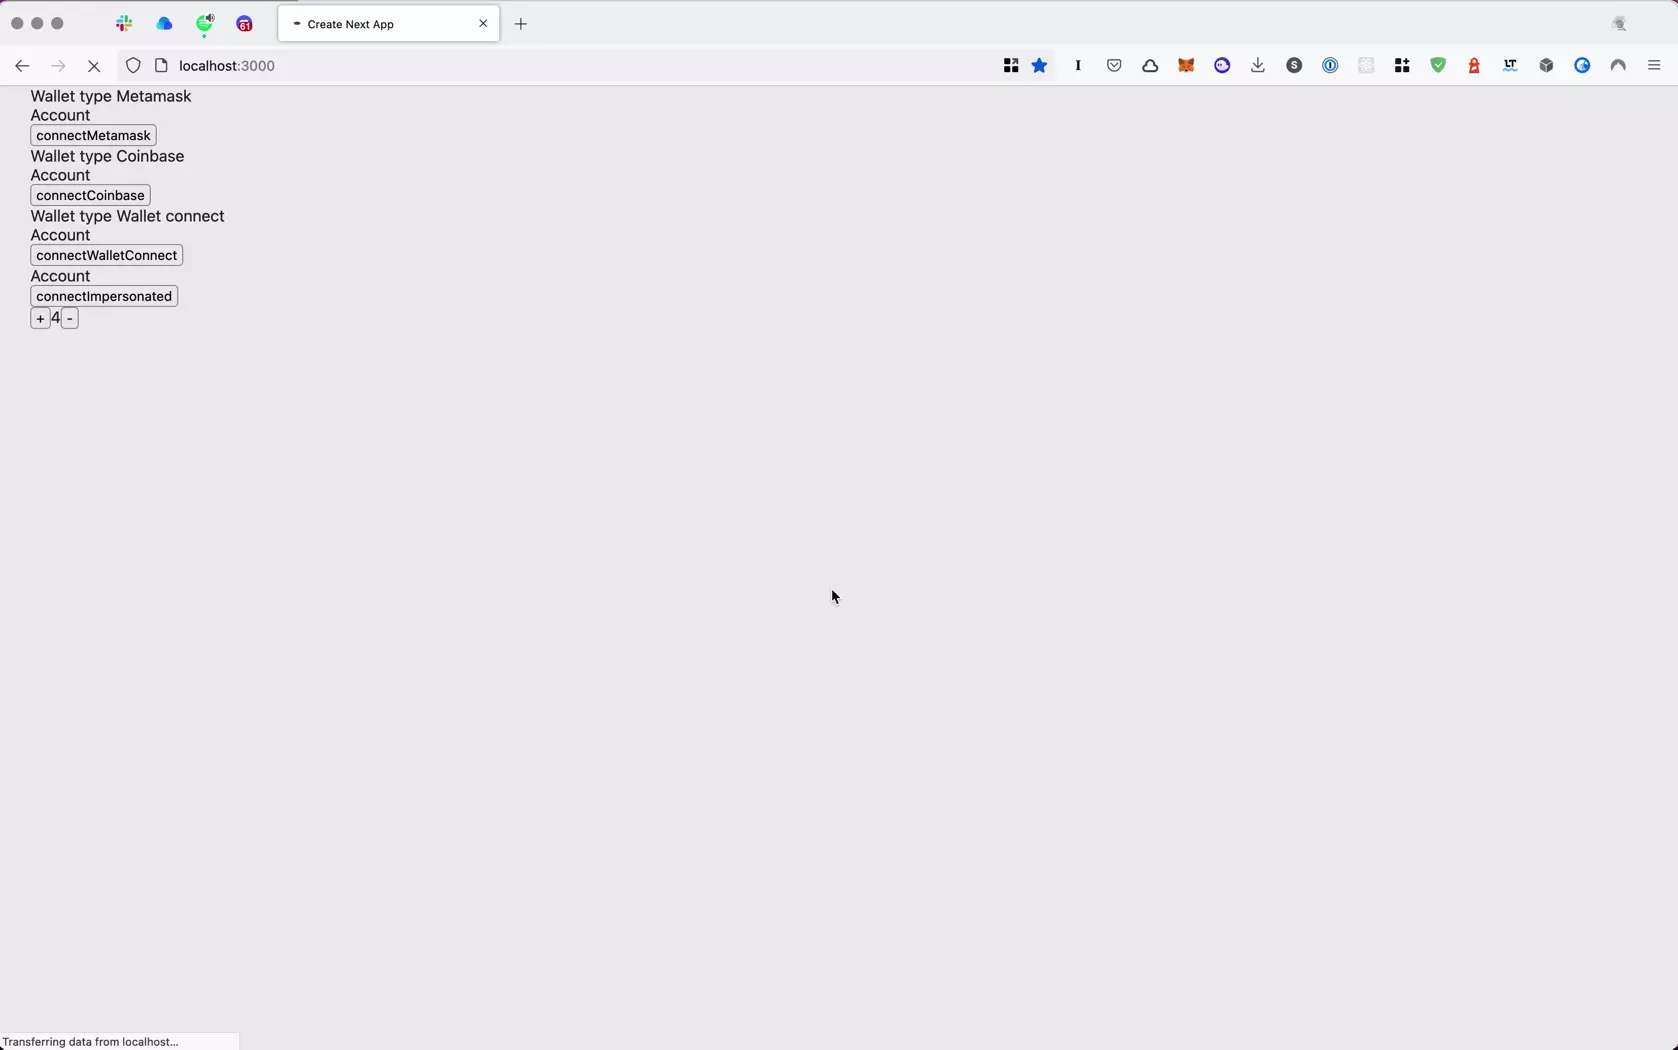 Although the app logic is basic, it still should go through mandatory flow
- Connect wallet
- Switch network (Goerli testnet in example)
- Sign the data with connected wallet
- Wait for transaction to confirm
- Update data after transaction confirmation But as an application developer, it’s crucial to be able to spin up the interface as fast as possible and dealing with the same flow over and over could be tedious, that’s where fe-shared packages is useful.
Fe-shared is design in a way to easily plug in any app which is using Zustand for state management. Although it is possible to use it without Zustand, it’s still the easiest way.
First let’s start with services folder, it’s where abi files are located, we’ll create services for each abi, to only pass the required data, do some sorting and easily mock contract responses in tests
import { writeContract } from '@wagmi/core';
import { Client, getContract } from 'viem';
import { Config } from 'wagmi';

import { COUNTER_ADDRESS } from '../../utils/constants';
import { _abi as CounterAbi } from '../services/abi/CounterAbi';

export class CounterDataService {
	private counterFactory;
	private client: Client;
	private wagmiConfig: Config | undefined = undefined;
	constructor(client: Client) {
          this.client = client;
          this.counterFactory = getContract({
	    address: COUNTER_ADDRESS,
	    abi: CounterAbi,
	    client: client,
          });
	}

	public connectSigner(wagmiConfig: Config) {
          this.wagmiConfig = wagmiConfig;
	}

	async fetchCurrentNumber() {
          return await this.counterFactory.read.getCurrentNumber();
	}

	async increment() {
          if (this.wagmiConfig) {
            return writeContract(this.wagmiConfig, {
				address: COUNTER_ADDRESS,
				abi: CounterAbi,
				functionName: 'increment',
			});
		} else {
			throw new Error('CONNECT YOUR SIGNER');
		}
	}

	async decrement() {
		if (this.wagmiConfig) {
			return writeContract(this.wagmiConfig, {
				address: COUNTER_ADDRESS,
				abi: CounterAbi,
				functionName: 'increment',
			});
		} else {
			throw new Error('CONNECT YOUR SIGNER');
		}
	}
}
Each service should have some sort of connectSigner method. It’s done to fetch and sign data through different RPCs. Other way user will need to switch to proper network before seeing any data, and it makes everything even harder for apps communicating with multiple blockchains.
Now when we have a service for fetching smart contract data ready, let’s see how we can use it properly. Conveniently, fe-shared has everything covered. To make it work, we need first to init WagmiProvider this is due to some methods of wagmi.sh only being available through Context API
src/web3/components/WagmiProvider.tsx
'use client';

import { createWagmiConfig, WagmiZustandSync } from '@bgd-labs/frontend-web3-utils';
import { QueryClient, QueryClientProvider } from '@tanstack/react-query';
import React, { useEffect, useMemo } from 'react';
import { WagmiProvider } from 'wagmi';

import { useStore } from 'store';

const queryClient = new QueryClient();

export default function WagmiConfigProviderWrapper() {
	const getImpersonatedAddress = useStore((store) => store.getImpersonatedAddress);
	const setWagmiConfig = useStore((store) => store.setWagmiConfig);
	const changeActiveWalletAccount = useStore((store) => store.changeActiveWalletAccount);
	const setDefaultChainId = useStore((store) => store.setDefaultChainId);
	const setWagmiProviderInitialize = useStore((store) => store.setWagmiProviderInitialize);

	useEffect(() => {setWagmiProviderInitialize(true)}, []);

	const config = useMemo(() => {
		return createWagmiConfig({
			chains: chains,
			connectorsInitProps: {
				appName: 'Wagmi app',
				defaultChainId: chainId,
				wcParams: {
					projectId: wcProjectID,
					metadata: {
						name: 'wagmi',
						description: 'my wagmi app',
						url: 'https://wagmi.sh',
						icons: ['https://wagmi.sh/icon.png'],
					},
				},
			},
			getImpersonatedAccount: getImpersonatedAddress,
			ssr: true,
		});
	}, []);

	return (
		<WagmiProvider config={config}>
			<QueryClientProvider client={queryClient}>
				<WagmiZustandSync
					wagmiConfig={config}
					defaultChainId={chainId}
					store={{
						setWagmiConfig,
						changeActiveWalletAccount,
						setDefaultChainId,
					}}
				/>
			</QueryClientProvider>
		</WagmiProvider>
	);
}
app/layout.tsx
import WagmiConfigProviderWrapper from '../src/web3/components/WagmiProvider';

const RootLayout = async ({ children }: { children: React.ReactNode }) => {
	return (
		<html lang="en" suppressHydrationWarning>
		  <body>
		    <WagmiConfigProviderWrapper />
		    {children}
		  </body>
		</html>
	);
};

export default RootLayout;
After that, we can finally initialize our custom Web3Slice
src/web3/store/Web3Slice.tsx
import {
  createWalletSlice,
  initChainInformationConfig,
  IWalletSlice,
  StoreSlice,
} from '@bgd-labs/frontend-web3-utils';

import { TransactionsSlice } from '../../transactions/store/transactionsSlice';
import { CounterDataService } from '../services/counterDataService';

export type IWeb3Slice = IWalletSlice & {
  counterDataService: CounterDataService;
  connectSigner: () => void;
};

export const createWeb3Slice: StoreSlice<IWeb3Slice, TransactionsSlice> = (
  set,
  get,
) => ({
  ...createWalletSlice({
    walletConnected: () => {
      get().connectSigner();
    },
  })(set, get),
  counterDataService: new CounterDataService(viemClient),
  connectSigner() {
    const activeWallet = get().activeWallet;
    if (activeWallet && activeWallet.walletClient) {
      get().counterDataService.connectSigner(activeWallet.walletClient);
    }
  },
});
The purpose of Web3Slice is to have all the data services initialized so other part of the application could just call this services directly, without worrying where to handle it. Just do get().counterDataService
walletConnected is a callback function which will be called once the wallet is connected and activeWallet is already set.
Initializing Web3Slice and TransactionsSlice which will do the next is typically should be done once per app
Web3Slice is a good way to structure read data services, but how to communicate with transactions?
For that, we need to initialize our custom TransactionsSlice
src/transactions/store/transactionsSlice.ts
import {
  BaseTx,
  createTransactionsSlice as createBaseTransactionsSlice,
  ITransactionsSlice,
  IWalletSlice,
  StoreSlice,
} from '@bgd-labs/frontend-web3-utils';
import { goerli } from 'viem/chains';

import { CounterSlice } from '../../counter/store/counterSlice';
import { getDefaultRPCProviderForReadData } from '../../web3/store/web3Slice';

type IncrementTX = BaseTx & {
  type: 'increment';
  payload: {};
};

type DecrementTX = BaseTx & {
  type: 'decrement';
  payload: {};
};

export type TransactionUnion = IncrementTX | DecrementTX;

export type TransactionsSlice = ITransactionsSlice<TransactionUnion>;

export const createTransactionsSlice: StoreSlice<
  TransactionsSlice,
  IWalletSlice & CounterSlice
> = (set, get) => ({
  ...createBaseTransactionsSlice<TransactionUnion>({
    txStatusChangedCallback: (data) => {
      switch (data.type) {
        case 'increment':
          get().getCounterValue();
          break;
        case 'decrement':
          get().getCounterValue();
          break;
      }
    },
    defaultClients: {},
  })(set, get),
});
TransactionSlice will take care of adding transactions, switching networks, saving transactions to local storage and calling txStatusChangedCallback properly typed with all the payload data. In this example, both transactions call get().counterValue()
The setup is almost done, we only need to add slices to root slice
src/store/index.ts
import { createContext, type ReactNode, useContext, useRef } from 'react';
import { create, type StoreApi, useStore as useZustandStore } from 'zustand';
import { devtools } from 'zustand/middleware';

// combine zustand slices to one root store
import { CounterSlice, createCounterSlice } from '../counter/store/counterSlice';
import { createTransactionsSlice, TransactionsSlice } from '../transactions/store/transactionsSlice';
import { createWeb3Slice, IWeb3Slice } from '../web3/store/web3Slice';

export type RootState = IWeb3Slice & TransactionsSlice & CounterSlice;

const createRootSlice = (set: StoreApi<RootState>['setState'], get: StoreApi<RootState>['getState']) => ({
  ...createWeb3Slice(set, get),
  ...createTransactionsSlice(set, get),
  ...createCounterSlice(set, get),
});

export const useStore = create(devtools(createRootSlice, { serialize: true }));
It will throw an error due to createCounterSlice is not written yet
Now the app has all the setup, we can finally write the app logic itself.
import { StoreSlice } from '@bgd-labs/frontend-web3-utils';

import { TransactionsSlice } from '../../transactions/store/transactionsSlice';
import { IWeb3Slice } from '../../web3/store/web3Slice';

export interface CounterSlice {
	counterLoading: boolean;
	counterValue?: bigint;
	increment: () => Promise<void>;
	decrement: () => Promise<void>;
	getCounterValue: () => Promise<void>;
}

export const createCounterSlice: StoreSlice<CounterSlice, IWeb3Slice & TransactionsSlice> = (set, get) => ({
	increment: async () => {
		await get().executeTx({
			body: () => get().counterDataService.increment(),
			params: {
				type: 'increment',
				payload: {},
				desiredChainID: chainId,
			},
		});
	},
	decrement: async () => {
		await get().executeTx({
			body: () => get().counterDataService.decrement(),
			params: {
				type: 'decrement',
				payload: {},
				desiredChainID: chainId,
			},
		});
	},
	counterLoading: true,
	getCounterValue: async () => {
		set({ counterLoading: true });
		const counterValue = await get().counterDataService.fetchCurrentNumber();
		set({ counterValue, counterLoading: false });
	},
});
As you can see all data fetching is going through get().counterDataService this way even if the shape of the contract changes a bit, it will only affect counterDataService
Another important part is
get().executeTx({body, params}) this shape is used each time write to smart contract happens. Fe-shared will take care of switching network before constructing a transaction, saving transaction to pool and calling txStatusChangedCallback with any payload you’ve passed.
That’s it! The business layer of our app is done, as you can see, it’s effortless to work with transactions and signers once we finished setup. Feature slices have nothing to do with transaction itself, but at the same time the app has all the flexibility to work with any type of contract. The full example is available here