Project: Ensuring Quality Releases
Introduction In this project, you'll develop and demonstrate your skills in using a variety of industry leading tools, especially Microsoft Azure, to create disposable test environments and run a variety of automated tests with the click of a button. Additionally, you'll monitor and provide insight into your application's behavior, and determine root causes by querying the application’s custom log files.
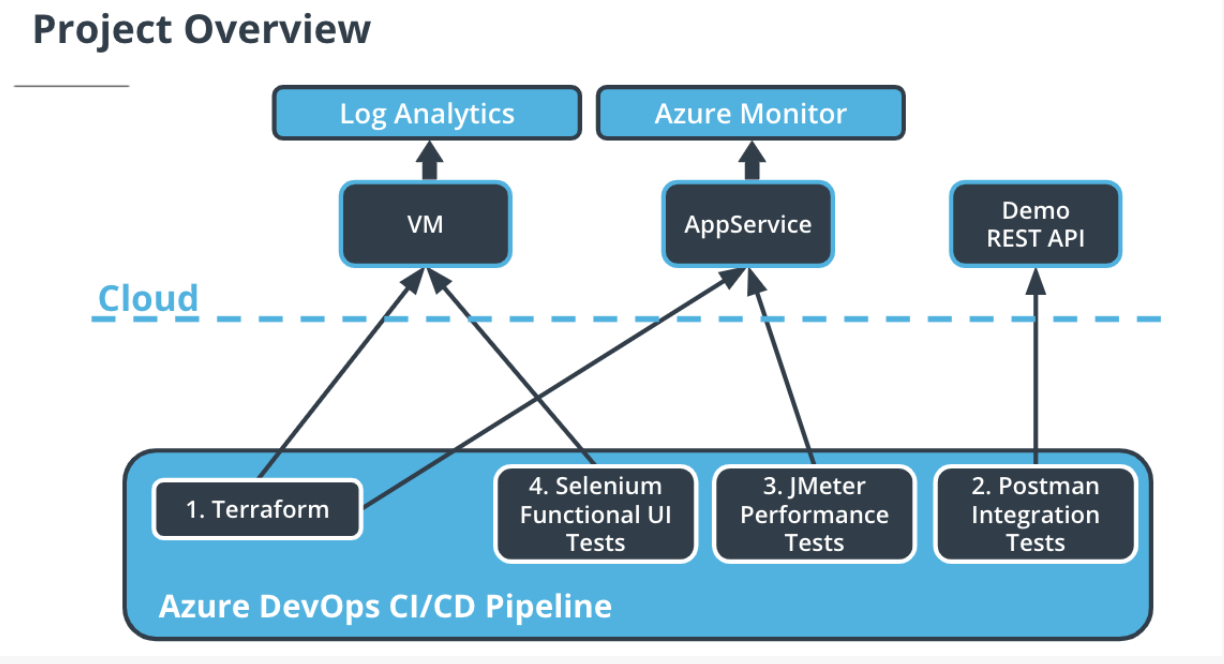
For this project we use the following tools:
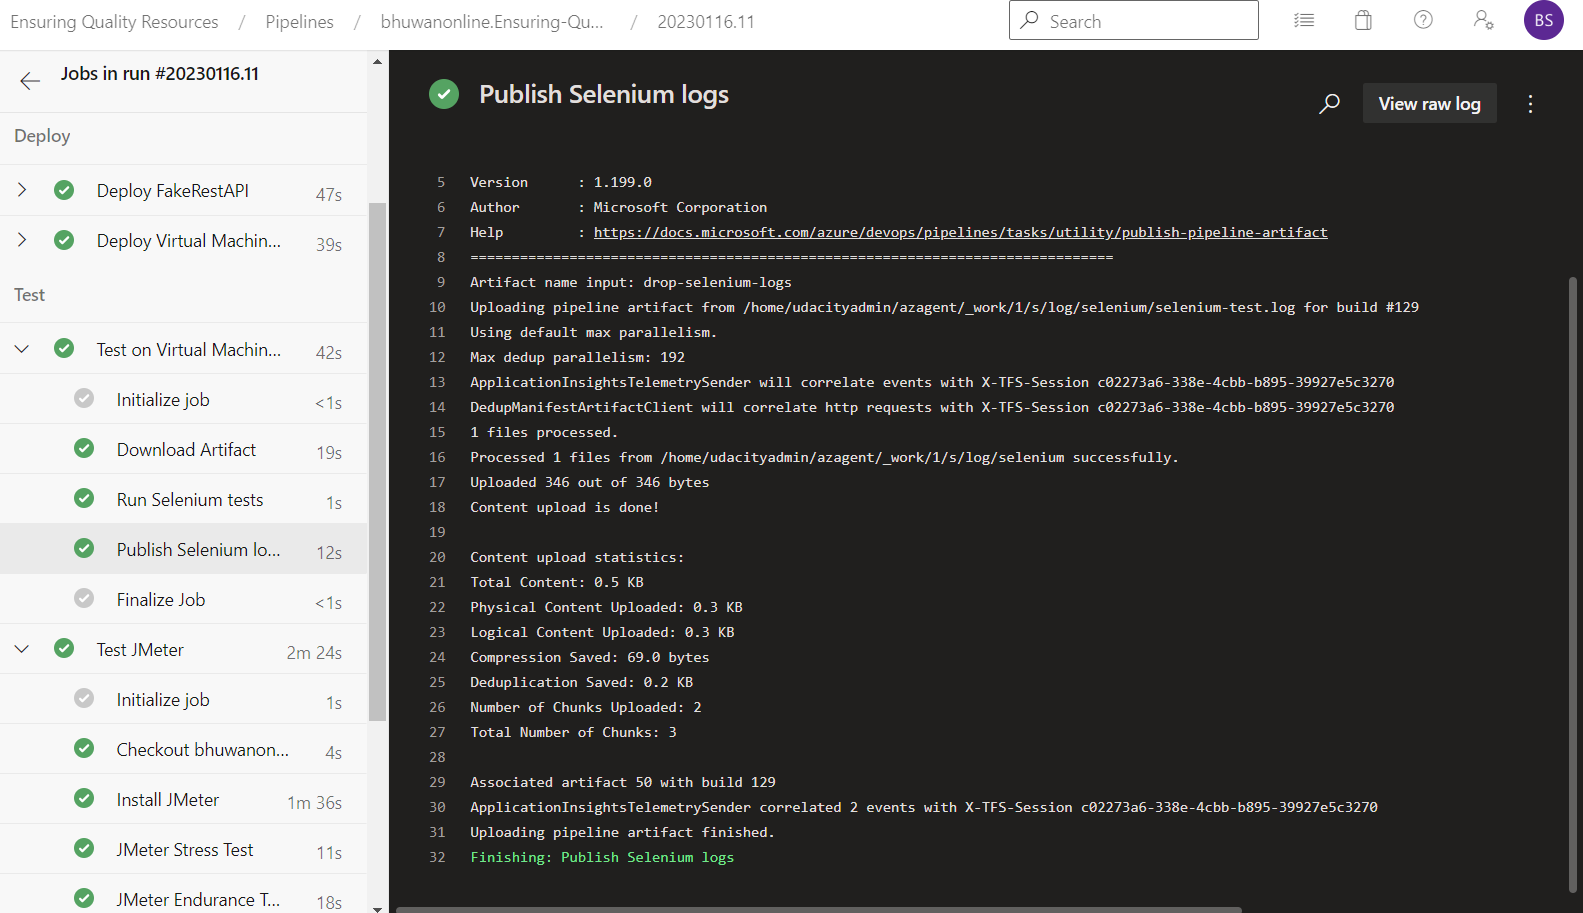
• Azure DevOps: For creating a CI/CD pipeline to run Terraform scripts and execute tests with Selenium, Postman and Jmeter
• Terraform: For creating Azure infrastructure as code (IaS)
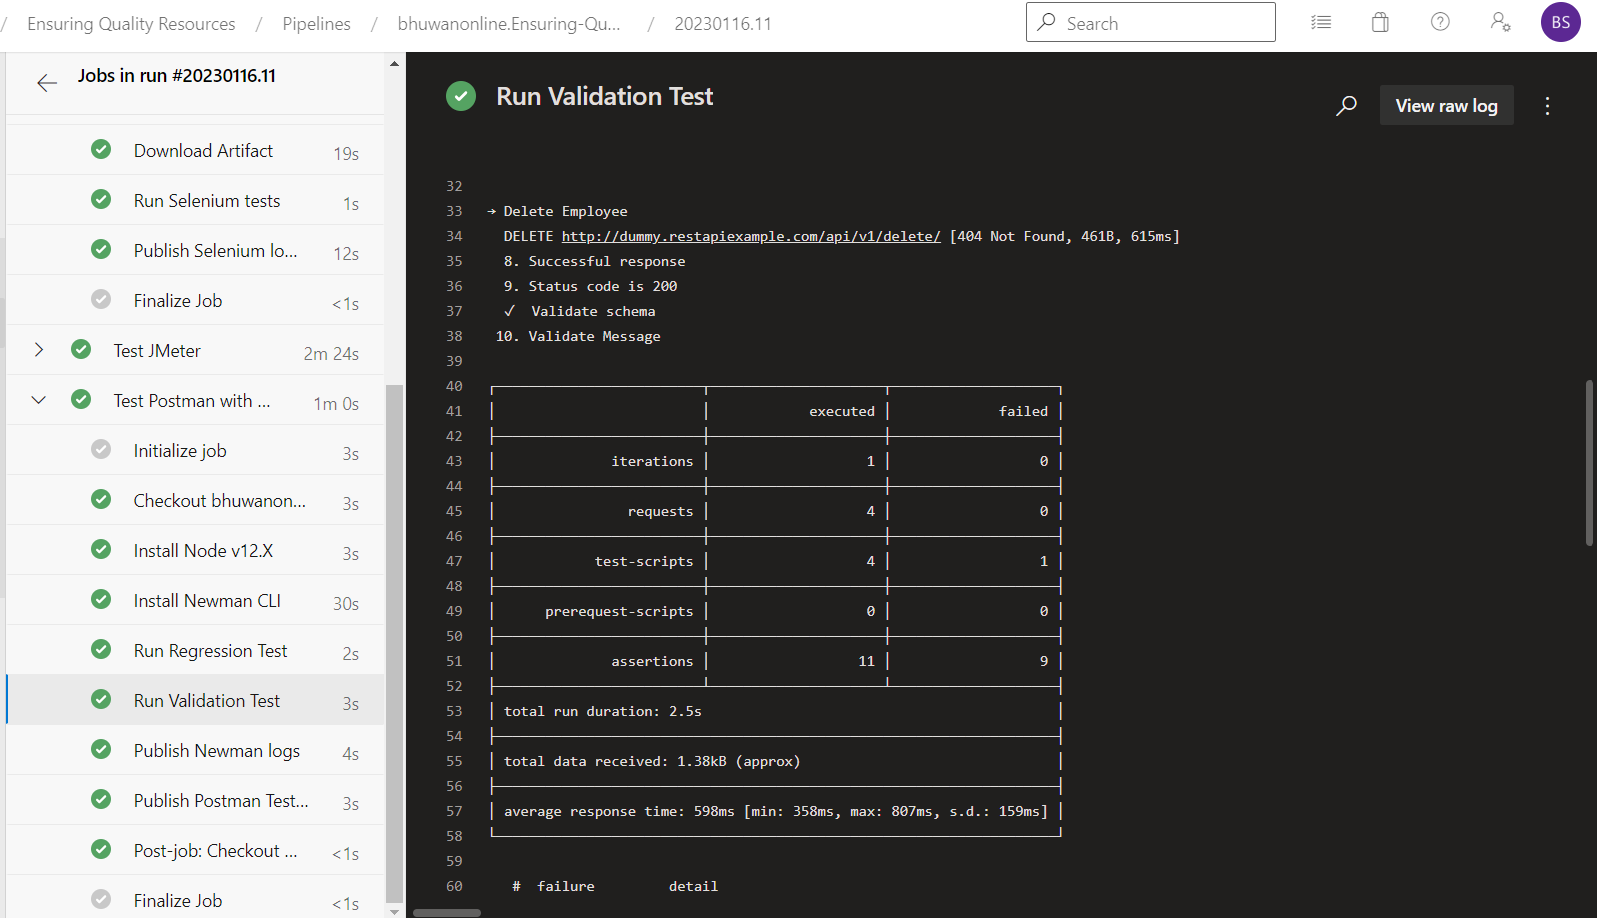
• Postman: For creating a regression test suite and publish the results to Azure Pipelines.
• Selenium: For creating a UI test suite for a website.
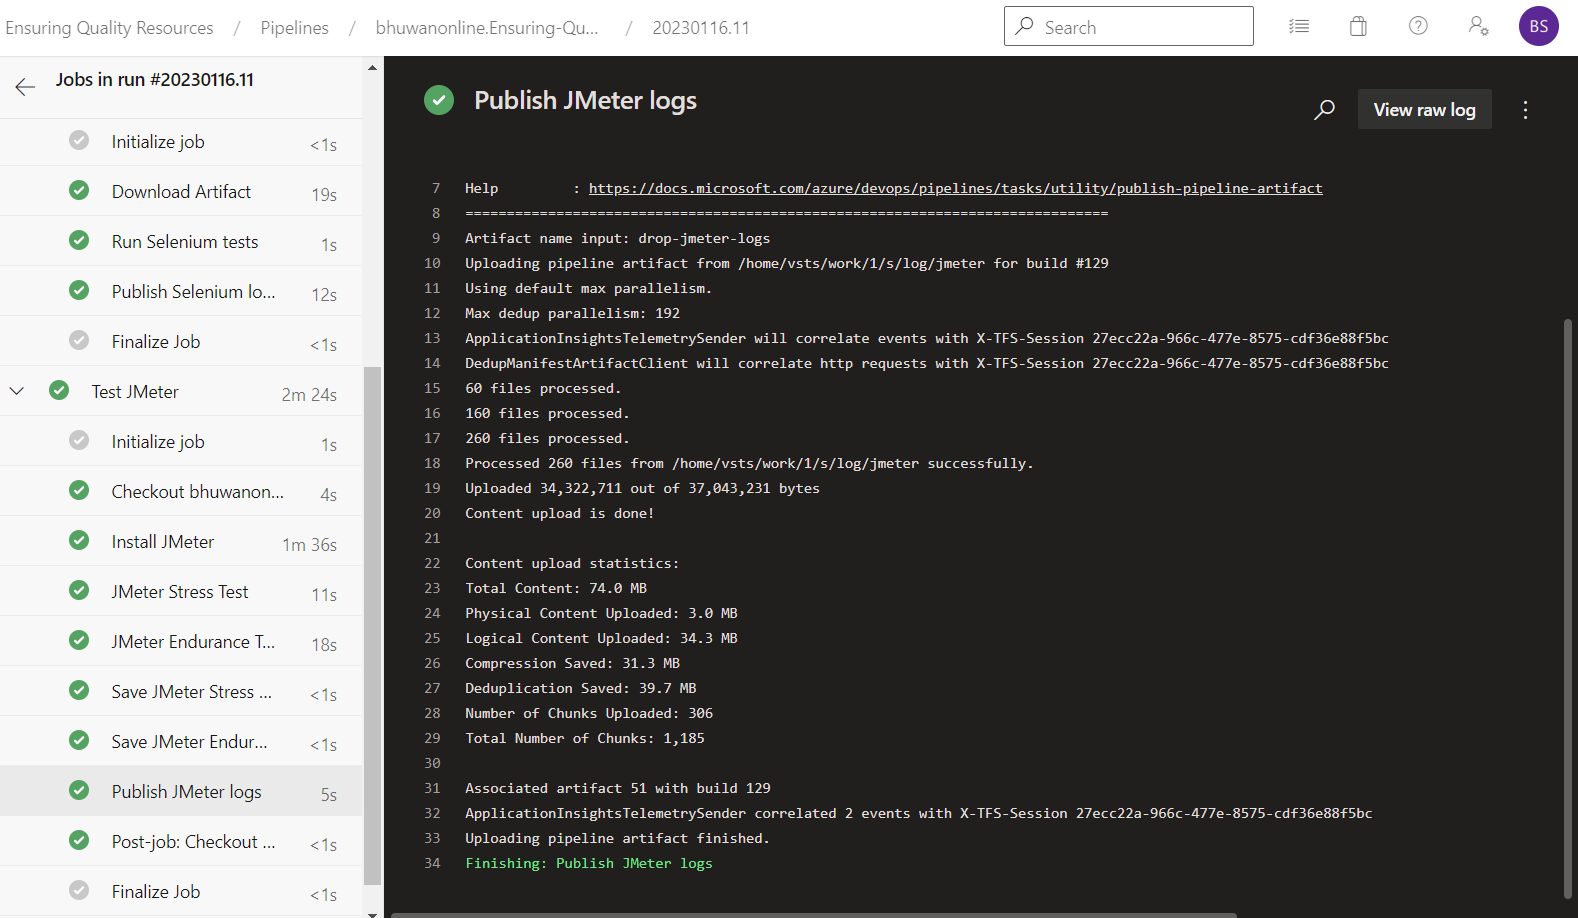
• JMeter: For creating a Stress Test Suite and an Endurance Test Suite.
• Azure Monitor: For configuring alerts to trigger given a condition from an App Service.
Dependencies
The following are the dependencies of the project you will need:
• Create an Azure Account • Create an Azure DevOps Account
Install the following tools:
o Azure command line interface o Terraform o JMeter o Postman o Python o Selenium
Instructions
- Execute the create-tf-storage.sh script
- Update terraform/main.tf with the Terraform storage account and state backend configuration variables:
•	storage_account_name: The name of the Azure Storage account
•	container_name: The name of the blob container
•	key: The name of the state store file to be created

terraform {
  backend "azurerm" {
    resource_group_name  = "tstate"
    storage_account_name = "tstate00000"
    container_name       = "tstate"
    key                  = "terraform.tfstate"
  }
}
Configuring Terraform
Rename terraform/environments/test/terraform.tfvars.example to terraform.tfvars and update the following values as required:
location = "East US" resource_group = "udacity-ensuring-quality-releases-rg" application_type = "WebApp"
virtual_network_name = "udacity-ensuring-quality-releases-vnet" address_space = ["10.5.0.0/16"] address_prefix_test = "10.5.1.0/24"
Executing Terraform
Terraform creates the following resources for a specific environment tier:
• App Service • App Service Plan • Network • Network Security Group • Public IP • Resource Group • Linux VM
Use the following commands to create the infrastructure:
cd terraform/environments/test terraform init terraform plan -out solution.plan terraform apply solution.plan
Setting up Azure DevOps
Logged into the https://portal.azure.com/ Logged into the https://dev.azure.com/ in a separate browser tab.
Create an Azure DevOps project
Next, we'll need to create an Azure DevOps project and connect to Azure. The screenshots below show the steps, but if you need to, you can also refer to the official documentation for more detail.
-
Create new project and name it
-
Create new pipeline
-
Select GitHub and then your GitHub repository:

4.Configure your pipeline by choosing "Existing Azure Pipelines YAML File" and select the azure-piplines.yaml file in the menu that pops out on the right:


Configuring the VM as a Resource
Click on Environments and you should see an environment named Test. Click on it.


click on Add resource and select Virtual Machine.

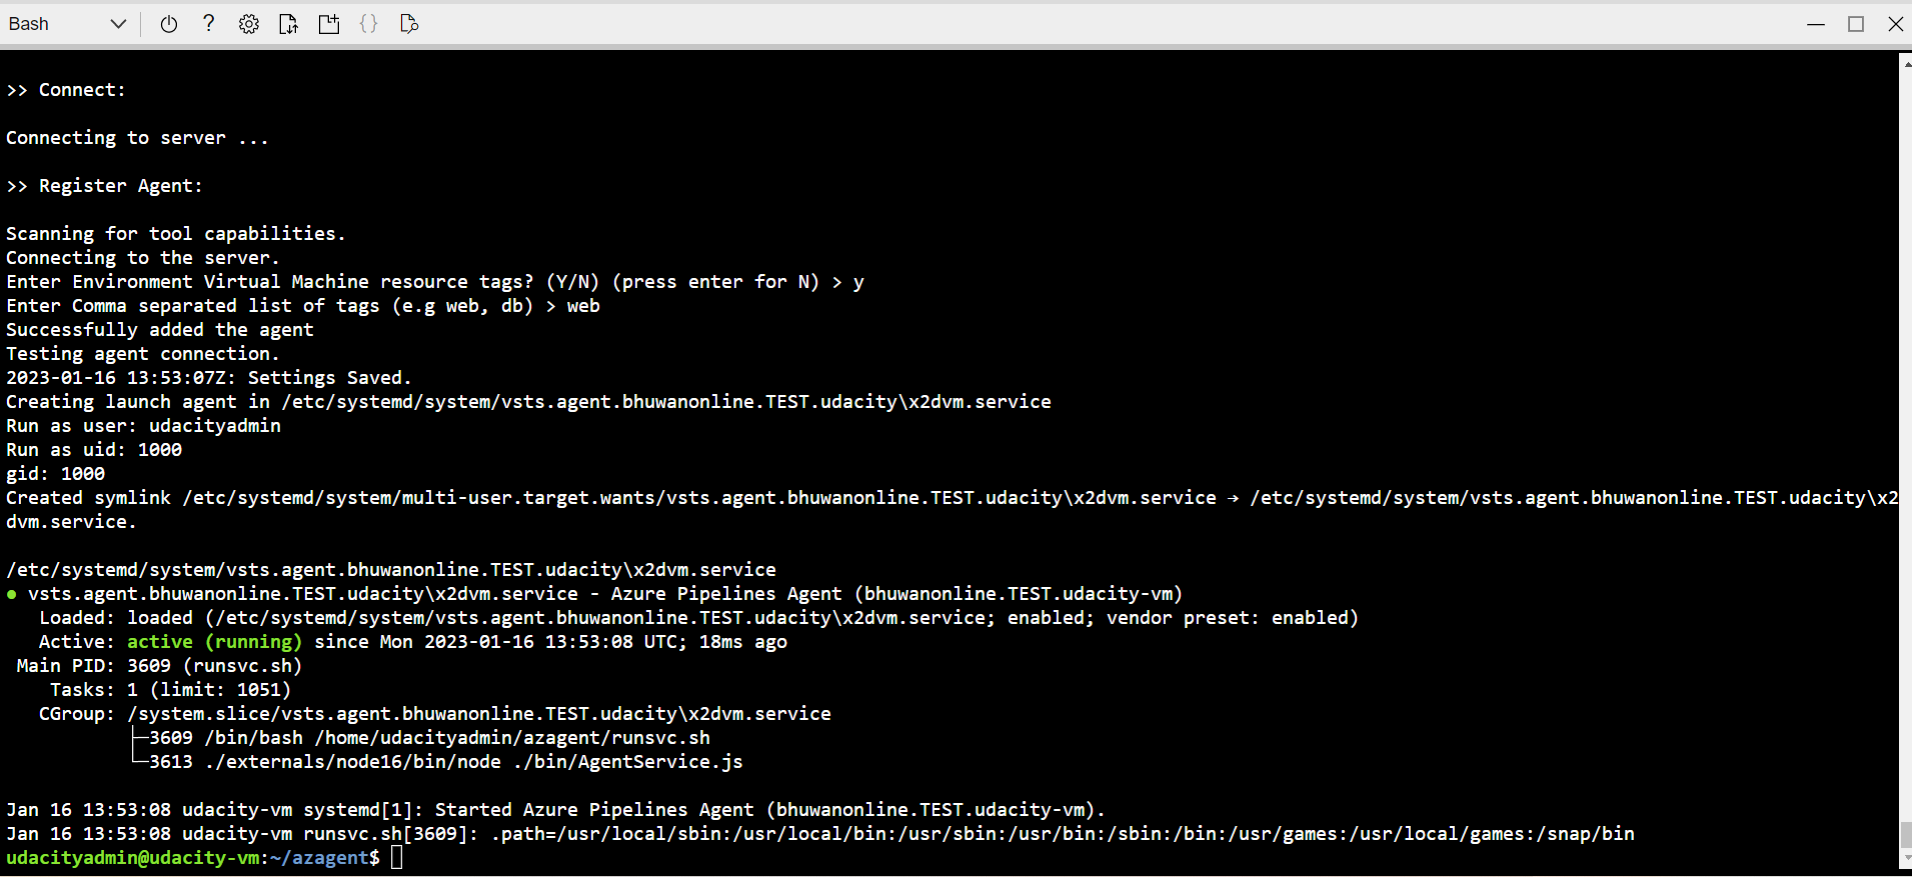
Select Linux as the OS. You'll then need to copy the registration script to your clipboard and run this on the VM terminal.
If everything was successful, you should see this output from the connection test:

Back on Azure DevOps portal in Environments, you can close out the Add resource menu and refresh the page. You should now see the newly added VM resource listed under Resources.
Adding service connection
Go to project settings and then to service connections:
Click on "New service connection" and select "Azure Resource Manager"
Select "Service principal (automatic)":
Name the connection "azurerm-sc" and create the new service principal:
Create a Service Principal for Terraform
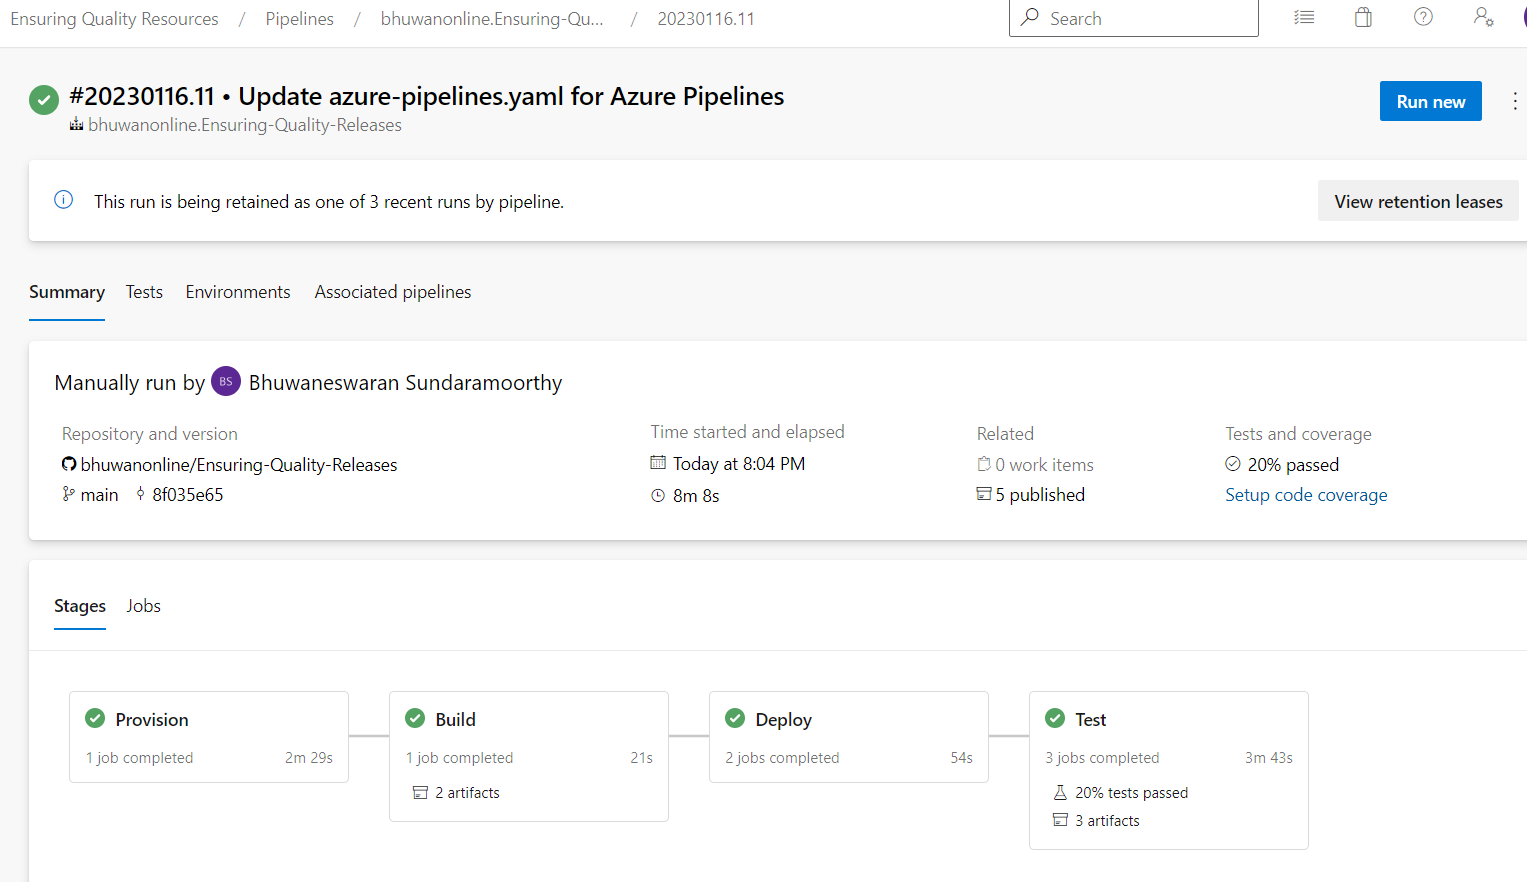
Run the pipeline
Go to the pipelines overview

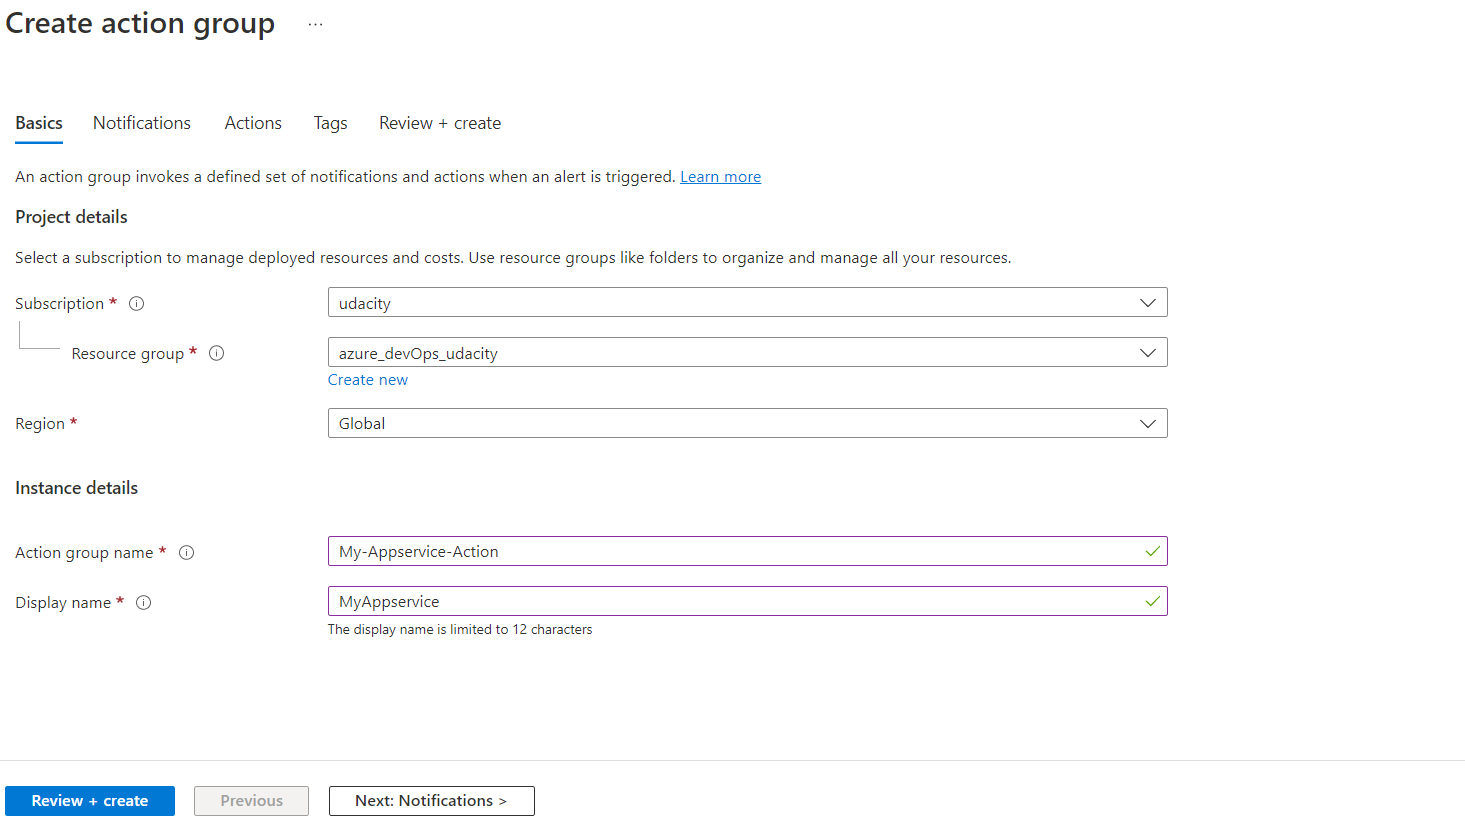
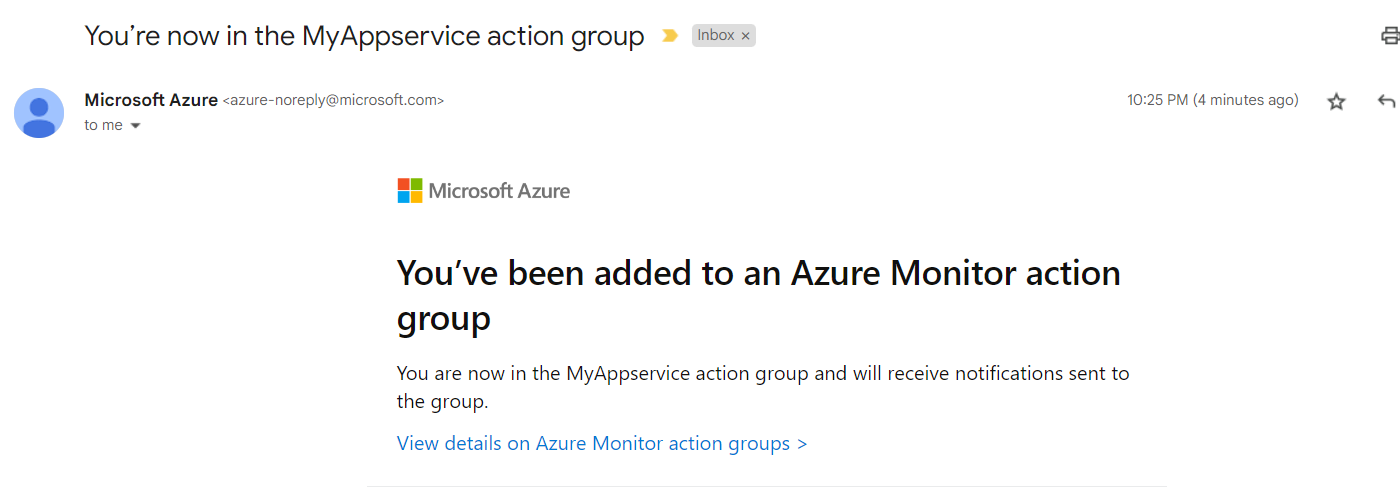
Configure Azure Monitor
Go to the Azure Portal, select your application service and create a new alert in the "Monitoring" group:


Log Capturing:

